Understanding Injection Molding, Insert Molding, and Overmolding for Companies


Have you ever wondered why most tools are easy to hold and grip? It’s all thanks to the introduction of processes, including injection molding and casting services, insert molding and overmolding. However, if you’re not part of the industry or haven’t heard of these terms, they can be confusing. It’s understandable because insert molding and overmolding are two types of injection molding. Continue reading below to learn more about injection molding, insert molding and overmolding processes.

What is injection molding?

Molten plastic is injected into a mold during injection molding. The mold will then cool down, and the plastic will become solid. Companies use injection molding to produce various products, such as consumer goods, automotive parts, and medical devices. 

RELATED: How to design products for injection molding & prototyping firms

How does injection molding work?

A popular technique used by manufacturing design firms, injection molding is used to create parts by injecting molten materials into molds. This is a relatively common process for plastics, although it applies to glass, ceramics, and metals.During this process, the mold of the product is made first. A mold is a hollowed-out block that will give shape to the liquid or molten material. The mold will then be placed on the injection molding machine. 

The plastic pellets will be heated until they melt. This molten plastic will go under high pressure into the mold. While the material hardens as it cools, it will take on the mold cavity’s shape. Once the plastic cools down and solidifies, the product or part will be ejected from the mold. Injection molding allows the creation of parts of all sizes and shapes. Molds can also be designed to produce more complex internal features. This ability to develop intricate designs is why injection molding is applicable in different industries. 

RELATED: 10 Injection molding design mistakes to avoid while working with CAD design services & engineering firms

What is insert molding?

The manufacturing process of insert molding involves adding parts, mainly metal, on top of the molded parts. Insert molding consists of the use of inserts in the injection molding process. This process is done before the product is cured and helps cut down the processes required during assembly following molding. After the parts that will be molded on top of the product are obtained, another layer will be accepted after the parts are inserted into the mold. 

Insert molding can be carried out in two ways: automated and manual. Manual insert molding is relatively cheaper than automatic insert molding. But as far as consistency is concerned, automated insert molding is the ideal choice. It reduces human errors and increases efficiency. Introducing inserts onto the mold cores cast using the automated or manual process will result in plasticizing the plastic pellets after the mold halves are closed.

The pieces will be ejected from the mold after the plastic hardens. The inserts will then be encapsulated in the parts. An excellent example of insert molding is the addition of a plastic layer over the screwdriver’s metal part for the plastic handle to be produced. 

RELATED: Which manufacturing technology is right for your new invention?
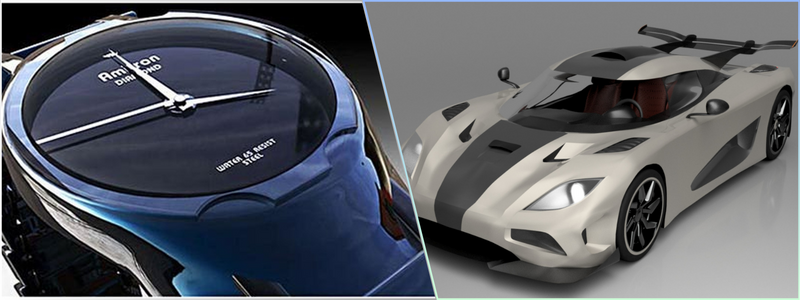
product-design-and-development-company

What is overmolding?

Overmolding is a manufacturing process involving a seamless combination of different materials into a single item or part. The overmolding process involves two essential steps. Molding and curing the substrate, typically plastic, is the first step. This is followed by direct molding the layer over the initial layer to produce a single product. Product design companies designing a toothbrush is a typical example of overmolding, where a basal layer is formed first, followed by a rubber layer. 

Overmolding can significantly reduce production costs. Some of the critical components of the process include the rigid plastic base covered by a flexible, thin, rubber-like material. This manufacturing process has astounding versatility as it is helpful for different home items, including toothbrushes, hand tools, and razors. 

Advantages of injection molding 

1. High and efficient production 

After the molds are developed, it speeds up the process, with cycle times only requiring 10 seconds. This ideal option for high- and medium-volume production runs from 10,000 parts to more than 100,000, depending on the molds used. 

RELATED: An overview of injection mold materials and SPI standards for companies and firms

2. Intricate detail

High-pressure injection forces molten plastic into the mold, enabling the creation of intricate and detailed shapes.

3. More choices of materials 

Choose from a diverse array of plastic materials tailored to meet the specific properties required for the final part.

4. Minimal to no post-production 

Little to no post-production is required since the parts often have pleasing aesthetics. 

5. Lower cost per part

The cost per part is meager for high-output production runs. 

6. Reduced waste 

Unlike most manufacturing methods, very little waste is produced during molding. 

RELATED: Injection molding tips for cost-effective prototypes and mass-manufacturing by a mold design firm

7. Repeatability

Identical products can be manufactured repeatedly. It’s a good choice for parts with high reliability and tolerances across high volumes. 

Disadvantages of injection molding 

1. Design limitations

There are several design elements a product designer need to consider during injection molding. These include controlling the thickness of the wall, preventing sharp edges and undercuts, and using radii and drafts to eject the parts. 

2. High initial cost 

A substantial capital cost might be required for higher volumes of production that require a great deal of machining and time to produce. 

3. Longer initial lead times

Some tools may take several weeks to be produced, so consider using other technologies like CNC machining services or 3D printing, especially for lower production runs. 
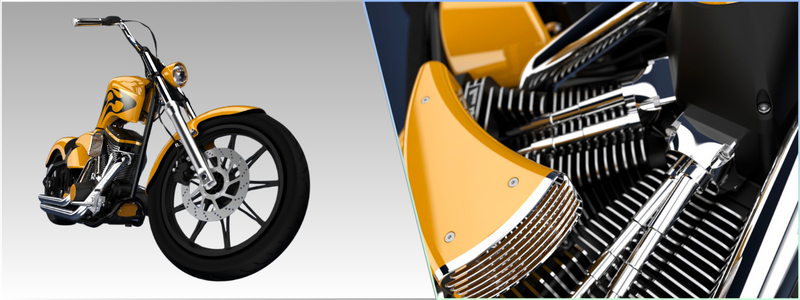
prototype-design-firm

4. Not cost-effective for small production runs

Injection molding might be unsuitable for smaller production runs when other manufacturing processes are more suitable. 

RELATED: How to save money on injection molding: 10 tips from an engineering design firm

Advantages of insert molding 

1. Lower cost 

Insert molding makes it possible to create thousands of parts of products in just one day. Its economic significance leads to reduced costs for the entire molding production process. 

2. Faster assembly time 

The assembly of products needed in CNC machining is often challenging. However, insert molding can do away with the need for assembly. The overall production cost is reduced because no assembly time is involved. 

3. Multipurpose parts

The parts produced by 3D modeling design services for machine parts using insert molding can serve various purposes depending on the specific function that the product is intended to serve. The combination of metal and plastic parts will benefit not only the end users of the product but even the manufacturers. The use of plastic parts can also improve the design’s flexibility and make it lighter than metal. 

RELATED: 3D printing technologies for modeling and prototyping

Disadvantages of insert molding

1. Multiple technologies for manufacturing 

Machining processes such as die casting are required for custom-designed inserts. This is made before the start of the actual process of insert molding. This results in a higher cost per part. 

2. The complexity of part design

The injection molding designers must be familiar with the design of the technology’s manufacturing principles for them to produce custom-made metal inserts in insert molding. This is the only time when it becomes practical to integrate the involved technologies. 

Advantages of overmolding 

1. Eliminate the need for adhesives 

Adhesives are no longer required in overmolding since the different parts get the chance to fuse during the process. This will increase the durability of the parts or products produced. It also results in an overall reduction in production costs. 

RELATED: A product designer’s guide to design for manufacturability

2. Better product performance

Adding other suitable quality materials to a product can significantly improve its performance. Those products that go through overmolding have two edges in terms of materials over the traditional products used in most industries. This will, therefore, enhance the performance of the products made using overmolding. 

3. Improved flexibility of materials 

Combining several parts is required in overmolding, increasing the part’s flexibility because it leverages each of the benefits of the involved materials. Design for manufacturing and assembly firms can also use an overmolding design guide to enhance flexibility further. 

RELATED: Design for manufacturing and assembly tips (DFMA) — cut your product design company’s production costs

Disadvantages of overmolding 

1. De-bonding

The risk of delamination may occur if two different parts are bonded together in an injection mold. Delamination may take place if there is a change in the range of optimal temperatures. Mechanical interlocks will be required when the available heat fails to bond the two materials successfully. 

2. Multiple processes of production 

Two steps are involved during manufacturing using overmolding, which can increase the cycle time of each part. The production cost may also be higher than just molding one part in one process. Overmolding also needs more tools compared to single molding because the process involves two steps. 

How Cad Crowd can help 

Injection molding and its two specific types, insert molding and overmolding, are efficient and helpful processes. These techniques help produce different parts with various uses and applications. Before embarking on your project, it’s vital to assess these methods to make a well-informed decision. Knowing what type of finished part you plan to make and its specific application will help you identify the proper process. Cad Crowd offers injection molding and casting services and can help you find specialists to guide you through every step to ensure successful production.  Contact us for a free quote.

Freelance Rapid Prototyping Costs, Pricing, and Rates for Companies and Inventors


From an engineering viewpoint, a prototype is a preliminary version of the intended final product. A prototype doesn’t need all the features and functionalities of an end product, but it should correspond well to the desired design, shape, size, and aesthetics. The idea behind a prototype is to let designers and engineers evaluate the product’s working principle, usability, and specifications. The prototype is constantly refined and improved throughout product development until it transforms into a “final” prototype before the design enters the mass-production phase.

Continuous development in manufacturing technology has arrived at a point where prototyping is no longer expensive and time-consuming. Rapid prototyping with 3D printing or CNC machining can fabricate complex objects using plastic and metal materials directly from CAD models. Most importantly, nearly all rapid prototyping services and freelancers specialize in low-volume custom fabrication works.

Rapid Prototyping Methods

Some people use the terms “rapid prototyping” and “3D printing” interchangeably, although they are not the same things. 3D printing is simply one method to achieve rapid prototyping by additive manufacturing, which includes popular options such as:

  • Fused Deposition Modeling (FDM): one of the most affordable 3D printing processes to build parts from plastic materials. However, an industrial-grade FDM can also print objects from carbon fiber and metal powder (infused with plastic filament).
  • Stereolithography (SLA): SLA is a better rapid prototyping method than FDM for objects that require a smooth finish and fine details. The process does not use plastic filament but liquid resin as the base material to produce transparent/translucent parts.
  • Selective Laser Sintering (SLS): powdered polymers are melted (shaped) layer by layer using a laser. The method is best when building a functional prototype that can withstand rough handling.
  • Material Jetting: droplets of photopolymers are deposited through a nozzle on a build plate. Exposure to light will cure the droplets quickly, allowing the machine to build an object layer by layer. The method allows for the fabrication of an object using multiple different materials.
  • Binder Jetting: a liquid agent binds a specific region of a layer of powder material to build a shape. The process continues from one layer to another until the material transforms into the desired physical object. The used powder material can be plastic, metal, wood, or ceramic.
  • Sheet Lamination: while technically a 3D printing method, sheet lamination differs from the abovementioned methods. It works by stacking sheets of material and cutting them to create the final shape. Usable materials include paper, metal, and plastic. The material can be fused in various methods, such as heat and sound. Sheet lamination is a blend of additive and subtractive manufacturing.
  • CNC Machining: an example of a subtractive manufacturing method, CNC machining builds an object or parts of an object by cutting, milling, drilling, and manipulating a single block of material. The technique is ideal for creating metal parts but can handle plastic just fine. CNC machining is the best rapid prototyping option when high accuracy and tight tolerances are crucial.
rapid1

There are many best methods to cover your rapid prototyping needs. It all depends on which phase of product development you currently stand. Early in the design process, a simple non-functional model should be good enough as a proof of concept. You can even make it from the cheapest material available to reduce cost. As the development progresses and another prototype is needed, you may want to produce a functional or beta prototype that closely resembles the intended final product in terms of material, finishes, and structural strength. You can also build the proof-of-concept with 3D printing services and the final prototype with CNC machining.

RELATED: 3D Printing Services, Cost and Rates for Companies and Firms

The Design Part

Regardless of the rapid prototyping method utilized during fabrication, the design part always follows the same progression path. The first step is to prepare the digital drawing. Using CAD software, the prototype designer creates a three-dimensional illustration of the part to be prototyped. You can also purchase a ready-made 3D model from online marketplaces. The file is saved in a format readable by the prototyping equipment. Most 3D printers can fabricate the part (based on the file) with only minor adjustments. In contrast, a CNC operator has to translate the file into a programming command the machine can execute.

Some prototypes might need assembly, especially when they comprise multiple parts that must be created one at a time. Then, there is the finishing part, which usually involves washing, polishing, or applying colors.

Why Rapid Prototyping?

A primary advantage of rapid prototyping is that it allows businesses and everyday inventors to have proof-of-concept as early as possible during product development. Unlike conventional manufacturing methods (such as injection molding), rapid prototyping is a budget-friendly option for low-volume production. Ordering a small batch of custom-made parts has become economically viable. Most freelancers in the 3D printing or CNC machining industry do not have a strict minimum order quantity. You can place an order for one item.

Customizability is another strong point of rapid prototyping. Advanced 3D printing technology can handle even the most complex geometries and intricate structures that are otherwise cost-prohibitive to create with other manufacturing methods. Tooling is no longer an issue because a 3D printer is essentially a mini factory capable of creating just about any object in any shape imaginable.

rapid2

The same thing applies to CNC machining, although it is more flexible than 3D printing in terms of customization. If your prototype is supposed to have complex internal structures, CNC can only do so much to drill and mill the material. The only workaround is to machine the parts separately. For instance, a gun is a more complex object. Still, a single CNC machinist should be able to create a functional prototype of a revolver or rifle by producing the parts individually.

Rapid Prototyping Rates

There isn’t a universal price range for rapid prototyping services. Every prototype is different, and the clients, whether established companies or early investors, will likely have specific requirements and details. In most cases, the most significant factors to affect prices are as follows:

  • Prototyping process: each method has its advantages and potential drawbacks. For example, an FDM is more affordable than an SLS, and the final product quality reflects the price.
  • Prototype parameter: the size, shape, and complexity will also affect the price. Some materials are more expensive than others, and at the same time, certain materials require different processing techniques or finishing.
  • Location: the rapid prototyping facility location also matters, assuming you order online. Not only does location determine shipping fees, but also labor costs.

Still, developing a ballpark figure to gauge the average price you should expect when hiring rapid prototyping services from freelancers in the U.S. and Canada is not impossible. Types of material and level of details must be taken into account. With that in mind, you can categorize the services into three major groups, including functional parts (made of ABS or PLA), figurines (transparent or high-grade resin), and metal objects (stainless steel, brass, or sterling silver).

Let us say you want to have a straightforward, functional caster prototyped from either ABS or PLA. The diameter should be big enough for a typical beer mug but not overly large that it looks out of place on a coffee table. One PLA caster should cost around $2.50, whereas the ABS variant is about twice as much. An SLS nylon caster falls in between at $3.50 plus shipping.

As for the figurine or miniature, you might want a smooth finish and good details. A figurine the size of a small USB stick (about 5cm) is priced at no less than $20 for transparent resin or closer to $25 for high-quality resin. The cheapest option is a standard resin figurine, which should cost about $5 per piece.

Metal objects cost a lot more. They require more complex processing and more expensive materials in the first place. For instance, a jewelry metal bracelet with a diameter of 6cm costs nearly $400 for the sterling silver model and around $200 for the brass option.

rapid3

When your rapid prototyping project calls for a subtractive (as opposed to additive) manufacturing method, CNC machining is one of the most viable options. Most CNC shops operate on a price/hour basis, so your best bet is to provide as detailed CAD drawings as possible to reduce setup time. You can also give the material to the shop to avoid the small percentage price markup. In the United States, the average rate goes from $60/hour for simple objects in large quantities to $150/hour for complex objects.

Rapid prototyping, with both additive and subtractive manufacturing methods, primarily aims to reduce the time spent on the early product development process. Rapid prototyping cannot produce anything beyond proof-of-concept unless the product is all-mechanical, such as a bicycle bell, an automatic watch, or an eyeglass frame. If the product has electric circuitry of any sort, the PCB must be assembled or prototyped using different methods.

Cad Crowd’s Rapid Prototyping Freelancers Can Help

Contact Cad Crowd for a qualified and trusted 3D designer or rapid prototyping engineer to complete your project; you won’t regret it. The benefits are staggering.

We could list the numerous companies that choose to use this technology or the variety of new methods cropping up practically daily to meet the world’s increasing demand for rapid prototyping. Still, we’ll leave you with an examination of the beautiful benefits the technology can offer you. Look at everything it can do, and don’t hesitate to jump on board with the wave of the future.

Look at how it works, or contact us today for a free quote if you’d like to get started immediately.

How do Architectural BIM Services for Companies Complement the MEP/FP Design Process?


There’s no question about the significant growth in popularity that BIM or Building Information Modeling has been getting these past few years. On the off chance that it’s your first time learning about BIM, it’s often described as a new way of going about the documentation and design of construction projects.

BIM comprises the virtual representations of actual pieces and parts used to construct a building. These BIM elements have the logical and physical characteristics of their counterparts in the real world. Simply put, BIM elements are digital prototypes of the physical elements of a building. With the help of BIM, you can build something virtually before you build it physically.

Users of BIM list several benefits it offers at different phases of the construction project, including estimation, scheduling, risk analysis, more effective management of facilities, and developing a more collaborative process among all stakeholders. However, BIM can offer more in other specific aspects and areas. One particular case is how it provides substantial advantages to contractors who work on mechanical, electrical, plumbing, and fire protection or MEP/FP design and construction. Using BIM in MEP/FP modeling streamlines projects improves collaboration, and reduces waste and risk.

BIM proves beneficial in MEP/FP through its application in 3D modeling design services, shop drawing services, fabrication drawing services, builder’s working drawings, comprehensive section reviews, collision detection, bill of materials, scheduling, and more. These benefits are equally applicable to both electrical and mechanical fields.

RELATED: Industry Rates for BIM Services & Building Information Modeling Costs

Benefits of integration of architectural BIM services in the MEP/FP design process

Complete BIM integration has been proven to be greatly beneficial. If you’re still unsure as to how architectural BIM services can complement the MEP/FP design process, here are a few points to convince you further:

The 3D advantage

The first is the most basic BIM modeling service benefit. However, 3D designs of ductwork and piping can help MEP/FP contractors save more effort and time. Thanks to these designs, they can better visualize and understand their clearances and know how to add equipment or make adjustments before its final implementation in the field.

They can also view the model from all possible angles, for example, which include the interface of the processes. It can also be used for redesigning the model and making further enhancements along the way.

BIM1

Interference prevention

How often have you heard horror stories about electrical trays and plumbing being installed haphazardly? This clash, mainly when several players are involved in the project’s different facets, is typical in construction projects.

The bright side is that it is possible to detect these clashes with the help of BIM during the design stage to solve them immediately. Clash detection includes but is not limited to Hard Clash, Soft Clearance Clash, 4D/Workflow Clash, and the like. You can imagine how much money and time you can save if delays are prevented before they happen.

RELATED: Building Information Modeling (BIM) Freelance Contractors on Cad Crowd

Improved estimation of costs

BIM software consists of tools for budget management and cost estimation. It simplifies estimating their work’s cost more simplified for MEP/FP engineers to ensure that they stick to their budget. With the help of BIM, MEP/FP engineers can also pinpoint areas where they can further lower costs and enhance their systems’ efficiency in general.

Improved visualization

BIM offers a building representation in 3D that allows MEP/FP engineers to visualize how the finished product will look. It makes it possible for MEP engineers to detect potential problems early on in the process and make the necessary adjustments before the start of construction. BIM also offers MEP/FP engineers an enhanced understanding of how their systems and the rest of the building will interact to improve the overall quality of their work.

Gain total control

MEP/FP contractors can also use BIM to get a bird’s eye view of different components, including ceiling elevations, the plumbing layout, the walls with electrical wires, and the rest. They only need to use a single platform to access these details.

The common platform also serves as the single version of truth for every stakeholder involved in the project. It gives them total control over the project’s scope of work and saves them from more agony since flaws can be detected early on. All of these mean that there will no longer be unwanted wastage of resources because of errors.

Enhanced collaboration

BIM modeling & design services allow MEP/FP engineers to work hand in hand in real-time with contractors, architects, and the rest of the stakeholders. It enhances their communication lines and ensures everyone stays on the same page from construction to completion. BIM also allows MEP engineers to corroborate their work with other trades and pinpoint possible conflicts early on to reduce the risk of delays and rework.

BIM2

Better management of the project

BIM modeling & design offers a centralized single platform for managing each aspect of a building project, from design to construction. MEP/FP engineers can then use it to efficiently manage resources, track progress, and coordinate with the rest of the stakeholders.

Architectural BIM services can also help MEP/FP engineers meet their deadlines, project requirements, and budgets to improve their work’s overall efficiency.

Higher safety levels

BIM also comes in handy in simulating various construction scenarios, such as possible safety hazards. It lets MEP/FP engineers determine and address risks before the start of construction to improve worksite safety for all workers. MEP/FP engineers can also use architectural BIM modeling services to ensure the correct installation of their systems and compliance with all relevant standards for safety.

Augmented accuracy

BIM software allows MEP/FP engineers to develop accurate models and visualize their systems, including plumbing and electrical systems. It helps ensure the correct installation of the systems and lowers the risk of rework and errors. BIM also makes it easier for the MEP/FP engineers to confirm that their systems adhere to all relevant standards and codes to help improve their work and its overall quality.

Procurement and logistical planning

It’s no secret that MEP/FP work is rather complex. Several large and small components like pipes and wires occupy space, financial resources, and planning bandwidth. To prevent chaos, BIM can help streamline different activities, including material procurement and procurement planning. It helps ensure that elements made offsite will fit perfectly in their respective spots.

It also helps MEP/FP contractors order and deliver only the required materials on-site. It results in better estimates to help you save money by eliminating over-ordering. In addition, it also gets rid of the hassles of offsite or on-site bulk storage of materials.

BIM3

Prototypes made faster

In the ever-evolving field of construction, integrating 3D printing services and rapid prototyping services is a game-changer. Since the first 3D-printed house milestone in 2017, MEP/FP contractors have been blending 3D printing with BIM for groundbreaking results. This fusion enables the creation of rapid prototypes, providing stakeholders with a tangible, detailed representation of complex designs and enhancing communication and project clarity. This innovative approach streamlines the construction process and offers cost-effective, efficient solutions, revolutionizing building and design.

Address challenges

There are instances when smaller components can become significant challenges for MEP/FP contractors. It’s easier for them to model the bigger components to their precise measurements instead of handling the smaller ones. BIM modeling can solve this challenge for contractors by allowing them to design, model, and eventually develop the smaller parts quickly in the most detailed way possible.

Streamlined processes for design and construction

Architectural BIM services allow MEP/FP engineers to create accurate and detailed models of their systems that reduce the need for site visits and manual calculations. MEP/FP engineers can also use BIM to harmonize their work with the rest of the trades and manage the construction process to cut down on the possibilities of rework and delays.

Sustainable benefits

MEP/FP contractors who wish to go green can also use BIM modeling services and make the most of their sustainable benefits. Since the BIM model offers a common platform where stakeholders can collaborate, they can easily use it to consider the energy properties and materials throughout the design stage. This is where the inputs of MEP/FP design can substantially impact. Better integrated BIM designs can help in the construction of more energy-efficient buildings.

RELATED: Affordable Building Information Modeling from CAD Crowd Freelance Contractors

Welcoming BIM innovations in the MEP/FP design process

BIM has a significant potential to become the most powerful partner for MEP/FP contractors. It offers a long list of benefits. However, the exciting technology’s improved collaboration and planning capacities can drive better control of resources, early detection and solving of problem areas, and more integrated efforts.

How Cad Crowd can help

Cad Crowd can link you with the best and top-of-the-line architectural BIM services to complement your company’s MEP/FP design process to generate better results.

AutoCAD Fields and Dynamic Data: Tuesday Tips With Frank | AutoCAD Blog


In my last post, we used AutoCAD fields and custom sheet set properties to automate title block information. Today, I’m going to demonstrate a way to automate a callout or label by using a little-used but very powerful feature of fields.  

I’ll assume you have at least a working knowledge of using AutoCAD fields, so this won’t be a deep dive into them but instead focus on a particular feature. Let’s set up a simple scenario and let your imagination turn it into something you’re familiar with. You have a closed object of some kind in your drawing. Maybe it’s a pool, a pond, or a parking lot… and you have to label its total area in some way. That may be via a multileader, a label block with attributes, or it may be somewhere in a block of notes. Have I got you thinking yet? 

Now, here’s the kicker. During the design phase, that closed feature will change its shape, thus changing its total area. Or maybe it’s in a prototypical drawing and changes for every project it’s used in.  

If you’re using a static callout of that area, you’ll need to query the feature whenever it changes and subsequently edit the callout to reflect the new area. Trust me when I tell you that it won’t take very many times doing that to make it get old. This is where an AutoCAD field can come to your rescue. 

The Object Is Your Objective

By my count, there are 50 field names available from the Field dialog box, and they fall within seven categories. You can leave the category set to All and choose what you want from the entire list, but most people prefer to find and set their category first, thus paring down the list. Since the enclosed feature in our drawing is an AutoCAD object, choose the Objects category.

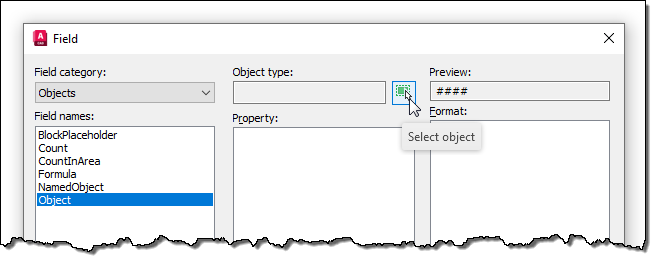
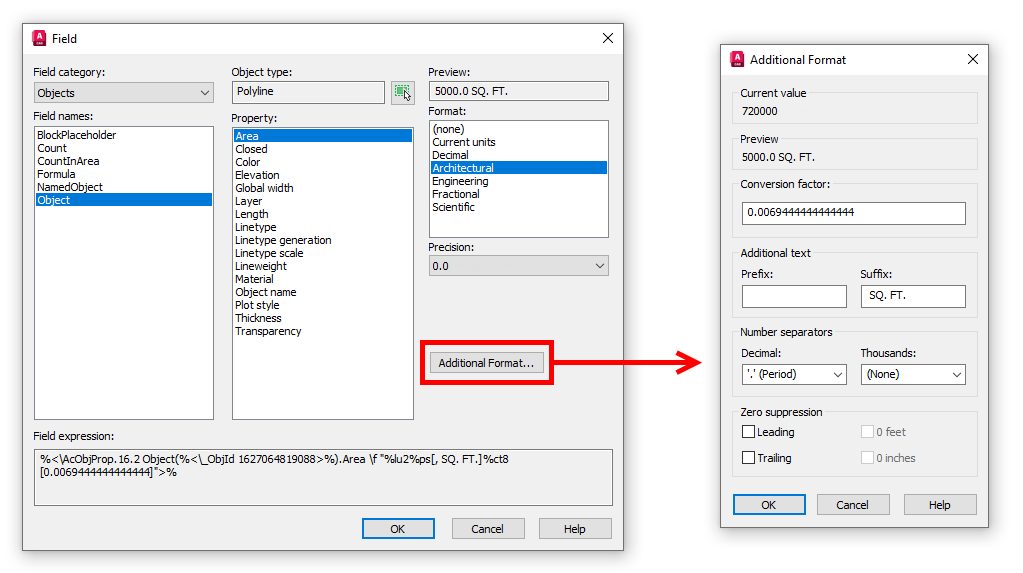
Screenshot of objects category for AutoCAD fields

You should now see only the six field names in the category. All are useful in their own way, but we’re after the Object field for this exercise. When selected, the dialog will change to offer other options. Our next step will be to select the closed feature we’re working with, so select the small select icon next to the Object Type box and select the closed feature. The middle property panel will now be populated with all the properties of the polyline available to you.

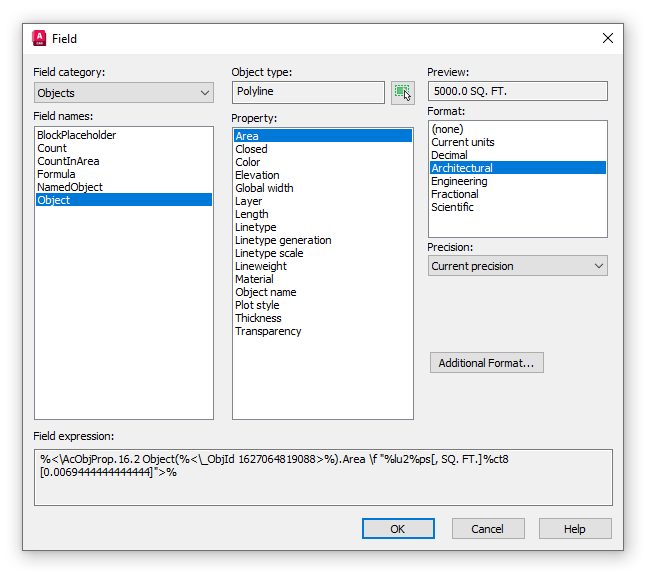
Screenshot of Object Type Box with AutoCAD Fields

In this example, we’re labeling the total area of the object we’ve selected, and conveniently, Area is at the top of the list. Select it, and make sure the formatting is what you want from the Format box on the right.

Pro Tip: Need some additional text like a prefix or suffix? Click the Additional Format button for these options and more!

Screenshot of Additional Format with AutoCAD field

Now, with the proper field applied to the callout of your closed feature, it will update whenever its shape is edited. (Just remember the rules on updating fields. I suggest a quick regen).

Not only does this method cut out the continual querying and editing steps, but it also removes the possibility of typing in the wrong value. We humans are quite prone to mistakes, you know – at least this one is.

My example used the area property of a polyline. It could have been the length of a path through a park or even the name of an Xref. The point is to keep this nugget in mind should you ever have to call out a property of an object. It might just save you a lot of work and keep those pesky typos out of your valuable drawings.

More Tuesday Tips

Check out our whole Tuesday Tips series for ideas on how to make AutoCAD work for you. Do you have any favorite AutoCAD tips? Tell us in the comments!

AutoCAD Hatch Problems & Tips – Boundary Errors + Time Saving Tricks | 2 Minute Tuesday


Hey Everybody!
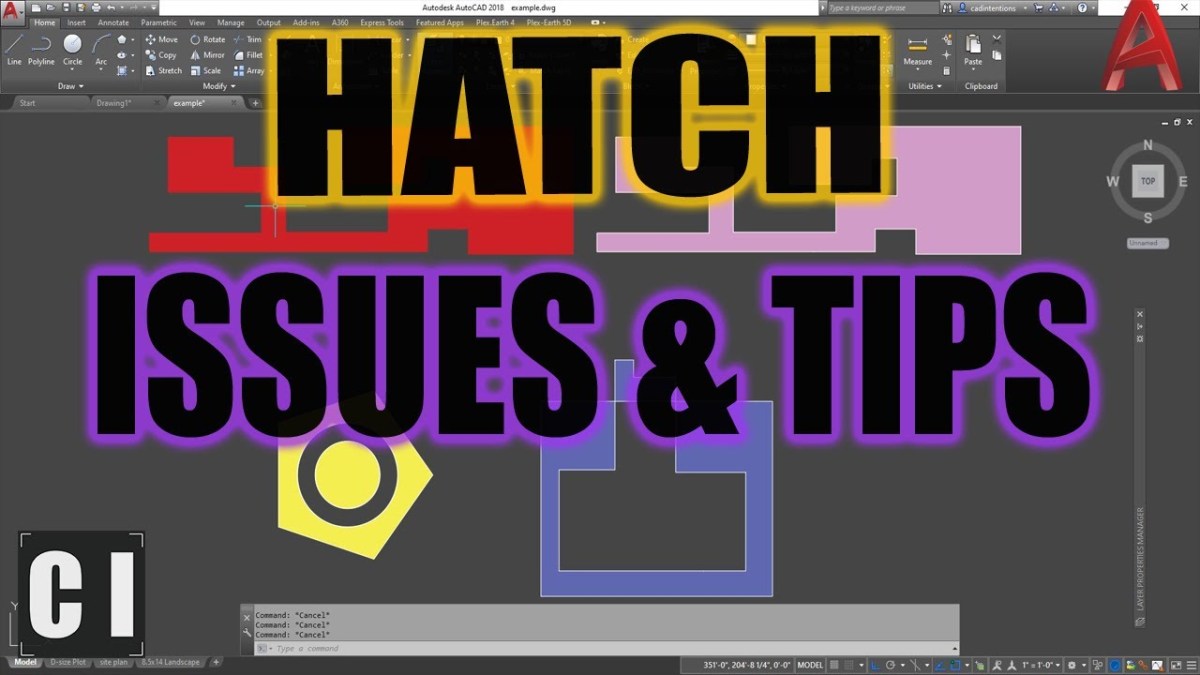
I hope you’re ready for this weeks new video and post. In it we are taking a look at the hatch command and in particular, some of the most common issues and errors we encounter when hatching in AutoCAD.

Before we jump into today’s post, I wanted to thank this weeks Sponsor: ThePrepared.org !

The Prepared is a free, high-quality weekly newsletter about engineering, manufacturing, and infrastructure.
It’s nerdy, useful, and fun!
Learn more and Subscribe here:  theprepared.org


If you’ve used AutoCAD for any amount of time recently, I’m sure you have encountered any number of Hatching issues when trying to fill irregular or complicated shapes.

In today’s video, I wanted to take a look at some of the most common hatching issues & errors that you’ll encounter, and walk you through exactly how to fix them.

Whether you have unclosed areas or boundary issues with hatches, today’s video will help you solve them in just a few clicks!

Check it out below and start hatching like a pro:
https://youtu.be/piE0fmxtNYw


That’s all for today’s quick Autocad Tip, I hope you all were able to take something away from it and able to add a new tool to your CAD toolbox!

Thank you again to this weeks Sponsor: ThePrepared.org 
Be sure to check them out and subscribe to their awesome weekly newsletter, it’s honestly one of my few must-read emails when it hits my inbox. 

Be sure to subscribe and follow on Twitter @cadintentions to keep up to date and be the first to get updates on the newest videos, posts, and downloads.

As always, thank you so much for reading and watching, I am super excited to be back and posting regularly on the blog and hope you all will follow along.
Cheers and happy Drafting!

PS. In case you missed out or are interested in the brand new AutoCAD Fundamentals & Workflows Course, check it out here (Available for Instant Download NOW): https://gum.co/learnautocad

The following two tabs change content below.

Brandon is a Civil Designer, Aspiring Blogger/Creator, Husband, Father to two Amazing Kids and Tech Aficionado from a small town in Canada. He has been obsessed with design and technology since he can remember and working as a Civil Designer for nearly as long. Brandon’s blog and Youtube channel, CADIntentions.com has been his outlet and excuse for keeping up with new tech and trends in the CAD design world for the last 10 years growing to more than 60,000 subscribers and over 15,000,000 views, while also being the source of many great friendships and unique opportunities.

If you would like to Sponsor CAD Intentions or Work together in some way, Please visit my About Page and send me an email: http://cadintentions.com/about-me/


Consumer Electronics Show (CES) Recap 2024: Las Vegas Inventors and Design Firms Recap


The Consumer Electronics Show, popularly known as CES, is a much-anticipated yearly event that showcases the newest, hottest, and most exciting inventions and innovations in the world of technology. 2024 is no different, as the CES once again highlighted the zenith of technological innovation to give the public a glimpse of the future. This year, the event held in Las Vegas was a one-of-a-kind display of ingenious creativity where companies from various parts of the world came together to introduce their latest inventions and innovations. 

Here’s a quick recap of some of the most captivating and exciting CES exhibits this year for Las Vegas Inventors and Design Firms:

Consumer Electronics Show (CES) recap 2024: Las Vegas inventors and design firms recap

Innovative In-Car Eye-Tracking Technology by Bosch

bosch-in-car-eye-tracking-system

Bosch unveiled an innovative new and exciting use of eye-tracking technology in vehicles that goes beyond safety. Eye-tracking was originally a part of driver assistance systems, but this time, Bosch now sees it as a means to add enjoyment to the driving experience with two notable uses: 

Its first use is simple and has something to do with driver fatigue. Imagine yourself feeling sleepy and tired while driving on your way home, and your car’s eye-tracking notices it, so it offers to prepare an espresso for you once you arrive. This is possible because the vehicle is connected to your home’s automatic espresso machine to ensure that a freshly brewed cup of coffee will welcome you when you enter the door. 

Its second function is more state-of-the-art as it adds context to the drive. The eye-tracking system will notice what you’re looking at outside while driving and give you details about it. For example, the system might inform you of the opening hours of a coffee shop you passed by. It can also give you a quick recap of the history behind an interesting building that caught your eye. This feature transforms your usual drive into something more engaging, informative, and fun. 

Bosch.com

EcoFlow Delta Ultra Invention

Ecoflow-Delta-Ultra

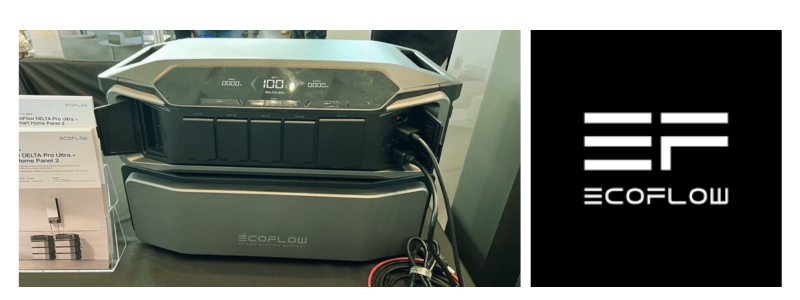
One standout during the CES 2024 is the EcoFlow Delta Ultra, which offers a giant leap forward in how modern homes are powered. It was showcased in a cozy setting that resembles a house to highlight its mix of cutting-edge technology and practicality. At its core, the Delta Ultra invention is an inverter and battery system for the entire house meant to take advantage of the energy of rooftop solar panels. It stores and keeps solar power so homeowners can use it to run their residences. One of its cool features is its ability to pull electricity from the grid when it is more affordable and send back power once prices soar. 

The invention can also work with your home’s existing switches, but it shines out the most if you pair it with Smart Home Panel 2. With more and more houses getting solar panels, EcoFlow Delta Ultra is an all-encompassing, powerful, and stylish way of handling energy use in homes. To make things even better, the product is not a mere concept because you can now buy it and start your way of managing your home’s energy. 

Ecoflow.com

Gyrogear GyroGlove Invention

Gyrogear-Gyroglove

The Gyrogear GyroGlove is hailed as among the top product inventions during CES 2024 for a good reason: it is an innovative breakthrough meant to help people with disabilities. This invention is specifically made for people suffering from hand tremors, such as Parkinson’s patients. An advanced gyroscope is used to steady the hands. 

GyroGlove’s innovative product design makers, Gyrgear, are now in talks with top medical officers at different insurance companies in the US. The GyroGlove invention has also been approved by the US FDA and the Therapeutic Goods Administration of Australia as a medical device. Various global standards groups are certified to prove its effectiveness and safety. It’s a significant invention that will make daily life easier for people with motor challenges. 

Gyrogear.co

Hydrogen Initiative of Hyundai 

Hyundai-Hydrogen-initiative

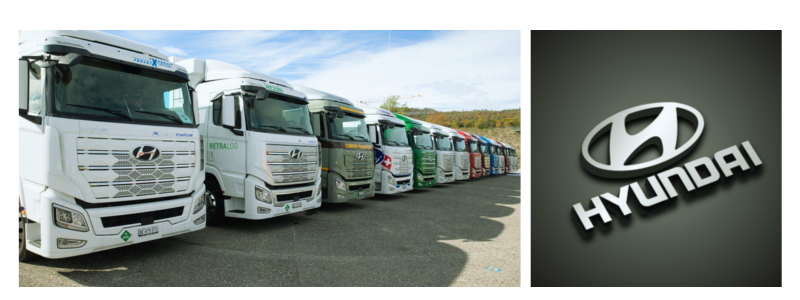
Hyundai shared its exciting plan during the CES 2024 to manufacture 3 million tons of hydrogen for the company’s steel mills by 2030. Becoming a leader in the ever-growing hydrogen economy is an ambitious move. It’s been a while since the company started to invest in hydrogen fuel cells and successfully introduced electric vehicles or EVs. However, with the tough competition and some challenges in the innovative market of battery EVs, the company decided to focus more on hydrogen to be on top of the game. 

This significant step towards hydrogen is not only about cars alone. It can also change industries, including maritime shipping and steelmaking. Hyundai placed big bets on hydrogen despite the infancy of the technology. It’s a shift in their technology and a strategic move for the future of green technology and the automotive sector. 

Hyundai.com

Gaming, Robotics, and AI Innovations by NVIDIA

Nvidia-AI-innovation

A gaming and AI tech leader, NVIDIA, revealed so many exciting new advancements at CES 2024 that will change the realm of gaming, generative AI, robotics, and content creation. It focused on generative AI’s power, proving NVIDIA’s significant role in this field. Several key things discussed include the launch of the TensorRT-LLM library for Windows. It allows large language models to function better on RTX PCs and the new Chat with the RTX playground. The innovation enables users to enhance the reality and accuracy of generative AI models by combining them with various data sources. 

NVIDIA also showcased its progress in digital avatar technology with the Avatar Cloud Engine or ACE. It uses generative AI to produce realistic digital avatars for PC and online use. The company also partnered up with Getty Images to introduce iStock’s generative AI service run by NVIDIA Picasso for producing 4K images from text. It uses an AI model trained on the massive library of Getty Images. They also introduced the GeForce RTX 40 SUPER Series GPUs aimed to improve generative AI and gaming.

These GPUs, such as the RTX 4070 Ti SUPER and RTX 4080 SUPER, offer faster memory, more [power, and more significant boosts in performance for high-end content creation and gaming. The collaboration of NVIDIA with OBS and Twitched for Enhanced Broadcasting and the RTX Remix’s open beta proves their focus on enhancing gaming. The company is also all in on AI with the RTX laptops and the extensive use of RTX tech in more than 500 apps and games, which include those from Blizzard and Activision. 

They also have a Day Pass membership and the Cloud G-SYNC technology for GeForce NOW. NVIDIA also launched the Isaac platform, which focuses on more innovative robotics and shows its dedication to breakthroughs in various areas. The announcements by NVIDIA at CES 2024 prove that the company leads the way in technology to offer distinct experiences for creators, tech enthusiasts, and gamers worldwide. 

Nvidia.com

GREEN IMPACT Initiative by Panasonic

Panasonic-green-impact-initiative

Panasonic made a ripple at CES 2024 with its focus on innovation and sustainability. They unveiled the Panasonic GREEN IMPACT initiative. It is a notable move towards carbon footprint reduction and support for a circular economy. The initiative covers an extensive array of solutions for a society with zero carbon dioxide, such as using renewable energy, the development of high-performance electrodes for hydrogen, intelligent systems for energy use management, and air-to-water heat pumps. Panasonic also announced its exciting partnerships with other companies, such as Infinity and Fisker, in the mobility and automotive industries.

They unveiled sustainable audio systems and the Neuron platform, a state-of-the-art solution that improves vehicle software and enhances the efficiency of electronic control units. Panasonic also introduced new sustainability technologies and partnerships, such as eco-friendly Kinari material and bio CO2 technology, which are meant to improve the growth of crops and fight climate change.

They also expressed their commitment to STEM education through programs such as the Innovators for Impact initiative. The presence of Panasonic at CES 2024 proved the company’s commitment to improving lifestyles while prioritizing technological advancement and sustainability. 

Panasonic.com

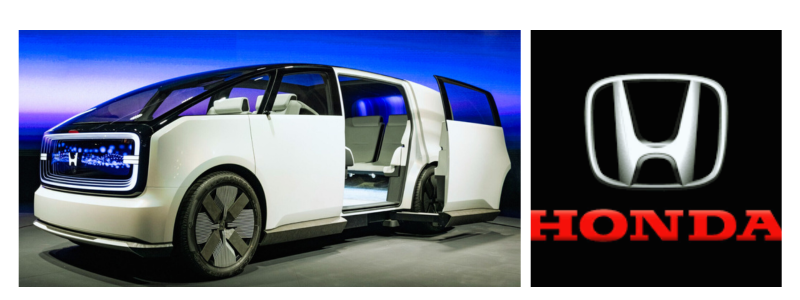
Visionary 0 Series EVS by Honda 

O-Series-EVS-from-Honda

Honda shared some exciting plans during CES 2024 for their electric vehicles, or EVs, with the introduction of its 0 series EVs. The move challenges the existing trend of heavy and bulky electric cars. The brand unveiled a couple of concept vehicles, the Space-Hub and Saloon, marking a significant shift from conventional EV designs. 

They are preparing for the 2026 launch of their first-ever North American commercial model with a focus on producing light and thin EVs, which is a fresh take in the field of EVs. The Saloon, which is meant to be the first model in the 0 series, is the perfect example of the new direction. This sporty, spacious, and sleek EV looks like it came directly from a sci-fi flick. 

Honda.com

How Cad Crowd can help

Cad Crowd offers new invention development, consumer product design, wearables design, engineering design, prototype design, and more that could help you and your design firm become part of the CES soon. 

Best Mouse For CAD (2022 Edition) – AutoCAD & Design Gear Guide


I’m excited to kick off this year’s AutoCAD/Design Gear Guide with my picks for the Best Mouse for CAD!

Every year or two I like to do a series of roundup posts highlighting and sharing some of my favorite tools and hardware for AutoCAD and Design in general.
Today we are taking a look at some of the Best Mice on the Market for CAD, many of these I’ve used over the last few years and some are highly recommended by fellow designers and users alike.

I’ve written previously about specific specs and features to look for when choosing the right mouse for AutoCAD and design here (CAD Gear Guide), in that article we go over some of the key things to look for when choosing your next ‘daily driver’ mouse.

The one issue with calling or choosing the Best CAD mouse is that mice, along with many other peripherals (keyboards, headphones in particular) are that there is no one size fits all options. Sure there are always a few top-of-the-class and generally recommended options but it’s rare, if not unheard of that a single Mouse or piece of hardware is “the BEST”.

We don’t all fit the same mold and neither do our mice preferences, especially when it comes to ergonomics, wired/wireless preference, accuracy/dpi, Left Handedness (Like myself), or even just overall aesthetics.

With all that in mind, I like to share some of my favorite Mice for AutoCAD and Daily Use each year, including a few options from a variety of types.


So, in no particular order here are my “Best CAD Mouse” picks for 2022:

3D Connexion – CAD Mouse Compact Wireless:

The CAD Mouse Compact Wireless, had been my daily use mouse for the past 2-3 months now and I am a big fan of it and many of its features.
I like the ergonomic feel and comfort when holding/using this mouse for long periods, I’ve found the smaller/compact size to be more comfortable than the standard size CAD Mouse by 3D Connexion, fitting my use better not only at the office or desk but also especially when travelling with it.

Battery Life has been great so far and I really like the additional buttons and dedicated radial menu center button. I would also highly recommend their accompanying mouse pad, using the two together feels buttery smooth when drafting in particular.
Buy the CAD Mouse Compact Wireless here (Amazon)


Logitech – MX Master 3:

The MX Master 3 is the newest version in Logitech’s line of professional mice and from what I can tell, the most popular mouse line for the past handful of years. You would be hard-pressed to go into any design, engineering or professional office and not find the majority of the workers using one of the MX Master mice.
There really isn’t much criticism for these mice and I can say that my MX Master 2 is the mouse I’ve used the most over the last 4 or so years and the longest I’ve used any single mouse in my life.

One thing I miss most for whatever reason having switched to the 3D Connexion mouse is the top button to release/freewheel the scroll wheel. I still find myself going to use that feature on any mouse I’ve used since and I wish it was a standard option on every mouse now haha.

Another great feature of the MX Master 3 is the move to USB-C for their charging cable, many newer laptops and even PCs have fewer and fewer standard USB ports, and having to deal with dongles is always a pain.
Buy the MX Master 3 Now (Amazon)


3D Connexion – CAD Mouse Pro Wireless:

The CADMousePro Wireless is the bigger brother version of the Compact mouse from above. I really enjoy using this mouse as well, but a few things have pushed me to choose the smaller compact version the majority of the time instead.
Again this is personal preference-based, since I find the Pro version to be just slightly too wide for my comfort.

In many cases, I find myself accidentally clicking the middle mouse button when trying to right-click, but if you have larger hands or prefer the additional size and feel then everything I enjoy and love about the CAD Mouse applies to this version as well!

At only $20~ difference from the Compact, both are great and CAD specific Mouse options that I will continue to use and recommend to my friends/colleagues for years to come.

One other point to note is the lack of USB-C for charging, both for the PRO and Compact versions of the wireless CAD Mouse. Not a deal breaker by any means but certainly something to consider.

Buy the CAD Mouse Pro Wireless Now (Amazon)


Logitech – MX Ergo Trackball Mouse


I couldn’t have a CAD Mouse list without including one of the most popular Trackball style mice. The MX Ergo Trackball Mouse is highly reviewed and regarded as a great option for those designers that prefer the Trackball feel and style for drafting.

It has a lot of the same great features and ergonomics as the MX Master series while also including the ability to use the trackball for less wrist/arm movement throughout the day. In turn, helping with fatigue and repetitive stress that is oh so common in the industry.

Check out the MX Ergo Mouse here if you’re a Trackball fan (Amazon)


Logitech – MX Vertical Wireless:

I wanted to include a vertical style ergonomic mouse on this year’s list since I’ve heard great things and have been wanting to try one since a friend and coworker started using one around the office last year. Just seeing one of these is certainly intriguing, and you can’t argue that it does seem more ergonomic to have your hand/wrist in a more natural upright position for extended periods of time.

This mouse is on my list to try in the next year, I will certainly update this post if I do get a chance to use one for an extended period of time.

Check out the MX Vertical Wireless Mouse here: (Amazon)


That’s all for this year’s list of my favorite/best CAD Mouse for 2022. I hope you enjoyed the list and I would love to see in the comments what mouse you’re currently using daily and why?! Let’s build out a list of all the CAD Intention readers/subscribers’ favorite CAD Mouse too!

These are just a few of the Mice I recommend and have been recommended for AutoCAD and I’d love to continue adding to the list this year as well as hear your suggestions!


That’s all for today, I hope you all will continue to check out and enjoy my posts lately, they have been a ton of fun to work on and I’m excited about more. Be sure to subscribe and follow on Twitter @cadintentions to keep up to date and be the first to get updates as well as sign up for the newsletter here: Signup Here (CAD Intentions Newsletter).

As always, thank you so much for reading and watching, I am super excited to be back and posting regularly on the blog and hope you all will follow along.

Cheers and happy drafting!


The following two tabs change content below.

Brandon is a Civil Designer, Aspiring Blogger/Creator, Husband, Father to two Amazing Kids and Tech Aficionado from a small town in Canada. He has been obsessed with design and technology since he can remember and working as a Civil Designer for nearly as long. Brandon’s blog and Youtube channel, CADIntentions.com has been his outlet and excuse for keeping up with new tech and trends in the CAD design world for the last 10 years growing to more than 60,000 subscribers and over 15,000,000 views, while also being the source of many great friendships and unique opportunities.

If you would like to Sponsor CAD Intentions or Work together in some way, Please visit my About Page and send me an email: http://cadintentions.com/about-me/


Top 3D Architectural Rendering Books, Magazines, and Blogs for Companies to Follow


If you think you already know everything there is to know about 3D architectural rendering services, you might want to think again. The thing about this unique field is that discoveries pop up daily, which means you also have new things to learn. Whether you want to brush up on your team’s existing knowledge or your company is poised for growth, here are some of the top 3D architectural rendering books, magazines, and blogs you should follow.

Brian M. Crisp’s Architectural Rendering with Mental Ray

Brian M. Crisp’s “Architectural Rendering with Mental Ray” is a book that covers almost everything that might interest you, from proper setup of lighting to texturing, rendering, and more, with lots of helpful tips on every page. This is the best 3D architectural rendering book for someone who wants to master using Mental Ray for 3DS Max or Maya architectural rendering.

Brian M. Crisp’s Architectural Rendering with V-Ray

This is another book by Brian M. Crisp, but V-Ray is its primary focus this time. This literature covers various topics, just like the first book on mental ray. The key difference is that it reviews more details on the capabilities and features of V-Ray that set it apart from its predecessor.

Sarah Jones and Michael Secrist’s Architectural Visualization: Its Relevance to the Unbuilt World

Sarah Jones and Michael Secrist’s book, published in 2018, is not a technical book written as a tutorial and guide for 3D architects, artists, or designers. Instead, this book delves into 3D architectural visualization services and their importance for any renovation or building project.

The authors explain how the success of a project is dependent on the communication between the 3D architectural rendering designers and architects. It also uncovers the secrets behind effective communication with CGI artists, making it a fantastic read that benefits architects and employers alike.

Readers of the book will better understand 3D architectural visualization and rendering and all the essential steps it involves. This way, architects lacking 3D architectural visualization proficiency can refer to this book to learn how to communicate more effectively with visualization companies to ensure a smoother project. Employers can also use the book to understand their projects better, learn why some things should happen, and participate in the process if needed.

RELATED: What are Architectural 3D Visualization Costs, Service Fees & Rates for Companies?

Light: Science and Magic

book1-1

Light: Science and Magic is mainly meant for professional photographers as it discusses a comprehensive analysis of various options for photographic lighting. But don’t worry because the book works wonders even for architects, particularly in 3D architectural rendering and 3D architectural visualization. The book captures the very essence of the effect of various lighting conditions on the quality of the final image. No matter how expensive the equipment you’re using might be, it won’t provide excellent results if you are not knowledgeable about appropriate lighting.

The same rule applies to 3D architectural rendering because even the most state-of-the-art tech software and advanced tools will never produce amazing 3D renders independently. You still need to have a certain level of expertise and knowledge, especially regarding lighting.

Adding this book to your must-read list can drastically increase the 3D modeling skills of an architect, which is critical to come up with eye-catching and appealing 3D renders. Whether your company is looking to elevate your team’s lighting proficiency or refine your architectural 3D modeling services to produce standout 3D renders, this book is a valuable resource not to be missed.

RELATED: What are Architectural Rendering Costs, Rates, and Pricing for Companies?

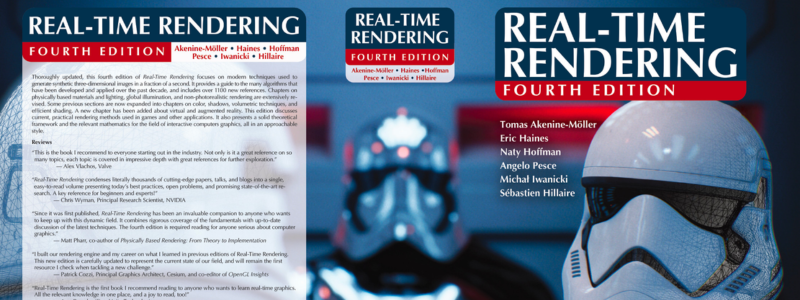
Real-Time Rendering

Real-Time Rendering is a collection of four editions and is an amalgamation of different experts who combined their forces and joined together to come up with this work. With three books already behind it, this newest edition delves into the most modern methods for exemplary results in rendering. The book is also written in a way that is easy to understand, complete with helpful examples and references to other examples.

You don’t need any prior 3D rendering knowledge to understand this book because it starts with the basics of mathematics and slowly progresses to more advanced techniques typically used in the finest quality games. While its primary focus is video game rendering, only a few architectural books can match this book as it details the 3D rendering field. All the methods that the book covers are universal and are also applicable to different rendering purposes.

Featuring 24 chapters, the book’s authors go into great detail as they describe every single step of the complicated process. After reading this book, you can expect to learn more about 3D rendering, transformation, processing, illumination, light, colors, texture, shading, AR, VR, and other elements. Real-time rendering is your best choice to learn more about detailed rendering.

book2

Eric Wing’s Revit 2020 for Architecture: No Experience Required

Revit 2020 for Architecture: No Experience Required is precisely what its title suggests. This is a must-read book for any beginner without experience using Revit for architecture. With Autodesk Revit considered the top architectural BIM software, it’s no surprise that many architects use it for 3D visualization. If you plan to use Autodesk for your 3D renders, this book, written by Eric Wing, a BIM Services Manager, is something you should read.

The book will guide you through the world of Revit and help you develop high-quality architectural renderings and visualizations. It opens with critical elements like familiarizing yourself with the interface of Revit and using its fundamental features as an example. It begins with model creation, progressing to door and window placement and various perspectives, views, plans, angles, and 3D perspectives. After you finish this book with 17 chapters alongside your project creation, you will soon master all the essential tools for high-quality and detailed 3D architectural renders.

RELATED: Architectural VR/AR 3D Rendering Costs, Rates & 3D Modeling Pricing for Design Firms

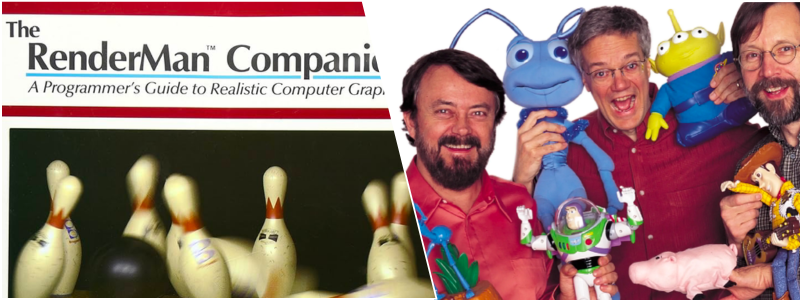
The RenderMan Companion: A Programmer’s Guide to Realistic Computer Graphics by Steve Upstill

Steve Upstill’s book covers everything, including the fundamentals of materials and lighting, to more advanced subjects like global illumination, motion blur, and depth of field. This also includes several chapters that discuss procedural modeling techniques and generating textures. The book is also a helpful resource for those who wish to learn and master techniques for computer graphics programming to create photorealistic images in different 3D applications such as Cinema 4D and Maya.

book3

Michael Brightman’s The SketchUp Workflow for Architecture

3D architects, 3D landscape architects, and 3D interior designers worldwide use the premier 3D design software SketchUp. Michael Brightman, the man behind this guide on SketchUp, is a successful architect and is now the Lead Instructor and President at a SketchUp Authorized Training Center based in Denver.
This book tackles modeling buildings, design visualizations, and developing construction documents using LayOut and SketchUp Pro. Published in 2013, this guide rose to popularity as one of the best books about software. The high demand for this book resulted in its recent update in 2018.

It also teaches field professionals how to harness the program’s power for all project sizes, types, and styles. It provides step-by-step guidelines on using the software at different stages of the architectural design process. Those who buy the volume will also gain access to tutorial videos on several advanced methods of architectural rendering. The guide teaches how architecture professionals can take advantage of SketchUp in different stages of their work.

RELATED: 3D Interior Design Costs, Modeling Pricing, and Rendering Rates for Buildings

CGarchitect

CGarchitect is an online open community that caters to enthusiasts and professionals in architectural rendering and visualization. This blog boasts a constantly growing showcase gallery of more than 100,000 renderings. They also regularly promote the newest job openings in the architectural visualization field.

The blog also features an impressive selection of articles that include insights from experts in the industry and the latest news about the constantly changing field of architectural rendering. You can also check out the bustling online forum where readers can share tips, raise questions, share their work, and ask for advice from other community members.

Enscape Blog

book4

The Enscape Blog, launched in 2017, has quickly become the leading blog on architecture and architectural rendering. It contains top-quality feature articles on various topics for AEC students and professionals and renders tips straight from visualization experts. It doesn’t matter if you’re an architect, 3D architectural rendering specialist, 3D designer, or just a 3D architectural visualization fan; this blog is something you should check out.

Ronen Bekerman Architectural Visualization Blog

The Ronen Bekerman Architectural Visualization Blog is directly relevant to people who work on architectural renditions. Aside from the available tutorials and resources to advance your skills in rendering, you can also explore different projects, showcase your work, and even follow weekly podcasts to learn the latest industry trends.

How Cad Crowd can help

Aside from these top 3D architectural rendering books, magazines, and blogs, Cad Crowd is another platform where you can find a blog section filled with helpful articles to gain more insights about the 3D architectural rendering industry.

JTB World Blog: JTB XClipClean 4.0.0 released


JTB XClipClean 4.0.0 has been released.

  • Upgrade from VBA to .NET improving performance and stability.
  • Remove messages about uninstallation in very-silent installation mode.

If you are using clipped xrefs or blocks you may find this app useful.

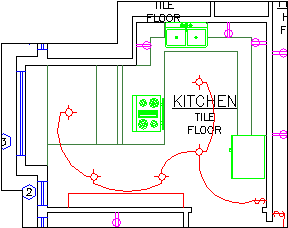
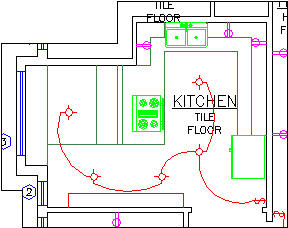
Kitchen with the xclip boundary visible

JTB XClipClean is an Xclip-cutter app for AutoCAD to clean up xrefs or blocks that been clipped so that the information that is outside the clip is removed. This is useful when you need to remove hidden geometry and minimize DWG file size.

AutoCAD allows blocks and xrefs to be clipped using the XCLIP command. Sometimes for different reasons you have to clean up the blocks or xrefs that have been clipped. JTB XClipClean can help you with that by deleting and trimming geometry that is outside the xclip boundary.

Revit does not handle xclipped blocks and xrefs so XClipClean can be useful to run on drawings before taking them into Revit.


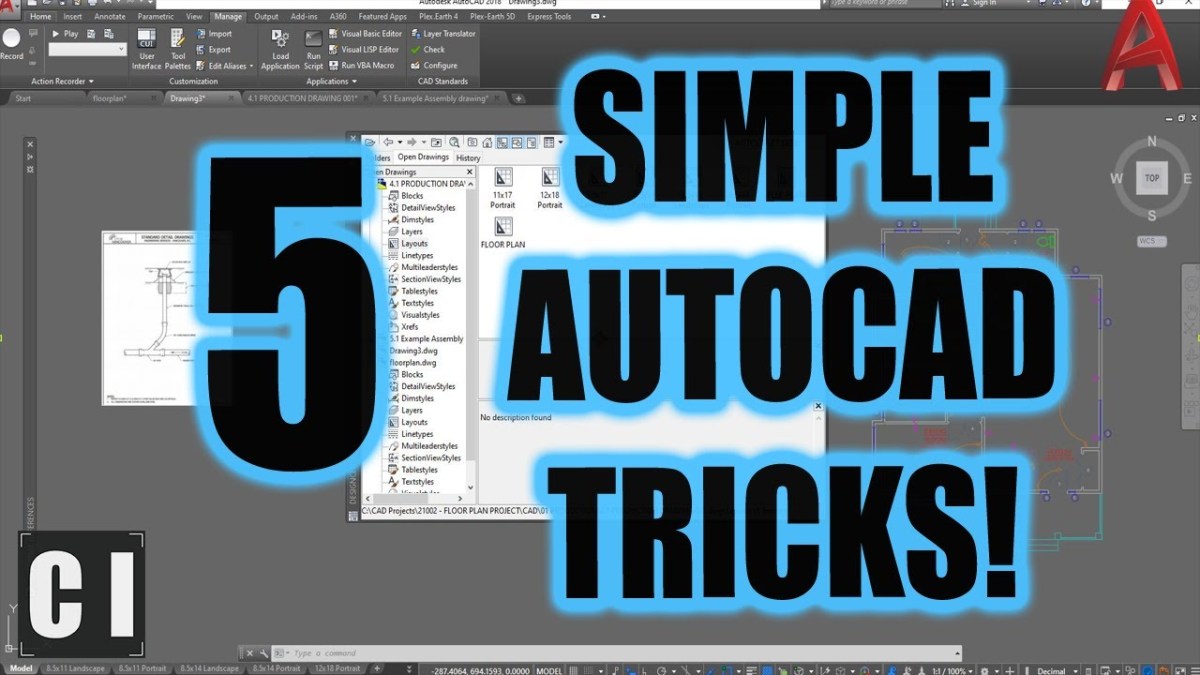
5 Simple AutoCAD Tricks To Save You Time! – Must Know Productivity Hacks!


Hey Everybody,

Brandon here back with a new post and I’m excited to get back to writing here and in general after a few months of focusing on the Youtube Channel and video tutorials.

Depending on when you’re reading this, you may have just finished enjoying the Long weekend (May Long) like myself. My family and I just took a relaxing camping trip with some friends where we were able to disconnect and really recharge while being away from the office and work.

Whether you happen to be coming back from a long weekend, vacation or just a day off, we’ve all had to deal with those short weeks.

Short weeks like those that we encounter with long weekends can be a blessing and a curse. In our industry, deadlines, and projects keep coming, and sometimes crunching a whole week of work into a shorter 4-day week can be the norm.

These crunch/rush periods of work are one of my main motivators to continually learn newer, faster, and more productive workflows when it comes to AutoCAD and design in general.

Being able to get more quality work done in a short period of time is a skill that can be improved with practice and learning. So with that in mind, let’s jump right into this week’s video, in it we take a look at 5 easy to remember, simple AutoCAD Tricks that will instantly help save you time in your short weeks!


5 Simple AutoCAD Tricks To Save You Time! – Must Know Productivity Hacks!


That’s all for today’s quick Autocad Tip, I hope you all were able to take something away from it and able to add a new tool to your CAD toolbox!

Be sure to subscribe and follow on Twitter @cadintentions to keep up to date and be the first to get updates on the newest videos, posts, and downloads.

As always, thank you so much for reading and watching, I am super excited to be back and posting regularly on the blog and hope you all will follow along.
Cheers and happy Drafting!

PS. In case you missed out or are interested in the brand new AutoCAD Fundamentals & Workflows Course, check it out here (Available for Instant Download NOW): https://gum.co/learnautocad

The following two tabs change content below.

Brandon is a Civil Designer, Aspiring Blogger/Creator, Husband, Father to two Amazing Kids and Tech Aficionado from a small town in Canada. He has been obsessed with design and technology since he can remember and working as a Civil Designer for nearly as long. Brandon’s blog and Youtube channel, CADIntentions.com has been his outlet and excuse for keeping up with new tech and trends in the CAD design world for the last 10 years growing to more than 60,000 subscribers and over 15,000,000 views, while also being the source of many great friendships and unique opportunities.

If you would like to Sponsor CAD Intentions or Work together in some way, Please visit my About Page and send me an email: http://cadintentions.com/about-me/