3 Ways to Get Back! AutoCAD REVERT, UNDO, and OOPS: Tuesday Tips With Frank | AutoCAD Blog


Today’s Tuesday Tip is really three tips in one, with all three sharing the same theme. They let you Get Back to where you… started (you thought I was going to say once belonged, didn’t you?) Sometimes our work doesn’t take us where we want, and we realize it’s best to start over, or as the Fab Four told us, it’s time to Get Back.

AutoCAD REVERT: Toss It and Start Over

The scenario: You have an existing drawing, and its design needs to be updated. There are various design options, and your job is to try them and decide on the best. You work for a while, try ideas, get stuck, get unstuck, work more, until you realize it’s just not going to work.

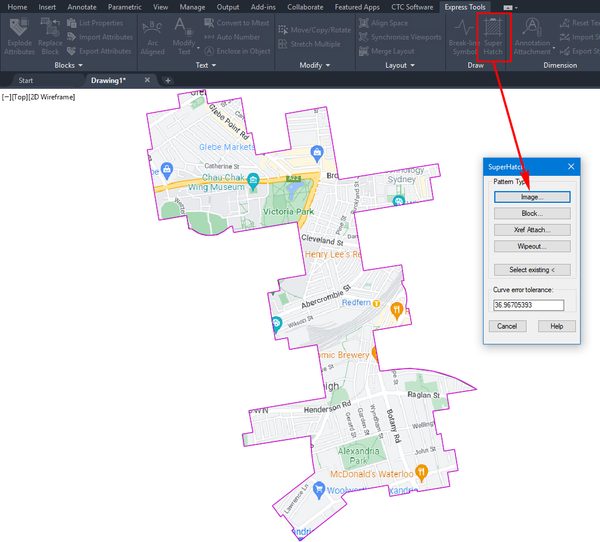
Yes, you could close the drawing, making sure that you don’t save it, then reopen it to start over. There are better options that will get you there quicker. The first is an Express Tool. It is called REVERT, and it does exactly what you might think. It tosses out all your edits and Gets Back to the state of the drawing when you opened it. It’s not in the Ribbon, so you’ll have to remember its name – unless you have the MENUBAR turned on.

I first wrote about the Express Tools found in the MENUBAR way back in 2018. There are more tools there than in the Ribbon. You can find REVERT there if you want.

Screenshot of AutoCAD REVERT

There’s another way to revert your drawing back to its original state, and it works as a segue into my next topic. You can type in the full UNDO command, then B for Back, then accept the Y for Yes to accept the prompt to undo everything.

AutoCAD UNDO: Control Your Undo

Some of you may not be aware that UNDO is a full-fledged command with options. If you’re like most of us, you type U and pop the spacebar, or maybe use the Windows Ctrl-Z option or the little icon (and pulldown menu) in the QAT.

Let’s consider our design scenario again. This time, some of your initial design changes work perfectly, and you don’t want to lose them if you continue. In other words, a full REVERT or UNDO “Back” later on would remove things that you want to keep. But UNDO is still your friend here. Notice all the options available in the full command. I’ll be focusing here on one of them, but feel free to explore further in the help file.

You can use the “Mark” option to set a kind of bookmark of the current state of your drawing. You can set multiple, in fact. Later, when you do an UNDO “Back”, it will only go back until it finds the most recent Mark.

Screenshot of AutoCAD UNDO

Once a Mark is encountered, it will be removed. If you have more than one Mark set, subsequent calls to UNDO “Back” will go to those. If you’re using the U <enter> method (which is actually UNDO <1>) and a Mark is encountered, you will be informed about it. Once all of your Marks are accessed and removed, running UNDO will Get Back to the beginning.

AutoCAD OOPS: Get Back the Erased

Back to our design scenario one more time. You work on an idea, get to the end, and decide against it, so you erase it all. You work on a different part of the design for a while, which is going to work great, but then you realize the stuff you deleted would now work in conjunction with your new design. You want to keep what you have, but also Get Back what you’ve deleted. Now what?

That’s where our last option comes in handy. It’s called OOPS. Yes, I’m serious here. As far as I know, it’s been in AutoCAD from the very beginning. It restores the last object, or set of objects, that were deleted by the last ERASE command. Just type it into the command line and press return, and your object or objects will return.

Screenshot of AutoCAD OOPS

A word of warning, though, OOPS doesn’t work like UNDO does. It won’t keep going back in time restoring erasures. It’s a one-time deal. You can only Get Back the last object or objects that were erased.

And In the End…

I’ve got to hand it to myself. It was so tempting to fill this post with Beatles puns, but I was able to stick to the topic.

Using REVERT, UNDO, and OOPS, you can easily Get Back the last thing you erased, you can Get Back to a virtual bookmark in your design, or you can Get Back to where you started.

And now, I’ve Got a Feeling that I’m going to call my dog, Jo Jo over, we’ll Come Together, and I’ll drop all my pent-up puns on him. It will be just the… Two of Us.

More Tuesday Tips

Check out our whole Tuesday Tips series for ideas on how to make AutoCAD work for you. 

AutoCAD 3D Editing Basics: Tuesday Tips With Frank | AutoCAD Blog


In my last Tuesday Tip, I introduced you to some handy tools for turning your 2D shapes into 3D solids. Today, I’m going to take you just a little further with AutoCAD 3D editing and show you how easy it is to turn your extruded (or press/pulled) objects into more complex structures.

To illustrate these tools better, I will use the same simple geometry I created last time: a box and a cylinder (extruded from a 2D rectangle and a circle). However, for today’s post, I’ve moved the cylinder to the center of the box and made it a little taller.

Screenshot of cylinder and cubes in AutoCAD

The subjects today are the 3D editing tools, Union, Subtract, and Intersect. They can be found in either the 3D Modeling workspace or the 3D Basics workspace. I’ll be demonstrating these tools via the 3D Basics workspace, as it’s a bit cleaner and easier to see the icons.

Union

The first tool out of the box is Union. With this command, you don’t have to worry about what order you select things (more about that with the next tool). As you’ll see in the animation below, I take advantage of this by using a crossing window selection box. Quite simply, the UNION command will combine all the selected 3D solids into a single solid object. So, I no longer have a box and a cylinder, but now I have a box with some kind of a boss on top.

Please keep in mind that my examples are simply for visualization purposes and do not depict anything useful.

Animated gif of AutoCAD Union example

Subtract

On to the second tool — the Subtract command. In this animation, you’ll notice I pause for the extended tooltip when selecting the subtract icon. This is a reminder to use these, especially in the 3D workspaces, as they give you a detailed (and sometimes animated) illustration of how the tool works.

You’ll see that its workflow is to select the object(s) you want to keep, hit enter, and then select the object(s) to subtract. In this case, I’m keeping the box and using the cylinder to subtract, thus creating a hole in the box. You may also notice that I’ve moved the Command Line into frame and used F2 to expand it into the text window. I did so because, for some reason, the prompts for what to select (the kept object vs the subtraction object) are not very clear—just something for you to keep in mind.

Bonus Tip: I’m using the Orbit command at the end to show the hole better. Just hold down your Shift key, press down the scroll wheel on your mouse, and just move the mouse around! It’s a fast way to visualize your 3D work.

Animated gif of Subtract in AutoCAD

Intersect

The third and final tool for the day is the Intersect command. I stayed with my box and cylinder solids, but using intersect on them doesn’t do Intersect justice. It just creates a smaller cylinder. However, the extended tooltip has a terrific visual example, as shown below.

Both shapes began as 2D objects that were extruded into 3D solids. Intersect operates just as you would expect. It takes the overlapping regions of multiple 3D solids and turns the overlap into a new solid.

Screenshot of AutoCAD Intersect

Much like the Union command, you don’t have to worry about the order of your object selection. In my example animation below, I selected the box and cylinder individually, but I could have also used a crossing window as I did with Union.

Animated gif of AutoCAD Intersect

Summing Up

As you can see, these tools are not too terribly difficult to use, but they’re extremely powerful, especially when used together. Hopefully, even with my incredibly simple examples, you’ve been inspired to visualize how they can bring your seemingly complex project to fruition.

Hey, there’s nothing wrong with keeping one foot in your familiar 2D world, but don’t be afraid to put the other into 3D. Poke around some while you’re there. Expand the Ribbon Panel and see what other tools are available in the Additional Tools area. Explore both 3D workspaces. You’ll find familiar tools (3D versions of Chamfer and Fillet) and some new ones as well.

And by all means, don’t forget to hover over them to see their Extended Tooltip. It’s a terrific method for getting a feel for how a tool works before you find a need to use it.

More Tuesday Tips

Check out our whole Tuesday Tips series for ideas on how to make AutoCAD work for you.

Quick Tip: Using an Image as a Hatch in AutoCAD | AutoCAD Blog


Contributed by Autodesk Community member Deepak Maini

With AutoCAD widely used in infrastructure projects, one thing that I get asked about is an easy way to insert an image inside a complex area.

This is where the Express Tools > Super Hatch command is convenient, as it allows you to use an image as a fill pattern, as shown below. 

Screenshot of Hatch and image in AutoCAD

You can select the image, define its placement point, and then click inside the region for the image to crop to the shape of that region.

It’s as easy as that!

Learn More

Enjoyed this article? Then check out the Autodesk Community for even more great content from talented users across Design and Make industries.

How to Add Custom AutoLISP Commands Into the AutoCAD Ribbon | AutoCAD Blog


Contributed by Autodesk Community member Arshdeep Singh

In my previous blog post, A Guide to AutoCAD Ribbon Customization, I explained how the built-in commands from AutoCAD can be added to the ribbon to streamline workflows and enhance productivity. This blog is a continuation, where I expand on how to take customization a step further by integrating your own custom AutoLISP commands into the ribbon. This allows you to create a truly personalized and efficient workspace tailored to your unique design needs.

What is AutoLISP?

Before we get started, it’s a good idea to understand AutoLISP. AutoLISP is a very powerful language that has been around for a long time and was designed to allow users to write custom commands that extend the capabilities of AutoCAD. AutoLISP programs are saved as .lsp files. While there are a handful of different methods to load the program into AutoCAD, I particularly like the CUI method where I can also add it to the ribbon after adding.

AutoLISP programs can be loaded into AutoCAD to run as commands. By combining AutoLISP with CUI, you can integrate these commands into the ribbon, making them easily accessible for daily use.

If you are a programming enthusiast, you will love this article by Autodesk where the origins of LISP and AutoLISP are explained: AutoLISP and Visual LISP (AutoLISP)

Writing a Basic AutoLISP Program

We will write a very basic hello world program in which we will add the AutoCAD’s ribbon as a command. Any basic text editor like Notepad can be used to write this program but Visual Studio Code with AutoLISP extension is the recommended way.

This program displays a message box with the text “Hello World” when the user runs the HELLOWORLD command. You can copy the code below into a text file and save it with the .lsp extension:

Introduction to the Customize User Interface Editor

A cuix file stores all the interface customizations like the menus, ribbon tabs, and workspaces. It controls how the commands are organized and displayed on the ribbon tab. You can also type CUI on the command line to open the Customize User Interface (CUI) Editor.

It’s always a good idea to back up the current customization file before making any changes. The customization file path is listed in the Properties Tab under General  Filename

Browse to the folder and copy the customization file/s to a backup folder of your choice.

Screenshot of AutoCAD CUI File Location

Adding LISP files to CUI

1. Launch the Customize User Interface (CUI) Editor.

2. In the left panel, right-click on the Lisp Files option and click on Load File.

AutoCAD screenshot load LISP

3. Browse to the folder where you have stored the AutoLISP program and select the program.

4. Now the program will be listed under LISP files, and it will be automatically loaded every time you start AutoCAD.

AutoCAD Screenshot of LISP File Loaded

5. Click Apply and OK

6. A security warning will appear if the AutoLISP program does not have a CA recognized digital signature installed.

Screenshot of AutoCAD security prompt

Clicking on “Always Load” will trust the AutoLISP program and the security warning will not be shown again unless the LISP program is modified.

Clicking on “Load Once” will only trust the AutoLISP program for the current instance of AutoCAD and the warning message will be shown every time the program is loaded.

Important Note: Only load AutoLISP files that you wrote yourself or that come from trusted sources. Loading unverified files can pose security risks or compromise your system.

Now at this point, we have successfully loaded an AutoLISP program into AutoCAD and the HelloWorld command can be called from the command line. Next, we will convert this into an AutoCAD command and assign an icon to it.

Creating a Command from AutoLISP Programs and Assigning an Icon

1. Launch the Customize User Interface (CUI) Editor.

2. In the left panel, Under the Command List menu, click on Add new command.

Screenshot of AutoCAD create a new command

3. Add all the required information like the Name, Description, and Command Display Name.

4. Assign an icon of your preference or browse and upload a custom icon (Optional).

5. Under Macro, add ^C^CHelloWorld.

Screenshot of AutoCAD Command Parameters

If you are using some other custom program than the one we are using in this example, you should enter the command name for your lisp program. The command name can be identified by opening the lisp program and looking for the following syntax (defun c: HelloWorld )

6. Click Apply and OK

Now at this point, we have successfully created a new AutoCAD command that references our AutoLISP program. Next, we will look into how we can add this command to the ribbon.

Adding the Custom Command to the Ribbon

My previous blog post, A Guide to AutoCAD Ribbon Customization, covers in detail how to add the built-in commands to the ribbon. Please refer to it for more detailed instructions.

1. Launch the Customize User Interface (CUI) Editor.

2. In the left panel, expand the Ribbon Tab and expand the Panels Tab.

3. Add a new panel and a row. Give the panel a meaningful name, for example, “My Panel.”

4. Search for our HelloWorld command under the command list and simply drag and drop it to the Row under the new panel we just created.

5. Set the Button style to Large with Text (Horizontal) or your preferred view. Panel Preview window will update the preview on how it would look on the ribbon.

Screenshot of AutoCAD panel preview

6. Drag and drop or copy the new panel “My Panel” to the bottom of the Home-2D Tab under Ribbon.

Screenshot of AutoCAD home tab CUI

7. Press Apply and OK. Just like that, the new command has been added to the ribbon and is ready to be used.

Screenshot of AutoCAD home tab preview

Keep Going

Integrating AutoLISP commands into AutoCAD’s ribbon not only enhances productivity, but also provides a customized and efficient user experience.

By leveraging the power of AutoLISP and the flexibility of the Customize User Interface (CUI) Editor, you can streamline your workflows and tailor AutoCAD to suit your unique needs. Remember to always verify the source of AutoLISP files to ensure security and avoid potential risks.

The Visual LISP, AutoLISP, and General Customization community forum is a great place to get help with AutoLISP programs from the experts in the Autodesk community. Happy coding and designing!

Common AUTOCAD Mistakes to Avoid for Perfect Drawings Every Time!!


Hey All,

Happy Thursday! I hope you’re having a great week so far, it’s been a busy one here and I’m looking forward to sharing 2 new AutoCAD Videos with you all.

I’ll jump right in since I want to keep today’s email short, in the first video this week we are taking a look at some of the most Common AutoCAD Mistakes that I see new and experienced users consistently making and how to easily avoid them!

Whether you’re a beginner or an experienced user, these essential tips will help you improve your workflow, enhance your design accuracy, and save valuable time.

Common AUTOCAD Mistakes to Avoid!

Let me know in the comments what some common Mistakes you run into or find yourself making on the regular!

Next up we’ve got the second video this week, in it we are taking a look at how to set up Dark Mode in AutoCAD and in particular, how to create a custom dark mode for paper or layout space! Dark mode in software has been around for quite a while, it is well known that it is easier on your eyes and much better when working at a computer for prolonged hours of work.

AutoCAD in DARK MODE is a GAME CHANGER! – Custom Dark Mode for Layouts / Paper Space

That’s all for today, I hope you enjoyed this week’s email and I would love to hear what you think? Be sure to let me know by hitting reply or sending me a message over on twitter @cadintentions ! 

As always, thank you so much for reading and watching, I am super excited for the rest of the year, growing the content, tutorials, and blog with you all. 

Cheers and happy Drafting!

The following two tabs change content below.

Brandon is a Civil Designer, Aspiring Blogger/Creator, Husband, Father to two Amazing Kids and Tech Aficionado from a small town in Canada. He has been obsessed with design and technology since he can remember and working as a Civil Designer for nearly as long. Brandon’s blog and Youtube channel, CADIntentions.com has been his outlet and excuse for keeping up with new tech and trends in the CAD design world for the last 10 years growing to more than 60,000 subscribers and over 15,000,000 views, while also being the source of many great friendships and unique opportunities.

If you would like to Sponsor CAD Intentions or Work together in some way, Please visit my About Page and send me an email: http://cadintentions.com/about-me/


Simple AutoCAD Tricks to Split a Polyine!


Hey All,

I hope you’re doing well and managing to stay afloat in this typically busy season for engineering, design, and construction!

It’s certainly been crazy here the last few weeks but things are starting to settle down and I’m excited to share this week’s email/tutorial with you all.

First off, this week’s video is a fun one!

In it we are looking at a bunch of ways to split a polyline or polygon in AutoCAD.

Whether you need to break up/split your polyline at a random location, split it into equal segments, at specific distances or explode it into individual segments. This video has a command and answer for you!

Check it out here: AutoCAD How to Split a Polyine! Break at Points, Equal Segments, Split & More!

That’s all for today, I hope you enjoyed this week’s email and I would love to hear what you think? Be sure to let me know by hitting comment or on twitter @cadintentions ! 

As always, thank you so much for reading and watching, I am super excited for the rest of the year, growing the content, tutorials, and blog with you all. 

Cheers and happy Drafting!

PS. If you’d like to improve your AutoCAD/Design skills to get into working remotely with CAD, be sure to check out my highly rated and recommended AutoCAD Fundamentals & Workflows Course! to learn all of my favorite Tips/Tricks!

I created this course to answer all of our most common questions and concerns when learning AuotCAD, I even polled 1000s of readers to get their questions and answered them all in the course!

It’s packed full of 15+ years of experience along with practical and highly requested tutorials on everything from initial drawing setup to pdf plotting, annotative text, xrefs, templates, packaging files for final submissions or archiving and so much more

If you’re excited to learn new workflows and AutoCAD Skills and join millions of viewers who learn from and enjoy my tutorials daily,

Get the Course Here

What viewers are saying about CAD Intentions Tutorials:


Where were you all my life
You have great tips on your channel

Stefan D.


Thank you, thank you, thank you! That was very helpful!
Nicole H.


Thanks a lot, Brandon. I didn’t know how to use this useful tool.
Manuel Q.

The following two tabs change content below.

Brandon is a Civil Designer, Aspiring Blogger/Creator, Husband, Father to two Amazing Kids and Tech Aficionado from a small town in Canada. He has been obsessed with design and technology since he can remember and working as a Civil Designer for nearly as long. Brandon’s blog and Youtube channel, CADIntentions.com has been his outlet and excuse for keeping up with new tech and trends in the CAD design world for the last 10 years growing to more than 60,000 subscribers and over 15,000,000 views, while also being the source of many great friendships and unique opportunities.

If you would like to Sponsor CAD Intentions or Work together in some way, Please visit my About Page and send me an email: http://cadintentions.com/about-me/


Must-Know AutoCAD Customizations! Simple Pro Designer Tricks You Need to Learn Now


Hey All,

I hope your week has been a good one and not as busy as mine so far 🙂

I wanted to share today’s video asap since it’s a great one when it comes to saving time and setting up our AutoCAD or C3D workspaces to be as efficient and easy to use as possible.

In the tutorial I walk through a handful of my favorite Must-Know AutoCAD customizations. These are things that I do to tweak and improve my AutoCAD workspace on every new/fresh install or machine I’m working on.

Everyone has different preferences when it comes to screen setup, colors, toolbars and more. And in the video, I teach you how to get started with setting up yours to save you time!

Must-Know AutoCAD Customizations! Simple Pro Designer Tricks You Need to Learn Now

That’s all for today, I hope you enjoyed this week’s email and I would love to hear what you think, do you have any ACAD Customizations you have to do?
 
Be sure to let me know by hitting reply or on twitter @cadintentions ! 

As always, thank you so much for reading and watching, I am super excited for the rest of the year, growing the content, tutorials, and blog with you all. 

Cheers and happy Drafting!

PS. If you’d like to improve your AutoCAD/Design skills to get into working remotely with CAD, be sure to check out my highly rated and recommended AutoCAD Fundamentals & Workflows Course! to learn all of my favorite Tips/Tricks!

I created this course to answer all of our most common questions and concerns when learning AuotCAD, I even polled 1000s of readers to get their questions and answered them all in the course!

It’s packed full of 15+ years of experience along with practical and highly requested tutorials on everything from initial drawing setup to pdf plotting, annotative text, xrefs, templates, packaging files for final submissions or archiving and so much more

If you’re excited to learn new workflows and AutoCAD Skills and join millions of viewers who learn from and enjoy my tutorials daily,

Get the Course Here

What viewers are saying about CAD Intentions Tutorials:


Where were you all my life
You have great tips on your channel

Stefan D.


Thank you, thank you, thank you! That was very helpful!
Nicole H.


Thanks a lot, Brandon. I didn’t know how to use this useful tool.
Manuel Q.

The following two tabs change content below.

Brandon is a Civil Designer, Aspiring Blogger/Creator, Husband, Father to two Amazing Kids and Tech Aficionado from a small town in Canada. He has been obsessed with design and technology since he can remember and working as a Civil Designer for nearly as long. Brandon’s blog and Youtube channel, CADIntentions.com has been his outlet and excuse for keeping up with new tech and trends in the CAD design world for the last 10 years growing to more than 60,000 subscribers and over 15,000,000 views, while also being the source of many great friendships and unique opportunities.

If you would like to Sponsor CAD Intentions or Work together in some way, Please visit my About Page and send me an email: http://cadintentions.com/about-me/


5 Must-Know Tricks to Create Layouts Faster in AutoCAD!


Hey All,

Happy Friday! I hope you’ve had a great week and are ready for a few days off to recharge.

It’s been a couple of weeks since the last email/video due to a last-minute surgery and then getting sick right after, but all is well and back to normal!!! And I’m excited to share this week’s video with you all.

In today’s video, I wanted to share a handful of answers/tricks to common questions that have come up recently in comments and in the CAD Support Private Discord (Learn more/Join Here), focusing on Layouts and Ways to speed up our drawing Production in AutoCAD.

We touch on the quickest ways to copy/reproduce layouts, tricks to automate text, how to use a block library/notes swipe file and more!

5 Must-Know Tricks to Create Layouts Faster in AutoCAD! – New Layouts, Copy Layouts & Automation

These tips are ones I talk about often and recommend to anyone looking to improve drawing production speed and simply streamline their layout workflows!

That’s all for today, I hope you enjoyed this week’s email and I would love to hear what you think, do you have any Layout Tricks?
 
Be sure to let me know by hitting reply or on twitter @cadintentions ! 

As always, thank you so much for reading and watching, I am super excited for the rest of the year, growing the content, tutorials, and blog with you all. 

Cheers and happy Drafting!

PS. If you’d like to improve your AutoCAD/Design skills to get into working remotely with CAD, be sure to check out my highly rated and recommended AutoCAD Fundamentals & Workflows Course! to learn all of my favorite Tips/Tricks!

The following two tabs change content below.

Brandon is a Civil Designer, Aspiring Blogger/Creator, Husband, Father to two Amazing Kids and Tech Aficionado from a small town in Canada. He has been obsessed with design and technology since he can remember and working as a Civil Designer for nearly as long. Brandon’s blog and Youtube channel, CADIntentions.com has been his outlet and excuse for keeping up with new tech and trends in the CAD design world for the last 10 years growing to more than 60,000 subscribers and over 15,000,000 views, while also being the source of many great friendships and unique opportunities.

If you would like to Sponsor CAD Intentions or Work together in some way, Please visit my About Page and send me an email: http://cadintentions.com/about-me/


AutoCAD Hatch Problems & Tips – Boundary Errors + Time Saving Tricks | 2 Minute Tuesday


Hey Everybody!
I hope you’re ready for this weeks new video and post. In it we are taking a look at the hatch command and in particular, some of the most common issues and errors we encounter when hatching in AutoCAD.

Before we jump into today’s post, I wanted to thank this weeks Sponsor: ThePrepared.org !

The Prepared is a free, high-quality weekly newsletter about engineering, manufacturing, and infrastructure.
It’s nerdy, useful, and fun!
Learn more and Subscribe here:  theprepared.org


If you’ve used AutoCAD for any amount of time recently, I’m sure you have encountered any number of Hatching issues when trying to fill irregular or complicated shapes.

In today’s video, I wanted to take a look at some of the most common hatching issues & errors that you’ll encounter, and walk you through exactly how to fix them.

Whether you have unclosed areas or boundary issues with hatches, today’s video will help you solve them in just a few clicks!

Check it out below and start hatching like a pro:
https://youtu.be/piE0fmxtNYw


That’s all for today’s quick Autocad Tip, I hope you all were able to take something away from it and able to add a new tool to your CAD toolbox!

Thank you again to this weeks Sponsor: ThePrepared.org 
Be sure to check them out and subscribe to their awesome weekly newsletter, it’s honestly one of my few must-read emails when it hits my inbox. 

Be sure to subscribe and follow on Twitter @cadintentions to keep up to date and be the first to get updates on the newest videos, posts, and downloads.

As always, thank you so much for reading and watching, I am super excited to be back and posting regularly on the blog and hope you all will follow along.
Cheers and happy Drafting!

PS. In case you missed out or are interested in the brand new AutoCAD Fundamentals & Workflows Course, check it out here (Available for Instant Download NOW): https://gum.co/learnautocad

The following two tabs change content below.

Brandon is a Civil Designer, Aspiring Blogger/Creator, Husband, Father to two Amazing Kids and Tech Aficionado from a small town in Canada. He has been obsessed with design and technology since he can remember and working as a Civil Designer for nearly as long. Brandon’s blog and Youtube channel, CADIntentions.com has been his outlet and excuse for keeping up with new tech and trends in the CAD design world for the last 10 years growing to more than 60,000 subscribers and over 15,000,000 views, while also being the source of many great friendships and unique opportunities.

If you would like to Sponsor CAD Intentions or Work together in some way, Please visit my About Page and send me an email: http://cadintentions.com/about-me/


5 Simple AutoCAD Tricks To Save You Time! – Must Know Productivity Hacks!


Hey Everybody,

Brandon here back with a new post and I’m excited to get back to writing here and in general after a few months of focusing on the Youtube Channel and video tutorials.

Depending on when you’re reading this, you may have just finished enjoying the Long weekend (May Long) like myself. My family and I just took a relaxing camping trip with some friends where we were able to disconnect and really recharge while being away from the office and work.

Whether you happen to be coming back from a long weekend, vacation or just a day off, we’ve all had to deal with those short weeks.

Short weeks like those that we encounter with long weekends can be a blessing and a curse. In our industry, deadlines, and projects keep coming, and sometimes crunching a whole week of work into a shorter 4-day week can be the norm.

These crunch/rush periods of work are one of my main motivators to continually learn newer, faster, and more productive workflows when it comes to AutoCAD and design in general.

Being able to get more quality work done in a short period of time is a skill that can be improved with practice and learning. So with that in mind, let’s jump right into this week’s video, in it we take a look at 5 easy to remember, simple AutoCAD Tricks that will instantly help save you time in your short weeks!


5 Simple AutoCAD Tricks To Save You Time! – Must Know Productivity Hacks!


That’s all for today’s quick Autocad Tip, I hope you all were able to take something away from it and able to add a new tool to your CAD toolbox!

Be sure to subscribe and follow on Twitter @cadintentions to keep up to date and be the first to get updates on the newest videos, posts, and downloads.

As always, thank you so much for reading and watching, I am super excited to be back and posting regularly on the blog and hope you all will follow along.
Cheers and happy Drafting!

PS. In case you missed out or are interested in the brand new AutoCAD Fundamentals & Workflows Course, check it out here (Available for Instant Download NOW): https://gum.co/learnautocad

The following two tabs change content below.

Brandon is a Civil Designer, Aspiring Blogger/Creator, Husband, Father to two Amazing Kids and Tech Aficionado from a small town in Canada. He has been obsessed with design and technology since he can remember and working as a Civil Designer for nearly as long. Brandon’s blog and Youtube channel, CADIntentions.com has been his outlet and excuse for keeping up with new tech and trends in the CAD design world for the last 10 years growing to more than 60,000 subscribers and over 15,000,000 views, while also being the source of many great friendships and unique opportunities.

If you would like to Sponsor CAD Intentions or Work together in some way, Please visit my About Page and send me an email: http://cadintentions.com/about-me/