How to Create 2D Objects: AutoCAD Foundations | AutoCAD Blog


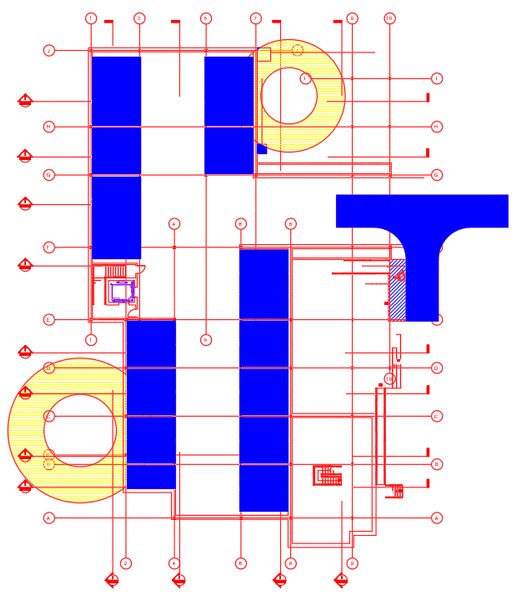
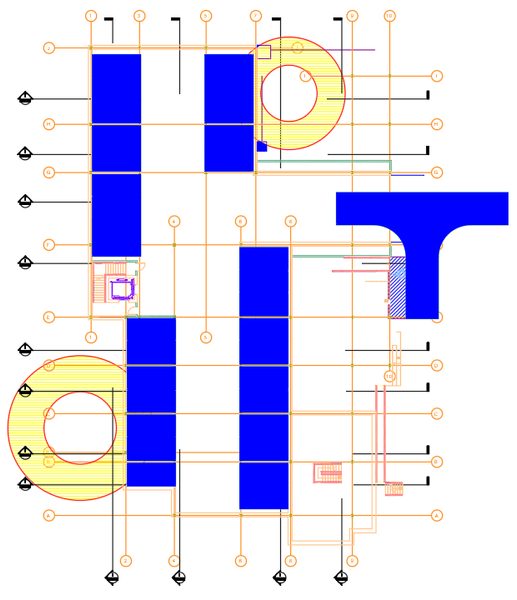
2D objects are fundamental to creating designs in AutoCAD and include many forms such as lines, arcs, circles, rectangles, and polygons.

For our AutoCAD Foundations blog series, we’re sharing four quick exercises to help get you started learning the basics of 2D objects. For the full tutorial on how to create 2D objects, you can check out the AutoCAD Foundations article.

2D Objects Exercise #1: Create a Line in AutoCAD

Let’s start at the very beginning. A line is the most common 2D object in a drawing.

Draw a Line

In this exercise, you’ll try out multiple ways to start the LINE command and draw a line.

From the ribbon, click Home tab > Draw panel > Line.

Screenshot of Line icon in AutoCAD

Or enter LINE at the Command prompt and press Enter.

When prompted for the first point, you can type in a coordinate or click in the drawing area where you’d like to begin the line. Once you specify your first point, the Command prompt will ask where you’d like to end the line. Here, you can type in a coordinate or click in the drawing area.

Screenshot of Line command in AutoCAD

The LINE command continues to prompt you for additional points. Press Enter or the Spacebar to end the command.

2D Objects Exercise #2: How to Create a Polyline in AutoCAD

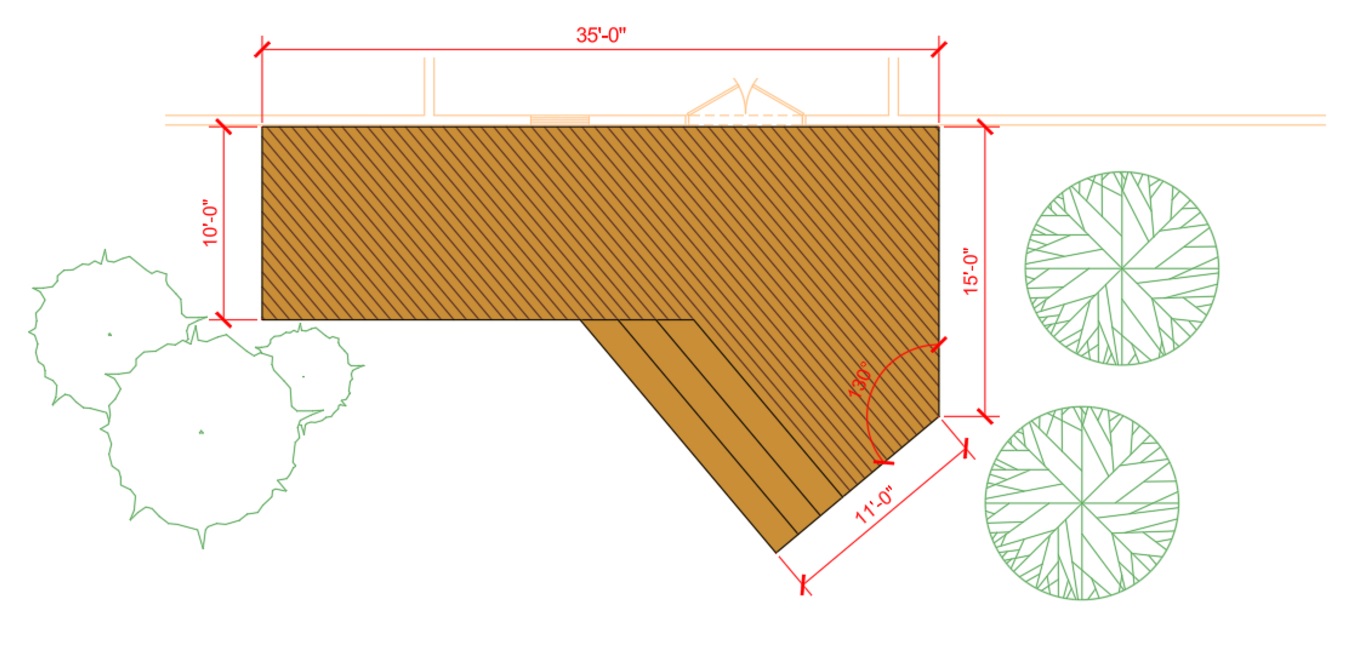
Now that you have the line down, let’s move on to a polyline. A polyline is a connected series of line or arc segments that is created as a single object. They are useful for irregular shapes; borders; contour lines; roads and rivers in maps; and more.

Polylines can be open or closed and have different starting and ending widths for each segment.

Draw a Basic Polyline

In this exercise, you’ll draw a polyline.

From the ribbon, click Home tab > Draw panel > Polyline.

Screenshot of Polyline icon in AutoCAD

Or enter PLINE at the Command prompt and press Enter.

After you specify the first point of the polyline, you can use the Width option to specify the width of all subsequent segments. You can change the width value at any time, even as you create new segments. Continue specifying additional points to define the polyline. Press Enter or the Spacebar to end the command.

Screenshot of Pline command in AutoCAD

2D Objects Exercise #3: How to Create a Rectangle in AutoCAD

Now, let’s move on to see how to draw closed objects such as rectangles and polygons.

Draw a Rectangle

In this exercise, you’ll draw a rectangle.

1. Do one of the following:

  • From the ribbon, click Home Tab > Draw Panel > Rectangle/Polygon drop-down menu > Rectangle
  • Or enter RECTANG at the Command prompt and press Enter

2. Specify the first and then second corner of the rectangle

2D Objects Exercise #4: How to Draw a Polygon in AutoCAD

Once you’ve mastered the rectangle, you can move on to a polygon.

Draw a Polygon

In this exercise, you’ll create a polygon.

1. Do one of the following:

  • From the ribbon, click Home tab > Draw panel > Rectangle/Polygon drop-down menu > Polygon
  • Or, enter POLYGON at the Command prompt and press Enter

2. Enter the number of sides for the polygon.

3. Specify the center of the polygon.

4. Enter c to specify a polygon circumscribed about a circle.

5. Specify the radius of the circle, either by moving the cursor and clicking in the drawing area or by entering a distance.

Learn More: How to Create 2D Objects

Ready to move on to arcs, circles, polyline arcs, donuts, ellipses, and splines? Be sure to check out the entire AutoCAD Foundations article for even more in-depth tutorials on creating these 2D objects. And stay tuned for our entire series here on the blog (or catch up on past articles!) as we highlight even more great tips for getting started with AutoCAD.

Did You Know About the AutoCAD SETBYLAYER Command? | AutoCAD Blog


Contributed by Autodesk Expert Elite and Autodesk Community member Tom Richardson

Have you ever referenced a drawing into another drawing, but the content isn’t showing the correct color, line weight, or line type based on the layer state in your current viewport/drawing? In this article, take a deep dive on how to resolve this issue using the AutoCAD SETBYLAYER command.

The Situation

You receive a drawing from another user/department, such as an exported CAD file from Revit. You download the drawing and then set the layer colors and visibility based on the CAD standards for your project. Unfortunately, some content does not show the correct colors, linetypes, etc.

This image shows the received drawing with no layer color changes.

Screenshot of AutoCAD drawing with no color on layers

This next image shows how the drawing looks after changing all layer colors to color 1 (red). Compare this image with the previous image. Notice that the hatch objects and elevator still show their original color (yellow, blue, and purple) despite the layer color change. This is because the objects have forced colors set in their properties.

Screenshot of AutoCAD layers changed to red color

The Resolution

Use the SETBYLAYER command to reset the properties of objects in the drawing to ByLayer.

The Workflow

1. Open your copy of the AutoCAD drawing that you received.

AutoCAD drawing with layers

2. Thaw, turn layers on, and unlock all layers in the drawing.

3. With no objects selected, type SETBYLAYER and then press Enter.

4. Review the active settings at the command line. See the Instructions for Changing Settings section below if you want to change the active settings.

5. Select the objects you want to modify or type ALL and press Enter.

6. After selecting the objects, confirm the number of objects selected and press Enter.

7. You will then be asked if you want to change the ByBlock properties to ByLayer. The default response if you press Enter is Yes.

8. You will then be asked if you want to include blocks. The default response if you press Enter is Yes.

9. Confirm that the content in the drawing is now correctly showing the properties based on the current layer state.

10. Use the Layer Previous command (LAYERP) to reset the layer state to the CAD Standards for your project and save the drawing.

Instructions for Changing Settings

A. Before selecting the objects for this command, type S and press Enter.

B. In the SetByLayer Settings dialog, uncheck any properties you do not want to change to ByLayer and click OK. The options available to change are Color, Linetype, Lineweight, Material, Plot Style (if available), and Transparency.

C. Continue using the command by selecting objects, as noted in Step 5 above.

Learn More

Enjoyed this article? Then check out the Autodesk Community for even more great content from talented users across Design and Make industries.

Replacing Blocks in AutoCAD: REPLACE vs BREPLACE | AutoCAD Blog


Contributed by Autodesk Community member Michael Thomas

At Autodesk University 2024, I delivered a session on Working Smartly with Blocks in AutoCAD. An attendee asked about the differences between Replace and Block Replace. This is an excellent question. However, it was asked in the survey, so I am unable to respond, nor do I know who asked the question. So here is the answer!

FIND (and REPLACE)

FIND is not specific to AutoCAD. It is a tool in most word processors and text editors. Use it to quickly locate text by searching for words and phrases. It is useful for navigating a document and for checking for the presence of specific words.

Think of Find as a search engine for your document. In AutoCAD, use it to locate words in text, attributes, dimensions, leaders, tables, and hyperlinks.

Screenshot of Find and Replace in AutoCAD

Replace extends find so that is also replaces the found text. Replacement is content only; it leaves the existing character and paragraph formatting unchanged.

Screenshot of Find and Replace in AutoCAD

As there is no actual REPLACE command in AutoCAD and Find and Replace works with text, I am assuming the attendee meant BLOCKREPLACE. This is an Express Tool command.

Finding all the blocks in a drawing to replace can be a tedious process. So, BLOCKREPLACE makes this easier by replacing all instances of a block with a different block definition.

AutoCAD screenshot for BLOCKREPLACE

The first step is specifying the block definition for replacement. Do this by selecting it in the dialog or by picking an instance within the active drawing.

Then select the replacement block, again either by selecting it in the dialog or by picking it within the drawing.

AutoCAD prompts you to purge the now unreferenced block definition from the drawing. If you choose not to purge the unreferenced block definition, you can always use the purge function later.

Gif example of BLOCKREPLACE

The command searches the entire drawing for the specified block, replacing it with a block that you specify. The replaced block inserts with the same scale, insertion point, and rotation as the existing instance.

Heads up that BLOCKREPLACE has a commandline-only version (-BLOCKREPLACE) if needing to do scripting or similar automation.

Similar is BLOCKTOXREF, which replaces a block definition (and all instances) with a selected xref.

Block Replace (BREPLACE)

Block Replace (BREPLACE) is a smart block feature. It replaces selected block instances with a selected block. Unlike BLOCKREPLACE, BREPLACE does not replace all instances. Instead, it only replaces the instances you select.

After starting the command, select the blocks. Note, they must all be of the same definition.

From the Block Replacement panel, select the desired replacement. AutoCAD uses machine learning to generate suggestions. This capitalizes on the block name and visual similarity between existing blocks. The suggestions are based on the available block definitions in the drawing and your block libraries.

Screenshot of Block Replace panel

So with BREPLACE, you can choose between the suggestions, recently used blocks, or pick the replacement from the drawing. The replaced block instance retains the scale, rotation, and attribute values of the original block.

Gif animation of BLOCKREPLACE

BLOCKREPLACE vs BREPLACE

BLOCKREPLACE is quicker and cleaner when wanting to replace all instances of a block in a drawing. It can be simple to miss instances with BREPLACE, especially if on off/frozen layers or in different spaces. BLOCKREPLACE even purges the original definition, cleaning the drawing as it goes.

BREPLACE, however, gives the flexibility of replacing only selected instances. So you would use BLOCKREPLACE when wanting to replace all instances and BREPLACE when wanting to replace only selected instances.

The benefit of BREPLACE is not needing to know the replacement block ahead of time, as AutoCAD smartly suggests blocks similar in geometry and orientation. You can also select from recently used blocks, even if those blocks were recently used in other drawings.

As BREPLACE lists blocks not only from the current drawing but also the block libraries, it can save time by not needing to first add the block definition to the drawing.

Learn More

Want to learn more about BREPLACE and the other smart block features? Check out Michael Thomas’s AU class

Enjoyed this article? Then check out the Autodesk Community for even more great content from talented users across Design and Make industries.

How to Add Custom AutoLISP Commands Into the AutoCAD Ribbon | AutoCAD Blog


Contributed by Autodesk Community member Arshdeep Singh

In my previous blog post, A Guide to AutoCAD Ribbon Customization, I explained how the built-in commands from AutoCAD can be added to the ribbon to streamline workflows and enhance productivity. This blog is a continuation, where I expand on how to take customization a step further by integrating your own custom AutoLISP commands into the ribbon. This allows you to create a truly personalized and efficient workspace tailored to your unique design needs.

What is AutoLISP?

Before we get started, it’s a good idea to understand AutoLISP. AutoLISP is a very powerful language that has been around for a long time and was designed to allow users to write custom commands that extend the capabilities of AutoCAD. AutoLISP programs are saved as .lsp files. While there are a handful of different methods to load the program into AutoCAD, I particularly like the CUI method where I can also add it to the ribbon after adding.

AutoLISP programs can be loaded into AutoCAD to run as commands. By combining AutoLISP with CUI, you can integrate these commands into the ribbon, making them easily accessible for daily use.

If you are a programming enthusiast, you will love this article by Autodesk where the origins of LISP and AutoLISP are explained: AutoLISP and Visual LISP (AutoLISP)

Writing a Basic AutoLISP Program

We will write a very basic hello world program in which we will add the AutoCAD’s ribbon as a command. Any basic text editor like Notepad can be used to write this program but Visual Studio Code with AutoLISP extension is the recommended way.

This program displays a message box with the text “Hello World” when the user runs the HELLOWORLD command. You can copy the code below into a text file and save it with the .lsp extension:

Introduction to the Customize User Interface Editor

A cuix file stores all the interface customizations like the menus, ribbon tabs, and workspaces. It controls how the commands are organized and displayed on the ribbon tab. You can also type CUI on the command line to open the Customize User Interface (CUI) Editor.

It’s always a good idea to back up the current customization file before making any changes. The customization file path is listed in the Properties Tab under General  Filename

Browse to the folder and copy the customization file/s to a backup folder of your choice.

Screenshot of AutoCAD CUI File Location

Adding LISP files to CUI

1. Launch the Customize User Interface (CUI) Editor.

2. In the left panel, right-click on the Lisp Files option and click on Load File.

AutoCAD screenshot load LISP

3. Browse to the folder where you have stored the AutoLISP program and select the program.

4. Now the program will be listed under LISP files, and it will be automatically loaded every time you start AutoCAD.

AutoCAD Screenshot of LISP File Loaded

5. Click Apply and OK

6. A security warning will appear if the AutoLISP program does not have a CA recognized digital signature installed.

Screenshot of AutoCAD security prompt

Clicking on “Always Load” will trust the AutoLISP program and the security warning will not be shown again unless the LISP program is modified.

Clicking on “Load Once” will only trust the AutoLISP program for the current instance of AutoCAD and the warning message will be shown every time the program is loaded.

Important Note: Only load AutoLISP files that you wrote yourself or that come from trusted sources. Loading unverified files can pose security risks or compromise your system.

Now at this point, we have successfully loaded an AutoLISP program into AutoCAD and the HelloWorld command can be called from the command line. Next, we will convert this into an AutoCAD command and assign an icon to it.

Creating a Command from AutoLISP Programs and Assigning an Icon

1. Launch the Customize User Interface (CUI) Editor.

2. In the left panel, Under the Command List menu, click on Add new command.

Screenshot of AutoCAD create a new command

3. Add all the required information like the Name, Description, and Command Display Name.

4. Assign an icon of your preference or browse and upload a custom icon (Optional).

5. Under Macro, add ^C^CHelloWorld.

Screenshot of AutoCAD Command Parameters

If you are using some other custom program than the one we are using in this example, you should enter the command name for your lisp program. The command name can be identified by opening the lisp program and looking for the following syntax (defun c: HelloWorld )

6. Click Apply and OK

Now at this point, we have successfully created a new AutoCAD command that references our AutoLISP program. Next, we will look into how we can add this command to the ribbon.

Adding the Custom Command to the Ribbon

My previous blog post, A Guide to AutoCAD Ribbon Customization, covers in detail how to add the built-in commands to the ribbon. Please refer to it for more detailed instructions.

1. Launch the Customize User Interface (CUI) Editor.

2. In the left panel, expand the Ribbon Tab and expand the Panels Tab.

3. Add a new panel and a row. Give the panel a meaningful name, for example, “My Panel.”

4. Search for our HelloWorld command under the command list and simply drag and drop it to the Row under the new panel we just created.

5. Set the Button style to Large with Text (Horizontal) or your preferred view. Panel Preview window will update the preview on how it would look on the ribbon.

Screenshot of AutoCAD panel preview

6. Drag and drop or copy the new panel “My Panel” to the bottom of the Home-2D Tab under Ribbon.

Screenshot of AutoCAD home tab CUI

7. Press Apply and OK. Just like that, the new command has been added to the ribbon and is ready to be used.

Screenshot of AutoCAD home tab preview

Keep Going

Integrating AutoLISP commands into AutoCAD’s ribbon not only enhances productivity, but also provides a customized and efficient user experience.

By leveraging the power of AutoLISP and the flexibility of the Customize User Interface (CUI) Editor, you can streamline your workflows and tailor AutoCAD to suit your unique needs. Remember to always verify the source of AutoLISP files to ensure security and avoid potential risks.

The Visual LISP, AutoLISP, and General Customization community forum is a great place to get help with AutoLISP programs from the experts in the Autodesk community. Happy coding and designing!

Learn AutoCAD Basics With the New AutoCAD Foundations Guide | AutoCAD Blog


Just starting out with AutoCAD? Or need a little refresher? We’ve got you covered. The AutoCAD Content Experience Design team recently released a new, 12-part series that details AutoCAD basics from start to finish.

From a tour of the UI to working with commands, creating 2D objects, getting started with blocks, and much more, AutoCAD Foundations helps you gain the knowledge you need to understand essential features and workflows. The topics include in-depth learning objectives, videos, and even exercises to try out and cement your new skills.

The entire AutoCAD Foundations series can be found online at the links below. It’s also available in AutoCAD 2025 as part of the product help.

AutoCAD Basics Covered in AutoCAD Foundations

All topics at-a-glance:

AutoCAD Foundations Guide

Individual topics:

1. Tour the AutoCAD UI

2. Take Your First Steps into AutoCAD

3. Create, Open, Save, and View Drawings

4. Start Working with Commands

5. Create Basic 2D Objects

6. Create Objects with Precision and Accuracy

7. Select, Modify, and Duplicate Objects

8. Change Object Properties and Organize Objects with Layers

9. Place Annotation and Hatch Closed Areas

10. Add Dimensions to a Design

11. Create and Insert Blocks

12. Organize and Output a Design with Layouts

Stay Tuned

Stay tuned for more as we detail each of these topics in future articles.