AutoCAD Object Properties: AutoCAD Foundations | AutoCAD Blog


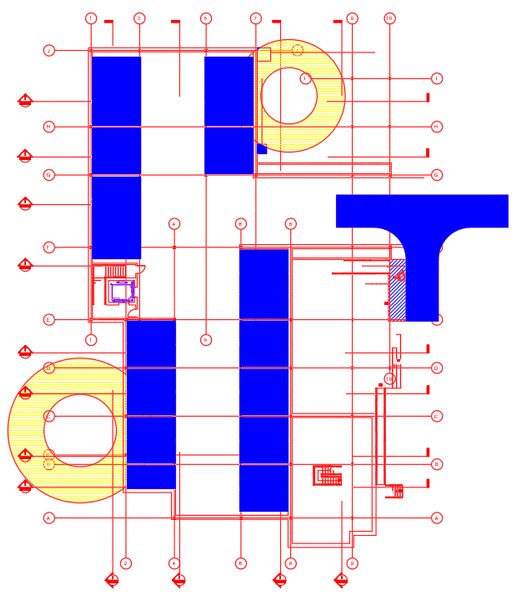
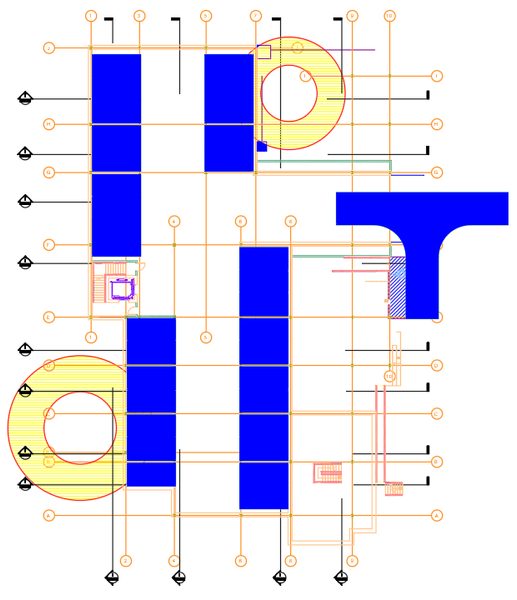
Objects in a drawing share several general properties that determine their appearance. These include color, linetype, linetype scale, lineweight, and more. Properties, such as color and linetype, can be changed per individual object or across many objects with the use of layers.

In our next installment of the AutoCAD Foundation blog series, we have a quick tip on how to change AutoCAD object properties. For the full tutorial on changing object properties and using layers, you can check out the AutoCAD Foundations article.  

How to Change AutoCAD Object Properties

All objects that you create have properties. Object properties control the appearance and geometric characteristics of an object. The general properties that are common to most objects are as follows:

  • Color
  • Linetype scale
  • Hyperlink
  • Layer
  • Plot style
  • Lineweight
  • Linetype
  • Thickness

All other properties are object type specific.

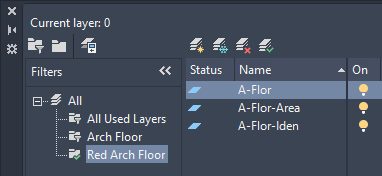
When objects are selected, you can use the Properties palette to verify and change property values. If you select an object in your drawing, here is what you might see in the Properties palette.

Screenshot of properties palette

Notice that the current properties for the selected object are displayed in the Properties palette. You can change any of these properties by clicking it and changing the value. A property that is set to “ByLayer” inherits its value from its assigned layer. In the previous example, the line object’s color of magenta is inherited from its assigned layer of 20 ELECTRICAL.

If you select several objects, only their common properties are listed in the Properties palette. If you change one of these properties, all selected objects are changed in one operation.

When the Properties palette is displayed and no objects are selected, the current property values are of those to be assigned to newly created objects. Property values listed as ByLayer, indicate properties that inherit their values from the layer to which the object is assigned. For example, changing the Color property value from ByLayer to Red causes all subsequent objects to be assigned the Red color which overrides the value of the assigned layer.

Screenshot of AutoCAD properties palette by layer

The Properties palette takes up a lot of space. For quick access to the most common properties, you can use the Properties panel on the ribbon. As you can see in this example, the listed properties will all be determined by the current layer.

Screenshot of AutoCAD properties palette ribbon

Keep Going

There’s much more to learn about object properties and layers. Check it out in Change Object Properties and Organize Objects with Layers: AutoCAD Foundations.

Did You Know About the AutoCAD SETBYLAYER Command? | AutoCAD Blog


Contributed by Autodesk Expert Elite and Autodesk Community member Tom Richardson

Have you ever referenced a drawing into another drawing, but the content isn’t showing the correct color, line weight, or line type based on the layer state in your current viewport/drawing? In this article, take a deep dive on how to resolve this issue using the AutoCAD SETBYLAYER command.

The Situation

You receive a drawing from another user/department, such as an exported CAD file from Revit. You download the drawing and then set the layer colors and visibility based on the CAD standards for your project. Unfortunately, some content does not show the correct colors, linetypes, etc.

This image shows the received drawing with no layer color changes.

Screenshot of AutoCAD drawing with no color on layers

This next image shows how the drawing looks after changing all layer colors to color 1 (red). Compare this image with the previous image. Notice that the hatch objects and elevator still show their original color (yellow, blue, and purple) despite the layer color change. This is because the objects have forced colors set in their properties.

Screenshot of AutoCAD layers changed to red color

The Resolution

Use the SETBYLAYER command to reset the properties of objects in the drawing to ByLayer.

The Workflow

1. Open your copy of the AutoCAD drawing that you received.

AutoCAD drawing with layers

2. Thaw, turn layers on, and unlock all layers in the drawing.

3. With no objects selected, type SETBYLAYER and then press Enter.

4. Review the active settings at the command line. See the Instructions for Changing Settings section below if you want to change the active settings.

5. Select the objects you want to modify or type ALL and press Enter.

6. After selecting the objects, confirm the number of objects selected and press Enter.

7. You will then be asked if you want to change the ByBlock properties to ByLayer. The default response if you press Enter is Yes.

8. You will then be asked if you want to include blocks. The default response if you press Enter is Yes.

9. Confirm that the content in the drawing is now correctly showing the properties based on the current layer state.

10. Use the Layer Previous command (LAYERP) to reset the layer state to the CAD Standards for your project and save the drawing.

Instructions for Changing Settings

A. Before selecting the objects for this command, type S and press Enter.

B. In the SetByLayer Settings dialog, uncheck any properties you do not want to change to ByLayer and click OK. The options available to change are Color, Linetype, Lineweight, Material, Plot Style (if available), and Transparency.

C. Continue using the command by selecting objects, as noted in Step 5 above.

Learn More

Enjoyed this article? Then check out the Autodesk Community for even more great content from talented users across Design and Make industries.

Control Your Large Layer List With Filters: Tuesday Tips With Frank | AutoCAD Blog


Layers. They’re a core feature any AutoCAD user learns about early on. After lines, arcs, and circles, along with how to modify said items, we learn about layers to help us better organize our drawings.

A well-designed layering standard is one of the key components of a design department’s efficiency. But what happens when that layer list becomes so large that it becomes unmanageable?

Imagine bringing a master plan together in an AEC office by bringing in all disciplines as Xrefs. You can suddenly have thousands of layers to manage. That’s where today’s topic comes in—it’s called Layer Filters.

Property Filters

You can create two types of named filters: property filters and group filters. One is more complicated than the other, but both can be very useful. Let’s look at property filters first.

First things first… open the New Property Filter dialog from the icon in the upper left corner of the Layer palette. It’s the one that looks like a folder with a little funnel.

Screenshot of property filter in AutoCAD

Now, it’s time to build your filter. You can use any of a layer’s properties to filter your results. I’ll be building a filter that only gives me layers that have the string “A-Flor” at the beginning and are either red or cyan in color. You first want to give it a name, as you’ll see it listed in the filters panel of the palette when you’re done. I’ll name mine Arch Floor.

Now come the property filters. Since I’m interested in the layer’s name, I’ll click on the Name column in the first row. You’ll see it’s pre-populated with an asterisk. If you’re unfamiliar with wildcards in AutoCAD, you might want to refer to one of my very first Tuesday Tips, where I discuss them more in-depth. I’ll specify the string “A-Flor*.” As I do, you’ll see the layer list begin to change, showing only those layers that match the new criteria. Next, I’ll click in the first-row field of the Color column. A small glyph will display on the right side. Click it to bring up the Select Color dialog. Select the red swatch and click OK. You’ll see your filter preview list now only shows A-Flor layers that are red. Congratulations. You’ve just built a logical AND query. That’s an important thing to know about this dialog. The first row of filters (I could have added any red A-Flor layers that are Thawed) is always a logical AND – in other words, all filters must be true to display a layer name.

Screenshot of layer filter properties in AutoCAD

But we said we wanted all A-Flor names that were either red or cyan. That’s where your subsequent lines come into play. They are logical OR statements. You’ll want to keep the first row’s filters, so let’s duplicate that row. Right-click anywhere on it and select Duplicate Row.

Now, I’ll change the red color to cyan. Just like that, I have what I was after. Click on OK to save your filter. It will immediately show up as the active filter in the layer palette.

Screenshot of active filter in layer palette in AutoCAD

Group Filters

Group filters are much easier to create. The icon is next to the properties filter – without the funnel.

Screenshot of creating new group filter in AutoCAD

This type of filter is just a name, drag, and drop operation. Let’s say we wanted a subset of our property filter containing just red A-Flor layers. Click the icon, and a new filter will appear in the palette, ready to be named. Since it’s now active, the layer panel will show no layers. It’s up to you to find what you want and populate it. I’ll return to my property filter, select only the red A-Flor layers, and drag them into the new group filter.

Yeah. It really is just that easy.

One Last Thing

There’s a very handy checkbox at the bottom of the filters panel in the palette. Check it to invert the results of the filter list. In the image below, instead of getting red A-Flor layers, you’d get those that are not red A-Flor layers.

Screenshot of checkbox at bottom of filter panel in AutoCAD

OK, two last things… remember earlier that I said you could have thousands of layers in our example scenario? If you ever do, you’ll notice that they probably won’t sort alphabetically. That’s controlled by a system variable called MAXSORT. Its default value is 1000. If you have 1001 layers, they won’t automatically sort. Set it higher to make it sort again. But not higher than 32767 – which is, of course, (nerd alert) the maximum value of a 16-bit signed integer.

So, don’t let a massive layer list overwhelm you. Take control of what you see by utilizing property and group filters.

More Tuesday Tips

Check out our whole Tuesday Tips series for ideas on how to make AutoCAD work for you. Do you have any favorite AutoCAD tips? Tell us in the comments!