Transformation Church in Tulsa tested the BirdDog X5 Ultra PTZ camera and found it to be a perfect fit for church production. With fast setup (QR code + BirdUI), sharp 4K60p video with 20x zoom, and smooth motion controls, it proved easy for both staff and volunteers to operate. AI Presenter Tracking allowed dynamic shots for youth services without extra crew, while robust connectivity (12G-SDI, HDMI, NDI|HX3, SRT, RTMP) ensured seamless integration with their Ross Carbonite system. For churches balancing excellence with budget, the X5 Ultra delivers pro performance, simple controls, and real-world value—helping ministries focus on the message, not the tech.
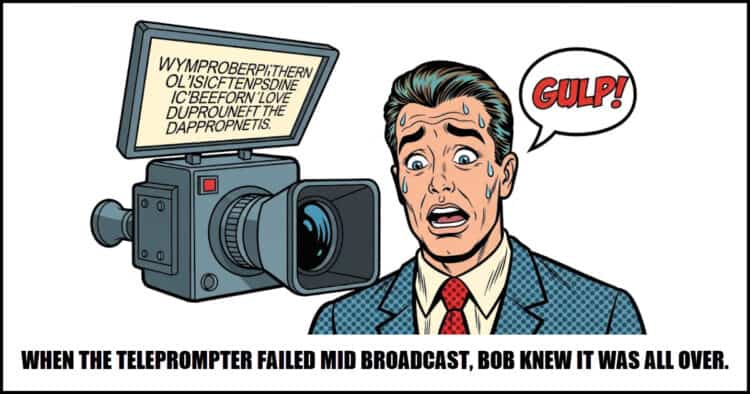
This video is basically an introduction to what a teleprompter is, how it works and why you may want to use one.
In most of the talking head or dialogue to camera projects I work on I always use a teleprompter for the person presenting.
Some of the people I work with are quite experienced so they use the prompt as sort of visual reminder as to what they are supposed to be saying.
Others I work with are less experienced and actually use the teleprompter to deliver an exact script to the camera.
Let’s face it, many of us will never achieve a level of comfort in front of a camera that could be described as “professional!”
A teleprompter is a great way of bridging that gap.
Production Design in Film – The Underrated Role Explained
OK so just before you scroll past this one thinking it has nothing to do with you, bear with me cos’ I’m going somewhere with this!
From my own observation and experience over the years, the average video creator follows a quite narrow path as far as learning goes.
First up they usually use a phone to capture some video and realize very quickly it looks terrible!
They also notice at the same time it sounds terrible as well.
So the next stop is learning about camera settings and how to get good audio.
Once they master that they realize it still looks pretty bad compared to others but at least it sounds OK.
That leads them to lighting and they start to watch endless YouTube videos on that subject and to some degree they get the lighting under control.
Sadly this is not the end of the story because although they have the camera or phone set up right and the lighting working correctly and the sound doing what it should… it still looks a bit meh!
This pretty much brings them to the final point of shooting which is production design.
Even if you are shooting yourself at you desk there has to be at least an element of production design to make that image look good to viewer.
5 Simple Ways To Level Up Your Videos – PowerDirector
Let’s face it, PowerDirector these days is just so full of features, assets of all descriptions and endless tools that it is really easy to forget exactly what you have at your disposal.
In fact I was working on something the other day when I thought to myself I really wanted to do a particular thing and of course couldn’t.
Then later I suddenly realized that of course I could do that, I just totally forgotten I had that feature available to me!
Here are a few tips for your videos that maybe you too forgot about or didn’t even know you had!
Filmora 14.9 Update – Mocha Insert Track + AI Video Enhancer (What’s New)
Another week and as usual, another Filmora update!
I swear every time I open that software to do some editing I get a message that a new version is available.
Of all the video editing software I feel comfortable recommending Filmora is by far the one that is most aggressively developed.
The crazy thing is that they actually maintain that level of development and rarely actually break the software or introduced bugs.
Here’s a run through of all the latest and greatest in Filmora 14.9.
What’s New in Magix Video Deluxe 2026
OK, before we go any further let’s address the elephant in the room as far as this video goes.
The voiceover is an AI generated voice that was created from a translation of the original transcript.
The reason for that is that Magix is predominantly a German company and their market is located in Europe for the most part.
They have been present in the U.S market for a long time but have never really made great inroads.
I think that is as a result of their marketing (or lack of) as opposed to the software itself because Magix has always been pretty good.
Anyway here’s rundown on what’s new in Video Deluxe.
Amazing Effects in Classic Films – How Did They Pull It Off? – Part 10
I always add these videos from the guys at Film Riot whenever they put one out.
Absolutely nothing to learn here just a great look at how some incredible (and sometimes not so incredible) effects were pulled off.
How to Live Stream on YouTube (The COMPLETE 2025 Guide)
From the outside, live streaming on YouTube looks to be a somewhat straightforward process.
You hook up the cam, click some links and off we go!
The actual situation is far more complex than that and unfortunately some of the main software choices for doing it make that complexity seem to go through the roof.
If you have ever delved into the settings of OBS for example, you will know what I am talking about.
So in light of that here’s a tutorial from the guys at Primal Video showing the absolute bare bones, simplest method of getting a live stream up and running on YouTube.
How To Create AI Visual Effects In Minutes (In Depth Guide)
I am still quite hesitant about jumping up and down over the latest and greatest in A.I for video developments.
My reasoning on that is that a lot of AI tools are not really all that great once it comes down to actually using them for something.
Sure they tick the boxes for creating a wow factor so that you want the tool or AI thingy that is being shown… but that’s not the point!
The point is can it actually DO something useful that will make that video better!
That brings me to the video below which I think you should check out along with the other resources mentioned.
Using AI for a one off special effect is exactly how this technology is used at its best and the little tip for avoiding subscriptions is well worth the price of entry.
How to Switch From Adobe to DaVinci Resolve – The Ultimate Guide (2025)
I am not sure that a lot people who read my Friday Roundups are actually using any Adobe products.
If they are then I can only send “thoughts and prayers.”
Don’t get me wrong, Adobe products are quite good and I still recommend Premiere Elements as a good choice for consumer level video editing.
I do that because you can buy a perpetual licence for the program and don’t have to get locked in to a subscription model with no real escape plan.
My main problem with Adobe outside of that is their somewhat authoritarian attitude towards their customers.
The whole “my way or the highway” sentiment kind of rubs me the wrong way.
Anyhoo if there is someone out there plotting an escape here’s a guide on moving over to DaVinci Resolve.
Discover more from The DIY Video Editor
Subscribe to get the latest posts sent to your email.
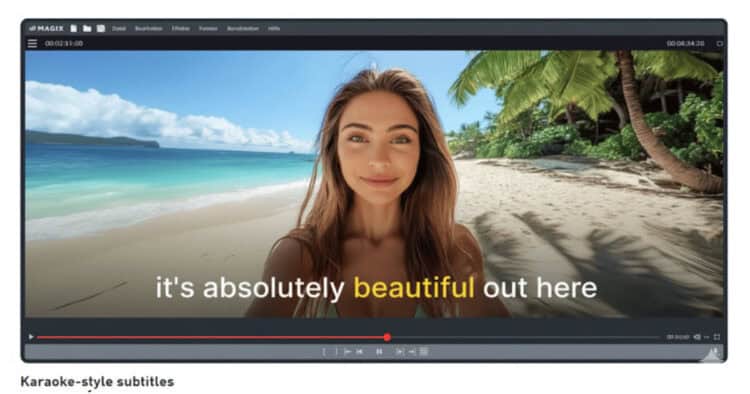
Highlighted Subtitles with Magix Video Deluxe 2026
One of the video editing software programs I have recommended for quite a while now has been the one from Magix.
Over the years it has had a few different names mainly because Magix purchased other software along the way and were trying to maintain connection to those they had absorbed.
For example it was Magix Movie Studio for a while because they had bought out the Sony Creative line of editors and that software was called Movie Studio.
That all seems to be behind them now and they have settled on the Video Deluxe moniker.
The software itself has always been very good but one thing that tends to keep them somewhat in the background is that they are a German company with a smaller footprint in the North American market.
Anyway I have just had a chance to revisit the program for the 2026 version and it really is a clean, no nonsense editor with great features.
Here’s a look at it using the “Speech to Text” animated subtitles feature to give you an idea.
5-Minute Video Editing – A Guide That Actually Works – Movavi Video Editor
One of the most common ways people “fall” into the whole world of video editing and creating content is sort of “reaction” based.
What I mean by that is that they have a desire to make a video thinking it might be fun or for whatever reason.
They “react” to that urge by grabbing a phone or camera and shooting some footage.
They dump that footage into an editor and realize that the footage isn’t really suitable or complete so the project gets kind of stalled.
On top of that they realize the audio is pretty bad which is something they didn’t really account for.
To each of these sudden problems, they “react” and find a way around them or solutions to them.
By the time they have completed a few projects they have developed a workflow that is based on reactions to problems.
On the surface this may seem OK but in the long run it almost always results in an inefficient and most importantly, unsustainable process.
Pretty soon the frustrations set in and it all goes a bit flat!
That’s why whenever I find a good, solid workflow tutorial I always post it here on the Friday Roundup.
Even if you think you have a pretty good workflow you should still do what I do and just quickly look at other suggestions to see if maybe yours could stand a polish.
YouTube’s Free AI Video Generator Just Got a Huge Update
OK so full disclosure here!
I don’t use any of these mobile / smartphone video editing or even A.I. video creation tools.
It’s not because I am some kind of grumpy old fart railing at those kids hanging around on the corner like I am grandpa Simpson or anything!
It’s just that the videos I work on for myself and my clients just don’t use those tools or features.
However in the interests of completeness here’s video from the guys at Primal Video on the latest and greatest regarding the YouTube video generator.
The Simplest Way To Spotlight A Player – PowerDirector
There are a bunch of ways to highlight a particular object or person in any video clip using PowerDirector.
Some of these could be described as being more elegant than others but in reality there are time when you just want to get the job done.
Not every project actually requires that you try to perform some kind of Hollywood magic on what is essentially a simple task.
Another in the recent series of basic tutorials on how to use CyberLink PowerDirector.
Given the (frankly, quite welcome) changes in the interface over the past year these new tutorials are a great asset for anyone new to the software.
In fact they are pretty good for anyone actually.
How to Use Green Screen & AI Background Remover – PowerDirector Basics
Up until A.I. features started making their way into consumer video editing software, pretty much the only way to remove a background was through the use of chroma-key or green screen.
As software developed those green screen modules became more accurate but they still relied on you getting a good solid key when shooting your footage.
These days whilst we still have that tools we also have A.I. models that can very accurately identify subjects, separate them from backgrounds and remove that background.
In my experience neither alternative is always perfect.
Usually it depends on the quality of the footage and its composition as to which method is going to work best.
I usually give both systems a try and choose the one that gives the best results.
How To Animate Objects Along A Curved Path In Filmora
One of the “unseen” actions that occurs when you use keyframes to make an object move in Filmora is that in fact a motion path is created.
Of course at its basic level that motion path is a straight line so there is no real need for the software to display that.
However if you check the video below you can see that you can not only display that motion path but can also adjust it to have different properties such as curves.
OpusClip – Why I finally said Yes
This is an interesting post from Daniel Batel this week covering a service he is testing out called OpusClip.
Essentially it is an A.I. driven service that can re-purpose long form content intelligently into short form for posting to social media.
On top of that it also has the ability to digest large amounts of footage and assemble it into content again, using A.I.
There are a few services and features out there at the moment that do this so I thought it might be interesting to follow along with Daniel while he checks this one out.
Discover more from The DIY Video Editor
Subscribe to get the latest posts sent to your email.
If you have been following this blog for any amount of time then you should know that I just loves me a solid workflow tutorial!
The reason for that is that I subject myself to the daily news, tips, articles and more importantly, marketing rubbish that gets put out about video creation.
Amidst all of that noise there is one subject that very rarely gets much attention from existing creators.
That subject is basically covered by the title of how to actually start.
You have shot some footage, you installed editing software and perhaps even opened it… so now what do you do!
Here’s at least one answer to that.
The Gaussian Splat Effect – Creative Transition Tutorial
How could you go past learning how to create an effect called a Gaussian Splat!
I mean come on!
I really have no idea when you would actually use this but it is a cool looking effect and relatively simple to pull off.
Besides that, think how impressed your friends or clients will be when you casually say something like, “Sure I could do that and while I am at it I’ll drop in a gaussian splat to really take it to the next level!”
Manual Adjustments Take Forever… Do THIS Instead – PowerDirector
One of the features that was added to PowerDirector a year or so back was the ability to copy and paste keyframe attributes from one clip to another.
At the time it was introduced it was the result of a lot of complaining to CyberLink on various forums that the feature was needed and wanted.
Eventually they came to the party and added the feature and at the time it was all the rage!
Of course since then some features like this have sort of drifted into the background while the marketing guys are getting all hot’n’heavy over A.I.
So here’s a little recap on what is a very, very handy feature to save you time in your editing.
Tips on Customizing Titles Designed by Cyberlink – PowerDirector
Like most decent video editing software these days PowerDirector comes with an overwhelming amount amount of free assets already loaded into the program.
On top of that they also continually add to that already impressive library of various elements you can use.
What is often overlooked by more inexperienced users is that a great many of those assets are customizable once you load them on to the timeline.
Here’s a look at how you can access those customization settings for titles.
Remove Silence From Video Automatically – Save Hours of Editing
This is a feature that many editing programs now offer and is one of those hybrid A.I. modules that can really help you with your editing process.
The feature itself is basically able to identify and remove silences in sections of video where there is silence which you would have to otherwise manually cut and delete yourself.
In fact if you look at the overall time taken to edit your average speaking video for YouTube or similar a majority of the time taken to do that would be carrying out this exact process.
I have given it a run based solely on the automatic setting and for most of the clips I gave it, it was completely accurate.
On other clips where I wanted longer gaps left between spoken words I used the manual mode which works fine.
Make Money Editing Videos – Portfolio Building & Client Strategy with Filmora
OK so first up the title of the video below talks about making 2K per week editing videos so let’s just acknowledge that as the clickbait it is.
Having said that let’s set our sights on a level that is more realistic because if you have taken the time to learn the basics of editing, you can make money.
Of course how much you can make will depend on a number of factors and no, it is not as easy as falling off a log!
If it was that easy everyone would be doing it.
Having said all of that here’s the real situation with editing at the moment.
Just about every creator that gets to any point of even minor success on YouTube or Instagram or whatever very, very quickly works out one vital point.
If they don’t farm out the editing of their videos as soon as they can, they will soon start to struggle with maintaining the level of content they need to build on their success.
In fact I saw an interview with Charlotte Dobre (https://www.youtube.com/@CharlotteDobre) the other day who has a couple of million subscribers.
In that interview she stressed that the first task she contracted out to a freelancer was that of an editor and she did not hire anyone else until she had that task covered.
So that tells you clearly that the need and the demand is there so if that seems interesting to you, here are some steps you can take to get started.
The Wildest Effect I’ve Ever Made in DaVinci Resolve
OK kids, there comes a time when everyone that deals with DaVinci Resolve has to pull up their big boy, big girl or gender non-specific pants and dive into the Fusion Page!
The reason I say that is because working with Resolve and not using the Fusion Page is just leaving so much of that programs capabilities on the table.
Yes it is daunting!
However if you can get a handle on it a whole new editing world of special effects opens up.
So in light of that here’s a tutorial form Daniel Batal that you can walk through with him step by step to begin to understand how it all works.
Best Free Video Editing Software Without Watermark (Mac & PC 2025)
I referred to a similar video to the one below a few weeks ago and from memory it was from the guys at Primal Video. (https://www.youtube.com/@PrimalVideo)
This is another one from what I would consider to be a trusted source and in this one they go a little deeper into what the free options are.
More importantly they cover how each one differs in what they offer as part of the free model as opposed to what you may have to pay for.
The reason this is relevant is that some people get put off by the fact that they would have to pay for “feature X” not realizing that they would probably never use that feature anyway.
So if you are looking around for a free editing solution this video is a good place to start.
Discover more from The DIY Video Editor
Subscribe to get the latest posts sent to your email.
Like a lot of features that are under constant development in the world of A.I., noise removal is a bit of an evolving subject.
Right now most video editing software at all levels is going to come with at least some kind of noise reduction system in place.
Some are more old school mechanical whilst others are more tied into the world of A.I.
Either way there is an underlying issue with handling background noise in your audio that causes this to be a difficult subject.
The issue I am talking about is what is known as shared frequencies.
Any sound that is created will be made up of audio at different frequencies so for example traffic in your video background will cover a range of frequencies.
At the same time your voice or the voices of the people in your videos will also be represented by a range of frequencies.
It is at the point where those frequencies overlap that we run into difficulty.
So I can sample the background noise of that traffic and feed it into my noise reduction module with instructions to remove those frequencies.
Unfortunately because the voices also have some of the same frequencies, those bits get removed as well.
On one hand we have removed that background noise but on the other hand we have just turned that vocal sound into Alvin from the chipmunks or Darth Vader!
This is where A.I. comes in by attempting to isolate exactly what is background noise to be removed and what is vocal sound that should be retained.
I have used the tools you see in the video below and both the Descript tool and the Adobe Podcast tools are very good BUT!
The Descript tool is expensive and sometimes the Adobe tool is too aggressive giving an unrealistic or over processed aspect to the vocal sound.
Right now I am using the Lark M2 Wireless microphone system to record all of my videos which has noise cancelling built in to the recording stage.
This has almost completely eliminated any need for heroic noise reduction at the editing stage.
How to Cartoonify Yourself With AI – PowerDirector
This is a quick run-through of one of the newer A.I. modules in CyberLink PowerDirector.
This one lets you upload an image of yourself or someone and the module then creates a cartoon character based on that image.
Using a prompt and the style selection you can determine what kind of cartoon character you want to look like.
From that point forward you can then add another prompt to create a short video with included audio and sound effects.
How To Crop Videos…The Right Way – PowerDirector
Although cropping videos would seem to be a pretty straightforward process there are still people who sort of get it wrong.
The reason it is important is that we are all trying to retain as much quality as we can in our projects so if you do this wrong you can end up with degraded footage.
The New Creator Hub – Filmora
This week Filmora released an update and for the first time in a long time, it wasn’t directly to the software!
They have created a new space online called Creator Hub which is a central point for many of the assets they have been building for quite a while now.
Up until now they have been adding all kinds of templates, workflows, tutorials and on and on with most of it being accessible through the Filmora interface.
Although that is still the case now they have merged the entire collection into one place that you can access which is really handy for those things you want but are not necessarily going into a project right at that moment.
How to use the New Anchor Point Feature in Filmora 14
Anchor points are new little feature that was added to Filmora recently but because they are not all wizzbang A.I driven, they have been a tad overlooked.
So here’s a demo of what anchor points are and how they can be used to create special effects and control assets in the timeline.
How to Improve Video Quality – Video Upscaling for Beginners
At the moment there are a number of A.I. services online that claim to be able to upscale or improve your existing videos on a semi-automated basis.
I have tried many, many of these websites and so far for me the results have been mediocre at best.
You can actually see a few of them in action in the video below from the guys at Movavi but unless you are going to go to the top of the food chain with A.I. upscaling then nothing else is all that great just yet.
The best advice so far is to export your videos at the best possible quality BUT!
Keep copies because A.I. upscaling and enhancement is improving all the time so next year it may be a totally different story.
As far as I am concerned, my thoughts and recommendations on the subject are fully covered in this post here: A Guide to Video Upscaling.
How To Remove Video Background – Top 3 AI Tools
One of the first tools that was released when A.I. driven features for video started to appear was background removal.
This has always been a pretty popular type of tool because for many content creators it has been a way of simplifying the shooting process enormously.
Rather than having to design and light an attractive shot for both the subject and the background all you had to do was make sure your subject looked good.
After that you just loaded the clip into a background remover and then replaced it with whatever you wanted.
Of course development of tools like that couldn’t go on free forever so these days the options for freebies has reduced.
Many video editing programs have their own background removal features these days and off the top of my head I am pretty sure Filmora, PowerDirector and CapCut have a feature like this.
Anyway here’s a rundown of some background removers that are still free or at least reasonably priced if your own software doesn’t do it internally.
The Key to Saving Hours on Set
Once the initial shine of shooting, editing and uploading that content you just created starts to wear off, one thing becomes inevitable.
That creative process is really time consuming, mind numbingly repetitive and ultimately begins turning into some kind of insatiable beast.
Give it a few weeks or a few months and total burnout is on the way!
The key to avoiding this regardless of the type of content you are creating is planning.
Intelligent planning based on your knowledge of your own creative process will save you every time.
Here’s an example of one creators planning process from start to finish.
It may not suit your process exactly but it is a good starting point.
DaVinci Resolve 20.1 – A Surprisingly Big Update
There was a recent update to DaVinci Resolve 20 taking it to version 20.1.
This is considered a sort of major..ish update and traditionally is the one where bugs and shortcomings from the most recent major update are addressed.
It is also one where some features that were not quite ready for the big update are added.
No-one that I am aware of has done a comprehensive run through of how things have changed so here’s a new video from MrAlexTech on what’s up.
Some of the new and improved stuff in for the Studio version only but he makes it very clear in the video what’s what with all of that.
Discover more from The DIY Video Editor
Subscribe to get the latest posts sent to your email.
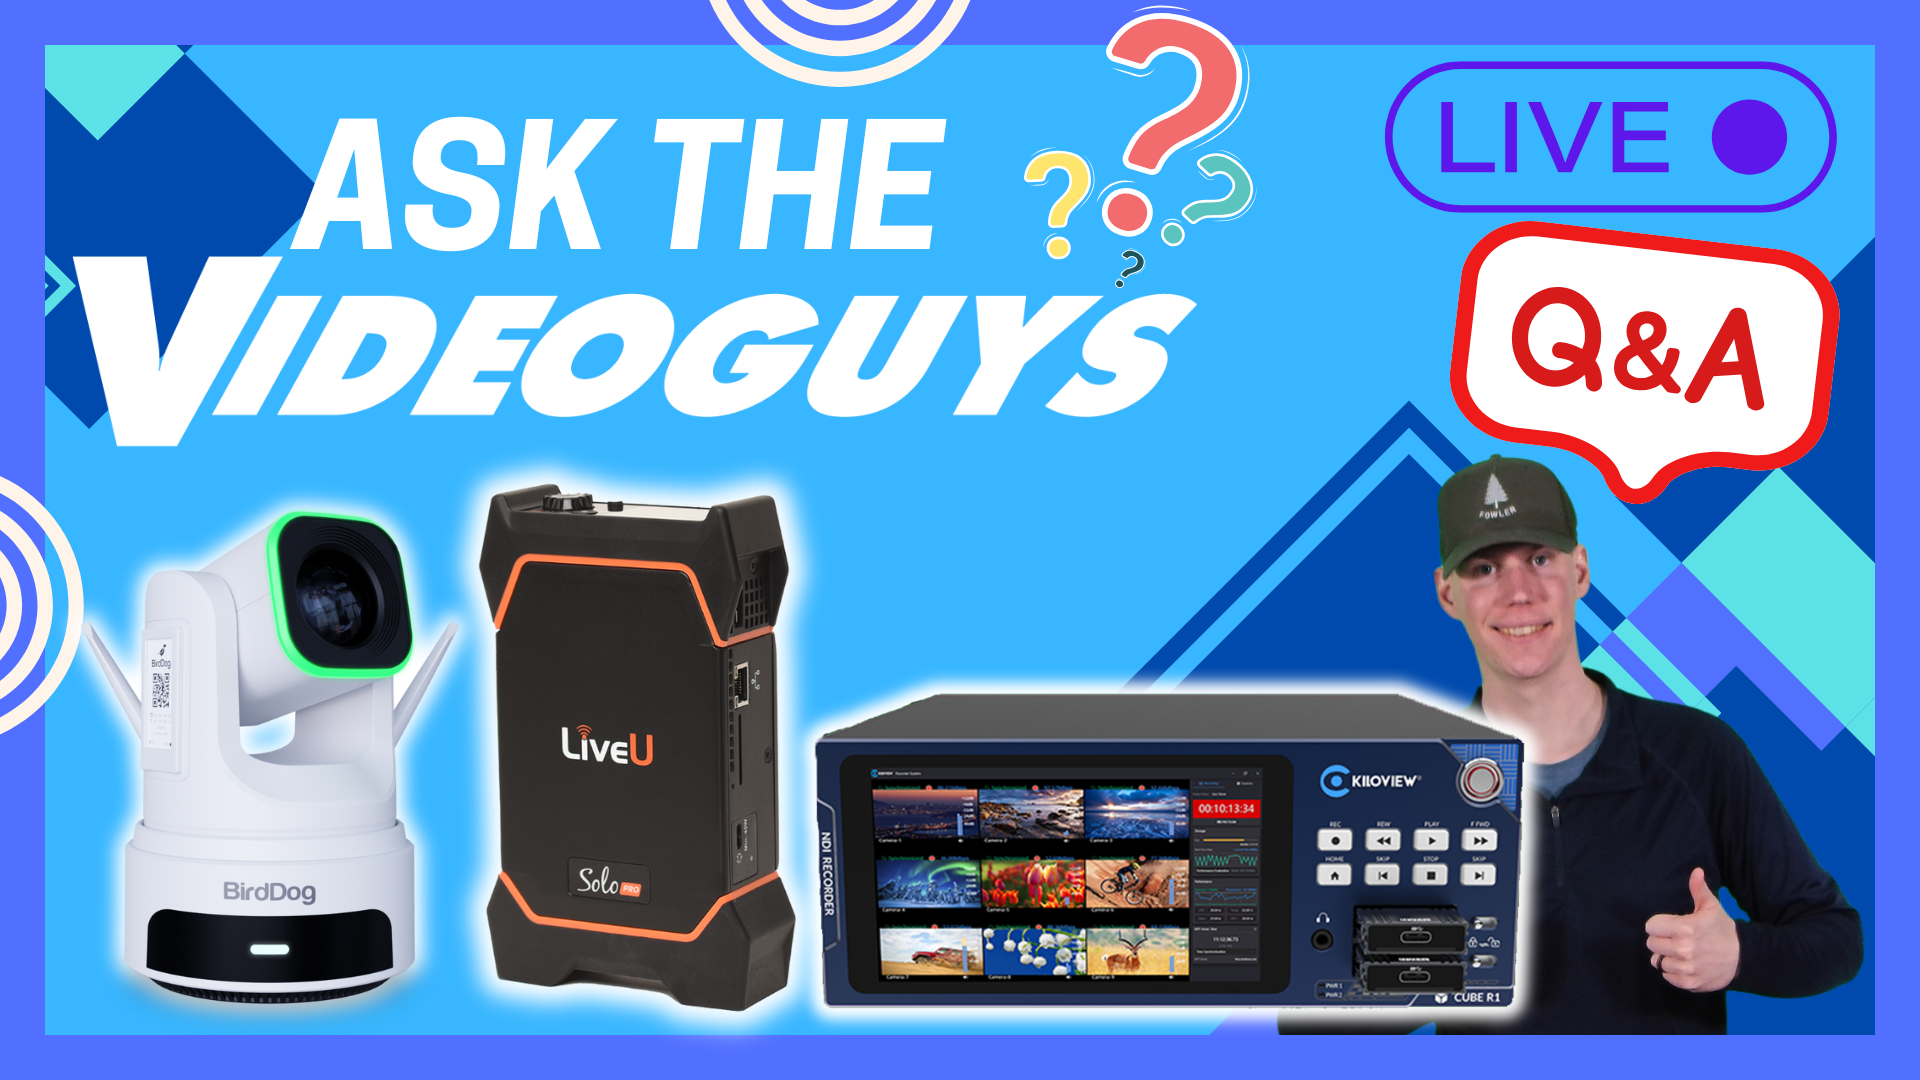
Join us for this installment of Ask the Videoguys where James will be answering our communities most asked questions from LiveU to Sports Streaming and even Multi-Camera Production Set-ups. Don’t miss this session packed with real-world advice and solutions for streamers, broadcasters, and sports producers.
Can I use the LiveU Solo Pro to access the internet on my computer while streaming?
No, the LiveU Solo Pro dedicates all bandwidth to video streaming.
Ensures top-quality, uninterrupted video delivery.
Uses bonded cellular technology (multiple modems) for reliable streaming.
Getting started with LiveU: Easy as 1,2,3
Step 1: Pick Your Model
HDMI or HDMI/SDI
Both support 4K HEVC and and up to 6 IP connections
Step 2: Choose a Connect Kit
DUO US 2 Modem Starter Kit
Quattro 4 Modem Bundle
Step 3: Activate Data Plan
Unlimited plan is $295/month for DUO.
Unlimited plan is $435/ Month for Quattro
Includes LRT cloud routing.
Use Code solo-videoguys for 5% off your data plan!
Add on LiveU Stream Tools
For a Unified Cloud Video Production Workflow
What are the best practices for cameras for outdoor sports?
Choosing the Correct Camera
High Frame Rates: 60fps+ for smooth, blur-free action.
High Dynamic Range (HDR): Balances bright sunlight and shadows.
4K Resolution: Ensures crisp footage, ideal for post-production editing.
Low-Light Performance: Maintains quality in evening or overcast conditions.
Stabilization: Reduces shake for steady shots during fast pans or movement.
Securing Your Equipment
Weatherproof Containers: Store sensitive equipment when not in use.
Elevated Platforms: Keep gear off the ground to avoid water damage.
Consider Outdoor Cameras: Designed to heat/cool the camera, and usually water resistant
Combatting Glare: Shades and Umbrellas
Monitor Hoods: Block out sunlight for clear screen visibility.
Protective Umbrellas: Shield cameras and operators from direct sunlight.
How can I set up a wireless video workflow for a multi-camera live event?
Atomos TX-RX
A UHD/HD wireless video transmitter and receiver system designed to streamline video monitoring and production workflows. On set, on location, or in the studio.
Transmits up to 4Kp30 over HDMI / 1080p60 over SDI
Range of up to 300 meters (985 feet)
Supports up to 4 receivers per transmitter
Powered by NP-F battery, USB-C or DC input (9–16V)
Reliable, scalable, cable-free solution
Set includes 1 transmitter and 1 receiver
Additional receivers purchased separately
Atomos Connect
Choose: Support for more camera models with 12G-SDI
Convert: SDI input to HDMI output conversion
Connect: WI-FI 6 (6E with Ninja Ultra) & 1GbE Ethernet
Stream: Stream to Facebook, Twitch, YouTube, & custom RTMP/S services
Share: Share media with Camera to Cloud & Atomos Edit
Sync: Synchronize cameras, audio recorders, & applications with AirGlu™.
Control: Support for AtomRemote app over Bluetooth.
RemoteView: Share live views from your Ninja over the internet
Atomos Shogun Ultra
Solid Internet: Network connectivity with Wi-Fi 6E and GigE.
Wireless Sync: Long-range robust wireless sync and control with AirGlu RF.
Third-party Sync: Third-party sync and app control with Bluetooth AirGlu BT.
USB-C Port: For future updates.
More Power Options: Multiple power options with NP battery slot and separate 2.1mm locking jack DC input.
SDI Out: Separate SDI Out for comprehensive SDI<>HDMI cross-conversion.
Super bright screen: Atomos Shogun Ultra’s super-bright, large 7-inch screen is viewable in almost every kind of light.
BirdDogs X1, X1 Ultra and X4 allow for Wireless PTZs on an NDI Network
Ultimate Flexibility: PTZ camera with NDI HX3, HDMI, USB-C, and Wi-Fi. Seamless connectivity anywhere
1080p60
20X Optical Zoom
HDMI/USB/IP
NDI HX3
4K30
12X Optical Zoom
HDMI/USB/IP
NDI HX3
4K60
20x Optical Zoom
3G-SDI, HDMI, USB-C UVC, Network Outputs
How can I record multiple camera feeds for post-production without camera storage limits?
AJA Ki Pro Line of baseband multichannel Recorders
AJA Ki Pro records high-quality files on production-friendly media.
Encodes to ProRes, DNxHD, DNxHR, H.265, or H.264 formats.
Supports 12G-SDI, HDMI 2.0, and optional Fiber SFP connectivity.
Intuitive VTR-like buttons and web-based UI for easy operation.
Three models to match your multi-camera recording workflow needs.
H.265 (HEVC) or H.264 (AVC)
Multi-Channel
–
–
ProRes
–
Multi-Channel
Yes
Avid DNxHD
–
Yes
Yes
Avid DNxHR
–
Yes
–
12G-SDI
–
Yes (1-Channel)
–
3G-SDI
Multi-Channel (4-Channels)
Multi-Channel (4-Channels)
HD-SDI
Fiber
–
Single Channel 12G Multi-Channel 3G
–
HDMI
Multi-Channel (4-Channels)
Yes
Yes
Component
–
–
Yes
LAN
Yes
Yes
Yes
Media
USB 3.2 Gen 1
Pak
KiStor
Raster
HD, SD
4K, UHD, 2K, HD
HD, SD
Kiloview CUBE R1 Multi-Channel NDI Recording System
Up to 4-CH 4Kp60 or 9-CH 1080p60 simultaneous recording
I then spent quite some time learning how to setup and use it because even though it was free, it was really, really complicated.
Now don’t get me wrong, OBS is great and for free software is incredibly feature rich!
However the problem with all that feature richness is that it is wildly complex and with that, has a steep learning curve.
These days my wife has switched to an alternative to OBS called Meld Studio.
Just to give you an idea of the difference, she set it up and started using it by herself with no input from me at all.
Bear in mind this is a woman that yells at computer screens so that will give you an idea of how (reasonably) straightforward it is.
Where to Get Free Footage for Video Editing? 5 Best Stock Sites
Free stock footage and image sites tend to come and go all the time although a few remain consistent.
The main reason for tht is that a free website trying to compete with some of the big ones without generating revenue beyond ads is pretty hard.
The two I know of that keep on keeping on are Pixabay and Pexels and the reason for them hanging around is that they were bought out by Canva.
So before we proceed any further, there are only two things you really need to know about me.
They are that I make videos and I am incredibly cheap and hate spending money on things I could get for free!
So in light of that here are a few of the current resources you can check out for free footage for your projects form the guys at Movavi.
Add Effects To People In Your Videos – PowerDirector
This is a feature in PowerDirector that has been around for a little while but it seems not a lot of people are aware of it.
As a broad overview, there are many,many built-in effects in PowerDirector that come with extended abilities.
By that I mean most effects do what they say on the box but if you dig into them a little you may find controls and settings beyond that.
Generally speaking the only way to really know what they are is to add the effect to a clip then go into the properties of that effect to see what is available.
You can see that in action in the video below where a “shake” effect is applied and as expected it applies to the entire clip.
However by going into the effect properties we discover that the effect can be applied as a mask and can track an object or objects in the clip.
How to Make Use of the Library Preview Window – PowerDirector
Sometimes when you are previewing what you have on the timeline in PowerDirector, you may want to also preview something that is in the media library.
Normally you do that by clicking on that asset and it displays or start to play.
The problem with that is that in doing so you have just lost your playhead spot from the thing you were previewing on the timeline! Doh!
That’s where the Library Preview Window comes into play.
It is a way of previewing something already loaded into the library without losing your spot on the timeline.
How to Save and Share your Project in Filmora 14
A feature that is well worth considering when it comes to choosing video editing software is the portability of that program.
It is not something that people tend to think of when deciding and very often only becomes a problem… when it becomes a problem!
By “portability” we actually mean the ability to create a project on one computer and be able to resume working on that same project on another computer.
There are two main ways most software deals with this situation.
The first is that it packs everything relating to and contained within the project into a single file that can be deployed on another computer for work to continue.
The second is to have the program accessible to a cloud account where the project is uploaded to.
Then later from another location, another user can access the assets online and continue working.
There is no “better” solution in this case, just individual preferences.
Here’s how Filmora handles this scenario.
How to Make High Quality Instagram Reels (Complete In-App Tutorial)
A few weeks ago I mentioned that Instagram had released its own editing App for the creation of Reels for their platform.
Since that time there have been a few upgrades and improvements added to the App making it a lot more effective for its purpose.
In the video below the guys from Primal Video run through an end-to-end Reels creation process using the App.
5 Free Audio Effects Every DaVinci Resolve Editor Should Know
The recent release of DaVinci Resolve 20 and the even more recent release of an update to version 20.1 saw the addition of a few interesting features.
Of note here were those added to the Fairlight page and although some already existed everything has had a bit of a polish up.
In the video below Jason covers 5 tools in that Fairlight Page that are built in to the program that can be used to very easily improve any audio track.
5 DaVinci Resolve Hacks I Wish I Knew Sooner
It’s pretty easy to get totally lost in all the settings of DaVinci Resolve especially in the Color Page.
After all it is intended for fully professional applications so there is a lot of stuff in there!
Having said that there are a few little tricks you can apply to take advantage of its power without having to go through 6 months of training to get it to do what you want.
In the video below you can see a few of those, two of which I use on nearly every project.
The first is the use of an HSV output node to control saturation easily and the second is using the Color Slice tool.
Discover more from The DIY Video Editor
Subscribe to get the latest posts sent to your email.
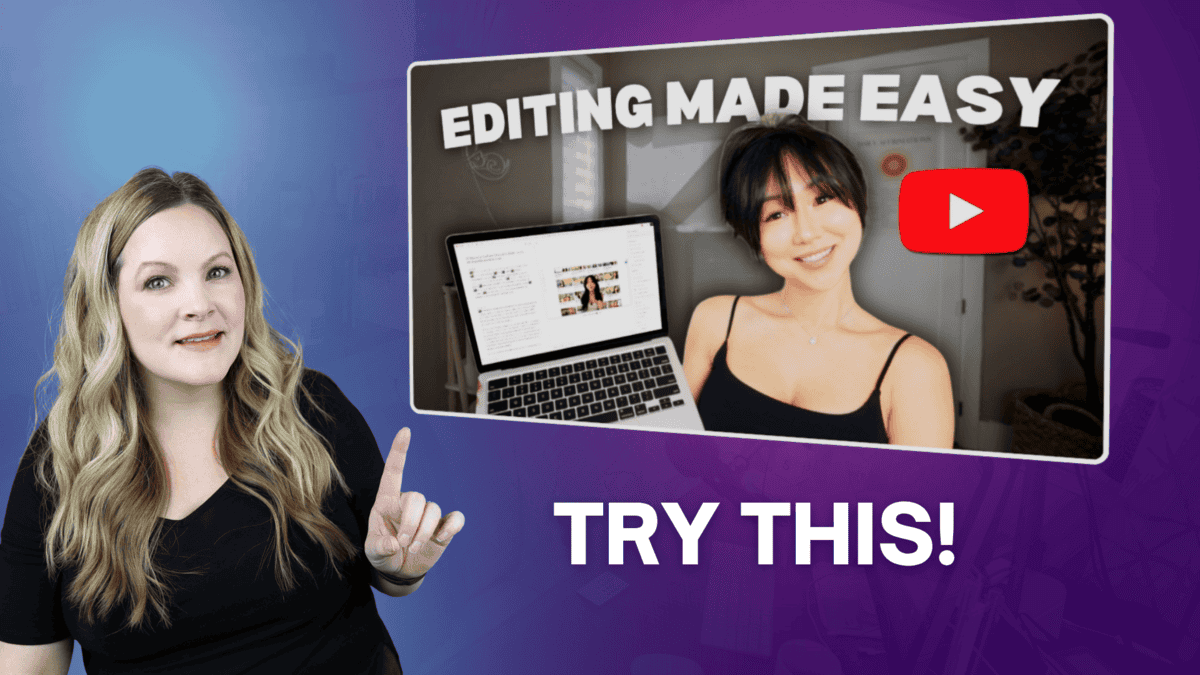
Ok, do you love Vanessa Lau’s editing style as much as I do?
If you watched her recent Descript video, you might be wondering how she does her smooth zoom in and out and that tilt screen effect…
In this video, I walk you through editing like Vanessa in Descript with Ecamm, covering the tilt screen effect, smooth zoom in and out, and custom layouts.
I’ll show you how to use Ecamm Live, Canva, and Descript’s timeline and smart transitions to create polished, pro-level videos.
If you want to master perspective shifts, overlays, and layout packs, you’re in the right place!
Breaking down other people’s edits in Descript is my new favorite hobby, haha…
VIDEO: Edit Like Vanessa in Descript (with Ecamm)
Some product links in this post are affiliate links, and I will be compensated when you purchase by clicking our links. Read my disclosure policy here.
Why Descript + Ecamm Is the Perfect Combo
Descript is an incredible all-in-one video editing platform, but it doesn’t natively offer every effect you might want—like Vanessa’s signature tilt screen. That’s where Ecamm comes in.
Ecamm Live isn’t just for live streaming—it’s also a fantastic screen and camera recorder. With it, you can record your face and screen simultaneously, set up different “scenes,” and add perspective effects before you even start editing in Descript.
By recording in Ecamm first, you can bring in already-styled footage to Descript, saving time and giving you more creative control.
Ecamm Live stands out as the ideal recording solution because it simultaneously captures both camera feed and screen recording. This dual-recording capability is essential for creating Vanessa’s signature look.
The software also excels as a live streaming platform, making it valuable beyond just recording. For content creators who do both recorded content and live streams, it’s an efficient all-in-one solution.
WhileDescriptdoesn’t directly offer the tilt screen effect, I’ve discovered a fantastic workaround using Ecamm Live. Here’s my step-by-step process:
Create separate scenes in Ecamm: Think of scenes like layouts where you compose your camera and screen arrangements.
Use overlays: Add a green overlay to act as a chroma key (green screen), which you later remove in Descript.
Adjust perspective: Use the perspective controls in Ecamm to tilt and shift your screen share, mimicking Vanessa’s dynamic framing.
Record your scene:Ecamm captures your webcam and tilted screen share as separate video files that you’ll bring into Descript for multi-track editing.
This setup gives you full control to customize the effect and tailor it precisely for your videos.
Working with Dual Recording Files
I made a full video on multi-track editing in Descript, but here’s a quick refresher.
After recording in Ecamm, you’ll have two separate files – one for your camera and one for the screen recording. Descript handles this beautifully by allowing you to create multi-track sequences.
When you import both files, Descript asks if you want to combine them into a multi-track sequence. Always say yes – this keeps everything perfectly synchronized while giving you individual control over each element.
Editing Multi-Track Sequences in Descript
Once your Ecamm recording is ready, import both your webcam and screen recordings into Descript. Combine these into a multi-track sequence for layered editing:
Open the multi-track timeline to see individual clips on separate tracks.
Mute the audio of the screen recording so only your voice on the webcam track is heard.
Resize and reposition your clips within the frame.
Use the **Layer > Visual Effects > Chroma Key** tool to remove the green screen background and make your overlay transparent.
Add your preferred background image or video underneath for a professional, polished look.
This powerful layering technique allows you to recreate the clean, immersive experience Vanessa is known for.
Related: Descript’s NEW Timeline Update – MUST KNOW changes
Select your clip, go to Layer → Visual Effects → Chroma Key.
Adjust similarity so the green background disappears without removing green elements from your screen recording.
Replace the green with a custom background image for a polished, branded look.
The chroma key automatically detects the green background and removes it, but you may need to adjust the similarity settings to ensure you’re not accidentally removing green elements from your screen recording (like buttons or interface elements).
For an even smoother fade effect, I sometimes create a green gradient in Canva, export it with a transparent background, and use it behind me in Ecamm. This blends me into the background more naturally.
Positioning Yourself Like a Pro
Vanessa often films herself looking at her screen rather than directly at the camera, which makes her videos feel conversational. To mimic this:
Resize and reposition yourself so the composition matches your desired style.
Experiment with camera placement—either above your monitor or off to the side.
Use camera mirroring in Ecamm to make the angle feel more natural.
Mastering Smooth Zooms in Descript
The smooth zoom effect that makes Vanessa’s videos so dynamic is surprisingly simple to achieve in Descript. It’s all about strategic scene creation and scaling.
Vanessa’s smooth zooms are simple to achieve inside Descript. Here’s the trick:
Split your timeline into scenes where you want the zoom effect to occur by hitting the slash key.
Select the clip and scale it up or down to create the illusion of zooming.
Use the**Option (Alt)** key while scaling to preserve aspect ratio.
Activate **Smart Transitions** in your settings to automatically smooth out zooms and other scene changes.
Adjust transition duration to control the speed of your zoom in or out for a natural feel.
This quick tip transforms static footage into dynamic, engaging video moments instantly.
Zooming Within Your Screen Recording
When you want to zoom and pan within your screen share:
Enter crop mode by double-clicking the clip on the timeline.
Zoom in by cropping and dragging the visible frame to highlight the area of interest on the screen.
Add scene splits where the focus shifts, ensuring you maintain clean transitions.
Apply Smart Transitions again for smooth movement between zoom points.
This technique guides viewers’ attention exactly where you want it during tutorials or software demos. With smart transitions turned on, these movements will feel fluid and professional.
Descript has many built-in layout packs for captions, lower thirds, and overlays, but you can personalize these to match your brand:
Start with a default layout and customize fonts, colors, logos, and elements.
Right-click your customized scene to save it as a new layout pack.
Reuse your custom layouts for consistent, branded videos without reinventing the wheel.
I’ve even created a large pack of over 120 layouts for vertical, horizontal, and square formats, making editing super fast and easy.
Creating your own layout pack saves time, keeps your branding consistent, and elevates your video quality instantly.
Why This Workflow Works
By using Ecamm to pre-style your recordings and Descript to refine them, you:
Save time on post-production.
Maintain brand consistency across videos.
Add advanced effects without advanced editing software.
It’s a workflow that keeps your content looking high-end while staying efficient.
Experiment often with Ecamm and Descript together; the combination opens a world of creative possibilities.
Keep exploring smart transitions and the new timeline to boost your editing speed and video polish.
Editing like Vanessa Lau isn’t about copying her exactly—it’s about understanding the techniques she uses and adapting them to your own style.
It is a fantastic way to level up your content and captivate your audience with clean, polished visuals and smooth effects. While Descript alone can’t create every effect, pairing it with a powerful tool like Ecamm Live bridges that gap perfectly. From tilt screen recordings to multi-track sequences, from chroma key backgrounds to smooth zooms, these techniques bring your videos to the next level. Get hands-on with these steps, customize your layouts, and make your editing process efficient and fun.
While these techniques might seem complex at first, they become second nature with practice. The key is to start with the basics and gradually incorporate more advanced effects as you become comfortable with the workflow. Remember, good editing should enhance your content without distracting from your message.
Ready to create videos that stand out? Let’s start editing like Vanessa—your audience will notice the difference!
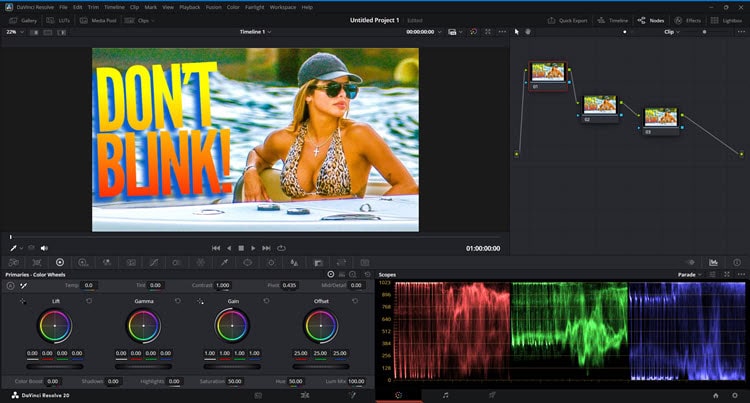
One thing I have noticed about the relentless development of Filmora over the past few years is that the conversation keeps revolving around what’s new.
That’s all very well but what seems to be getting lost is the fact that you can actually use the software to edit videos and create great projects!
I am pretty sure this is because the competition in this field is so fierce that the marketing departments have to keep prioritising new features, new development and all sorts of bright shiny stuff.
So to bring things back to a more realistic and practical level here are some actual editing things you can do with Filmora!
Switching from DaVinci Resolve to Movavi for 30 Days
Considering that this video was made by the guys at Movavi you would expect it to be a bit of a puff piece extolling the virtues of Movavi over Resolve!
In fact it is not really too bad and most of the points they make are quite relevant.
I personally do not use DaVinci Resolve for editing and in fact use either Movavi, Filmora or PowerDirector to do that.
I do use Resolve as a sort of pre-production tool before switching to something else.
My usual workflow is to pull raw footage into Resolve and get the color corrected.
I then use Fairlight to get the audio to the standard for whatever platform the video will ultimately be uploaded to.
That entails noise reduction, reverb correction if needed, compression, EQ then finally, normalization to the correct standard.
I then export to a new file and continue on with the more detailed work in one of the programs already mentioned.
The reason I use either Movavi, Filmora or PowerDirector is because as a blogger I need to keep my hand in with all of these programs to be able to help others.
My requirements are pretty straightforward so I would rarely use the super advanced features of Resolve anyway.
Check out the video and see what you think.
Easy Guide to Using Transitions in Video Editing – PowerDirector
This is one of the new “Back to Basics” videos that CyberLink have been releasing over the past few months.
They really are quite good and make understanding the concepts being shown very easy to get a grip on.
Sure the A.I. generated voiceover is a bit cheesy but I can live with that!
How to Edit Speech in an Audio Track Using an Equalizer
This is a run through of some of the audio editing features in CyberLink PowerDirector.
Its main focus is on a voiceover for video using the equalizer.
If you have ever been presented with an equalizer and not really known where to start then this is a pretty good introduction and explanation of the subject in action.
How To Screen Record on Windows (Free & Pro Level Options)
Screen recording has come a long way since the days of having to pay a ridiculous amount of money to get something that would give reasonable quality.
Just from memory I think Camtasia was about $300.00 and what you got was a screen recorder and very, very basic editing abilities.
These days most video editing software comes with a free screen recorder and outside of that, there are free recorders available that give great results.
Like anything to do with video there are a few settings you need to get right but overall it is a much easier and better proposition.
DaVinci Resolve 20 for Beginners – 5+ Ways to Delete Anything
Ok so this one kind of hits close to home for me because when I first started using DaVinci Resolve, it was a huge problem!
Now you would think that simply deleting something in a project would be pretty straightforward but the real problems start right after you do that.
For any modern video editing software, simply deleting something is not the whole action.
The real statement is to delete… and then what?
Delete and close the space that was left? Delete and move everything on the timeline? Delete and move only those assets on that track?
Delete and what?!
In the video below Jason covers most of the most common deletion methods you will probably comes across and how to do it without destroying your existing work.
DaVinci Resolve for Still Photos
This is an article I stumbled over this week that reminded me of something maybe not everyone is aware of.
Very often I have to use still images in projects or even outside of video work, for example on this blog.
Just as often those still images need either resizing, cropping or in many cases color correction of some kind.
What I discovered quite some time back now is that DaVinci Resolve is really good for doing that stuff!
There are a few little settings you need to get right but apart from that you can use the full power of the Resolve Color Page to work with stills.
Make a Film in DaVinci Resolve – New End-to-End Course
OK so first up full disclosure here!
The course mentioned in the video below from Casey Faris is about $200.00 in those United States type dollars.
So if that’s out of your range you can safely move along!
Secondly I am not an affiliate for the course so my mentioning it here does not generate any type of income for me personally.
Now with that out of the way here’s what I think.
Casey’s free course for DaVinci Resolve is an absolute beast and will put you totally in control of the software for your projects.
If your needs are modest then that’s really just about all you will need apart from just using the software and gaining experience.
However if you really want to take your videos up another level and stand well out from the crowd then this one is totally worth the cost of admission.
And that’s all I have to say about that!
Discover more from The DIY Video Editor
Subscribe to get the latest posts sent to your email.
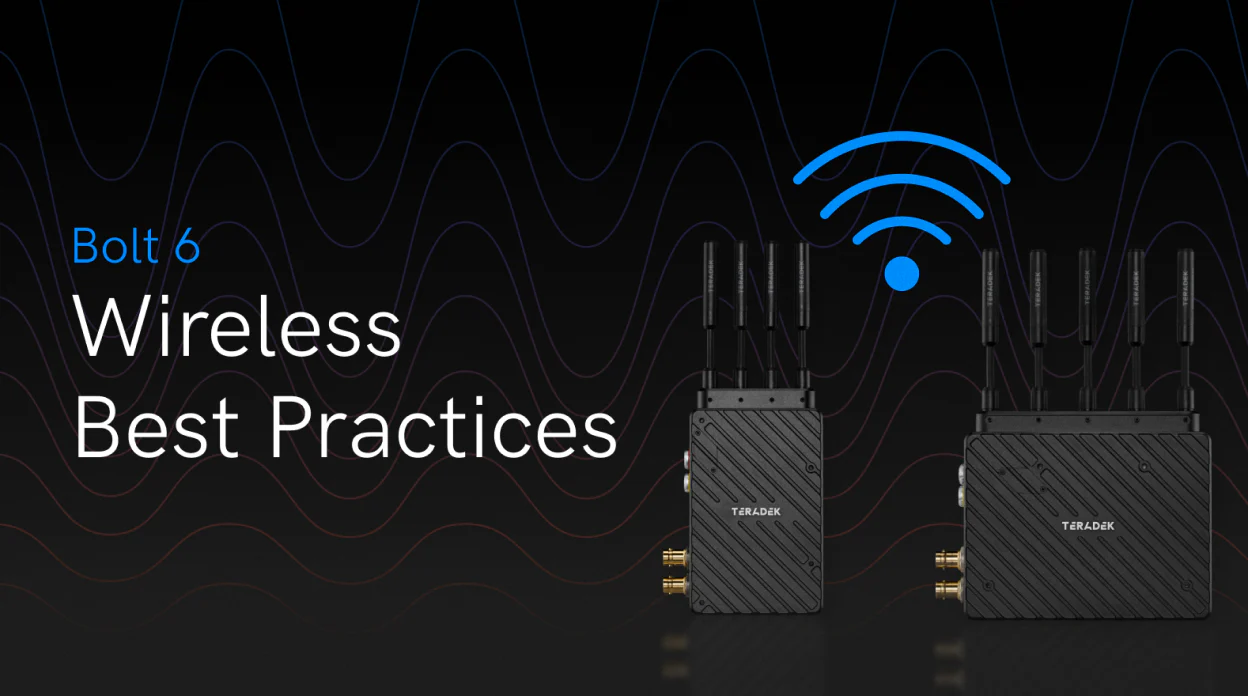
Wireless video issues on set can bring production to a halt, even with high-end tools like Teradek’s Bolt. Whether you’re dealing with blocking artifacts, tearing, or total signal loss, the first step is identifying the type of disruption you’re seeing. From large 8×8 pixel blocks caused by missing data to full-on “No Link” drops, each symptom points to different causes and solutions.
Interference often comes from nearby wireless gear, RF-heavy environments, or even poorly shielded cables. Physical obstacles like walls, metal, or even people can disrupt line-of-sight transmission. To maintain a clean feed, make sure TX and RX units are in clear view, separated properly, and away from other wireless systems. Replace bad cables, and don’t forget, shielding and spacing matter as much as frequency selection.