The Friday Roundup – YouTube Compression and A.I. Masking


Woman disappointed at poor YouTube upload quality.

Beat the Compression – How to Get Better YouTube Uploads

One thing that not a lot of people seem to be aware of is that when you upload a video file to YouTube, they will immediately re-encode and re-compress that file.

Your video will be converted to a new set of files using their own codec, at their own bitrates and subject to their own compression settings.

Even if you upload at the exact parameters and file type they recommend, it will still be re-encoded.

They do this for two reasons.

The first is so that they are operating on a universal codec for decoding and streaming all across the platform which in turn simplifies and adds consistency to the process for them.

The second reason is based on the fact that YouTube is a streaming service at its heart so it is designed to provide the best possible quality BUT!

The stream itself must be deliverable and ideally, operate on a smooth, uninterrupted basis.

In other words they are not going to attempt a 4K stream to a smartphone connected to a 3G network based on steam driven infrastructure!

That’s why when you upload they create a copy at the highest resolution you uploaded at and then they create lower resolution copies with even heavier compression.

So that’s the basic nuts and bolts of what it is and how it works but having said all of that there are still things you can control to improve how your videos look even after their compression.


How To Add Effects To Objects – PowerDirector

This is an A.I. driven feature in PowerDirector (and a few others to be honest) that I can actually get behind.

Motion tracking has been a feature in most advanced video editing programs for a while now and has really opened up a whole world of possibilities for effects and adjustments.

Before that you had to be kind of insane enough to sit in front of a computer and manually keyframe a motion path or mask frame by frame.

Automatic motion tracking arrived and this was a total game changer.

The problem with that version of motion tracking was that regardless of the software being used, unless there was a clear and distinct object or feature in a video to track, there was a tendency for the process to fail.

This meant a lot of time spent going back and correcting the track to get it accurate when it had lost whatever it was it was supposed to be tracking.

Of course that was always better than manual keyframing so most of us were OK with it.

Move to today and it is a whole new world where we can now use the traditional motion tracking features but at the same time have an A.I. model watching and correcting as it runs.

This is a way better solution and the results are very accurate.

Here’s a demo in PowerDirector.


How to Create an Effect Mask to Make one Person Black and White

This is a follow on from the previous post displaying the A.I based masking and tracking feature in CyberLink PowerDirector.

There is nothing much more to add as far the procedure goes I just wanted to add it to show another way you can use it.


How to Compress Video Without Losing Quality

Most video editing software can handle reducing file size quite competently by allowing you to reduce the resolution or bitrate of any file.

However it is not necessarily a task it is specifically designed to do.

If you really want to compress a file and maintain absolutely the best quality then a purpose built tool is your best option.

Here are a few alternatives.


What’s New in Filmora 14.8: Full VEO3 Tutorial + Game-Changing AI Video Tools

One of the more recent and frankly quite impressive A.I. tools that has come online is VEO3.AI (https://veo3.ai/)

This is an A.I. model that creates very impressive looking videos based on whatever information you provide in the form of a prompt.

Accessing it directly will run you at about U.S. $30 per month which is fine if you are going to be generating that amount of content with it.

If not then another way to use it is through an existing software that has it integrated through their own API.

In the video below you can see how to do that using Filmora so that you can enter a prompt and have the results pulled back into your editing software in one go.


Filmora 14 Hidden Cost Revealed – Paid Effects and AI Credits

While we are on the subject of Filmora and its integration with various external A.I. platforms, here’s a good one from Jacky on the subject of costs.

In the article above I mentioned that access to VEO3.ai through Filmora is probably a better deal if your use of the software is not that high.

In fact there are a number of external services you can use from within Filmora so here’s a breakdown on the costs.


How to Use the New Instagram Edits App (Step-by-Step)

So, Instagram have just come out with a separate App for editing videos and posting directly to Instagram (obviously!).

Will I ever use it? No, I never edit on mobile devices but there are lots of people who do!

Here’s a run through of all the features of the App from the guys at Primal Video.


See How to Make Your Videos More Fun With These 5 Transitions

These are a few simple but very effective transition suggestions from the people at GoPro.

In line with the action cam style of shooting these ones are basically “in-camera” transitions rather than anything depending on too much intervention at the editing stage.


Create a Cinematic Blast Impact Concussion Effect in DaVinci Resolve

This is a demonstration of creating a reasonably complex effect in DaVinci Resolve.

Having said that there is nothing really in the creation of the effect that absolutely requires that you do it in Resolve.

Most other reasonably well equipped video editors can pull this off with no problem.

The main reason I have added it other than the fact that it is a cool effect is this.

In order to create sequences like this you have to have a plan and pretty clear idea of what it is that you want to achieve BEFORE you start doodling around in your software.

Trying to do it any other way always ends up in a kind of half baked attempt or an entirely failed attempt altogether.


Introduction to DaVinci Resolve – [Full Course] for Beginners (2025)

So the deal is that about once per year Casey Faris comes out with a full introduction to DaVinci Resolve course.

This is a course for absolute beginners and used to be one that he sold for what I always thought was a reasonable price.

This year he has done the same thing with the difference being that the course is totally free!

Clearly if you have ever wanted to use Resolve or switch to it then this is definitely the course for you.

Having said that let be be clear, I will be doing this course even though I am not a beginner with Resolve at all.

This course is based on the latest version of Resolve 20 so there’s that but I mainly do the course every year because I always learn something new.

The other advantage I gain is that there are so many knobs and dials and buttons and choices in Resolve that I often forget things completely.

Highly recommended.


Discover more from The DIY Video Editor

Subscribe to get the latest posts sent to your email.
The Truth About Boring Videos You’re Afraid to Admit


Are you worried your YouTube videos are too boring to get views?

After feeling like I was out of ideas, I realized I was just bored with my long list of topics…

In this video, I reveal the truth about boring videos and how to make even dull topics engaging for your audience. I’ll share strategies for business owners, like the spider web strategy, the three magical questions to spark ideas, and how to use tools like the Zinger YouTube title generator.

We’ll cover content silos, decision fatigue, and how to create binge-worthy videos that grow your channel and business.

VIDEO: The Truth About Boring Videos You’re Afraid to Admit

Some product links in this post are affiliate links, and I will be compensated when you purchase by clicking our links. Read my disclosure policy here.

The Reality Check: When You Think You’ve Run Out of Ideas

Why Topic Selection Matters More Than Thumbnails or Titles

When your videos aren’t getting clicks or views, it’s tempting to blame your thumbnails or titles. While those are important, the real secret sauce is the topic itself. If your subject isn’t intriguing, even the flashiest thumbnail won’t save it. Before you stress over packaging, ask: is this topic genuinely interesting to me and my audience? Focusing on the “why” behind your content ensures you’re creating videos people actually want to watch—a key to YouTube growth.

Understanding the Two Sides of the Content Coin

There are typically two scenarios we face as content creators:

1. Publishing videos that aren’t getting views despite our best efforts.

You’re consistently publishing videos, but they’re not getting views or engagement. You might blame your thumbnails or titles, but the real issue could be that your topics simply aren’t intriguing enough.

2. Feeling stuck in inaction because we think our topics aren’t exciting enough.

You’re so unexcited by your own ideas that you don’t post at all. You’re paralyzed by the belief that your ideas are boring, so you end up not posting anything at all. This inaction becomes a self-fulfilling prophecy that stunts your channel’s growth.

The truth is, we rarely actually run out of ideas – we just need a fresh perspective on how to present them. Both situations stem from the same root problem: disconnection from what truly matters to your audience and what genuinely excites you as a creator.

The Magic of Three Power Questions

When I’m feeling stuck, I ask myself three transformative questions. I always return to these three powerful questions that never fail to ignite creativity. These questions have consistently helped me break through content blocks and create videos that both I and my audience love.

1. What Am I Excited About Right Now?

This is the spark. Even if it’s outside your niche at first glance, you can often connect it back to your core content strategy. Maybe there’s a trending topic or an unpopular opinion you’ve been itching to share. Channel that energy.

Tap into your current interests, news, or trends—just make sure they connect back to your niche for relevance.

This question is pure gold for business owners. If you work with people directly — through coaching, courses, memberships — you’re already tuned into their real-time struggles. Think about the last question they asked, a recent aha moment, or something you wish they’d ask but haven’t yet.

Draw inspiration from recent questions, struggles, or conversations in your community. These real-world pain points make for highly relatable content.

3. What does my audience want from me right now?

This question requires you to step into your viewers’ shoes. Imagine your ideal viewer opening YouTube and seeing your thumbnail. What would make them pause and say, “Ooh, I have to watch that”? Aim to create that kind of intrigue. It’s not just about being relevant — it’s about being irresistible.

When I align these three perspectives — my excitement, my clients’ needs, and my audience’s curiosity — that’s when the magic happens.

Pay attention to comments on your previous videos, questions from your community, and trending topics in your niche. What conversations are happening that you could add valuable insight to?

Making “Boring” Topics Binge-Worthy

The Excitement Factor

If you’re bored by your own topic, your viewers will be too. The energy you bring to your content is just as important as the information itself. Make sure you’re genuinely interested in what you’re sharing—your passion will translate on camera and keep your audience engaged.

Remember: If you’re not excited about the topic, your audience won’t be either. The key is finding the angle that ignites your passion while serving your audience’s needs.

From “Boring” to Binge-Worthy: Reframing Your Topics

Sometimes you have important information to share, but the topic itself seems dry. For instance, I know my audience needs to understand Google Analytics – it’s like having a crystal ball for your channel’s future. But “How to Read Your Google Analytics” sounds incredibly boring.

The solution? Reframe the topic to highlight the benefit or create intrigue. Instead of focusing on the mechanics, focus on the transformation or the “why” behind the information.

Related: Become Binge-worthy – Build Your Thriving Channel without spending HOURS Creating Videos

Using AI to Transform Your Titles

One of my favorite tools I’ve built inside Video Brand Academy is called “Zinger YouTube title AI tool”. I designed it specifically to take a boring or vague video topic and spin it into 30 punchy, clickable, scroll-stopping title options.

Not every suggestion will fit your style, but seeing your topic through new lenses can spark excitement and creativity. 

The Spider Web Strategy for Consistent Content

To avoid future creative blocks, I recommend implementing what I call the Spider Web Strategy, which I teach inside Video Brand Academy. Here’s how it works:

This involves organizing your content into 3-4 specific topic categories or “silos.” For example:

  • Video podcasting
  • YouTube growth strategy
  • Camera confidence
  • Sales and lead generation

When starting out, focus intensely on one category to build momentum. Once established, you can rotate between categories, which significantly reduces decision fatigue.

This strategy works because:

  1. It limits your choices, making content planning easier
  2. It helps you build comprehensive libraries around specific topics
  3. It creates opportunities for binge-watching as viewers discover related content
  4. It establishes you as an expert in specific areas

Each week, I rotate through those topics, which helps me stay consistent without scrambling for ideas. It also builds a binge-worthy channel, where one video naturally leads viewers to another, keeping them on your channel longer.

Related: Build Your THRIVING Channel (without spending HOURS Creating Videos) | Ep. 49

Bonus Hack: The 3×4 Method

If you’re still feeling stuck, try my3×4 Method”, I created a bonus training called the 3×4 Method. It’s a powerful system to help you generate months of ideas in minutes. And you can get it for free using the link in the description of the video. a bonus training available to Video Brand Academy members (and free via the link).

This approach further reduces decision fatigue and keeps your topic pipeline full of exciting, relevant ideas.

Related: 3×4 Method Secret Video: https://www.meredithmarsh.co/3×4

Conclusion

Running out of video ideas isn’t actually about lacking creativity – it’s about losing connection with your purpose and audience. By asking yourself these three magic questions and implementing the spider web strategy, you’ll never truly run out of content ideas again.

The key is finding that sweet spot where your excitement, your audience’s needs, and your clients’ challenges intersect. When you create from this place of alignment, your content naturally becomes more engaging, valuable, and binge-worthy.

Remember: your audience needs what you have to offer. The world is waiting for your unique perspective and expertise. Don’t let creative blocks keep you from sharing your valuable insights with the people who need them most.

Related: Consistent Sales of Your Online Course with YouTube

If you have an online business with a course, program, or any other kind of offer, and you’re not currently generating consistent sales on autopilot, I’d like to introduce you to the hands off youtube funnel that has made me over $20k on a $147 course! That way, you too can make consistent sales of your offer, with the beauty and simplicity of organic, evergreen traffic from YouTube! Start here with my free “AIT Method” training.

KMH Integration Looks Ahead: Embracing New Tech, Talent, and the Future of Systems Integration


As media and broadcast workflows evolve, so too must the companies supporting them. KMH Integration, now celebrating 20 years in business, is preparing for the next era of AV systems design with a clear focus on new technology adoption and talent development.

President Kevin Henneman says the path forward lies in adapting to IP- and cloud-based systems while growing a workforce ready for that shift.

“Technology doesn’t stand still. We’ve made ongoing training a top priority so our team understands how emerging software-driven solutions complement or replace legacy systems.”

KMH is already supporting clients through hybrid workflows that blend traditional baseband setups with IP video, cloud-based production tools, and software-defined infrastructure. This approach ensures scalability, long-term ROI, and future-ready design for stadiums, studios, and enterprise clients alike.

Growing Talent to Match Changing Technology
One of the biggest challenges the industry faces, according to Henneman, is building the next generation of technical professionals.

“We’ve partnered with local universities and found smart, passionate people who just needed exposure to the systems integration world. Some of our top team members came from those programs, and now they’re mentoring the next wave.”

KMH’s approach fosters a culture where every team member learns across disciplines — from cabling and installation to systems design and client consulting — creating a dynamic and well-rounded workforce.

Planning Projects for Maximum Flexibility
As the pace of technology change accelerates, KMH is also rethinking project timelines and purchasing strategies.

“We encourage clients to reverse-engineer the project timeline,” Henneman says. “You don’t want to buy gear too early and miss the next big upgrade. With good communication, we can plan for the right moment.”

Whether designing modern control rooms or integrating broadcast-grade infrastructure in corporate or education environments, KMH remains committed to providing flexible, scalable, and intelligent systems tailored to each customer’s goals.

Read the full article here

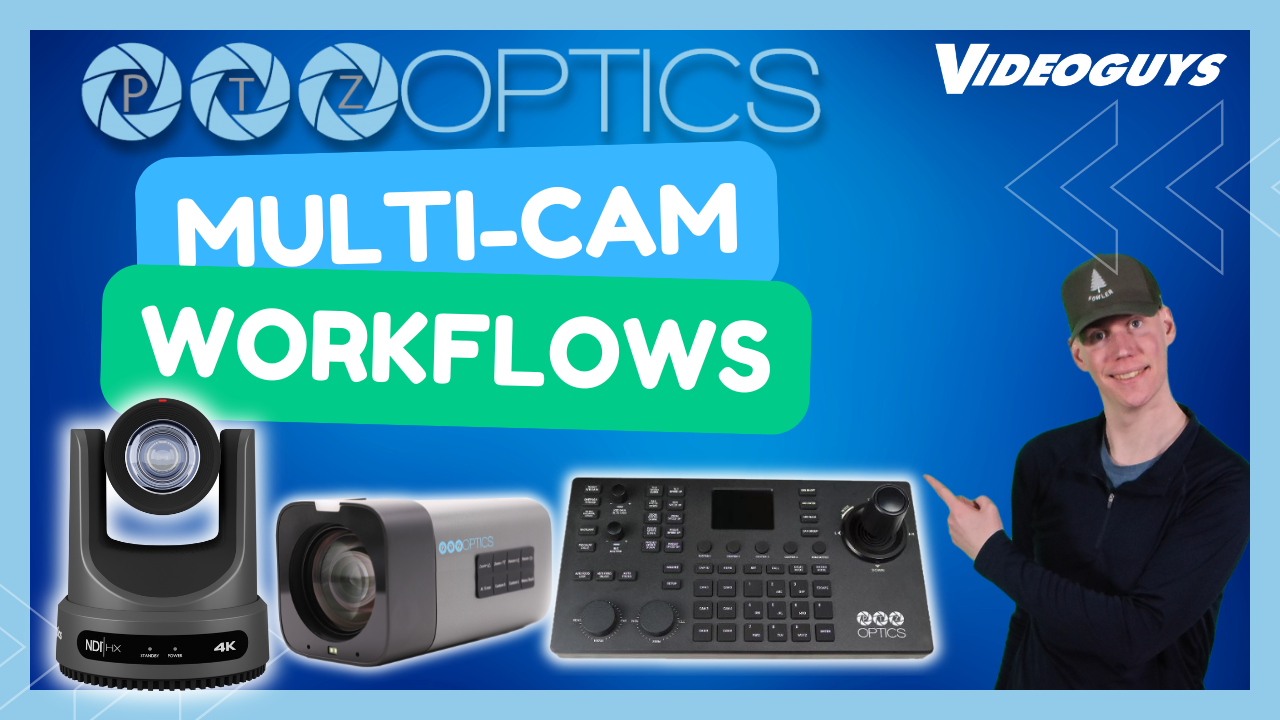
PTZOptics Cameras for Every Multi-Cam Workflow


Discover the latest PTZOptics cameras and bundles for live streaming, broadcast, corporate, education, and worship production. Learn how Move 4K, Studio SE, and more fit into any workflow. If you’re building or upgrading a multi-camera video workflow, PTZOptics has you covered with a full line of professional PTZ and box cameras designed to meet the needs of live streamers, broadcasters, educators, corporate teams, and worship techs alike.

In this week’s episode of Videoguys Live, we showcased the expanded PTZOptics product lineup, featuring:

🎥 Move 4K – A powerful 4K PTZ camera with auto-tracking and IP connectivity

🎥 Move SE – An affordable HD PTZ camera packed with pro features

🎥 Studio 4K – Compact box camera offering cinematic 4K quality

🎥 Studio SE – The new HD box camera for flexible installations

Whether you’re scaling up your live production setup or just starting out, PTZOptics offers solutions that are powerful, budget-friendly, and easy to integrate. We also explored PTZ camera bundles ideal for any level of production—from solo streamers to large venues.

Key Highlights:

  • IP and NDI support for flexible networking
  • Seamless camera control options
  • Auto-tracking and AI-powered functionality
  • Ideal for streaming, hybrid events, education, and house of worship setups

Learn more about PTZOptics below:

Kiloview RF02 Official Launch Webinar Replay: Everything You Need to Know


A big thank-you to everyone who joined us live for the official launch of the Kiloview RF02! If you couldn’t make it or want to revisit the key highlights, the full webinar replay is now available.

In this exclusive session, we explored the Kiloview Cradle Series RF02, a 2RU rack-mounted AV-over-IP media platform purpose-built for professional broadcast, live production, and event workflows.

Why watch the replay?

  • Discover how RF02 supports up to 18 modular cards for flexible configuration.
  • Learn how it combines encoding, decoding, media gateway, bonding, and more in a single system.
  • See how the network switch card and main processor card streamline IP-based workflows.

Whether you’re working in broadcast, live events, or studio production, RF02 delivers a scalable and centralized solution. Watch the video:

Learn more about Kiloview below:

/**/

Mixing Resolutions and Frame Rates in Video Editing


Mad men style guy warning sarcastically against mixing assets on the time line.

In an ideal world you and I should be able to slap any old collection of mixed assets on the timeline of our video editing software and life should just be excellent from that point forward!

Unfortunately you and I don’t actually live in an ideal world and in fact, when it comes to video editing, it is a world that is way less than ideal!

So just to clarify, mixed assets or mixed footage or even mismatched footage refers to a situation where you have video footage captured at varying specifications added to your project timeline.

Those differences could be in resolution, frame rate, bitrate or file types.

The reason doing this becomes problematic basically comes down to the complexity of editing videos in general and the way editing software has to try and deal with those complexities.

So at the core of the problem is the fact that in order to deal with video files of any kind, modern video editing software has to be calibrated to what could best be described as baseline set of specifications.

These settings are contained within the Project Settings of most video editing programs and from that point forward everything added is either too much, not enough or just right.

The “too much’s” and “not enough’s” are marked for handling of some kind in order to be made “just right!”

Sometimes those project settings are created when the first video is added to the timeline so the software assumes that the first clip added will be the baseline setting.

Most software already has a default project setting and expects you to be adjusting that according to what you will be working with.

So if your project is 4K at 30fps the software now knows what the height and width is going to be as well as the rate (time) at which individual images are going to be displayed to create the video.

Anything different to those baseline settings can be dealt with by either changing the size or compensating for different frame rate.

These two things affect the final output depending on how well the software can handle increasing or decreasing the values of assets to be included in the video you are working on.

Similarly it depends on how well the software can eliminate or add frames for any footage that is at a different frame rate.

Finally if you add footage that was created using a different codec, for example some MP4 footage mixed with .AVI footage then the software now has to activate two separate codecs at the same time in order to deal with your project.

Bear in mind that editing software cannot export a final video file at variable resolution or frame rate.

So unlike other computing tasks, video editing even slightly outside of routine actions, such as the one we are talking about here, requires at least some technical understanding of this to effectively manage the situation.

Understanding Mixed Assets in Video Editing

Footage Specifications

The first thing you really need to know from the outset are the exact specifications of the footage your dealing with.

How it was recorded, its resolution, frame rate and format are all essential for predicting its behavior on the timeline.

Using that information you can align the project settings with these specifications in mind to avoid issues such as pixelation, audio-sync problems or poor representation of motion.

Frame Rates

Frame rate indicates the number of frames displayed per second and as such is a representation of time and motion.

Beyond the actual frames per second there is also embedded within any digital video file a time code that controls the rate at which the video displays.

Variations in frame rates within a project requires a process called either frame interpolation or frame decimation depending on the situation.

If the frame rate of the footage is higher than the project frame rate then the the number of frames has to be reduced – decimated.

If the frame rate is lower than the project frame rate then the number of frames has to be increased – interpolated.

This very often results in a degraded visual experience especially when it comes to reproducing smooth motion.

Decimating frames can make the motion appear slightly jumpy or jarring to watch while interpolation usually results in a strange or even unrealistic representation of motion.

Resolution

Resolution determines the number of pixels in an image, determining its clarity and quality.

Expressed as width-by-height in pixels (e.g. 3840px x 2160px for 4K), resolution affects how footage is scaled within a project timeline and in preview.

So on a 1080p project timeline, any 4K footage has to be scaled down which is far more preferable to scaling 1080p footage up to a 4K project timeline without some kind of A.I. intervention.

The best way to conceptualize this is to understand that a 4K image of one frame has four times the amount of pixels that a 1080p image frame has.

When the editing software is converting 4K down to 1080p it uses the information from four pixels and combines them into one.

Because it has lots of data to do that usually the quality is maintained.

On the other hand, for the software to scale 1080p up to 4K it has to take each individual pixel and produce four pixels for each.

It has no real way of knowing how to do that accurately and almost invariably leads to image quality degradation.

Mixed Codecs

It may occur that you find yourself having to deal with footage that has been created by different devices and as a result different codecs were used to create that footage.

It could be a totally different codec such as .AVI and H.264 or it could even be as subtle as two different iterations of the H.264 codec.

Remember, even though the H.264 codec is probably the most common one you will encounter, there is no strict standard that all H.264 codecs must adhere to.

H.264 or H.265 footage from a DJI drone device is going to be vastly different from the equivalent footage from an MILC camera shooting video.

From a quality standpoint this is usually not much of a problem but it does require that the software you are using has to load two or more different codecs into play in order to work on the project.

If you are having glitches or freezes while you are working like this it will usually be because your computer is having trouble keeping up with the calls to the other codec.

Best Practices for Managing Mixed Assets

So that’s the basic situation with mixing assets on the timeline within a project so let’s get into how to manage this effectively.

Consistent Project Framework

The first thing to do is to plan out how you can maintain consistent video file parameters from shooting through to rendering your final file.

Capture all primary footage (A-roll) at the same resolution and frame rate and because this will be the majority of what is going to be on the timeline, set the project settings to match these specifications.

For B-roll and other secondary footage, try to capture or use stock footage that matches the project’s main settings.

If you cannot find footage at the same resolution or frame rate remember it is best to get footage at a higher resolution and take it down rather than the other way around.

If you are forced into a situation where you simply cannot match frame rates, test the secondary footage in your video editing software and see if it handles it OK.

Often short clips occupy such short actual screen time the difference may not be noticable.

Finally, if you are absolutely stuck with footage at either a different resolution or a different frame rate that you really want to use then the final solution may involve third party specialist software or even A.I.

Handling Variable Frame Rates

Mobile devices, due to power, processor and space restrictions, often record with variable frame rates, causing syncing issues during editing.

Rather than placing the pressure on your software during the actual editing process it is always better to get that footage to a constant frame rate before you add it.

There are two ways you can do this.

The first is to just start a new project, set the project settings at the correct resolution so that there is no increasing or decreasing of actual image size then render a new file at a constant frame rate.

If the results are fine then you can add it to your project.

If not you can try tools like Handbrake (free) to transcode variable frame rate (VFR) footage into a constant frame rate format, mitigating potential editing difficulties.

Try To Get Your Ducks in a Row

Probably the most effective strategy for dealing with mixed assets is to standardize all of your footage as best you can before you even add it to the library of your project.

If you have resolutions that need to be increased, do that separately in your editing software to see what the result are like.

If it looks OK fine, if not then you may have to go some kind of A.I. upscaling solution to get it in shape.

Either way treat it as a separate action so that your editing software and computer are not trying to deal with all that processing on the fly.

If your frame rates are off or variable then standardize them before you add then to a project.

This will result in way less stress on your editing computer and will enourmously cut down on the chances of crashes or glitches in the process because it all got a bit hard!

Export and Compression – A Note on YouTube

When you upload a video to just about any online platform you don’t control like YouTube or Instagram etc., be aware that your footage will be re-processed.

They do this for a number of reasons but the two main ones are:

  • A standardized set of video parameters across the platform to simply things for them.
  • Having higher to lower resolution versions of each video to enable a smooth streaming experience.

Just because you uploaded at 4K does not mean everyone is going to see your video at 4K.

The version they will see will depend on the speed of their internet connection and size of their display screen.

Having said that there is one unseen advantage to uploading at 4K.

This will trigger the use by YouTube of more recent and more advanced re-rendering models for your video and will maintin a higher level of quality for the lower resolution versions.

Audio Sync Issues – A Note on MP3

Changes in frame rates can lead to audio drift, where the audio goes slowly out of sync with visuals as the video progesses as I have already mentioned.

In addition to this direct result audio drift can also occur when the computer you are using is being pushed too hard to keep up with everything it has to do.

Too many resource heavy processes being called for at the same time can cause this to happen.

For example let’s say you have a cut from one clip to the next with a cross-fade transition in the middle.

That in itself is a pretty intensive action but then let’s say that those two clips are at different resolutions and different frame rates as well.

You win no prizes for guessing that there is a very good chance something is going to go wrong at that point!

Aside from that there is one other potential problem that is confined only to using MP3 audio files.

Usually when you add an audio file to the timeline it will play back at the speed determined by the editing software.

However in the case of certain (not all) MP3 files they have their own embedded time code which sometimes causes a conflict with the time code the software is working on.

The result will be out of sync audio or audio that slowly drifts out of sync over time.

The solution to this is to pre-process MP3 files through something like Handbrake to get them standardized before using them.

Software Resource Usage

Any upscaling or complex frame interpolations will consume significant system resources, potentially slowing down workflow.

Use these tools sparingly and prioritize capturing footage at desired resolutions and frame rates or pre-process these files before using them or as I said earlier, pre-process the footage separately.

A Word on Bitrates

The bitrate is the amount of digital information being used to represent each frame in a video and has direct bearing on the quality of the image you see.

Additionally when the bitrate is very high you have the ability to successfully apply more aggressive color correction and manipulation to the the video you are working on while maintaining quality.

Low bitrate footage cannot be adjusted too much or have effects applied without it all falling over!

The downside is that at very high bitrates you are dealing with files that are very large while the sheer amount of data can place a great deal of pressure on your editing computer.

The general rules are that you never want to try to increase the bitrate above what the files you have are already recorded at.

Essentially you are trying to make something out of nothing and there is no great advantage.

Conversely you can reduce the bitrate to bring your file sizes down and most editing software is pretty good at it.

Work out what you computer can handle and try to maintain the highest bitrate you can throughout the editing process.

Conclusion

Managing mixed resolutions and frame rates is a handy skill in video editing, requiring attention to detail and knowledge of editing software capabilities.

By maintaining consistency in footage specifications, employing advanced software features wisely and understanding the implications of mixed assets you can deliver high-quality content.

Resources

Handbrake

For standardizing frame rates, file parameters and file types.

Nero Video Upscaler AI

For upscaling content to higher resolutions with no loss of quality.


Original post Mixing Resolutions and Frame Rates in Video Editing

Panasonic AW-UE160: The Sleeper Hit of Professional PTZ Cameras


The Panasonic AW-UE160 is quietly redefining expectations for PTZ cameras. With a 1-inch 4K MOS sensor offering exceptional sensitivity, it handles low-light scenarios with ease—producing rich, sharp visuals that stand out. Whether you’re capturing live events or producing cinematic slow-motion sequences, the UE160’s high-speed frame rate support and precise pan-tilt-zoom control make it a powerful tool for serious content creators. When integrated with Panasonic’s robotic camera system, it delivers the fluid motion and versatility typically reserved for high-end broadcast setups.

Don’t underestimate what this camera can do for your next production. Watch the video for more:

Learn more about Panasonic below:


Why A Simple Streaming Runs on 8 YoloBoxes: A Success Story from William Kolacek


This article explains how William Kolacek, the founder of A Simple Streaming in March 2020, had one goal when creating his company: make professional, private live streaming easy and accessible for life’s most meaningful moments. Fast forward to today, William and his team have completed over 1,500 live streams and operate with eight YoloBox units, a decision that’s transformed their efficiency, scalability, and revenue. Before switching to YoloBox, William’s setup relied on cameras and PCs, which often included long setup times and limited mobility. That all changed when he discovered YoloBox in May 2020. After the first flawless streams, William quickly expanded his gear to include eight YoloBoxes, giving his team the flexibility to cover multiple events simultaneously and on the go. 

A Portable, Profitable Setup

The A Simple Streaming crew uses YoloBox with:

  • JVC GY-HM170 camera

  • Coman KX3636 tripod

  • Manfrotto 3137 tripod wheels

  • Marbero 167W battery

  • AT&T hotspot

This mobile-friendly rig lets them be fully operational in under 5 minutes without any wiring or PCs.

Favorite Features of YoloBox

William and his team rely on several YoloBox features that streamline their workflows:

  • SD card switching for pre-roll and highlight videos

  • Audio source selection for flexible mixing

  • Overlay graphics for branding and sponsorships

  • Built-in speed test for quick network checks

  • Fast, intuitive interface that anyone on the team can operate

William’s next move? YoloBox Pro, offers additional HDMI inputs and dual SD card video sources, making it ideal for expanding multi-cam coverage and live production flexibility.

Learn more about YoloLiv below:

/**/

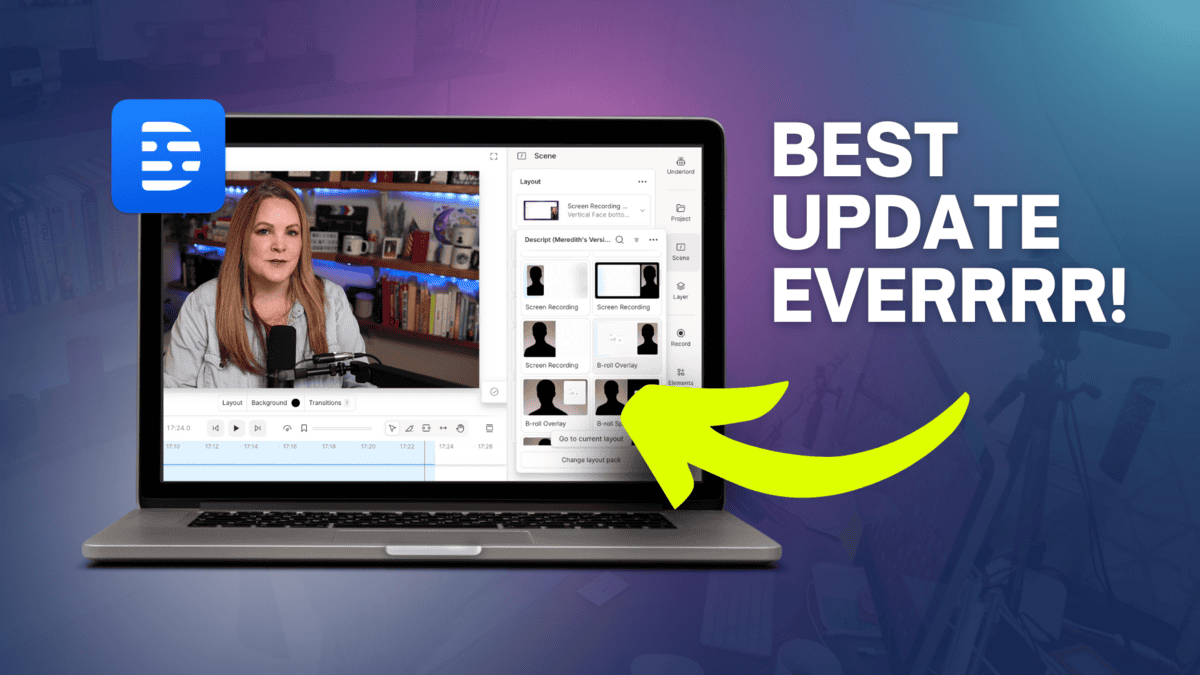
NEW Animated Layout Packs in Descript


Descript recently released new and updated layout packs, and it’s something I’ve been hoping for!

With the new layout packs and smart transitions, you can easily create smooth, polished videos in less time.

This is one of the best Descript updates I’ve seen in a long time and I’m loving it!

VIDEO: Title of YT Video

Some product links in this post are affiliate links, and I will be compensated when you purchase by clicking our links. Read my disclosure policy here.

Descript’s New Polished Layout Templates: A Game-Changer for Video Editing

As a content creator, I’m always on the lookout for tools that can streamline my workflow and enhance the quality of my videos. Today, I’m thrilled to share some exciting news: Descript has finally introduced polished layout templates, and they’re even better than I could have imagined! Let me walk you through this game-changing feature and show you how it can revolutionize your video editing process.

The Evolution of Descript’s Layouts

What Are Descript’s Animated Layout Packs?

Descript has just rolled out a collection of polished, animated layout packs that make video editing smoother and more professional than ever. These aren’t just the standard templates you might be used to-they come with built-in, seamless transitions and are designed to save you hours of manual tweaking. With just a click, you can add sophisticated animations to your timeline, instantly elevating the look and feel of your content.

Descript has always offered layout templates, but what’s new and revolutionary are the pre-built template packs with smooth, seamless transitions that polish your edit without requiring you to fiddle with advanced settings. Previously, creating these kinds of transitions was possible but time-consuming and clunky. Now, with just a click of a button, you can apply professional transitions directly to your timeline and adjust from there.

These layout packs are essentially collections of templates that share the same aesthetic or design feel. What would have taken 15-20 minutes to set up from scratch now happens instantly!

Why This Matters

  • Saves editing time
  • No need to build transitions manually
  • Easy to customize for your brand
  • Perfect for both horizontal and vertical video formats

The Power of One-Click Editing

What’s truly remarkable about these new templates is their ease of use. With just a single click, you can add a polished layout to your timeline and then make adjustments as needed. This is a massive improvement over the previous method, which was often clunky and time-consuming.

Understanding Scenes in Descript

If you’re new to Descript, scenes are one of the most important features — and one of the most misunderstood.

A scene is simply a signal that something new should happen visually in your video. You can create a scene by pressing the slash (/) key in your script. This adds a “signpost” that tells Descript when to insert a new layout or transition.

Once you’ve set your scenes, you can apply animated layouts from the new packs directly at those points. It’s as easy as picking a template, clicking to apply it, and customizing it from there.

What Are Scenes?

Scenes are one of the most powerful yet often misunderstood features in Descript. They act as signposts in your video, indicating where you want something different to happen in the frame.

Creating Scenes

Creating a scene is simple:

1. Position your cursor where you want the change to occur in your script.

2. Press the slash (/) key on your keyboard.

3. You’ll see a faint visual line appear on the timeline, marking the scene boundary.

Exploring the New Layout Templates

Now that we understand scenes, let’s dive into how to use these new layout templates effectively.

Applying a Template

1. Open the Scenes menu.

2. Navigate to Descript > Choose Layout.

3. Browse through the available layout packs.

4. Select the desired template.

Once applied, you’ll notice that Descript automatically creates the necessary transitions and animations, saving you valuable time and effort.

Customizing Your Layout

After applying a template, you can easily customize it to fit your needs:

1. Replace placeholder media with your own content.

2. Adjust the size and position of elements.

3. Modify cropping and other visual effects.

Smart Transitions: Another New Feature

Descript has also added Smart Transitions (currently in beta). These allow you to use smooth transitions with your own layouts without using Descript template packs. While I’ve found them slightly finicky during testing, they hold promise for even more customization options.

Branding Your Templates

One of the most exciting aspects of these new layout packs is the ability to customize them to match your brand.

Creating Your Own Branded Layout Pack

1. Duplicate an existing layout pack.

2. Replace background images and gradients with your own designs.

3. Update text elements with your preferred fonts and colors.

4. Add your logo to speaker layouts.

By following these steps, you can create a fully branded template pack that’s ready to use in all your future videos.

Branding Your Videos Has Never Been Easier

Updating backgrounds, gradients, and images across an entire layout pack is as simple as replacing a file. Want to swap out that default black-to-white gradient for your signature color? Just upload your new background, and it’s instantly applied to every relevant layout in the pack.

You can even add your logo to speaker layouts, animate its entrance, and fine-tune its placement within the intuitive Descript editor.

Why I Love Descript’s Animated Layout Packs

Descript’s new animated layout packs have truly transformed my editing process. They save me time, reduce frustration, and let me focus on what matters most: creating engaging, professional videos that reflect my brand. Whether you’re a seasoned editor or just starting out, these tools make it easy to look good, sound good, and feel confident on camera.

The ability to customize these templates to match my branding is particularly exciting. It means I can maintain a consistent look across all my videos while still benefiting from the time-saving features of these pre-designed layouts.

Conclusion

Descript‘s new polished layout templates are a game-changer for content creators. They offer a perfect balance of professional design and easy customization, allowing you to create stunning videos in less time than ever before.

If you’re a Descript user, I highly recommend exploring these new templates and seeing how they can enhance your video editing workflow. And if you’re new to Descript, there’s never been a better time to give it a try!

Remember, this is just one of many Descript tutorials I’ve created. If you want to learn more about making the most of this powerful software, be sure to check out my other videos and don’t forget to grab my updated Descript cheat sheet.

Don’t forget to check out my full Descript tutorial series and grab my updated Descript cheat sheet for even more tips and tricks.

Take your video editing to the next level- start using Descript‘s animated layout packs today, and let your creativity soar!

How to Grow a Small YouTube Channel FAST


How to grow a small YouTube channel fast?

In this video, fertility coach Sophie Byfield shares the strategies she used to grow her channel from 600 to 1,000 subscribers after joining Video Brand Academy.

Sophie dropped so many golden nuggets in this episode (especially the whole “niche within a niche” thing!!)

Learn Sophie’s “secret weapons” for consistent weekly video publishing, even as a busy entrepreneur and new mom.

Discover how to build an effective video content strategy by focusing on your top-performing topics. Get tips for outsourcing video editing to save time and stay consistent. Plus, find out how to leverage your TikTok audience to drive more views and subscribers on YouTube.

If you’re struggling to grow your small YouTube channel, this video has the proven tactics you need to see fast results. Implement Sophie’s methods and take your channel to 1,000 subscribers!

What Sophie Did Differently to Grow FAST With a Small Channel | Ep. 51

Some product links in this post are affiliate links, and I will be compensated when you purchase by clicking our links. Read my disclosure policy here.

Setting Goals and Staying Consistent

How to grow a small YouTube channel fast? When Sophie first started her YouTube channel, she didn’t set a specific goal for reaching 1,000 subscribers. Instead, her main focus was on consistency. She committed to publishing one long-form video every week, which drops every Tuesday morning. This consistency has been key to her growth and has helped her build a loyal audience.

After joining Video Brand Academy and implementing the strategies she learned, Sophie gained another 400 subscribers in just one month, reaching her 1,000 subscriber milestone by April.

Even more impressive? Her viewership numbers skyrocketed after hitting 1,000 subscribers, jumping from 2,000 to nearly 3,000 views in just four weeks.

While she initially struggled with slow growth, Sophie knew she needed to find a way to accelerate her progress. That’s when she decided to join the Video Brand Academy, which provided her with valuable insights and strategies to boost her channel’s performance.

Related: How to Grow on YouTube when you have 0 Subscribers | Ep. 36

The Power of Niche Within a Niche

One of the most important lessons Sophie learned on how to grow a small YouTube channel fast was the power of focusing on a niche within a niche. For her, this meant combining fertility and nutrition. Her most popular video topic has been fertility nutrition, which blends two highly sought-after subjects.

As a fertility coach, Sophie’s expertise revolves around helping women overcome obstacles to conception. Her YouTube content focuses on unlocking the missing pieces to fertility—whether that’s nutrition, mindset, or lifestyle changes. However, Sophie soon realized that to truly stand out in a competitive space, she needed to narrow her focus even further.

This led to her creating content around a very specific niche within the broader fertility space: fertility nutrition. Not only was this a unique blend of two high-demand topics—infertility and nutrition—but it also allowed Sophie to target a specific audience, ultimately leading to higher engagement and more subscribers.

By identifying this winning combination, she was able to create a series of videos that resonated with her audience and drove significant growth. This approach not only helped her gain subscribers but also increased her overall viewership.

Related: YouTube Growth Strategies for New Channels (under 1000 Subscribers) | Ep. 17

The Spiderweb Strategy

What was the game-changer for Sophie’s channel growth? Something I call the “spider web strategy.” A technique Sophie learned from the Video Brand Academy. This approach involves taking your most popular video and building out related content from there.

Here’s how it works:

1. Identify your most popular video topic (for Sophie, this was fertility nutrition)
2. Create additional videos that expand on different aspects of that popular topic
3. Link these videos together by referencing your other related content

By building this content web around her most successful topic, Sophie created a viewing pathway that kept viewers watching longer and subscribing more often. This strategy has been incredibly effective in keeping viewers engaged and encouraging them to watch more of her content. As a result, her viewership has skyrocketed since implementing this approach.

“Every single video, I point to another fertility nutrition video. So they keep watching longer and longer,” Sophie explained. This strategic approach not only increased her subscriber count but also dramatically boosted her overall viewership.

Streamlining the Content Creation Process

As a business owner and new mother, time management is crucial for Sophie. To maintain consistency with her weekly uploads, she had to find ways to streamline her content creation process. Here’s how she does it:

1. Outsourcing Video Editing

Sophie’s background as a video editor gave her a distinct advantage when it came to training her editor. One of the most significant time-savers has been outsourcing her video editing. Sophie found a virtual assistant who matches her style and understands her vision.

Here’s how she trained her:

  1. Provide both rough cut and final edited versions of a video so your editor can see the transformation
  2. Have them try editing a rough cut on their own
  3. Provide feedback and gradually refine the process
  4. Give clear guidelines and examples of your style
  5. They went through a process of feedback and adjustments until the VA understood her preferences.

While it requires some back-and-forth at the beginning, this investment pays off as your editor learns your preferences and style.

For Sophie, this process has been incredibly effective. She’s able to record her videos, send them off for editing, and trust that the final product aligns with her vision. Plus, with the flexibility of working with an editor, Sophie can stay ahead of her content schedule, ensuring that she always has videos ready to publish.

Now, Sophie can focus on planning and recording content while her assistant handles the editing, which has been a game-changer for her productivity.

2. Efficient Recording Process

To make the most of her recording time, Sophie follows these steps:

– She creates a rough outline with bullet points for each video.

– She aims to keep her raw footage to about 22 minutes for a 10-minute final video.

– Before recording, she listens to a “hype-up” song to get into the right mindset.

– She has a checklist of technical aspects to verify before hitting record (e.g., mic placement, camera settings).

Leveraging Other Platforms

While YouTube has been Sophie’s primary focus, she’s also found ways to use other platforms to support her channel growth:

TikTok Integration

With 40,000 followers on TikTok, Sophie has created a smart cross-platform strategy that fuels her YouTube growth. Sophie hosts a weekly live “Ask Me Anything” session on TikTok every Friday. This has been a great source of content ideas for her YouTube channel. When she sees questions repeated multiple times, she creates a long-form YouTube video addressing the topic in-depth.

To drive traffic from TikTok to YouTube, she:

– Mentions her YouTube channel during TikTok lives.

– Places her YouTube link as the first button in her TikTok bio.

– Creates TikTok content that teases more in-depth information available on her YouTube channel.

When she notices questions that come up repeatedly in these sessions, she creates in-depth YouTube videos addressing those topics.

Email Marketing

Sophie sends a newsletter to her email list every Tuesday, announcing her latest YouTube video. This helps drive views and engagement from her existing audience.

Turning YouTube Success Into Business Growth

While reaching monetization milestones on YouTube is exciting, Sophie’s primary focus has been on using the platform to grow her business. Here’s how she’s integrated YouTube into her business model:

1. Offering freebies: She creates downloadable resources mentioned in her videos, encouraging viewers to join her email list.

2. Promoting her automated webinar: She directs viewers to a webinar where they can learn more about her services.

3. Mentioning her paid community: Throughout her videos, she references her “Heal to Conceive” tribe, a paid membership community where she dives deeper into fertility topics.

By using YouTube as a trust-building platform, Sophie has been able to attract clients and grow her business organically.

Advice for New YouTubers on How to grow a small YouTube channel fast

Based on her experience, Sophie offers these top pieces of advice for those just starting their YouTube journey or feeling stuck:

1. Don’t give up: Consistency is key. Keep creating content and refining your approach.

2. Utilize shorts: Incorporate YouTube Shorts into your strategy to drive more traffic to your channel.

3. Be authentic: The videos where she speaks from the heart and shows up as her true self perform the best.

Remember, growing a YouTube channel takes time and effort, but with the right strategies and persistence, you can achieve your goals. Sophie is proof that it’s possible to go from zero to 1,000 subscribers in just nine months, and she’s excited to see where her channel goes from here.

Conclusion: Start Your YouTube Journey Today

Sophie’s journey to 1,000 subscribers is a testament to the power of consistency, strategic planning, and leveraging available resources. Whether you’re a fertility coach or in another niche, the key to YouTube growth is staying focused, creating valuable content, and building a system that works for you.

If you’re ready to take your YouTube channel to the next level, start by implementing some of these strategies today. Stay consistent, find your niche, and build your spiderweb of content. You might just see your subscriber count skyrocket too!

If you want to get some of the same strategies that she’s been using like the spiderweb strategy, for example, you can find it inside of Video Brand Academy along with a ton of other growth strategies beyond just doing basic keyword research.

Related: Consistent Sales of Your Online Course with YouTube

If you have an online business with a course, program, or any other kind of offer, and you’re not currently generating consistent sales on autopilot, I’d like to introduce you to the hands-off YouTube funnel that has made me over $20k on a $147 course! That way, you too can make consistent sales of your offer, with the beauty and simplicity of organic, evergreen traffic from YouTube! Start here with my free “AIT Method” training.