
The Friday Roundup – Filmora and Aiarty Release Latest Updates


User impressed with updates from Filmora and Aiarty.

Filmora 15 is Here… sorta

OK so we seem to have entered the old update season for video editing software and others at the moment.

CyberLink PowerDirector and Movavi have already made their move so this week it seems to be Filmora’s turn along with Aiarty which is an A.I video upscaling program I like to use!

So let’s kick off with Filmora but before I do let me make a few things very clear here because updating with Filmora can get a little complicated.

When you open you current version you will most likely be shown a splash screen offering a “Free” upgrade to version 15… yay!

Not so fast there tiger!

What it actually says is a free trial of the new version that you can test out and if you like it, buy the new one or if not, roll back the version 14.

Anyway rather than have me ramble on incoherently about it all check out the video below from Jacky.


What’s New in Filmora 15: AI Extend, Dynamic Captions & Source – Timeline Preview

OK so carrying on from Jacky’s slightly more restrained overview of the latest and greatest in Filmora 15 here’s another on the subject.

Jacky was basically covering the whole “how” of updating successfully without falling into any purchase traps you may not wanted to have fallen for.

This video is a straight run through of what has changed, what has been added and what has been enhanced.


Aiarty A.I. Video Upscaler Updates to Version 3.0
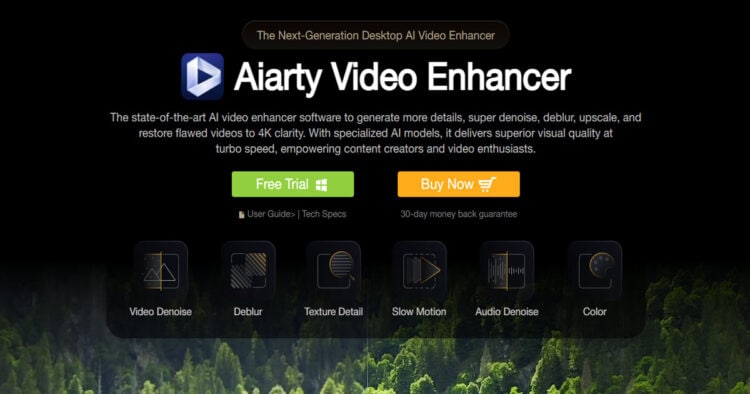
Aiarty review top image product shot.Aiarty review top image product shot.

So it is unsurprising that any of the current batch of A.I. video enhancers/upscalers are updated on the regular.

The reason for that comes down to the fact that the learning models they are based on are still constantly learning so it is kind of part of their DNA to keep getting better.

Although it is way more complicated than this, here’s how it works in overly simplified terms.

The software is exposed to an image which is standard definition, told what it is and guided to understand the overall context of the shapes it is “looking” at.

It is then exposed to exactly the same image only this time it is a high definition version.

The task for he A.I. is to learn what all the differences are, to learn what has changed and why as well as what has not changed… and why!

After examining millions of images, that’s how it learns and this is an unending process.

This week one of my favourite upscalers, Aiarty was updated and the testing I have done show a remarkable improvement over what was already a pretty solid video enhancer.


3 Shortcuts That Will Change How You Edit – PowerDirector

One of the first things we all should do once we get a little comfortable with whatever video editing software we are using is to learn some shortcuts.

Most people start of with the whole “point and click,” “drag and drop” process for editing and that’s fine to get started.

However it doesn’t take very long before some of those actions prove themselves to be very repetitive and before long… very tedious!

The answer to that is shortcuts so here are three of the most common ones that will serve you well shown in PowerDirector.

Remember, all software has them, you just need to find them.


Tips on How to Correct Shaky Video Footage in PowerDirector

Even if you are not using PowerDirector as you video editing software of choice, the video below outlines some very important points for when it comes to stabilizing video.

By all means check out the contents of the video but the important point is this.

No software can actually “see” your video and “know” what the stabilizer is actually supposed to be doing.

It an certainly take note of pixel positions and track them through time and make assumptions about how those pixels should move.

But at the end of the day they are still just assumptions.

If you find yourself with footage that needs to be stabilized then make sure you exhaust all possibilities with the software you have to get the best results.


How to Add and Edit Subtitles with AI – PowerDirector Tutorial

The tutorial below is one of the latest in a new series from the people at CyberLink covering most basic actions in PowerDirector.

Given the substantial changes to the interface over the past year these tutorials are a vital reference point for anyone working with the software.


Movavi Audio Editing Made Simple

Whilst I am fine adding this tutorial to the Friday Roundup I think there needs to be a little context added.

The basic tutorial is done in the Movavi Video Editor but it is based on a few things.

The first is that the audio in question would have to have been recorded in a relatively noise free environment so that not too much noise cancelling has to be used.

Anytime you start trying to incorporate heavy noise reduction on an audio track it can all go south very quickly.

The second is that the audio was recorded using some decent equipment to the degree that no equalization or compression was necessary.

I don’t mean super high end equipment here, just something a little beyond your phone mic or similar.


5 EQ Hacks Every DaVinci Resolve Editor Should Know

When presented with a fully professional EQ module in any software like the Fairlight page of DaVinci Resolve it is pretty easy to get a little overwhelmed.

The main problem I see with many newcomers to audio like this is that they start tweaking everything and before they know it, it all sounds terrible!

I personally learned to live with EQ adjustments by adopting the “less is more” approach coupled with the “keep it simple stupid” school of audio engineering!


How to Make Titles that Always Look Pro – DaVinci Resolve Motion GFX Tips

So the bottom line these days with most reasonably equipped video editing packages is that they are all going to offer pretty good titling ability.

Now that’s all well and good if you are already up to pace on designing graphics!

For the rest of us it is pretty much pointless because unless you know how to design titles, having all the tools doesn’t really advance you anywhere!

Here’s a great tutorial from Casey Faris on titling using DaVinci Resolve but the real value here is in the tips and tricks for title design itself rather than how to do it.


Discover more from The DIY Video Editor

Subscribe to get the latest posts sent to your email.
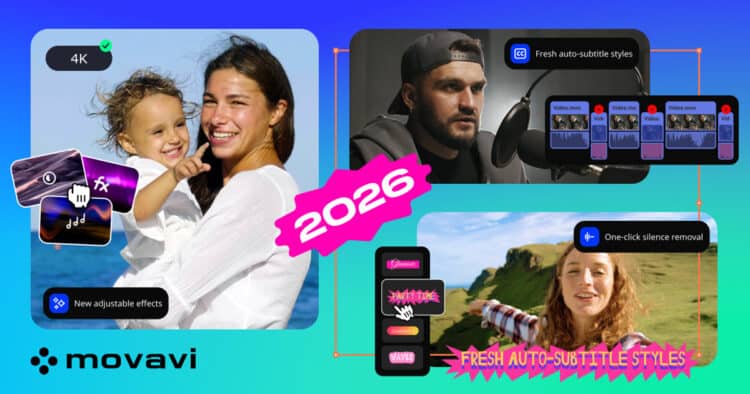
The Friday Roundup – Movavi Video Editor 2026 Released


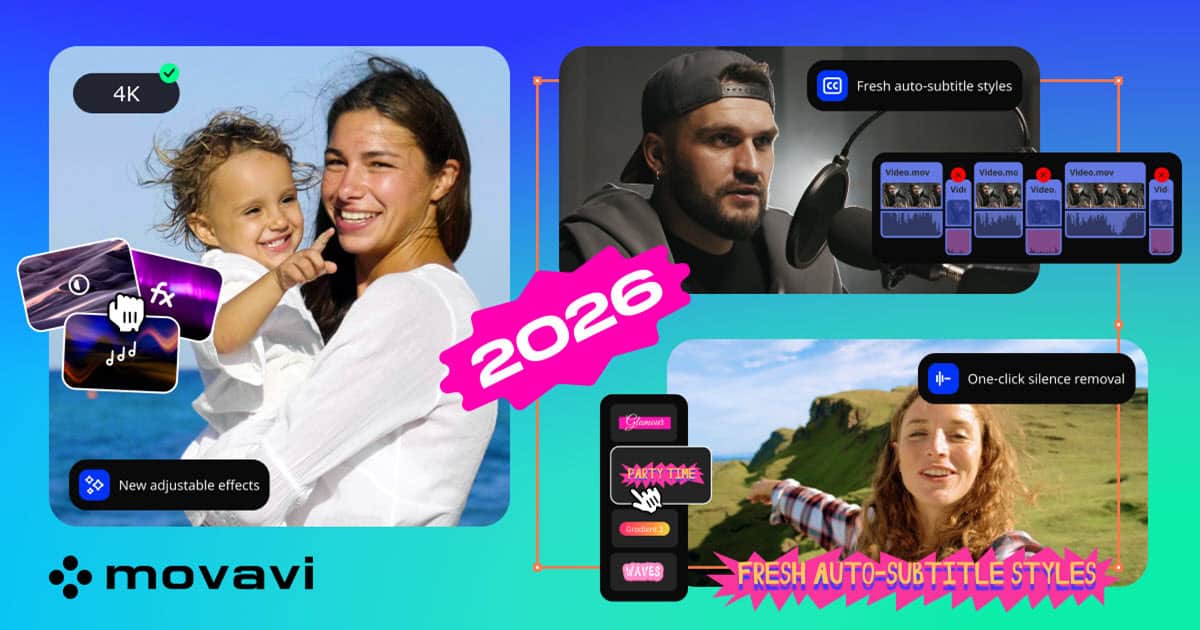
Movavi Video Editor 2026 product shot.Movavi Video Editor 2026 product shot.

Movavi Video Editor 2026 – New Tools and Effects for Faster Editing

The Movavi Video Editor is pretty much like the rest of the pack for when it comes to the development of the program and the timing of major updates.

They generally come out with security updates and bug fixes throughout the year and like the rest of the field, release a major update annually where the naming changes.

So right now we are experiencing the transition from Movavi Video Editor 2025 to Movavi Video Editor 2026 so let there be joy across the land!

Let’s get real with the understanding that no-one is really all that interested in the name change and that the important part is what has been changed in the software!

Here’s a rundown of those changes from the horse’s mouth and for my take on the program in general just click the link below.


This One YouTube Strategy Will Grow Your Channel Right Now

Ok so in all fairness to the original creators of articles I include in the Friday Roundup I prefer to keep their titles intact… no matter how clickbaity they are!

And let’s face it, this one is pretty clickbaity!

Anyhoo, all of that aside this is the first in a new series by the guys at Think Media aimed at two basic groups of YouTubers.

This first is YouTube hopefuls who actually haven’t started yet but want to get into the game and the second is those who have started a YouTube channel but have hit the wall so to speak.

By that I mean they have generated some modest growth and maybe attracted some subscribers but then everything has just stopped.

Either way, these days on youTube you pretty much have to have your ducks in a row before you can get any traction or maintain traction already achieved.

So here’s the deal.


4 Speed Tools To Level Up Your Videos – PowerDirector

Currently within PowerDirector there are about four separate tools or settings available to you for changing the speed of a clip or sequence.

Now there must be a reason for having four tools that effectively do the same thing right?

Well you know what? There is!

Check out the video below for a run through of all the ways you can apply speed changes in PowerDirector plus examples of each showing why you would use one over another in any given scenario.


How to Export Video in PowerDirector – Video Editing Basics

OK! So back in the day the options you needed to have a handle on for exporting your completed videos were pretty small.

In one sense that was a good thing because life was simple and uncomplicated!

In another sense that sometimes created problems in getting your final file into the correct format for whatever it was you were going to be doing with that file.

These days it is a whole new world with video editors like PowerDirector offering pretty much total control over every aspect of the export process and the parameters you are going to use.

That is also a bit of a “good news” “bad news” situation!

Good news because you have control, bad news because you have to know what you are doing and why you are doing it!

In the video below you can see a complete walk through of the file export process in PowerDirector explain what you need to do and why you would di it a particular way.

If it all seems a bit much and you really just want to take the lazy option then PowerDirector pretty much has you covered for that.

Just tell it what you intend to do with the final video file and it will automatically assess the material you have on the timeline and get you set up for the best possible quality export.


Top 4 Best AI Caption Video Editing Software for Beginners in 2025

This is a slightly different look at the video editing software selection process by taking the ability of the program to generate AI captions as the primary feature.

I am not sure that there are that many actual users out there that would be working with captions being the main feature but it is a unique way of approaching the subject.

In the video Jacky covers four separate editing programs that offer AI captions as a feature although let’s face it there are many more at this point in time!

My take on the four he mentions:

Filmora, yes. Perfectly capable offering good control over the resulting captions and very accurate.

CapCut, qualified yes. Same as for Filmora although offering slightly less as far as other editing and post production tools go as well as some privacy concerns.

Active Presenter, I have no idea! It is a streaming and capture program I have no experience with so I really couldn’t say.

Camtasia, no. Started of as the king of screen recorders many years ago and evolved into an editor through the pressures of the market changing. I personally feel it is way overpriced for what you get.


How Masks Work in Resolve – DaVinci Resolve for Beginners

After you have started out on your video editing journey you most likely will have learned a few basic things to get going.

Things like adding assets to the library and getting them organized, building your project on the timeline as well as working with and controlling individual tracks and well, the list goes on.

Once you have most of that under control probably one of the first of the more advanced skills you should get under your belt is masking.

Masking is one of the keys to moving towards having total control over the sort of things you can do in your videos.

In the video below you can see Casey run through most of the basic masking concepts in DaVinci Resolve but bear in mind that masking and masking control are pretty universal across almost all video editing programs.


DaVinci Resolve’s Fairlight Page for Complete Noobs

Originally DaVinci Resolve was a software designed for color correction and grading at a professional level.

However very early on the people at Blackmagic Design realized that the software would quickly go the way of the DoDo if it didn’t evolve into a more well rounded editing program.

They achieved that by utilizing two development strategies.

The first was to “in house” extend the capabilities if the existing program to allow for access to other editing tools.

You can see the results of that in the Edit Page, the Cut Page, the Color Page and the Deliver page.

For the addition of post production special effects and the ability to work with complex audio demands they turned to existing software such as Fusion and Fairlight.

Those programs were incorporated into the main program to complete the ability to deliver a total workflow.

The downside of that was that both the Fusion and Fairlight Pages are somewhat different to the rest of the program and can seem a little daunting to deal with.

In the video below Daniel Batal takes you on an end to end walk-through of the Fairlight page but mercifully keeps it aimed well and truly at the noobs level!


DaVinci Resolve 20 for Beginners – Edit Your First Video Step-by-Step

If you have followed along with any of my Friday Roundups for even a short amount of time you may have noticed I restrict my content to a smallish number of creators.

The reason for that is that over time I have burned through a bunch of creators and so-called experts on various topics.

Eventually some drop out on their own or some just annoy me because they start to drop quality in favor of getting clicks or subs or just plain selling stuff.

So for example my “go to” guys for DaVinci Resolve are:

  • Casey Faris for mainly color correction, grading and the fusion page.
  • Daniel Batal for general tutorials on all aspects of editing aimed specifically at newcomers or the inexperienced.
  • Jason Yadlovski for the Fairlight page and all things audio.

Now bear in mind each of these guys are very well versed in using all parts of Resolve, it’s just that those are the features they concentrate on.

In light of that this week Jason Yadlovski released a full step by step video demonstrating an entire editing process in Resolve and it is well worth taking a look at.


Discover more from The DIY Video Editor

Subscribe to get the latest posts sent to your email.
The Friday Roundup – Focus Basics and Camera Apps


50's cartoon guy stressing the importance of video focus.

Focus Basics for Video Production Beginners

Depth of Field, Focus Tools, and More

These days most of us are going to be shooting video on some kind of device that offers the ability to control the camera settings.

Just how much you can control those settings will depend on your device but remember this is no longer a “shooting with a phone or camera” discussion.

Nearly all mobile phones these days offer at least some degree of control over the basic settings that allow you to control focus and other parameters.

So given that fact, why would you want to do that in the first place?

Well I am glad you asked and so are the guys from Ground Control because they made a video all about it!


The Best Camera App for iPhone & Android? (Blackmagic Camera App Tutorial)

Just above this entry on the Friday Roundup I added a tutorial from the guys at Ground Control on the subject of focus.

In my intro to that tutorial video I mentioned that these days having a smart phone did not mean you didn’t have control over camera settings like you would with a camera.

Most phones these days offer at least basic control over the camera but if you really want to step it up to get the most you can out of your camera then a dedicated app can do that.

I used to use Open Camera for this purpose but about 6 months ago I switched to the Black Magic app instead.

Just like DaVinci resolve, it’s really, really free and really, really good!


5 AI Tools That Speed Up Video Editing – PowerDirector

Obviously the subject of the moment within the world of creating videos and video editing is the application of A.I models to various parts of the process.

Somehow along the way and yes, I am looking at you guys in the marketing department, most of this new stuff has been sort of lumped together in one big generic heap labelled, A.I.

The problem with that is that there is a very low level of differentiation occurring when it comes to the subject and what exactly is on offer here.

There are A.I. tools to complete tasks faster and more intelligently, there are tools for the creation of video assets, there are manipulation tools and there are specific tools for video upscaling and enhancement.

Each one of these may or may not be useful to you as a creator but when you pile them all together in one big bunch it becomes hard to work that out.

So in light of that here are 5 actual tools you can use in PowerDirector to help speed up and improve your workflow.


Keyboard Shortcuts for Faster Editing – PowerDirector Video Editing Basics

The folks at CyberLink have been steadily adding content to their “Basics” series of tutorial videos over the past few months.

If you are new to the program, want to see how it works or are just looking for a refresher then these are excellent for doing just that.

I wanted to highlight the one below that was added a few days ago because it covers a vital subject for any video editor.

The reality is that of course you can “point and click” or “drag and drop” your way to success using just about any video editing software.

However as most people discover very quickly, that becomes very tedious, very fast!

The real way to get fast and become efficient is to learn and use keyboard shortcuts as shown below.


One of the seemingly endless demands of creating videos for platforms like TikTok, Instagram and YouTube Shorts is the need to “fit in.”

Now by that I don’t mean you have to mindlessly follow what everyone else is doing or to even outright copy them!

What I mean is that audiences on those platform start to fall into certain expectations of how things are supposed to look is general sense and by utilizing those trends you can retain viewers.

The styles on those platforms are evolving fast and it helps to keep up!


15 Must-Try Transitions in Filmora – From Cinematic to Pro-Level Edits

Back in the day when it came to the subject of transitions there were two universal truths.

The first was that the marketing department of any given video editing software company was going to absolutely guarantee your successful path to cinematic greatness through the use of their packaged transitions.

The second was that the actual use of those aforementioned transitions in your edits would absolutely guarantee your status as a complete nerdling amateur!

However over time things have changed and the range of transitions being offered these days is not only way more sophisticated but also far more adjustable to a given scenario.

Here are a few on offer in Filmora.


Wondershare Filmora 14 AI Video Generator Tutorial For Beginners

There is a lot being said at the moment about some of the A.I. video generators being offered inside various software packages.

My take on it all so far is to use there sorts of things as tools for production rather than end-to-end solutions to make complete videos.

To me it’s not just the cost involved but that reality that right now an A.I. sequence of any kind that goes too long starts to look more and more artificial and less and less intelligent!

Here’s Jacky’s take on the offerings from Filmora.


How to Practice Editing as a Resolve Beginner

One mistake I see a lot of beginners make when they start out is to grab a tutorial on a particular technique they need at that point in time.

They study the technique then apply what they learned to whatever they were working on and then move on in life as if nothing ever happened!

Inevitably they will hit the need for that exact technique again so they go back and find the original tutorial, restudy and apply.

What they don’t realize is that they are overlooking a great opportunity to actually learn editing rather than having to constantly do refreshers on things they have done before.

The correct sequence is to find something you need to know, learn how to do it, do it, then do it again and again and again until you “know” it.

Editing in any software is very much like when you learned to tie your own shoe laces.

You learned how to do it, carried out the action, re-learned, repeated the action until you had repeated that action over and over so many times you could do it without thinking.

Editing can be just like that, the key is the repetition of those basic actions until they are second nature.


Discover more from The DIY Video Editor

Subscribe to get the latest posts sent to your email.

The Friday Roundup – HSL Color Control in PowerDirector


Businessman shocked at the complexity of software.

The Color Grading Tool You’ve Been Waiting For – PowerDirector

A few years back now the folks at CyberLink were receiving more and more demands from users to extend the capabilities of PowerDirector in certain ways.

The problem for them at the time was that introducing new features on top of the existing platform was twofold.

First it would complicate the user interface more than it already was, making it quite daunting for any newcomer.

Their marketing for new users was aimed at “ease of learning and use” so presenting those newbies with an interface that resembled the space shuttle controls was not a good way to go!

The second problem was that the addition of new features into existing architecture almost always meant more computer resources being called on at any given time.

Again, not a good look!

Their solution at the time was to spin off some of those features into stand alone programs hence the creation of ColorDirector, AudioDirector etc.

Those that wanted all the bells and whistles could have it while the core program remained relatively clutter free.

About two years ago CyberLink completely rewrote the software to keep up with more modern computing and operating system practices.

As a result they have been able to quietly port some of those advanced features across to the main program without any problem.

HSL controls in the color correction module are an example of this which you can see in the video below.


Editing Captions Was Never Easier – PowerDirector

PowerDirector has always been pretty much ahead of the pack when it came to titles and subtitling for videos.

Over the years they were the first to add very fine control not just at the “title’ or “word” level but also to the point of being able to control and design individual letters in a title.

Recently they added even more features to this part of the program and in the video below Maliek takes you through some of the new settings available to users.


New Feature Overview for Adobe Premiere Elements 2026

Adobe Premiere Elements was updated for 2026 a few months back now and they have generally tidied things up and added a few new features.

In the video below you can take a look at some of the new stuff and get a feel for where the software stands at the moment.

Premiere Elements is one video editing software product that I still recommend that comes from Adobe.

I say that because it can still be purchased as a standalone product with full access and updates without having to descend into the dark world of Adobe in general!


Transition Ideas for Street Style – Filmora

So if the actual content being created in this tutorial video is somewhat outside of what you would be doing then… check it out anyway!

The reason I say that is because the content of many of these video tutorials aiming at a particular style or genre is kind of irrelevant to the techniques being shown.

This one concentrates on some effects and transitions as related to a subject but there is no reason why you couldn’t use them somewhere else.


AI Smart Cutout vs Green Screen – Best Background Removal in Filmora

From the outside it would appear that the new breed of A.I. driven background removers and cut out tools have completely replaced using green screen.

However if you take a closer look at the subject I don’t really think we are quite at that point yet.

There are definitely times when A.I. can do a good job and if your budget falls short of the average Hollywood blockbuster then in that case it’s great!

The problem remains that if the footage you are dealing with falls outside of, or at least is close to the edge of what the A.I. has been trained on, things can go south.

In the video below you can see some good examples of situations where you may want to choose one over the other.


6 Canva AI Video Tools (Create Videos Faster)

It’s been a while since I actually went over to Canva myself to check out what’s been going on over there.

If you check out the video below from the guys at Primal Video you will see it turns out quite a lot has been going on!

I don’t use Canva all that much myself because the features it offers are not really the things I need for my particular projects.

However I do know that there are a bunch of people who use it on the regular and maybe you could too.


Corel VideoStudio Discontinues Updates…ish?

I came across this post from Gripps this week regarding the continued lack of updates to Corel VideoStudio.

The reality is that VideoStudio hasn’t been updated for a couple of years now and that would suggest that the software has been pretty much abandoned by Corel at this point.

Of course there has been no actual announcement by Corel on the subject so although I think Gripps is correct in his assumption, it is still just an assumption.

Sadly I think that trying to keep up with development in the modern age of video editing for Corel has proven to be a game of diminishing returns they can no longer support.

For most of the major software developers in the world of video editing, the introduction of A.I. into the mix plus Windows changes meant the only way forward was with a complete overhaul of existing code.

For the moment VideoStudio still runs perfectly fine on most modern computers but if you are going to be editing in the future then now would probably be a good time to identify an alternative.


DaVinci Resolve’s NEW Edit Page… for NOOBS!

Unless you are operating at the Hollywood blockbuster level of usage for DaVinci Resolve you are probably using it the same as me.

I use the Edit page for cutting, asset additions and most effects, the Color Page for corrections, the Fairlight Page for audio and finally the Deliver Page for rendering.

Truth be told I spend the vast majority of my time in either the Edit Page or the Color Page and for the others, I am just passing through.

So given the recent updates to Resolve it is well worth the time to sit back and go over the Edit Page especially to make sure everything is where you expect it to be.


How to Color Match Shots in DaVinci Resolve for Beginners

A particularly handy skill to get under your belt for video editing these days is being able to match different shots from different sources.

This can also include situations where the actual source is the same but the lighting conditions at the time were completely different.

If you think of the average “event” video like a birthday party, a wedding or just a get together with friends then it is quite common that you will be able to access footage from a bunch of people.

In itself that make piecing something cool together pretty easy but that convenience can quickly be lost when the color temperatures, exposures and device specific difference are very obvious.

That’s what I mean when I say color matching is handy skill to have because if you can quickly get everything looking consistent, the hard part is over.


Discover more from The DIY Video Editor

Subscribe to get the latest posts sent to your email.

The Friday Roundup – Video Editing Basics & A.I. Video Generators


Wizard boy learning video editing basics.

Master the Basics: The Secret to Becoming a Better Video Editor

Generally speaking Daniel Batal is one of my “go to” guys for video editing in DaVinci Resolve.

However this week he put out something a little different and very much well worth taking the time to watch.

Before I go any further let’s get something clear here.

This is a livestream and it goes for just over two hours!

So when I say take the time to watch, I mean a lot more time than for just a quick tips video.

In this livestream he doesn’t really get into Resolve specifically although he uses it to demonstrate things.

The actual topic of the presentation is just video editing in general.

It covers how to lift your game as an editor, regardless of what software you are using.


Top 5 AI Video Generators in 2025

OK, so the reality of the current state of video editing is that the news cycles are pretty much dominated by the latest and greatest in A.I.

I also think that will be the case for a while now, so we may have to get used to it.

As I have said before, I have no problem with A.I. effects and generators as long as they are actually useful.

One of the downsides to the subject is that it is a marketer’s dream come true. It provides all sorts of whizz bang visuals that can be used to lure customers in.

So in light of that, here’s a round up of some of the better A.I. video generators in use and how they perform.

The important question you really have to keep asking yourself with this stuff is, “Would I actually use it, and for what?”


The Best AI Masking Tool for Video Editing – PowerDirector

When masking came to consumer level video editing software there was much rejoicing in the land.

However that rejoicing was a little short-lived once we all worked out the limitations of masking in general.

That was because we were working with video and not still images. In our world, stuff moved.

Our only option was to manually keyframe the masks moving as well, and that was very tedious!

Then along came automated motion tracking, which allowed us to attach a mask to an automatically created motion path… woo hoo!

OK, although a step forward the limitations were still real.

Automatic motion tracking had its problems. Often it would “lose” the thing you were trying to track if there was insufficient visual separation between the subject and other elements in the image.

At least at that point it was more a corrective action rather than an endless keyframing action.

This all brings us to today where things have really taken a step forward with A.I.

The original automated motion tracking still exists, but now A.I. has been added.

The A.I. module is actually “watching” the video and understanding what all the elements are.

Therefore, the tracking is much more accurate.

Here’s a look at it in PowerDirector.


Edit Faster With Ripple Editing – PowerDirector

If you are new to PowerDirector or, in fact, new to video editing in general, then there are a few important things you need to know about the timeline.

One of these is the concept of what an asset on the timeline should do when you cut it, extend it, or move it.

By that, I mean what should happen to its position and, more importantly, what should happen to all the other assets on that timeline.

Should they move with that asset, should they stay in place, or should only the assets on the same track move? Or should they stay in place and everything else move!

Here’s an intro to ripple editing in PowerDirector but it applies to all video editing software.


AI Smart Cutout – Remove Backgrounds Fast in Filmora

OK, so this is one of the A.I. driven effects that has been introduced into Filmora this year which I actually can get on board with.

In fact, I use it myself quite often as in most cases (not all) it works just as well as green screen. This is achieved without having to faff around with an actual green screen.

You can see the feature demonstrated in the video below but bear in mind this effect is not perfect.

It is very, very good under most circumstances but remember even these A.I. effects are going to have their limitations.

A subject that blends with a background or lacks sufficient contrast will make it pretty hard for the software to work 100% of the time.

However, if you shoot with relatively good light, to get a decent image in the video, then you should be good to go.


How to Color Grade in CapCut – In Depth Guide

Although CapCut could accurately be described as a very simple or basic video editing solution, there are still plenty of tools inside for working on your videos.

When you compare the color correction and grading tools to a professional suite like DaVinci Resolve, it would be easy to dismiss it. However, in reality, there is a whole bunch of stuff you can control.

In the video below, the guys from Content Creators walk through a few complete color grading sequences. They show what is possible if you know your way around the interface.


How He Faked Celebrities in a Podcast

This is a demo from a guy called Gripps, who I used to refer to back in the day when Corel VideoStudio was active.

Anyhoo in this video he demonstrates a Voice Cloning feature in NoteGPT.

Now I don’t generally deal with podcasts and I don’t generally deal in celebrity cloning!

However, what I have used this service for is to clone my own voice. Then I use that clone of me in my own videos, using other software, the same way he does in the video.

Pretty handy for when I don’t feel like setting up a mike and recording things.


Easy Ways to Enhance ANY Shot in DaVinci Resolve!

Some good tips here from Casey Faris on improving your shots in DaVinci Resolve.

Given the amount of tools you have within the software to do this, it is very easy to go overboard. You could end up with a hot mess by the time you finish.

Heaven know the number of times I have done that myself!

The key message Casey is talking about here is that the key to all of this is to take what is there and very subtly improve it.

No heroics or drastic measures, just a little tweaking to bring out the best.


Discover more from The DIY Video Editor

Subscribe to get the latest posts sent to your email.

Top Videoguys Tips to Ensure a Successful Livestream Event


Join us for this episode of Videoguys where we’ve put together six essential tips to help you create smooth, engaging broadcasts that keep your audience tuned in. From preparing content in advance and setting up video backups to isolating your NDI network, these strategies will help you avoid common pitfalls like weak Wi-Fi, unstable power, or short cables.

By focusing on preparation, redundancy, and smart workflows, you’ll deliver livestreams that not only run seamlessly but also build credibility and lasting audience engagement.

Watch the full webinar to explore all six tips and take your productions to the next level:

See more video and tutorials 🞂 http://www.videoguys.com

The Friday Roundup – Editing Trailers and Android Editing Tips


50's guy proud of this new trailer.

Why You Need to Cut Audio Before Picture – Trailer Editing Tutorial

Movie trailers are by definition just short form content so it makes sense to look at them as if they are just he #shorts, Reels, Stories or whatever of the professional movie world.

In fact I guess they are the original short form videos and unlike our short content they enjoy a few advantages that we can certainly learn from.

First of all they are put together by specialist teams consisting of professional editors, audio mixers and marketing teams.

They are laser focused because they have to be, have big budgets and use market feedback to ultimately tweak them into a powerful medium for creating interest.

Now I am not saying that all your videos should suddenly start lookin like an Indiana Jones trailer!

But what I am saying is that these guys know what they are doing and are worth watching to see how they go about the process.


How to Edit Videos on Android (Complete VN Video Editor Tutorial 2025)

OK! Fair warning here.

I personally do not ever edit videos on my phone or on any mobile device of any description.

I find it fiddly, frustrating and ultimately I end up looking like grandpa Simpson yelling at those pesky teenagers standing on the corner.

Someone who actually does know how to do this without turning into grumpy old man is Justin from Primal Video.

So, if you are hellbent on using a phone to edit videos and are using an Android device then this is the video for you!


AI Image-to-Video in Filmora – VEO 3 Quality + Social Media Templates

I was blurbing (ranting?) on about AI the other day in a post somewhere pointing out that not all AI is actually useful at the end of the day.

Somewhere mid blurb I mentioned that Filmora is now integrated with Google’s VEO 3 AI video generator.

Anyway in the video below you can actually see how that has been implemented and the sort of project you can do with it.

Before you get all crazy on it we need to discuss the price of this because you will notice in the demo that Filmora uses a “token” system to access external services like this.

So the bottom line is that Wondershare will be using an API direct to VEO 3 to generate the videos.

Because they are a “bulk” user they will be getting a price for using the service that you and I will not otherwise have access to as individual users.

So in that sense you will be using the service at a reduced cost than if you were to directly access it yourself… so that’s good right!


iPhone 17 Video Tips & Presets – Filmora AI Editing

These are some pretty common sense settings you should be adjusting when using any phone for video, not just a new iPhone!

Of all the settings they talk about the one that gets glossed over very fast in the video is one you absolutely must change.

That setting is called “Auto FPS.”

What this setting does is change the frame rate automatically depending on the available light or other factors.

Generally you get two undesirable results from this if your shooting conditions start to stress out the camera.

The first of these is that there will be a noticeable “jump” in the overall brightness of the video being recorded as the phone changes the frame rate to compensate for changed lighting.

The second will be that your video files may be recorded with a variable frame rate which can cause problems later in the editing stage especially if you are applying effects.

Variable frame rate can also result in degraded representation of motion.

Remember most of these problems will not be particularly obvious as you play back on the device itself.

It is not until you start editing that they can become apparent and at that point it is a little too late.


CyberLink have released their 2026 version of PowerDirector which for the uninitiated, may seem a tad confusing.

So here’s the deal.

PowerDirector can be purchased as a standalone program that you get to install and keep on your computer forever, so that’s what they are referring to when they say PowerDirector 2026.

If you have that version then over the next three or four years you will will receive bug fixes and security updates for free.

You will not receive feature updates or additions nor will they be available to you.

These will all be packaged into the next version update at the end of the year and at that time you can choose to pay a discounted price to update or keep using the software as is.

On the other hand the PowerDirector 365 version is a subscription model and all updates roll out as soon as they are available.

This is regardless as to whether they are bug fixes, security patches, new or improved features, added assets or whatever.

So this year PowerDirector is really pushing the AI stuff as you can see in the video they have released as a promo this week.

I don’t really care about that stuff, it is still an awesome video editor despite the A.I bandwagon jumping their marketing department is doing!


Suggestions for using Pan and Zoom in PowerDirector

One of the ways in which most beginner editors are introduced to Pan and Zoom is to apply some kind of motion to a still image in a method referred to as the Ken Burns effect.

This was the technique the director Ken Burns applied to the still images he had available when he created his definitive documentary on the American Civil war.

Having very limited motion footage available due to budget restraints he used the wealth of still images accessible from the era to create his visuals.

To those still images he applied very subtle faux camera motion effects using pan and zoom to provide at least some kind of motion to otherwise static subjects.

Used intelligently it can be a great tool but like most editing tools, the operative word here is “intelligently!”

An often overlooked way to use the Pan and Zoom feature is a little more fiddly to apply but can have a great effect on the final product.

The method I am referring to is to use it to “reframe” the shots you have at your disposal.

Using Pan and Zoom used to be quite limited but these days with 4K video available the ability to zoom in without loss of quality is quite good.

Here’s a look at it in action.


Better Audio in DaVinci Resolve for Beginners! – Clear Dialogue, Mixing, Music & More!

I don’t actually use DaVinci Resolve for the meat and potatoes part of my editing workflow.

The reason for that is that It’s kind of like the opposite of taking a knife to a gunfight only in this case it’s like taking a Sherman tank to a knife fight!

For what I do and the videos I produce, Resolve is a bit beyond overkill.

What I do use it for is to get the color of my footage corrected, the audio cleaned up to the standard of the platform it will be going on as well as any other parameters like resolution and frame rate.

In the video below there is a great little tutorial on using some of the most accessible audio tools in Resolve to get your voice sounding perfect.

And just before you check it out, bear in mind that the entire tutorial is going to be carried out in the Edit Page without dealing with the complication of the Fairlight Page.


Step-by-Step Guide to EQ in DaVinci Resolve Fairlight

So you will notice that in the video tutorial above this one there is a complete walk through of polishing up a vocal track in DaVinci Resolve.

The key aspect of that video is that it is carried out entirely independent of the Fairlight Page using only the available tools in the Edit Page.

That’s all perfectly fine but there is one point in there where the EQ of the audio is being adjusted using the little 4 band graphic equalizer on the Edit Page.

That’s all fine for what it is but if there is a skill I would advise you to improve as a “next step,” that would be learning how to EQ using the big guns.


Discover more from The DIY Video Editor

Subscribe to get the latest posts sent to your email.

The Friday Roundup – Clipchamp and Product Videos


Mistakenly hired a chimp for editing.

Microsoft Clipchamp Tutorial for Beginners – A Complete Guide

I very often get people asking me to recommend a video editing program that would be suitable for those with very basic requirements.

I have to admit I keep forgetting about Clipchamp!

If you are very new to editing or want to see what editing is like then Clipchamp is absolutely a program you should check out.

For starters it is free although there is a paid version if you want to use some more advanced stuff, but at the end of the day it is a great intro to the editing process.

It is laid out in a similar manner to most of the common more advanced editors so from the start you can get used to how they work.

Here’s a complete look at it from the guys at Primal Video.


How to Shoot and Edit Product Videos (Beginner’s Guide)

A lot of people tend to scroll past video tutorials on YouTube and other platforms when the title mentions something like “Product Videos” or similar.

I don’t really blame them because it does tend to suggest some kind of strictly commercial viewpoint or at least a very narrow range of application.

Here’s why I think that’s wrong and causes them to miss out on some great tips.

Think of it this way.

A video highlighting or featuring a product is actually a video highlighting or featuring a thing or an object and that’s about all.

A better naming of many of these tutorials would be “How to shoot and edit a video that features an object!”

There are some good tips in this one for shooting static object and getting them looking good.


5 Audio Hacks to Clean Up Your Videos – PowerDirector

These are five of the current audio tools you can use in PowerDirector to clean up an audio track.

I personally don’t use the Speech Enhancement one all that much although I do check it out on occasion if I get material with poor voice recording.

If you are faced with a pretty terrible voice track then it can do a reasonable job of cleaning it up but I just think that getting audio right at the shooting stage is far better.

However I regularly use the Smart Fit tool to quickly get background music to run for the duration of the project.

That one is a real timesaver and ever since it was introduced I have used it over and over.

The other one I always use is the Normalization feature and I would recommend everyone to use that especially if you are uploading to YouTube.

There is probably nothing that will cause an audience to click away faster than a video that appears and they have to adjust their volume… users HATE THAT!


How to Layer Multiple Videos in PowerDirector

One of the current “darlings” of the new AI tools a lot of video editing software is now carrying is the ability to remove backgrounds.

Previously this could only really be done using green screen and let’s face it, no-one had the time to mask that much material!

Anyway, that ability to remove backgrounds relatively cleanly has introduced the option of being able to layer multiple videos on the timeline.

Of course there is one old adage as far as this goes that still holds very much true, “Just because you can, doesn’t mean you should!”

So here’s a look at some of the pitfalls and problems you may run into carrying out this process demoed in PowerDirector.


Remove Vocals from Your Videos with Filmora AI

This is a poorly disguised promo piece from Wondershare for their Filmora video editor.

So yes, it is a good editor and I recommend it… blah, blah, blah!

The reason I have added this item is that it gives a pretty good look at their AI vocal remover.

It can take the average music track, remove the vocals and leave you with just the backing music.

From my testing it is very accurate.


This Video Simplifies Color Grading in DaVinci Resolve

This is a complete, start to finish tutorial from Casey Faris on Color Grading in DaVinci Resolve.

In the tutorial Casey pretty much covers everything you need to know to achieve a successful color grade.

Not only does he teach all of that but the lesson also includes a bunch of free media that you can use to follow along with him.

Even if your projects don’t really need color grading as such, this is a truly excellent walkthrough of a bunch of tools and settings that you will find in the color page.


What’s New in DaVinci Resolve 20.2

This is the official release video from Blackmagic Design for the latest version of DaVinci Resolve which is 20.2.

There will be more videos coming in the next few weeks as everyone works their way through it all but this is the complete list.

A lot of it seems to be related to workflow changes aimed at greater flexibility and control.

From my perspective as a very basic user I don’t think there is much of interest for me but if you are using Resolve you may want to take a look at what has changed.


Discover more from The DIY Video Editor

Subscribe to get the latest posts sent to your email.

Script vs Teleprompter vs Outline – THE Method That Feels Natural


Struggling to look natural on camera?

You’re not alone!

I’ve tried word-for-word scripts, teleprompters, and winging it, each with its own challenges.

I can remember when my kids were little, and I’d be recording a YouTube video – my youngest would say, “why do you keep saying the same sentence over and over again?”

She looked at me like I was nuts…

We all know that word-for-word scripts can make you sound like a robot on camera…

But teleprompters? They make you look like you’re auditioning for the evening news.
 
(or at least it feels that way sometimes)

In my 10 years on YouTube, I’ve learned a thing or two about feeling comfortable and speaking naturally on camera without a word-for-word script or teleprompter.

In this video, I reveal the hybrid scripting method that helps me stay confident and connect with my audience.

Discover how to record YouTube videos that feel authentic, save editing time, and actually make you proud to hit publish.

VIDEO: Script vs Teleprompter vs Outline – THE Method That Feels Natural | Ep. 67

Some product links in this post are affiliate links, and I will be compensated when you purchase by clicking our links. Read my disclosure policy here.

Why Word-for-Word Scripts Don’t Work

The False Sense of Security

In my early days of creating YouTube videos, I leaned on word-for-word scripts. They felt like a safety net: if every sentence was written out, I couldn’t possibly forget something important or stumble over my words. But over time, I realized this approach came with big downsides.

Scripts made me feel robotic. Instead of speaking naturally, I was acting. Because I wanted everything to be perfect, I kept re-recording sentences again and again. I remember one day when my daughter asked why I was repeating the same line over and over, it hit me that I wasn’t actually communicating, I was just performing.

That was the turning point. A tightly scripted video might be organized, but it often sacrifices authenticity and connection.

Why Scripts Can Kill Your Delivery

  • They make you overly focused on perfection
  • They slow down recording because mistakes feel bigger
  • They force you to “act” instead of converse
  • They increase editing time because every slip feels like a failure

While scripts kept me safe, they also kept me stiff. And stiff doesn’t connect with viewers.

Related: Record Polished Videos without Memorizing Anything or Using a Teleprompter | Ep. 47

My Experience with Teleprompters

The Hype vs. Reality

At one point, I decided to try a teleprompter. The idea of looking straight into the lens while reading my script seemed like the perfect solution. And to be fair, teleprompters did help me in some ways. But the reality wasn’t as magical as I expected.

Setting up a teleprompter requires constant adjustment, the angle, the distance, the font size, even the scrolling speed. Even once you get it working, sounding natural while reading takes serious practice. Unless you’re already trained in broadcasting, your delivery can come off forced and unnatural.

Related: Teleprompter Tips: Techniques for YouTube Creators

How I Actually Use It Now

The real game-changer for me wasn’t reading scripts on a teleprompter. It was using the teleprompter as a second monitor. This lets me:

  • Keep outlines or notes in front of me
  • Look at participants during Zoom calls while maintaining eye contact with the camera
  • Create a more conversational, connected feel

Instead of leaning on the teleprompter as a crutch, I now use it as a tool to support a more natural workflow.

Winging It: Why Going Script-Free Didn’t Work for Me

On the opposite end of the spectrum, I experimented with hitting record without any notes or outline. While this worked occasionally, it usually led to long, rambling videos. I found myself saying the best things near the end of the recording, which meant I had to re-record entire sections and spend way too much time editing.

Recording without structure felt freeing in the moment, but it made the editing process a nightmare. It wasn’t sustainable for consistent YouTube content creation.

The Hybrid Method: The Best of Both Worlds

After trying everything, I landed on what I call the hybrid method, a structured yet flexible approach to YouTube video scripting. This has completely changed the way I record and made the process more enjoyable.

What’s Scripted

  • The Hook: My opening lines are always scripted. This ensures I grab attention right away and avoid rambling.
  • Transitions: I script key segues between major points so the flow feels smooth.
  • The Call-to-Action: I write this word-for-word so I don’t miss the opportunity to direct viewers to the next step.

What’s Flexible

  • Main Content: I outline bullet points instead of writing full sentences.
  • Stories and Examples: I allow myself to share these naturally as they come up.
  • Spontaneous Thoughts: I leave space for personality and in-the-moment ideas.

This balance gives me structure without locking me into a stiff performance.

Why It Works

The hybrid method helps me:

  • Stay on track without sounding scripted
  • Reduce editing time since I avoid rambling
  • Deliver content that feels conversational and authentic
  • Create videos that connect with viewers while still feeling polished

How to Implement the Hybrid Method

Step 1: Create Your Outline

Start with a simple structure:

  1. Script your opening hook word-for-word
  2. Write bullet points for your main ideas
  3. Script key transitions between sections
  4. End with a scripted call-to-action

Step 2: Use Tools Wisely

If you use a teleprompter, treat it as a support tool, not a crutch. Keep your outline visible, but don’t rely on it for word-for-word reading.

Step 3: Focus on Confidence

Your delivery matters more than your script. The more comfortable you feel, the less cringey your videos will be. For me, confidence comes from having just enough structure to guide me without boxing me in.

Building On-Camera Confidence

Confidence doesn’t appear overnight, it’s built through practice and small wins. The more you record, the more comfortable you’ll become. Over time, you’ll notice that your natural delivery improves, even when you don’t have everything scripted.

Remember: your viewers want connection, not perfection. Mistakes, pauses, and personality make you relatable.

Related: How to Talk and Feel Confident on Camera to a Camera: Beginner Tips | Ep. 29

Conclusion

Whether you use a script, a teleprompter, or an outline, the goal isn’t perfection, it’s connection. For me, a hybrid method of YouTube video scripting has unlocked the best of both worlds: structure that keeps me focused, and freedom that makes me sound authentic.

The sweet spot lies in the hybrid method, a mix of structure and flexibility that keeps you authentic while ensuring your message lands clearly. By scripting your hook, transitions, and call-to-action, while leaving room for natural delivery, you’ll create videos that feel confident, engaging, and anything but cringey.

Your viewers don’t need you to be perfect. They need you to be clear, genuine, and consistent. Once you find your rhythm, you’ll not only feel better on camera, you’ll also build a stronger connection with your audience and grow your channel with videos you’re proud to share.

If you want more tips on camera confidence, video setup, scripting, and editing, check out my Crush It on Camera series, where I share the exact gear and strategies I use. And don’t forget to grab the downloadable Crush It on Camera guide to make recording videos easier than ever.

Related: Consistent Sales of Your Online Course with YouTube

If you have an online business with a course, program, or any other kind of offer, and you’re not currently generating consistent sales on autopilot, I’d like to introduce you to the hands off youtube funnel that has made me over $20k on a $147 course! That way, you too can make consistent sales of your offer, with the beauty and simplicity of organic, evergreen traffic from YouTube! Start here with my free “AIT Method” training.

Hands-On with BirdDog X5 Ultra: PTZ Power for Worship Teams


Transformation Church in Tulsa tested the BirdDog X5 Ultra PTZ camera and found it to be a perfect fit for church production. With fast setup (QR code + BirdUI), sharp 4K60p video with 20x zoom, and smooth motion controls, it proved easy for both staff and volunteers to operate. AI Presenter Tracking allowed dynamic shots for youth services without extra crew, while robust connectivity (12G-SDI, HDMI, NDI|HX3, SRT, RTMP) ensured seamless integration with their Ross Carbonite system. For churches balancing excellence with budget, the X5 Ultra delivers pro performance, simple controls, and real-world value—helping ministries focus on the message, not the tech.

Read the full article here

Learn more about BirdDog below:

/**/