How to Talk More Comfortably to the Camera


Are you struggling with how to talk more comfortably to the camera?

Recording this video was the LAST thing I wanted to do.

Now, down to business: Are you ready to unlock the secret to talking more comfortably on camera and transforming your onscreen presence instantly?

In this video, I share essential tips to help you overcome camera shyness and build your confidence! Talking to the camera can feel awkward, but with practice and the right mindset, you can transform your onscreen presence.

We’ll explore practical techniques, including the importance of energy and body language, to help you speak naturally and confidently. Whether you’re a beginner or looking to refine your skills, these actionable strategies will guide you on your journey to becoming a more comfortable speaker on camera.

Speaking confidently to the camera is not natural. It’s awkward and weird, but after 10 years I have a few tricks up my sleeve…

Let’s dive in!

VIDEO: How to Talk More Comfortably to the Camera

Some product links in this post are affiliate links, and I will be compensated when you purchase by clicking our links. Read my disclosure policy here.

The Truth About Talking Comfortably and Confidently on Camera

Let me tell you a secret—nobody is born knowing how to talk to a camera! Most of us don’t naturally want to do it, but it’s become an essential part of existing in the online space. While it might come effortlessly to a lucky few, for most of us (myself included!), it takes real work to appear natural and confident on camera. The journey to becoming comfortable speaking to that lens—and by extension, to you, the viewer—is a learning process that requires patience and practice. But trust me, with time, that awkward feeling does fade, and finding your authentic camera presence becomes second nature!

What’s funny is that a few months after starting my YouTube channel, I ran into someone I’d known my whole life who said, “You seem so natural on camera!” I nearly laughed out loud. There was absolutely nothing natural about it! It was all pretending, editing, and a whole lot of effort.

Related: How to Talk and Feel Confident on Camera to a Camera: Beginner Tips | Ep. 29

The “Fake It Till You Make It” Method Actually Works

One of the most effective tricks is to pretend that talking to the camera is normal. In my early days, I had to convince myself that it wasn’t weird. I would check my surroundings, make sure I was alone, and then tell myself, Just act like this is a natural conversation.

Looking back at my first videos (which I hope you don’t do!), it’s obvious to me that it wasn’t natural. It wasn’t comfortable—it was awkward. I was awkward. But now, talking to the camera doesn’t really feel awkward at all. The difference between those early, stiff appearances and my current comfort level is remarkable. What once felt like speaking to an inanimate object now feels more like having a conversation with a friend. The camera has transformed from an intimidating device into simply a tool that connects me with you. This journey from awkwardness to authenticity didn’t happen overnight, but with consistent practice and a willingness to be vulnerable, I’ve found my voice. Everyone starts somewhere, and those cringeworthy first videos were necessary steps toward finding the confidence I have today!

At first, it felt forced, but over time, my confidence grew. A friend once told me I seemed so natural on camera—which was ironic because I was consciously pretending to be comfortable! The key takeaway? Confidence is built through practice and repetition.

Over time, with consistent practice, talking to the camera genuinely became comfortable. The pretending became reality.

Related: Overcome Camera Shyness: Boost Your Confidence on YouTube

Practical Tips to Boost Your Confidence and Talk Comfortably on Camera

1. Try Recording While Standing Up

One of the most effective changes I made early on was switching from sitting to standing while recording. Believe it or not, standing up can make a huge difference! When I first started, I assumed sitting comfortably would help me relax. However, I found that standing boosts energy, improves posture, and projects confidence.

When I tried recording while standing, everything changed. I had more energy in my body and voice, which translated to more confidence on screen. This makes sense when you think about it – public speakers, leaders, and presenters typically stand because it projects authority and importance.

Professional speakers and leaders stand when they present because it naturally commands attention. If you feel low-energy or unsure, try recording while standing—you’ll likely notice an instant improvement.

If you struggle with talking to the camera comfortably, I highly recommend that you try standing up! It doesn’t mean you have to always record standing up—you might notice right now I am sitting down. I haven’t recorded a standup video in probably 5 years or more, and even then it was only occasionally. The standing technique works because once I learned how to sort of master the energy and get more comfortable on camera, I could just flip the switch and turn it on. Now I can access that energy and comfort, just getting into that frame of mind of talking to the camera even while sitting down. Standing initially helped me break through that awkward barrier, giving me more physical freedom and naturally increasing my energy levels. It’s like training wheels that eventually allowed me to find my authentic camera presence in any position. Try it out—you might be surprised how much more animated and natural you become when you’re not confined to a chair!

2. Amplify Your Energy

Here’s a secret from the video production world: you have to 10x your energy and emotion on camera in order for it to come across to the viewer! What I mean is, if I want to appear excited, I need to be really over-the-top excited when recording for it to translate properly to you. The same applies whether I want to convey sadness, happiness, or anger—I have to significantly amplify those emotions for the camera to capture them effectively.

This sounds like an acting technique, though I’ve never acted or taken any acting lessons. But I know it’s true because I’ve experienced it firsthand. I’ve recorded videos where I thought I was excited and in a great mood, only to watch during editing and think, “Oh my gosh, you didn’t even smile! What’s wrong? What’s going on here?” I simply hadn’t flipped that energy switch.

You don’t realize this disconnect until you’re editing and see that your facial features barely moved throughout the entire video. “Wow, your facial expressions don’t even change, Meredith—what is wrong with you?” That’s precisely why practicing is so important, along with not giving up. Being conscious about the areas you want to improve and working on them incrementally with each video makes all the difference. The camera literally drains energy from your performance, so what feels exaggerated to you will likely appear just right to your audience!

3. Use Music to Set the Mood

Another thing I do every once in a while (I still do this) is just listen to music. I play some music maybe while I’m getting things set up or while I’m doing my hair or makeup before I hit record. If I’m not feeling super energetic and I know I need to record a video, I will sometimes use music to kind of get the energy flowing for me. It’s like a pre-camera ritual that helps shift my mindset from regular, everyday me to my slightly amplified on-camera presence. The right song can transform my mood, loosen up my facial expressions, and help me tap into that heightened enthusiasm needed for the camera. It’s a simple hack, but incredibly effective for those days when the energy just isn’t naturally there. Whether it’s an upbeat playlist to elevate my mood or something that matches the tone of the content I’m creating, music has become an essential part of my pre-recording routine when I need that extra boost!

I still use this technique regularly. Before recording, I’ll play some upbeat music while setting up my equipment or doing final preparations. It naturally elevates my energy and gets me in the right headspace for being on camera.

4. Remember to Smile!

When recording, don’t forget to smile! That doesn’t mean forcing a grin the entire time—that would feel unnatural and maybe even a little awkward. Instead, think about how you would engage in a conversation with a close friend. You’d naturally smile, laugh, and express yourself in a way that feels warm and inviting. The same principle applies on camera! Amplifying your emotions helps convey authenticity and connection, making your message more engaging. If it doesn’t come naturally, try placing a sticky note near your camera as a gentle reminder. A genuine smile can make all the difference in how your audience perceives you—so let it shine!

It sounds so simple, but it makes a massive difference in how you come across. In normal conversation with friends, you naturally smile and show expression. On camera, many people inadvertently adopt a serious “concentration face” that can make them appear stern or disinterested.

If you need a reminder, put a small sticky note near your camera with “SMILE!” written on it. It’s not cheating – it’s giving yourself the tools to succeed!

Embrace the Learning Process

Feeling awkward on camera? That’s totally normal! The key is to push through the discomfort and keep practicing. Every little trick helps—whether it’s a sticky note reminder, a go-to playlist that hypes you up, or simply pretending to be confident until it feels real. The more you do it, the more natural it becomes. I know this firsthand—if you watched my early videos (please don’t!), you’d see just how awkward I was. But I showed up anyway, kept going, and over time, I improved. So don’t wait until you feel ready—just start, keep practicing, and watch your confidence grow!

Improvement comes from being willing to see your own weaknesses in the editing process and then consciously working to address them in future videos. For instance, I noticed I would blink excessively when trying to find my words. Once I became aware of this habit, I could work on pausing, taking a breath, and gathering my thoughts instead.

5. Join a Group Zoom Call, Meetup, or Host Your Own Live Stream!

One of the best ways to get comfortable on camera is by practicing in a live setting! Join a Zoom call, attend a group Meetup, or even go live on your own channel. These experiences help you gain confidence by simply having a conversation through the camera. The more you show up and engage, the more natural it will feel—so find opportunities to get those reps in and start improving today!

Practice Makes Comfortable

The bottom line is that there’s no substitute for practice. The more you talk to the camera, the more natural it becomes. Here are some ways to get those reps in:

  • Join group video calls where you can practice speaking on camera in a low-pressure environment
  • Do live streams on social media platforms
  • Record practice videos just for yourself
  • Join online communities focused on video creation where you can get feedback and support

Conclusion

Becoming comfortable on camera doesn’t happen overnight, but it absolutely can happen. The key is to start before you feel ready, pretend you’re comfortable until you actually are, and keep showing up consistently.

Remember my simple formula:

  1. Pretend you’re comfortable
  2. Practice regularly
  3. Pay attention to areas for improvement
  4. Persist even when it feels awkward

Your natural, confident on-camera presence is waiting on the other side of that practice. Trust me, if I can go from an awkward, behind-the-scenes person to someone who’s completely comfortable talking to a camera, you can too!

I’d love to invite you to join me inside Video Brand Academy! We host multiple meetups every month, giving you the perfect opportunity to practice speaking on camera in a supportive environment. From my What’s Working Now sessions, where I share the latest YouTube trends and tactics, to deep-dive analytics calls and open office hours for Q&A and brainstorming—there’s something for everyone. The best way to gain confidence on camera is simply by showing up and practicing, and Video Brand Academy is the perfect place to do just that. Come join us and take your on-camera skills to the next level!

Related: Consistent Sales of Your Online Course with YouTube

If you have an online business with a course, program, or any other kind of offer, and you’re not currently generating consistent sales on autopilot, I’d like to introduce you to the hands off youtube funnel that has made me over $20k on a $147 course! That way, you too can make consistent sales of your offer, with the beauty and simplicity of organic, evergreen traffic from YouTube! Start here with my free “AIT Method” training.

Pro Tips for Syncing Video & Audio, Remote Intervie


Learn how to sync video & audio seamlessly, improve remote interview quality, and record long events without file splits! Join Ask the Videoguys for expert live streaming tips and gear recommendations.

Watch the full video below:


I am considering a multicamera production…. ​will the cameras (and audio) be in sync?​​

Ways to connect a camera to a switcher:​

  • NDI​
  • HDMI​
  • SDI​
  • USB​

Ways to connect audio to a switcher:​

  • Direct inputs from mic/receiver to switcher​
  • Embedded audio in NDI feed​
  • Dante audio​
  • Master program from dedicated audio mixer​

First let’s talk about syncing Video

  • Baseband Video will always have the lowest latency:HDMI, SDI, USB
  • NDI will have different levels of Latency:​
    • Full Bandwidth will have lowest Latency​
    • NDI HX will have varying amounts of latency ​
  • Tech Tip: Always have the same type of connecting cameras facing the same subject

Let’s talk about syncing audio

  • Audio inherently has extremely low latency no matter the transmission method because it is a small file to transfer than video​
  • Most modern switchers can delay audio to match the video ​

How can I get a camera in those hard-to-reach spaces?​

NDI​

  • Just 1 Cable needed for video, power & control​
  • Perfect for retrofit applications & flexible production use​

Now you can use your Wi-Fi network when only a power outlet is available

Wireless NDI​

  • Great for older buildings where you can’t run new cables​
  • Utilizes the power of NDI HX3 compression ​
  • Both Wireless PTZs and Wireless Encoders are available​
  • NETGEAR Pro AV introduced Wireless Access points for Wireless NDI​

Go truly wireless with BirdDog X4 ​or with Legacy cameras and wireless encoders​

  • 4K 60p​
  • NDI HX3​
  • WiFi 6​
  • Halo Tally ​
  • 3G SDI, HDMI, USB, Ethernet, WiFi​
  • Built in battery (6 hours)​
  • Totally wireless functionality with Battery and WiFi

Wireless NDI Encoders​ Kiloview N2

N2 NDI wireless video encoder is a professional video encoding device for NDI video production. It can encode SDI/HDMI video source into NDI|HX, through Ethernet or WiFi. The network is used for video transmission for any compatible system, equipment or software in the network, and it also supports the SRT/RTMP transmission protocol. N2 supports HDMI input.

Atomos Connect and Shogun Ultra

Atomos Connect shares your creative vision with your team worldwide and upgrades your Ninja’s I/O with 12G-SDI to HDMI cross-conversion, Wi-Fi 6 (6E for Ninja Ultra) and 1GbE Ethernet, wireless NDI networking and timecode synchronization. Shogun Ultra is your gateway to amazingly fast and productive cloud workflows. So much more than a super-bright monitor recorder, it takes you to new heights of productivity and collaborative creativity. Work faster, work better.

We record long events, but our cameras split the files into multiple clips. Is there a way to record one long, uninterrupted file? ​

Atomos monitor and recorders are the solution!​

  • Take the HDMI/SDI output of your camera and record directly to Atomos device​
  • Record up to 8k 30p RAW or 4k 120p​
  • Check out our latest Atomos Video for more details!​

What if I am utilizing a Switcher workflow? 

  • Most Production System allow you to record master program as well as several other mixes of your inputs whether its baseband or IP. ​

What if I am utilizing an NDI workflow?

Kiloview CUBE R1
The Kiloview CUBE R1 is an award-winning NDI recorder designed for multi-channel, high-quality video capture. Ideal for live events, post-production, and content creation, it supports custom layouts, various NDI formats, and flexible storage options. With a user-friendly interface and reliable performance, it ensures efficient and seamless recording for professionals.
  • Multi-Channel NDI Recording​
    • Simultaneously records up to 9 NDI sources in high-definition, supporting various resolutions and formats.​
  • Synchronized Recording​
    • Ensures all NDI sources are recorded in sync using a self-defined NTP server.​
  • Hot-Swappable Storage​
    • Equipped with dual hot-swappable SSD slots for continuous, non-stop recording.​
  • Flexible Monitoring Layouts​
    • Offers 1/4/9 multiview layouts with customizable overlays for each window, including audio levels, tally status, and source names.​
  • Plug-and-Play Operation​
    • Provides a turnkey solution with user-friendly design, ideal for live events and post-production scenarios.​

​We do a lot of remote interviews, but our guests always look and sound terrible. What’s the best way to improve their video quality?​

Tips that we suggest to our remote guests:​

  • Have a wired network connection to the computer/camera they are using​
  • Use headphones whenever possible to minimize feedback loops​
  • Recommend using an external microphone – Built in microphones are not ideal on computers​
  • Recommend using a professional camera, whether a DSLR, PTZ or high end webcam​

Send them a camera and microphone if you can!​

  • Utilize things Like BirdDog Cloud and PTZOptics Hive studio. Send your guest a camera and tell them to connect it to the internet and you will control the camera remotely. Some ​

Optimizing Worship Production: PTZ and REMI Workflows with PTZOptics


Join Paul Richards from PTZOptics as he explores the latest PTZ and Box cameras designed for houses of worship. In this video, Paul breaks down a Good, Better, Best workflow using PTZOptics cameras and their versatile connectivity options to streamline production. He also provides an in-depth demo of Hive Studio, showcasing its powerful remote production capabilities for worship services. Learn how PTZOptics’ innovative solutions, including auto-tracking cameras and remote control features, can elevate your worship production, making it more efficient and engaging for both volunteers and congregants.

Learn more about PTZOptics below:

/**/

Live Studio Demo by Videoguys


On This Week’s Videoguys Live, Join James in the Videoguys Studio as we introduce the powerful Atomos Sun Dragon! Watch our in-use demo to see how this innovative device enhances video production with its stunning display and advanced features. Perfect for filmmakers and content creators looking to elevate their work. We will also be showing off all of the new Promotions from Atomos. Don’t miss out on these amazing deals and our comprehensive review and hands-on experience!


Atomos Sun Dragon

World’s first sun spectrum, HDR, waterproof, DMX controlled, 5-color LED, mount-anywhere, lightweight flexible rope light. Get the Sun Dragon iOS app for Control and Updates​

Precise Control
Comes with fully featured controller unit. Can also be controlled ​ via Bluetooth, Ethernet or DMX.​

Super Bright & Color Profiles​

  • 2000 lumen (non-diffused version)​
  • Color Temperatures to match ARRI, Canon, Nikon, Panasonic, RED, Sony, and Z CAM color science​
  • Advanced RGBAW design of 5 different colored LEDs – red, green, blue, amber, and white​

Flexible​
Fits into places other lights can’t with 30cm (1 foot) bend tolerance.​

Lightweight​
Weighs less than 1kg / 2.2 pounds.​

Quick to Deploy​
Gives filmmakers and photographers more creative options.​

Rugged​
IP68 rated: dustproof and waterproof to depth of 1 meter (3 feet).​


Atomos Shinobi II

Shinobi II is our highly popular ultra-slim, high-brightness HDR monitor, perfect for photo and video creatives looking for top-tier performance and versatility

Save 10$ on Shinobi II
$349.00 reg.
$315.00 PROMO
Now – 2/28/25 Only!


Atomos Ninja Phone

Now with 4K streaming! Ninja Phone turns your smartphone into a high‑end 10‑bit recorder, monitor and streamer for your professional video camera or other HDMI‑equipped device.

Save $200 on Ninja Phone!
$399.00 reg.
$199.00 PROMO
Now – 3/31/25 Only!


Atomos Shogun Ultra

Shogun Ultra is everything you’d expect from a Shogun. Perfect for HDMI mirrorless and SDI cinematic cameras, with enhanced camera to cloud connectivity.


Save $200 on Shogun Ultra!
$1,199.00 reg.

$999.00 PROMO
Now – 3/31/25 Only!


Atomos SUMO 19SE

A bright (1200nit), HDR touchscreen covering the DCI-P3 (P3) Color Gamut, and able to record Apple ProRes RAW up to 6Kp30. With its rugged and versatile design, the Sumo 19SE is the perfect addition to an on-set video village.

Buy a SUMO 19SE and get a FREE Sunhood!
$2,240.00 reg. total

$1,995.00 PROMO with FREE Sunhood
Now – 3/31/25 Only!


Avoid These Recording Mistakes (Beginner-Friendly Tips)


Before you hit record on your next YouTube video or video podcast, here are some easy mistakes to avoid in creating polished YouTube videos!

You might not even realize some of these topics are mistakes, but if you’re making them now, they could be hindering your ability to grow on YouTube.

I prefer polished  over perfection, but there are some simple recording mistakes that COULD trip you up and hinder your ability to grow on YouTube without you even realizing it…

VIDEO: Avoid These Recording Mistakes (Beginner-Friendly Tips)

Some product links in this post are affiliate links, and I will be compensated when you purchase by clicking our links. Read my disclosure policy here.

It’s natural to want your videos to be perfect—you don’t want to embarrass yourself or look unprofessional. You want to sound good, look good, and feel confident. But the reality is, perfection isn’t human. No one maintains perfect eye contact in a real conversation, so forcing it in your videos can actually make them feel awkward rather than polished. Instead of striving for perfection, focus on being presentable and authentic. A well-polished video that feels natural will always connect better than one that feels overly staged.

Remember that when you’re looking at your screen instead of the camera, viewers don’t actually feel that direct connection. Instead of forcing unnatural eye contact, focus on looking where it feels natural—just like you would in an in-person conversation. This is what makes video marketing so powerful; it creates a sense of real connection that other forms of marketing can’t replicate. It’s the next best thing to being face-to-face with your audience, making your message more engaging and impactful.

Here’s what to do:

– Look at the camera lens periodically, just as you would make eye contact during a normal conversation

– Allow yourself to look at your notes or glance away naturally

– Avoid the common mistake of staring at yourself on the screen while recording

Related: How to Talk and Feel Confident on Camera to a Camera: Beginner Tips

Plan Your Packaging Before Your Content

This might sound counterintuitive, but creating your title and thumbnail before recording is crucial for success. Think of it like product packaging at a store – the outside needs to attract attention before anyone discovers what’s inside.

Your videos will be more polished, more presentable, and better received by your audience if you create your title and thumbnail before you hit record. Planning these elements in advance helps you stay focused, structure your content effectively, and ensure your video aligns with what will attract viewers.

The thumbnail grabs people’s attention, while the title sparks interest. Together, they create intrigue and curiosity, making viewers feel like there’s a gap they need to fill. Your ideal viewer will be compelled to click and watch the video to satisfy that curiosity and find the answers they’re looking for.

When planning your video’s “packaging”:

– Create an attention-grabbing thumbnail that works in harmony with your title

– Write a title that generates genuine interest

– Design both elements to create curiosity that can only be satisfied by watching your video

Understanding Your Audience’s Perspective

Even if you know what your audience needs to learn, you have to make them care about it. Before you hit record, take the time to figure out why this topic matters and why your perspective is valuable. Think about it from your ideal viewer’s point of view—what they need to see, what they want to hear, and how your content can truly resonate with them.

You can’t go wrong with your video when you craft it specifically to meet the needs of your ideal audience. Before you hit record, challenge yourself to come up with a strong title, an engaging thumbnail, and clear reasons why this topic—and your perspective on it—matters to your viewers. By doing this in advance, you can naturally weave these elements into your video, making it more compelling and impactful.

Recording without considering your audience’s viewpoint is a critical mistake. Before hitting record, ask yourself:

– What does my audience want to know about this topic?

– Why should they care about what I’m sharing?

– How can I present this information in a way that resonates with their needs?

The Script vs. Riff Debate

You need to feel confident and comfortable with how your words come out, and for some, having a word-for-word script is a helpful first step. Others may find that a strict script adds pressure, making them feel like they have to get every word perfect, which can lead to stress and anxiety. There’s no right or wrong approach—whether you script, outline, or improvise, it’s about what works best for you. However, one thing is certain: the first part of your video needs a strong hook. When a viewer is intrigued by your title and thumbnail and hits play, your opening moments must grab their attention and keep them watching. The first 10 to 30 seconds, or even the first minute, are crucial in keeping your audience engaged so the time and effort you put into your video truly pays off.

I’ve included a collection of powerful hooks inside the YouTube Roadmap Planner to help you grab your audience’s attention and keep them engaged.

It took me a few years to realize that there’s actual psychology behind creating intrigue, interest, and curiosity gaps. Whether you script your videos word for word, use an outline, or prefer to improvise, knowing how to craft your first 10 to 30 seconds to make it truly hook-worthy is absolutely invaluable.

There’s no one-size-fits-all approach to scripting. What matters most is finding a method that helps you feel confident and comfortable on camera. However, certain elements of your video deserve special attention:

– Your hook (first 10-30 seconds) should be carefully crafted

– Key points and important information might benefit from scripting

– Complex explanations often work better with at least an outline

Riffing can leave a lot of room for errors, mistakes, and extra editing, which is why it’s important to approach it with intention. Instead of relying on improvisation to save time, focus on developing the skill of crafting clear, cohesive sentences on the fly. The goal is to minimize mistakes or seamlessly turn them into natural speech, reducing the need for excessive editing and making your content flow more smoothly.

 If you go into your YouTube analytics and check a video you’re really proud of—one you spent a lot of time on—you’ll see how much of that video your audience is actually watching. The average view duration will tell you how long people are sticking around, whether it’s 3 minutes, 4 minutes, or more. If your retention rate is around 20% or lower, it’s a sign that improving your video scripting skills could be really valuable. Learning how to structure your content to keep viewers engaged will help, and once you master that skill, you can riff more confidently and naturally without losing your audience. Scripting may feel limiting at first, but it’s an essential tool to develop before you can effectively improvise on the fly.

Technical Checks Before Recording

It’s never been easier to record your videos directly into your computer. For example, I’m using Ecamm Live to record straight to my computer, with both my camera and microphone connected. It only takes a few seconds to hit record and quickly double-check that the video looks good and the audio sounds right. Even if you’re recording with a camera and a lapel mic, you can still ensure everything is working by watching the audio meter as it moves, confirming that the microphone is picking up sound. This way, you avoid wasting time and can prevent the need to re-record.

These simple but crucial checks can save hours of frustration:

1. Verify your microphone is on and working

2. Check camera battery levels

3. Test audio levels

4. Review your background for distracting elements

5. Ensure all equipment is properly connected

Check What’s Going on Behind You in your Frame

This is a mistake I continue to make time and time again, and if you watch all of my videos, you’ll probably spot it every few videos. The mistake is not checking what’s going on behind you in your frame. It’s something that can easily slip through the cracks, but it’s important to make sure your background is clear of distractions.

Just make sure you don’t have any weird or unwanted items behind you that you didn’t intend to have in your video. Before you start, do a quick check—while you’re checking your mic and ensuring your camera is working, also confirm that everything happening behind you is what you expect.

Make Your Videos Work for Your Business

If you don’t have a strategy in place before you hit record on how your video fits into growing your audience or business, there’s a good chance it won’t help either. This can be as simple as having a lead magnet or freebie to mention throughout your video and using it as a call to action at the end. If you’re using YouTube to build your audience and your business, you must also be using YouTube to build your list.

If the video you’re creating doesn’t align with any of your lead magnets or list-building efforts, at the very least, include a call to action that directs viewers to what they should watch next. Point them to the next obvious video on your channel, keeping them engaged with more of your content. Ideally, you can do both—mention your lead magnet and suggest another video related to the topic. You can link the next video in your end screen, where it will appear as a clickable thumbnail for viewers who watch until the end. You can also guide viewers to a playlist to keep them engaged with more content.

For new viewers discovering your content for the first time, it’s crucial to guide them strategically. Direct them to more of your valuable content through carefully curated playlists, and most importantly, connect them with a lead magnet to build your email list. These strategies are part of our comprehensive approach inside Video Brand Academy, where we regularly discuss such topics during our monthly meetups.

Every video should serve a purpose in your overall business strategy. Before recording, determine:

– How this content fits into your audience growth plan

– What lead magnet or freebie you’ll promote

– Which related videos you’ll reference

– Your specific call-to-action for viewers

Ready to Level Up Your YouTube Game?

If you’re ready to create more polished, professional videos that actually grow your business, I’d love to help you take the next step. Inside Video Brand Academy, we dive deep into these strategies and more, helping creators like you build their audiences and generate consistent revenue through YouTube. These tips have been incorporated into the YouTube Roadmap Planner, which includes detailed checklists for both pre-upload and pre-recording phases, along with worksheets and step-by-step guides for developing your YouTube strategy, spiderweb strategy, and various growth techniques to help you expand your audience, generate consistent revenue, and successfully YouTubify your business.

Visit Video Brand Academy to learn more about how we can help you YouTube-ify your business and create videos that truly connect with your audience.

If you have an online business with a course, program, or any other kind of offer, and you’re not currently generating consistent sales on autopilot, I’d like to introduce you to the hands off youtube funnel that has made me over $20k on a $147 course! That way, you too can make consistent sales of your offer, with the beauty and simplicity of organic, evergreen traffic from YouTube! Start here with my free “AIT Method” training.

Ask The Videoguys – LiveU Solo Pro, Avid License Renewal, G-RAID Diffe


On This Week’s Videoguys Live, Join James for this installment of Ask The Videoguys for a comprehensive guide on essential video production tips! We’ll delve into getting started with LiveU Solo Pro, renewing your Avid Media Composer license, exploring the differences between G-RAID PROJECT 2 and G-RAID MIRROR, and setting up a custom RTMP stream from your YoloBox. Don’t miss out on these crucial insights to elevate your video production skills!


How Do I Get Started with LiveU Solo Pro?​

Step 1: Buy the LiveU Solo Pro

  • 4K Video Resolution​
  • Up to 4Kp60 full video resolution​
  • HEVC Encoding​
  • Up to 20Mbps streaming​
  • Supports up to 4 External Modems​
  • 5G Support available as modems become available ​

Step 2: Add the Modems

  • ”Kits” of Verified Modems​
  • Pre-installed SIMs, ready to activate​
  • Unlimited data plans with no commitment ​
  • Start and stop at any time​
  • “Traveler” kits can operate all over the world​
  • With regional specific pricing ​
  • 2 Modem Pro Kit​
  • Data Plan: $295/month​
  • Solo PRO Connect 4 Modem Kit​
  • 4x LU Net 4G​​
  • 4x Sims U.S. version​​
  • Includes LiveU Solo PRO Belt Pack​​
  • 2x Y Cables​
  • HDMI Extension Cable​​
  • HDMI Tension Clip​​
  • Getting started card
  • Data Plan: $435/month​​
  • If you need worldwide version, give us a call

Step 3: Activate LiveU Solo Pro with Solo Connect

Solo PRO Connect 2 Modem

Solo Pro Connect 4 Modem Kit Bundle with Cables & Belt Pack


How Do I Renew My Avid Media Composer Perpetual License?

If you do not own an Avid Media Composer subscription or have a Perpetual license that has expired then you can choose from a new Ultimate subscription today.

The Ultimate subscription includes Media Composer editing software plus Avid Symphony for color correction, the PhraseFindand ScriptSync tools and support for network storage and collaborative workflows.

Do you have an Avid Media Composer Subscription License already?

The subscriptions can be easily renewed with these versions. The difference between a Subscription Renewal and a new subscription is that these will easily extend the term of your current subscription license for another year. You can add these at any time and Avid Account Manager will extend from your current expiration date.


What is the Difference between theG-RAID PROJECT 2 & G-RAID MIRROR?

G-RAID PROJECT 2

  • For Pro-Video workflows​
  • Ships in default RAID 0 – full capacity, full performance​
  • RAID 0 (Striping): Data is stored evenly across the number of disks in the array. This process is called disk striping and involves splitting data into blocks and writing it simultaneously/sequentially on multiple disks. It provides improved performance but no redundancy

G-RAID MIRROR

  • For Pro-Photo workflows​
  • Ships in default RAID 1 – full redundancy, half performance, half capacity​
  • RAID 1 (Mirroring): Data is duplicated and stored on each drive. This process is called mirroring, and it ensures you won’t lose your files if a drive fails. It provides redundancy but no performance gain


How Do You Setup a Custom RTMP Stream From Your YoloBox?

Select Red Plus to add new streaming Destination and select RTMP(S)

​Add A Custom RTMP/SRT/HLS Destination

Input Manually

Updated Platforms Page


Videoguys’ Top Products of 2024


As 2024 unfolds, the video production world is buzzing with innovations that redefine how creators, professionals, and broadcasters approach their craft. From cutting-edge cameras to cloud-based management systems, here are the top products of 2024 that are setting new standards for creativity, efficiency, and quality. 

NOTE: This list of our top products is not presented in any order. These items were all introduced in 2024 and all impressed us in the ways we describe below 


BirdDog X Series: The Future of NDI HX Cameras

The BirdDog X Series represents a new era in PTZ cameras, boasting advanced NDI HX technology for high-quality, low-latency video over IP networks. The series includes the X1, X1 Ultra, X4 Ultra, and X5 Ultra, offering a camera for every production scenario. The X1 is compact and portable, the X4 Ultra is tailored for mid-tier projects, and the X5 Ultra is perfect for cinematic workflows. With enhanced low-light performance and expanded dynamic range, the X Series cameras are versatile tools for live streaming, remote production, and studio environments. 

Vizrt TriCaster Mini S: Live Production on Your Own Workstation 

Vizrt’s TriCaster Mini S takes live production to a new level by allowing users to run its powerful software on their certified workstations. This flexibility enables creators to utilize familiar hardware while accessing professional-grade features like virtual sets, multi-camera switching, and advanced graphics. The software retains all the functionality of the hardware version, making it a cost-effective solution for producers who demand high-quality performance without being tied to specific hardware. 

Canon CR-N100 and RC-IP1000: Completing the PTZ Lineup

Canon’s PTZ lineup now includes the CR-N100, a budget-friendly entry-level camera, and the RC-IP1000, a flagship controller offering precise and intuitive camera operation. The CR-N100 is perfect for educational institutions, houses of worship, and small businesses, delivering sharp HD video at an accessible price point. When paired with the RC-IP1000, users can seamlessly manage complex multi-camera setups, making it a robust and versatile solution for creators at every level. 

Atomos Ninja Phone: Turn Your iPhone into an HDR Monitor

The Atomos Ninja Phone transforms your iPhone into a professional-grade HDR monitor, bridging the gap between mobile filmmaking and professional production. Compact and powerful, this tool offers real-time HDR monitoring and recording, perfect for on-the-go creators. With support for professional codecs and precise color calibration, it elevates smartphone videography to cinematic heights while maintaining portability and ease of use. 

SanDisk Professional G-RAID Project 2: RAID-0 Performance Redefined

The Sandisk Professional GRAID Project 2 is a game-changing storage solution for video editors and creators handling 4K and 8K footage. Its RAID-0 configuration delivers blazing-fast performance, eliminating bottlenecks in data access. Built for the demands of modern production environments, the GRAID Project 2 ensures rugged reliability, and the speed required for even the most intensive workflows.

YoloLiv YoloDeck Bundles with YoloBox Ultra

The YoloDeck bundles featuring the YoloBox Ultra combine hardware and software to create a powerful, all-in-one live streaming solution. The YoloBox Ultra provides advanced features like multi-camera switching, overlays, and encoding, while the YoloDeck adds expanded functionality for larger productions. Together, they offer a seamless, affordable setup for creators looking to take their live streams to the next level. 

Pixellot AIR NXT: AI-Powered Sports Production

The Pixellot AIR NXT leverages AI-driven technology to automate camera operation, delivering professional-quality coverage for sporting events. Its lightweight design and quick deployment make it ideal for schools, amateur leagues, and small sports organizations. With features like automated highlights and live streaming, the AIR NXT empowers teams to expand their audience while reducing production costs. 

PTZOptics HIVE: Cloud Management for Move SE and Move 4K

PTZOptics introduces HIVE, a cloud-based platform for managing PTZ cameras like the Move SE and Move 4K. HIVE allows users to control, configure, and monitor cameras remotely, making it a perfect solution for distributed teams. This cloud management tool enhances collaboration and simplifies complex workflows, enabling real-time adjustments across multiple locations with ease. 

Kiloview N60 with NDI 6: Advanced Video Encoding

The Kiloview N60 takes video encoding and decoding to the next level with NDI 6, offering efficient bandwidth use and ultra-low latency. Its dual functionality simplifies video distribution and enhances production workflows. Designed for reliability, the N60 is perfect for live events, remote productions, and broadcast environments, ensuring seamless integration and consistent performance. 

LiveU Solo Pro Connect Kits: Seamless Live Streaming Anywhere

The LiveU Solo Pro Connect Kits make high-quality, wireless live streaming accessible to creators on the move. Combining bonded cellular technology with cloud-based management, these kits ensure reliable and uninterrupted streams even in challenging conditions. Compact and intuitive, they provide an ideal solution for anyone looking to go live from virtually any location with professional-grade quality. 


These top products of 2024 showcase the incredible advancements shaping the video production industry. Whether you’re upgrading your gear, exploring new technologies, or optimizing your workflow, these tools promise to elevate your productions and expand creative possibilities.


Improving YouTube videos using analytics? How to know if your YouTube Videos just plain suck


Improving YouTube videos using analytics?

I don’t want this to come off-sounding rude or insulting… but you probably already know that growing your audience on YouTube comes down to views and watch time.

​Meaning, simply make yourself easy to find, easy to watch, and easy for those viewers to come back to you, and the algorithm will reward you.

​So if your videos aren’t easy to watch…you would want to know that, right?

​In this episode, I explore the key metrics that can help you determine if your videos are truly engaging.

YouTube won’t come out and tell you your videos are bad… but your analytics will (seriously!)

VIDEO: How to know if your YouTube Videos just plain suck

Some product links in this post are affiliate links, and I will be compensated when you purchase by clicking our links. Read my disclosure policy here.

Understanding the Importance of YouTube Analytics

When meeting new Video Brand Academy members or clients for the first time, it’s not uncommon to hear something like, “I know I need a new camera” or “I know I need new video editing software. Can you help me figure out what to buy to make my videos look better?” Others might ask, “Can you watch my videos and tell me what to improve?”

Wouldn’t it be great if simply buying a new camera, a fancy lens, or new software could magically improve videos, improve performance, grow the audience faster, and make the process as easy as that?

There is a whole Crush It on Camera series on YouTube that discusses creating an ideal visual space. It helps people set up so they look good on camera, sound good, feel confident speaking to the camera, and create professional, polished YouTube videos that establish them as go-to experts in their niche.

YouTube provides data through its analytics. It tells you what might be “wrong” with your videos. Your analytics provide valuable insights into what to fix, change, or tweak to improve your content. Using your own data and metrics to make decisions is highly effective, including decisions about whether to upgrade your camera, change how you edit videos or create “better” videos.

Either way, many of those are just people’s comments or opinions. Even thoughts about video quality—whether the videos are good or not—are ultimately opinions unless you’re looking at your analytics. By analyzing metrics like retention rate, average view duration, and click-through rate, you can gain insights into how your videos are performing and where there’s room for improvement.

There are many things people might point out in their videos that they don’t like. They might not like the way they look, wish their skin was smoother, wish they talked faster, or even wish they talked slower. Despite all this, it’s possible to put out videos that may not look perfect and still grow a channel.

Related: 10 Ways to Read YouTube Analytics (so you can grow faster!) |Ep. 8

Retention Rate: The First 30 Seconds Matter

Whether the video is interesting, grabs people’s attention, or reaches the right audience, what truly matters is what happens after someone clicks play. That is the crucial information in the analytics that needs to be thoroughly analyzed.

One of the most critical metrics to pay attention to is the 30-second retention rate. Whenever YouTube provides a metric, handing over numbers on a silver platter, like a 30-second retention rate of 71% with a “good job,” it’s a clear signal of what the platform values. It indicates that the algorithm prioritizes this metric, so it’s essential to pay attention to it.

This tells you how many viewers watch your video after the first 30 seconds. A high drop-off rate might indicate that your video’s introduction doesn’t match the expectations set by your title and thumbnail. Make sure your opening hook is engaging and relevant to keep viewers interested.

Average View Duration and Percentage Viewed

The 30-second retention metric indicates whether the packaging matches the product. Once viewers stay beyond the first 30 seconds, the focus shifts to the retention of the entire video. This is where metrics like average view duration and average percentage viewed come into play.

Average view duration represents the average amount of time people watch a video after hitting play. This figure depends on the video’s total length. For example, if a 10-minute video has an average watch time of five minutes, the average percentage viewed would be 50%.

YouTube prioritizes watch time and views because it aims to keep viewers on the platform as long as possible. Therefore, longer average view durations generally indicate better performance and benefit the channel.

These metrics show how long viewers are watching your videos on average. A low average view duration might suggest that your content isn’t engaging enough, or that you’re not getting to the point quickly. Consider making longer videos to increase watch time,

There are many different factors to consider when analyzing video performance. This is one of the reasons why it’s advised to make longer videos in the Video Brand Academy: longer videos tend to generate more watch time but ensure the content remains engaging throughout.

Improving Your Video Content

If your analytics indicate that your videos aren’t retaining viewers, it’s time to make some changes. Here are a few strategies to consider:

Enhance Your Script and Flow

It’s probably not the visual quality of your video that’s the issue, as discussed in a recent episode about whether video quality actually matters. However, audio quality is crucial. If your video is easy to watch but difficult to listen to, it could be the reason for poor performance. If you’re looking at your average percentage viewed or average view duration and noticing that people are only watching a small portion of your video, it can be disheartening, especially after investing so much time and energy into it. But the important takeaway is that now you know there’s room for improvement. There are plenty of tips and strategies available in the Video Brand Academy to help increase your retention. With many moving parts and variables to consider, the key point is that you now have the answer to the question, “Do my videos suck or not?”

Focus on improving the structure and flow of your videos. A well-organized script can keep viewers engaged without the need for fancy editing. Ensure your content is clear, and concise, and delivers value to your audience.

Prioritize Audio Quality

While video quality is important, audio quality is crucial. Poor audio can drive viewers away, so invest in a good microphone and ensure your audio is clear and easy to listen to.

Experiment and Evolve

Content creation is an ongoing process of experimentation and improvement. Don’t be afraid to try new things and learn from your analytics. Use feedback from your audience and data to refine your approach and enhance your videos over time.

Conclusion: Keep Improving and Engaging

The only way to truly fail on YouTube is to stop improving. By regularly analyzing your analytics and making data-driven decisions, you can enhance your content and grow your audience. Remember, your channel exists to serve your audience, so always strive to create content that meets their needs and expectations.

At the end of the day, if one is getting comments on their content from people thanking them for their video, thanking them for this tutorial, or in some way showing appreciation for the content they create, then, of course, their videos don’t suck—they’re useful to the people they are trying to reach. Now, if one can improve them as they go, they have the ability to reach more people. Not only that, they have the ability to create content that is even better in service to those people.

*** If you’re looking for more guidance on improving your YouTube content, join the community, the Video Brand Academy, where you can get feedback and insights from other creators.

So if you are on YouTube on your own and wondering how to improve videos, what you should try, and what’s working on YouTube right now, you are invited to hop on the waitlist. You’ll be notified when the doors are open to Video Brand Academy.

Related: Consistent Sales of Your Online Course with YouTube

If you have an online business with a course, program, or any other kind of offer, and you’re not currently generating consistent sales on autopilot, I’d like to introduce you to the hands-off YouTube funnel that has made me over $20k on a $147 course! That way, you too can make consistent sales of your offer, with the beauty and simplicity of organic, evergreen traffic from YouTube! Start here with my free “AIT Method” training.

Learn the NEW Descript Video Editing in 23 Minutes


I have to say… the new Descript video editing is better than ever.

​The video editing functionalities have improved, we have all new AI features, and now there’s a whole new way to record your polished pro-looking videos.

Descript video editing is so much better in the NEW Descript.

Here’s everything you need to know about how to use Descript in one crash course!

The “New” Descript is better than ever, so I put together this Crash Course to get you up and running.

VIDEO: Learn the NEW Descript in 23 Minutes

Some product links in this post are affiliate links, and I will be compensated when you purchase by clicking our links. Read my disclosure policy here.

Understanding Descript Basics

Descript stands out from other video editors with its unique drive workspace. This Descript video editing feature allows you to organize your projects just like you would on your hard drive or Google Drive. You can create folders, star them for easy access, and keep everything neatly organized. This saves time and reduces headaches down the road. To start a new project, simply hit “Start Project” and choose “Video Project.” You can import videos from Zoom, your hard drive, or record directly within Descript using the new “Rooms” feature.

Importing and Transcribing Videos

Importing a video into Descript is straightforward. Once imported, you have the option to transcribe it. This is useful if you want to edit your video based on the transcript. Keep in mind that your account comes with a limited number of transcription minutes, so use them wisely. Once transcribed, you’ll see your transcript on the left, the playback window in the center, and all the features and functions on the right.

Efficient Video Editing with Descript

Descript is designed to save you time. You can edit your video by highlighting mistakes or silences in the transcript and deleting them. This reflects in the timeline, and vice versa. For more traditional editing, you can split clips and delete sections directly in the timeline. Descript’s AI, known as Underlord, offers additional time-saving features.

Related: Descript’s New Editor Layout (what is Underlord??)

Leveraging Underlord AI for Faster Edits

The Underlord AI in Descript is like having an assistant built into your editor. It helps you identify word gaps, silences, and retakes, allowing you to shorten or remove them efficiently. This AI doesn’t take over your editing but assists you in making quicker decisions. For instance, the “Shorten Word Gaps” feature searches for silences and lets you remove them with a single click.

Related: Every Underlord Feature (Descript AI)

Enhancing Audio with Studio Sound

Descript‘s Studio Sound feature improves your audio quality, especially useful if you’re recording in noisy environments. However, if you’re in a quiet room with a decent microphone, you might not need it. If you do use it, adjust the intensity to avoid distortion.

Removing Filler Words and Editing for Clarity

While Descript offers a “Remove Filler Words” tool, I find that filler words are part of my natural speech. The “Edit for Clarity” function, however, can be useful if you want to refine your video further. Experiment with the intensity level to find what works best for you.

Descript offers advanced AI tools like eye contact correction and green screen effects. These features take time to process, so plan accordingly. They can significantly enhance your video, bringing you closer to a final product ready for export.

Fine-Tuning Your Edits

My editing philosophy is BFF: Basic, Fine-Tune, Fancy. After using AI to handle the basics, I move to fine-tuning. This involves tightening cuts, adjusting dead space, and ensuring everything flows smoothly. Descript’s keyboard shortcuts and blade tool make this process efficient.

Recording with Descript

Descript‘s recording feature allows you to create remote recording spaces, similar to Zoom or Riverside. You can select your camera and microphone, and even invite others to join. The quality might appear downgraded during recording to save bandwidth, but rest assured, the final output is high quality.

Hidden Shortcuts and Features

Descript is packed with hidden shortcuts that save time. You can duplicate compositions to experiment without fear of losing progress, adjust the playback speed to edit faster, and use highlighters to mark sections for later review. The “Ignore Media” function lets you hide sections without deleting them, offering flexibility in your editing process.

Adding Elements and Captions

Descript allows you to add text, titles, and other elements to your video. You can adjust their timing and position in the timeline. The captions feature creates dynamic captions from your transcript, customizable to fit your style and branding.

Exporting Your Final Video

When you’re ready to export, Descript offers two options: Publish and Export. Publishing is faster and happens in the cloud, while exporting saves directly to your hard drive. I recommend exporting for maximum control over your final file, allowing you to preview and back it up as needed.

Descript is a powerful tool that can transform your video editing process. With its intuitive interface and advanced features, you can create professional-quality videos with ease. If you found this guide helpful, don’t forget to grab my Descript cheat sheet for more tips and tricks!

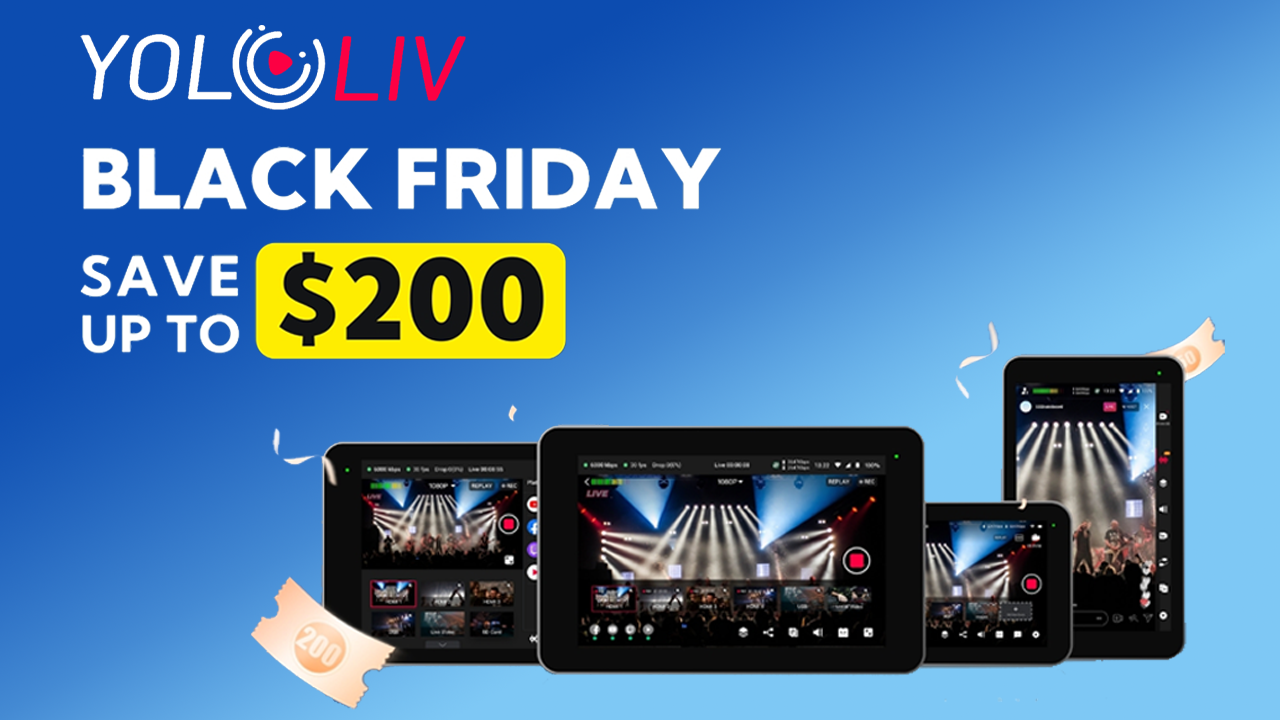
YoloLiv’s Biggest Sale of the Year! | Black Friday 2024


Save now on YoloLiv YoloBox Ultra, Pro, Mini, and Instream with Black Friday Specials! Now through December 6th, 2024 only!

/**/

/**/

$200 Off Black Friday Special!
  • Encoder, Monitor, Switcher & Recorder
  • Stream to Facebook, YouTube, RTMPs, & more for widescreen
  • Stream to Instagram & TikTok vertical
  • 4 HDMI Inputs
  • 4K Streaming
  • ISO Recording
  • NDI (additional $99 fee from YoloLiv)
$1,498.00 reg.
$1,298.00 PROMO
Offer expires 12/6/24
$200 Off Black Friday Special!
Control your YoloBox with confidence, faster then ever before. YoloDeck has 15 LCD keys poised to trigger unlimited actions for your YoloBox
$1,647.00 reg.
$1,447.00 PROMO
Offer expires 12/6/24

/**/

/**/

$50 Off Black Friday Special!
  • Encoder, Monitor, Switcher & Recorder
  • Widescreen Orientation only
  • Stream to Facebook, YouTube, RTMPs, & more
  • 3 HDMI Inputs
  • 1080p Streaming
  • 8″ Display
$998.00 reg.
$948.00 PROMO
Offer expires 12/6/24
$50 Off Black Friday Special!
Control your YoloBox with confidence, faster then ever before. YoloDeck has 15 LCD keys poised to trigger unlimited actions for your YoloBox
$1,147.00 reg.
$1,097.00 PROMO
Offer expires 12/6/24

/**/

/**/

$50 Off Black Friday Special!
  • Encoder, Monitor, Switcher & Recorder
  • Widescreen Orientation only
  • Stream to Facebook, YouTube, RTMPs, & more
  • 1 HDMI Input
  • 1080p Streaming
  • 5.5″ Display
$698.00 reg.
$648.00 PROMO
Offer expires 12/6/24
$100 Off Black Friday Special!
  • Encoder, Monitor, Switcher & Recorder
  • Vertical Orientation only
  • Stream to TikTok and Instagram
  • 2 HDMI Inputs
  • 1080p Streaming
$998.00 reg.
$898.00 PROMO
Offer expires 12/6/24