Atomos Ninja TX vs TX GO vs Ninja RAW


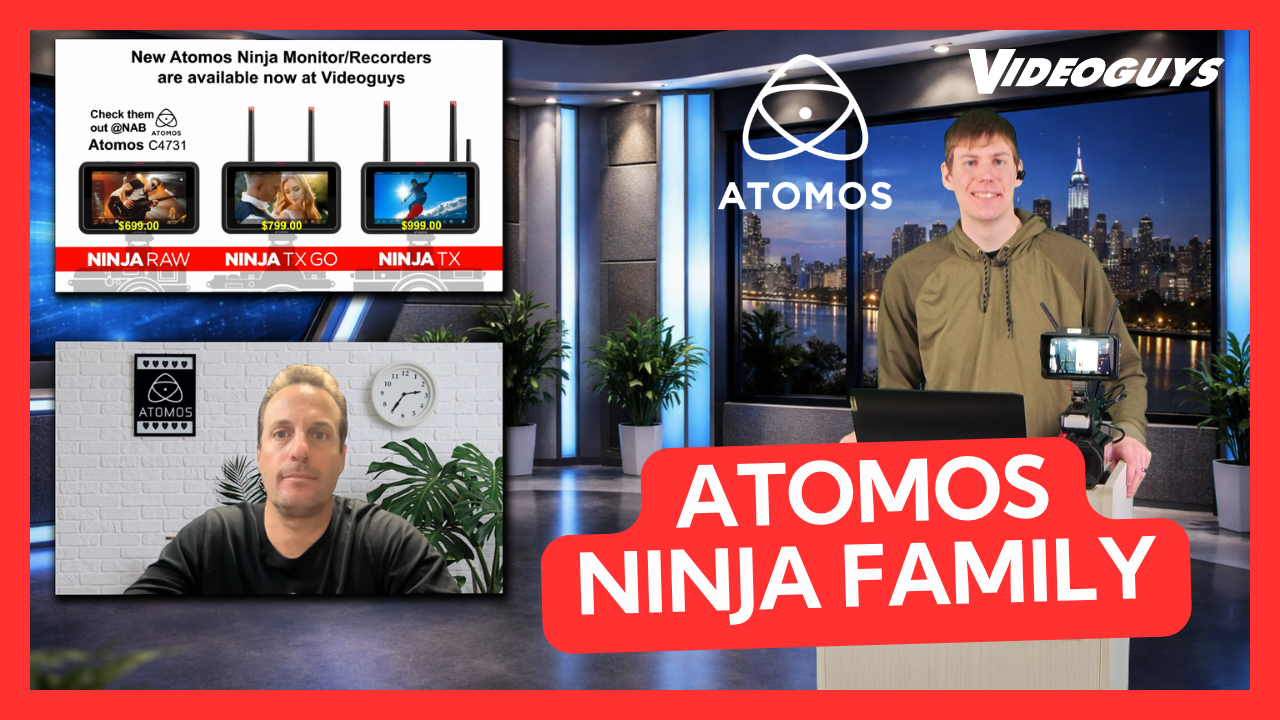
Atomos Ninja TX, Ninja TX GO & Ninja RAW Explained + Shogun AV19 First Look

As NAB 2026 approaches, exciting new tools are hitting the market—and Atomos is leading the charge with an expanded Ninja lineup and an all-new Shogun display.

In this episode of Videoguys Live, James from Videoguys is joined by John Restivo to break down the latest releases, including the Ninja RAW, Ninja TX GO, Ninja TX, and the upcoming Shogun AV19.

Whether you’re upgrading your workflow or building a new production setup, here’s everything you need to know.

Meet the New Atomos Ninja Lineup

Atomos has expanded its popular Ninja series with three new models designed to fit a variety of production workflows. While each model targets a different user, they all share a strong core foundation.

Shared Features Across All Ninja Models

All three devices include:

  • 1500-nit HDR touchscreen display
  • Apple ProRes RAW, DNx, and H.265 recording
  • USB-C camera control (ISO, shutter, white balance, aperture)
  • External recording via USB-C drives
  • Professional monitoring tools like focus peaking, zebras, and frame guides

This means no matter which model you choose, you’re getting a powerful, professional-grade monitor-recorder.

Atomos Ninja RAW – Best for HDMI Workflows

The Ninja RAW is the most straightforward option in the lineup, ideal for individual creators and camera operators working primarily with HDMI cameras.

Key Benefits:

  • HDMI-only monitor/recorder
  • ProRes RAW included out of the box
  • Compact and easy to use
  • Great for mirrorless and DSLR cameras

If you’re looking for a simple, high-quality recording and monitoring solution, the Ninja RAW is a strong choice.

Atomos Ninja TX GO – Add Camera-to-Cloud & NDI

Stepping up to the Ninja TX GO introduces built-in Wi-Fi 6 antennas, unlocking more advanced workflows.

Key Benefits:

  • Wi-Fi 6 connectivity
  • Camera-to-cloud integration (Atomosphere, Frame.io, Dropbox)
  • NDI transmit and receive support
  • Up to 6K ProRes RAW recording

This model is perfect for creators who want to integrate cloud collaboration and IP-based workflows into their production.

Atomos Ninja TX – The Flagship Option

The Ninja TX is the most advanced model in the lineup, offering maximum flexibility for high-end productions.

Key Benefits:

  • 12G-SDI input and output
  • 8K ProRes RAW recording
  • Timecode sync via AirGlu (Bluetooth)
  • Advanced file naming for multi-camera workflows
  • HDMI + SDI compatibility

If you’re working with cinema cameras or multi-camera setups, the Ninja TX is built to handle demanding production environments.

Why Use an External Monitor Recorder?

While many cameras offer internal recording, adding an Atomos monitor-recorder provides significant advantages:

  • Larger, brighter display for accurate focus and exposure
  • Access to professional codecs like ProRes RAW
  • Consistent recording formats across multiple cameras
  • Enhanced monitoring tools for better production quality

For creators serious about video production, an external monitor-recorder is a game changer.

Atomos Shogun AV19 – A Powerful New 19” 4K HDR Display

Also debuting is the Shogun AV19, a brand-new 19-inch 4K HDR touchscreen monitor designed for studio and live production environments.

Key Features:

  • 19” 4K HDR touchscreen display
  • Rack-mountable design for studios and flypacks
  • 12G-SDI and HDMI connectivity
  • Multi-camera input with quad-view switching
  • Records up to 4 ISOs + program output
  • Customizable function buttons
  • Full-size XLR audio inputs

The Shogun AV19 is ideal for live events, broadcast environments, and production teams needing a powerful all-in-one monitoring and recording solution.

See Atomos at NAB 2026

If you’re attending NAB Show 2026, be sure to visit the Atomos booth to experience these products in person. From the Ninja series to the Shogun AV19, seeing these tools firsthand makes a huge differ

Final Thoughts

Atomos continues to innovate with flexible, future-proof solutions for creators at every level. Whether you need a simple HDMI recorder, a cloud-connected workflow, or a full production monitor, the new Ninja lineup and Shogun AV19 deliver powerful options.

For more updates on the latest video production gear, be sure to follow Videoguys and tune in to our weekly live shows.


The Friday Roundup – Beginner Composition & A.I. Models


Humorous cartoon image of poor shot composition.

Film Composition for Beginners

Shot composition is another of those seemingly “unseen” factors that determines how your audience will respond to your videos.

When I say “unseen,” I mean unseen by the audience although possibly unseen by you the creator as well!

Your audience will not be thinking to themselves that your video has poor composition!

In fact they will probably be thinking nothing at all apart from having a strange sense of something not being quite right about what they are looking at and an urge to click away.

It is your job to take away that feeling by composing correctly and as appropriate for what it is that you are shooting and trying to achieve with your video.


Stable Diffusion vs FLUX vs Nano Banana vs GPT Image vs Z-Image Turbo: Text-to-Image Comparison

Like most of the video editing software programs these days PowerDirector is providing access to various A.I. models through the user interface.

Although the marketing tends to suggest that the software “has A.I.,” the truth is that the software is connected to exterior A.I. engines and that is actually where the work is being done.

The basic problem with this is that unless you know exactly what the purpose is of each of these models is or know their respective strengths and weaknesses are… it’s a bit of a crap shoot!

Fortunately CyberLink have have started to address this problem with some tutorial videos outlining why you would choose to work with one model for a projects over another.

This week they are covering Text-to-Image and in the video below you can get a concise rundown on each and what projects they are more suited to.

For a look at a similar comparison on the Image-to-Video models on offer you can see it in a recent Friday Roundup HERE. https://diyvideoeditor.com/the-friday-roundup-gear-envy-and-speed-ramping-tips/


AI Video Rescue in Filmora: Fix Bad Audio, Remove Objects & Save Your Footage

One thing I really can get onboard with as far as A.I. goes is the ever expanding range of correction tools that are becoming available to the average user.

I would like to say that I am always well prepared to shoot all my videos perfectly with every contingency anticipated and compensated for.

As I say, I would like to say that but it would be an outright lie!

Sometimes I don’t notice that dog taking a poop in the background or that the distant building site is creating sound that my mics are going to pick up!

Here’s a few of the tools I use in Filmora to get things back on track and make it look like I had it under control the whole time.


Convert Horizontal Video to Vertical in Seconds

Well I guess Movavi is a little late to this party but as they say, better late than never!

Movavi have just added an “Auto Crop” module to their video editing software and after testing it out for myself it works very, very well.

It can take horizontally shot video and automatically convert it to vertical video completely automatically.

Just as a little tip from me as well, if you know you are going to convert something ahead of shooting then do this.

Work out your intended framing so that you are quite generous about the space to are leaving in the original 16;9 footage.

That way when it comes time for cropping programs like Movavi have greater leeway for adjusting the cropped frame to convert to vertical.


Creating the Back to the Future Hoverboard Effect

I am not really convinced anyone reading this blog is actually going to go out and replicate what’s shown in this video!

However there is an important point to note about the post production side of things after the original footage was captured.

You will notice in the video the results on an almost no budget shoot are very good and the reason for that is only a couple of little things done in editing.

The actual separation of the final objects is something any of us can do with a reasonable consumer level video editor.

You could use masking, green screen or even A.I to get that done cleanly.

The second point is the addition of subtle shadows in the shots he gets.

It is a tiny detail that really sells the effect and again, you and i have those tools.


What To Do When Your Content Feels Repetitive (Live Channel Review)

If you are starting up or have already started a YouTube channel then there should be at least one undeniable fact that you are aware of.

That fact is that your channel must have a relatively tightly focused subject that you are making videos on.

If you don’t do that then YouTube has so much difficulty finding an audience for you that ultimately it gives up.

So given that a channel has a focus subject and an audience is building or had been built, that channel will hit the next big problem.

That problem is that you simple can’t keep producing content on and on forever without it ultimately starting to get repetitive.

Not only will your audience begin to notice but let’s face it, it will start slowly sucking the life out of you over time.

The question to be answered here is how to pivot to another subject to breathe life into the channel and you without alienating your existing audience.

It’s a fine line and in the video below a couple of guys with proven track records on the platform cover this subject in depth.


Appeal Video for Reused Content Demonetization on YouTube (How to)

There are a number of YouTube video genres that involve re-working, commenting or somehow making use of existing YouTube content.

Most of those types of video are perfectly acceptable in YouTube’s eyes BUT!!!

In order to examine the vast amounts of footage that is uploaded to YouTube every day, they rely heavily on A.I. driven bots to complete that task.

The real data those crawlers are trying to determine is whether or not the content is just someone re-using someone else’s content or if it is a legitimate reuse such as a reaction video or commentary.

Unfortunately when it comes to A.I in certain scenarios there seems to be a lot of artificial and not quite so much intelligence!

The result of that is many users getting “Reused Content Demonetization” strikes that are not actually accurate.

Here’s a run-through on how to deal with that situation.


Create a Pro Audio Visualizer Effect in DaVinci Resolve (No Plugins Needed)

I always try to add any tutorial I find each week that somehow involves the Fusion Page of DaVinci Resolve.

This one of the most powerful modules within the overall Resolve toolkit… BUT!

Let’s face it, this is pro level compositing and special effects all wrapped up in an interface that makes the space shuttles control deck look like a kids toy!

So unlocking all that power whilst being desirable, is not exactly an easy process.

What I like to do is find simple tutorial like the one below to learn Fusion even though I may not actually be wanting to create that effect for anything.


Top 5 AI Filmmaking Tools 2026

Since the first A.I. services started to appear I have always held the view that A.I for video editing was a good thing provided it was treated only one way.

That “way” is that A.I is a tool. It is not some kind of replacement for content creation or video making.

So over the past year or so there has been an explosion of different A.I models claiming to do all sorts of things and from what I can see, most of them are pretty naff.

There are however a few really good models that can go a long way in helping video creators save time and effort to add to their projects in a meaningful way.

I have my own preferences but here’s a list of current services that I can pretty much get onboard with.


Stop Shooting Like This… Please!

This is a really good “hands on” walkthrough of setting up good lighting for video with minimal pro equipment.

When I look back at the early stuff I was shooting it is because of the things in this video that I had such a hard time correcting the color and getting it to look decent.

Even then the results were pretty mediocre because a universal truth in video is that you can’t polish a turd!


Discover more from The DIY Video Editor

Subscribe to get the latest posts sent to your email.

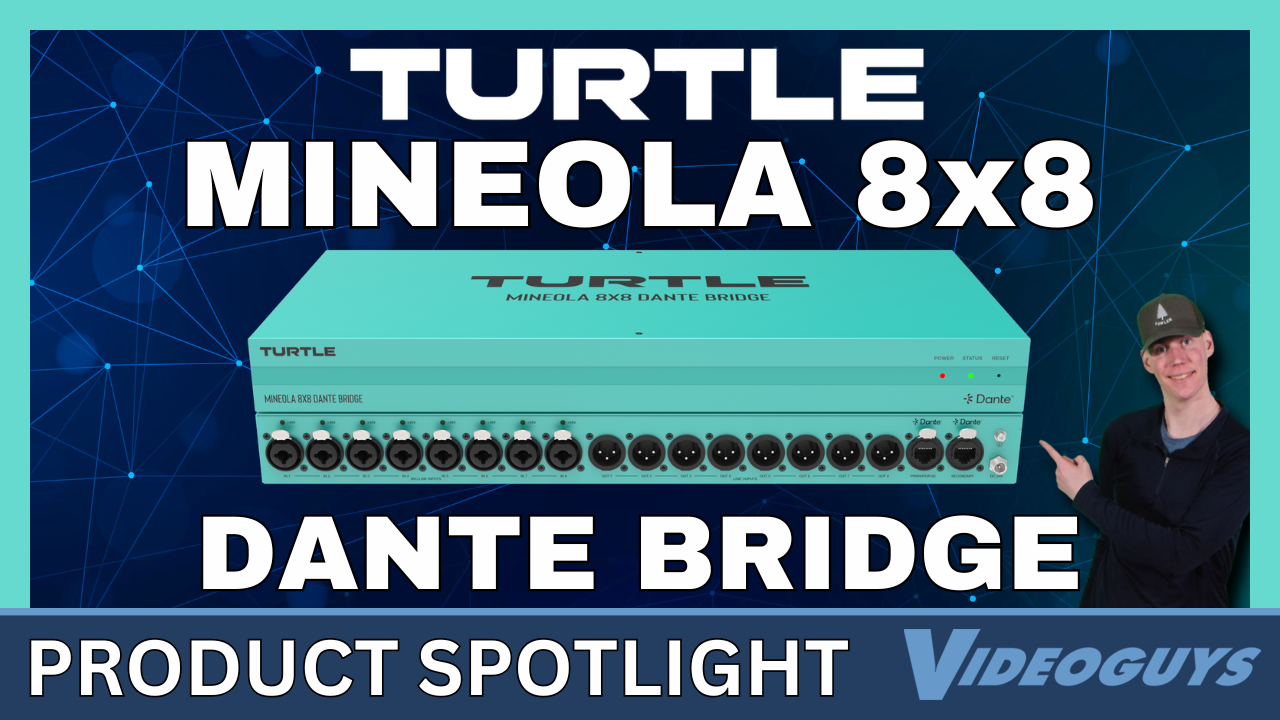
Turtle AV Mineola 8×8 Review


If you’re working in modern AV or broadcast environments, chances are you’re already familiar with Dante Controller and the power of networked audio. But what happens when you need to bring traditional analog gear into that ecosystem?

That’s where the Turtle AV Mineola 8×8 comes in.

What Is the Mineola 8×8?

The Turtle AV Mineola 8×8 is a powerful audio interface designed to bridge the gap between analog audio sources and Dante-enabled networks. Whether you’re connecting microphones, mixers, or other outboard gear, this compact unit simplifies the process—no extra converters or complicated signal chains required.

It’s built for professionals who need reliability, flexibility, and clean audio in environments like live production, broadcast studios, houses of worship, and education facilities.

Key Features That Stand Out

The Mineola 8×8 is packed with features that make it a versatile addition to any AV workflow:

  • 8 Analog Inputs & 8 Outputs
    Easily route multiple audio sources and destinations with full flexibility.
  • Combo XLR/TRS Inputs with Mic Preamps
    Built-in preamps and 48V phantom power let you connect professional microphones directly.
  • Balanced XLR Outputs
    Deliver clean, noise-free audio to your downstream equipment.
  • Dual etherCON Dante Ports
    Redundant primary and secondary network connections ensure reliability in critical environments.
  • Power over Ethernet (PoE)
    Simplifies installation by delivering both power and data over a single cable.
  • Built-In DSP Control
    Access EQ, gain, delay, and presets through an intuitive web interface—no external processing required.
  • Seamless Dante Integration
    Works effortlessly with Dante-based systems for smooth routing and management.

Why It Matters

Integrating analog audio into a digital network used to require multiple pieces of gear and added complexity. The Mineola 8×8 eliminates those barriers by combining everything into a single, rack-friendly unit.

This makes it ideal for:

  • Broadcast and live production setups
  • House of worship installations
  • Educational AV systems
  • Corporate and government AV environments

With PoE support and redundant networking, it’s also a strong choice for permanent installs where reliability is critical.

Scalable for Any Workflow

Not every setup needs an 8×8 configuration—and Turtle AV understands that. The Mineola series is available in multiple configurations, including 2×2, 4×4, and 16×16 models, so you can scale your system based on your exact needs.

Whether you’re building a small production rig or a large, multi-room audio network, there’s a Mineola solution that fits.

Built for Professional Use

The Mineola 8×8 is TAA compliant and backed by a 5-year warranty, making it a dependable choice for professional and government applications alike. Its rugged design allows it to fit seamlessly into racks, flypacks, and control rooms without adding unnecessary complexity.

Final Thoughts

The Turtle AV Mineola 8×8 is a smart, efficient solution for anyone looking to integrate analog audio into a Dante network. With robust I/O, built-in DSP, and simple network connectivity, it removes the friction from hybrid audio workflows.

If you’re upgrading your system or designing a new one from scratch, the Mineola 8×8 is a reliable tool that helps future-proof your audio infrastructure while keeping your setup clean and manageable.

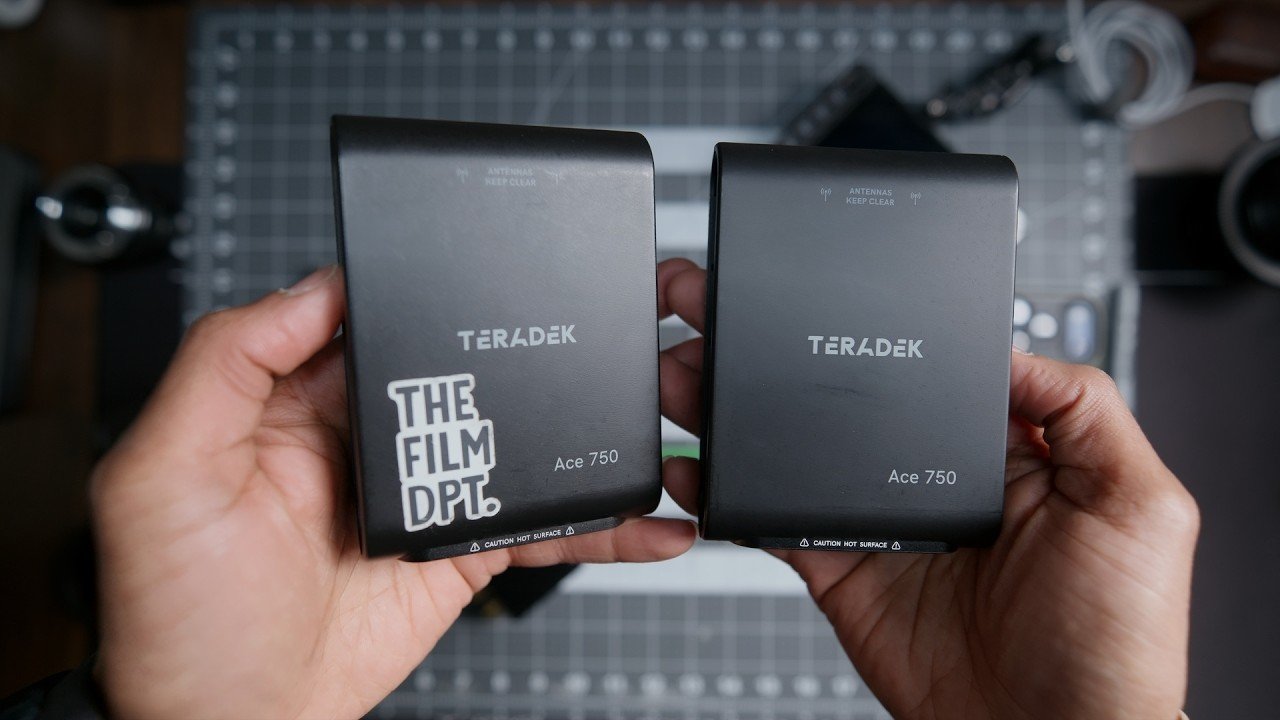
Teradek A750 Review: Reliable 4K Wireless Video for Real Production Workflows


In this hands-on review, the Teradek A750 is tested across a range of real-world production setups, from lightweight iPhone rigs to full cinema builds, highlighting its consistency and reliability in demanding environments. While positioned as a more budget-friendly option on paper, the system delivers dependable 4K transmission, low latency, and stable performance, especially with the advantages of 6GHz connectivity improving signal reliability on set. Watch more:

Learn more about Teradek here

Read the transcript: 

[music] [music] This video is long overdue and I know a lot of you all have asked [music] me my experience with the A750s, so this is the video for you. I’ve used the Pterodc A750 on a variety of productions from iPhone rigs, mirrorless [music] setups, and full-on camera builds. This budget transmitter and receiver has delivered [music] on every situation I needed to, especially when I needed a 4K signal and low latency. Still going strong. That’s me. There’s my leg. [snorts] Most of you have been on the fence about getting into the Terjack system because of the price. This is where the A750 comes into [music] play. So, what you’re getting is 4K 30p, 10bit HDR, true zero delay, a range up to 750 ft, [music] line of sight, 6GHz frequency, and expandable with the Bolt 6 system, all for around $1,000 [music] for both the transmitter and the receiver. In my opinion, this is the better budget option to own. However, I am going to be talking about the cons first of the A750, just so [music] you know. And there’s not a long list. So, here’s the first one. Now, there’s no SDI on this unit. That might be a con for most of you all coming from or comparing it to the DJI SDRs or the Holland or Axons. I get it. But this is mainly made for mirrorless cameras or just cameras that only have HDMI obviously. So, I still think it’s useful. HDMI is still going to be around. And a lot of production cameras that are more high-end still have HDMIs on some, not all of them. So, there’s that. The second thing is that there’s no iPad app for viewing. Reason being that this model, the A750s or really all the terterodex, they don’t use Wi-Fi based systems. These are their own chip systems, the BB3 system. And we’re going to talk more about that a little bit later in this video. For power, it does come with its own barrel to DTAP cable, which is fine. It’s not a locking. It’s not threaded, so it kind of just sticks in and that’s it. And you could knock it out if if depending on how your rig is. And there’s a second option where you can actually buy a battery plate which has a Sony MPF and a Canon LP battery. Um, but that makes it a lot more bulkier obviously. And yeah, so there’s that. But those are really the three things that I find as cons. There’s more to this video and you get to weigh the pros and cons which the pros outweigh the cons in my opinion in a lot of ways. But before I talk more about the good stuff, let me just talk about today’s sponsor, Audio. To me, what makes a good music platform like Audio is simple. It actually has music you enjoy listening to. When the music library is full of tracks that genuinely inspire you, finding the right piece for a project becomes a lot easier. Now, audio has several ways for [music] you to discover new music. And personally, I’m a browser. When I log in, I usually just see what’s on the what’s new section. I play a few tracks. I save ones that I like. And then I click [music] find similar. That opens a whole new set of artists and tracks that I haven’t heard before. Now, [music] on the days that I feel a little bit more indecisive, I pull up Hans 2.0. All I have to do is type in a feeling or expression and it starts surfacing tracks [music] that match that vibe. And it’s a really quick way to get the creative gears turning. Now, if you want to try it out [music] yourself, you can start for free. And also use code cine70 to get 70% off your first year. [music] Honestly, tools like this can cut your music search in half. And if you’ve been enjoying the music in this video so far, I’ve actually put together a playlist just for you. Check it out. Everything I’m about to mention depends on your use case. I know some users have a really good experience with Wi-Fi based transmission systems. So, feel free to rent out these units and test it for yourself. For me, this hasn’t been the case. Wi-Fi transmission systems can be convenient, but it’s been unreliable. The possibility of getting a ton of interference is at a greater risk. The BB3 silicon chips in the Bolt 6 and A750 have proven themselves time and time again, which leads me to talk about the 6 GHz option. >> Flashback. So, let’s say you have a five lane highway. This is your 5 GHz [music] uh workflow, which most devices like the DJI Pro and the SDR can operate between 2.4 GHz all the way up to 5.8 8 GHz. So let’s say you know and you’re in a high congested area with a lot of different types of frequencies happening. So it gets so cluttered. Imagine it’s like your you know your traffic basically. The six [music] GHz is your fast lane or the carpool lane. It’s going to allow you to get over it and get a better [music] data transfer, data stream, better frequency, better reliability, and it bypasses all that extra congestion. Now there are a lot of models out on the market already that offer 4K signal. And what’s nice about the Pterodact system is that the 4K is consistent at 10 bit 42:2. [music] The clarity and detail is just a win. Of course, you need a camera that outputs a [music] 4K signal, but even in 1080p, it looks great with the terterodex. Now, there’s going to be some level of latency coming from the camera to the transmission and [music] going out, but but terod has proven themselves to have the lowest rate for latency. I can easily pull focus off the A750s. So, this is something I highly recommend. You can get by with other systems, but I’m not in the market to get by. I want to have something that’s reliable and consistent. And overall, you can use the A750 as a base and expand to the Bolt 6. So, you can always keep the system with you. There’s no need to buy one system and buy a whole new system and not use it. You can use both in any and all scenarios that they’ll communicate. And pairing them is really easy. Here’s how to do that. All right. All right. So, once you download the Bolt app, you just go find it on your phone. I’ve already unpaired these, but just so you know, on the A750, you want to make sure that Bluetooth is enabled. What you do is press this little button here. You’ll see it toggle on and off. So, Bluetooth on, Bluetooth off. Let’s make sure it’s on. And then in your Bolt 6, you’ll just navigate through the menu to go to the Bluetooth setting. And then make sure that’s on. Then you just hit pairing. It should see the transmitter first and then you should see the receiver next and pair. I’ll let this go on real time. It’s syncing and it’s complete. And then we go back out. You can go to each one. And here in the app, you can actually go and change whether you want the 5 GHz or 6 GHz channel. So, if you open up the receiver, you get all this extra information. So, it’s loading information. Right now, I’m not connected to anything, but you can see all this information here, which is great. If we go up to the menu up the top here, and then wireless settings, and then you go to 5G or 6G. Same thing with the Bolt 6. Or you can actually go to the menu inside the device as well. That’s the only difference between the two. You have to do all the settings in the app for the A750 versus the Bolt 6. You can do it on the device itself. I used to bounce between the DJI Transmission Pro, SDR, and Pterodact, both the Bolt and ACE. Now, I’ve recently sold my DJI transmission system, both the SDRs and the Pro models. But to briefly explain why I did that, there were just some drawbacks from the DJI system compared to the Pterodex system for my workflow. >> Flashback. This >> has been kind of crazy with this camera system. >> Main with the DJI stuff, the transmission, it’s not really great for a big setup like this. The most recent job that I was on, we used the Ronin 4D as well as the other DJI products for that, you know, transmission system. DJI hasn’t made a significant update to those devices in a while as well. I digress. And so here are a few things why this was the last straw for me using the DJI system on professional sets. One, when you have to use multiple receivers, it has to go into broadcast mode. And broadcast mode increases the latency and the quality degrades. So you don’t get a crisper image. Though it is still 1080p, I think it just doesn’t look good and you get a weaker picture coming into it. and we had some, you know, high-profile clients. There was really no complaints that I heard, but our VTR and, you know, ACS were trying to figure out things how to make it work. Um, and two, for whatever reason, the the image kept dropping out. We were in a probably heavily um traffic area in terms of signal. We were at the docks in Chicago and there’s a bunch of other uh industrial plants and stuff like that. as the Wi-Fi was it was a lot of traffic in terms of airways and so we just kept getting the image dropping out and they were reset and stuff like that so it was just a nightmare to use so we eventually just strapped a bolt 500 that we ran down to get from the um rental house and that kind of saved our day basically and that was just the last straw I don’t want to run through that again so this is why I’m moving on to fully moving on to terod deck so I normally do not do a long range test simply because a lot of my jobs are in close proximity when I’m using transmission systems. So, I never really hit that range, but I have the time. Why not? This is kind of common amongst kind of reviews. And so, just to give you an idea of my environment, I am in the middle of the farmlands. Uh I do have power line poles, uh but nothing like significant interference. And so this would be a good clean slate to test. I have a very long driveway. So right now we’re walking all the way down to my uh what’s that called? Trash can. And I don’t know how long the dropway is, but it’s pretty long as you see. I’m kind of out of breath holding these two things. But um this is going to give that test and you had to do your own testing um when you’re using it in buildings, homes, all that jazz. Again, I did more testing on my other video. You can try you can test out to see. But um Oh, I think it dropped. It did drop. Okay. It says good link, but it’s not. I think I’m actually well past 750 ft. [snorts] Uh, yeah, I think that’s well over 500 700 ft as I’m looking at it. Maybe it will connect once I get closer. Yeah, it doesn’t it doesn’t even see it doesn’t even say video sending. So, that means there’s absolutely no signal. [snorts] But there you have it. There’s that test. That happened quick. See if it pops up. See, it’s just a black screen right now for me. You kind of see that [snorts] and picture. Okay. Wow, that’s crazy. Okay, so right here is at his limit. And to give you an idea of how far that is, it’s kind of hard to tell with this wide lens, but the camera is way down by the house. And I think that is about 750 ft line of sight. So, there you have it. So, yeah. [snorts] So, that wraps up for this video. I hope you enjoyed it. I hope you learned something new. And if this is helpful, please share. Uh, this year has been quite slow in terms of me putting out videos per month this year, which has been fine for me, I guess you can say. Um, but this summer is going to be really fun. There’s some exciting stuff coming. Some more work I can’t wait to talk about. So, stick around. Uh, subscribe if you haven’t. And, uh, I catch you guys on the next video. What was that? I I don’t know. But I’ll see you all later. Sheesh.

The Friday Roundup – Bad Color Results and A.I. Storytelling


Man shocked at bad color grade due to monitor calibration

Your Color Grading Looks Wrong… Here’s Why

A while back now my wife started doing the final editing of some of her videos rather than having to wait around for me to get to it.

Anyway that was fine cos’ hey, it’s not like she was paying me!

Anyway one of the first hurdles we had to get over was that the videos she was uploading to YouTube had absolutely terrible color.

The workflow we had was that I would run the original footage through DaVinci Resolve making sure that the color and the audio were within correct parameters.

I would then pass it on to her for the editing part but to her, the color looked bad so she would then “correct” it.

That correction was the actual source of the problem because her monitor was displaying color incorrectly.

To fix that problem I had to get her to stop applying color correction to the video when she received it just because on her monitor it all looked wrong.

The real problem here is that all monitors and phone screens display color differently so for me I do two things.

First, I calibrate my monitor as best I can and secondly, I correct my colors using tools like you find in the Resolve Color Page so I don’t rely on how it looks to me.

I use those scopes and other tools to make sure the colors are correct independent of how they look on my monitor or anyone else’s for that matter.


Overview of AI Storytelling in PowerDirector 365

This is a demonstration of the new(ish) AI Storytelling module in PowerDirector 365.

First up, this is only available in the subscription version of PowerDirector and using it costs credits like many of the A.I. features in software these days so there’s that.

It is an interesting deployment of A.I and although don’t see it as a total solution to creating a story, I think it could be useful as a starting point to at least get some ideas on the timeline.


How to Record Video on PC (Screen Recording Tutorial)

These days just about all consumer level video editing programs come with some type of free screen recording function.

Most are accessible from within the program itself but in reality operate as a standalone module.

Back in the day this wasn’t the case and in fact a good quality screen recorder would set you back at least over $100!

So here’s the kind of interesting part of the new breed of screen recorders that are packaged with editing software.

I test a lot of software to work out which ones I would recommend and of course check out the screen recorders while I am at it.

After having done that many, many times I have realized they all look almost exactly the same!

Sure there are slight differences but but those differences are purely cosmetic and what I suspect is that they are all the same licensed software from whoever built one of the original ones.

Anyway, conspiracy theories aside here’s a tutorial form the Movavi guys showing how to correctly setup your screen recorder to get the best results.


What’s New in Filmora 15.3 (Part 2): HDR Color Wheel, AI Effects, Nano Banana 2 & More!

This is Part 2 in the series covering the latest updates to Filmora 15.

Although they have been hitting the old A.I. button pretty hard, that’s certainly not the whole story!

There have been new features as well as some great upgrades to existing ones.

The HDR Color wheel is a pro level addition to what have become over time some excellent color correction and grading tools.


How to Use the New Relight Feature in Filmora 15

A week or two ago I posted a video highlighting some of the recent updates to Filmora 15.

One of the new features mentioned in that video was the Relight module but in that video there was no real demonstration of what it actually did.

So to fill that gap here’s a more complete explanation of the Relight feature covering what it does, how to access it and the available settings.


How to Make an Appeal Video for YouTube Inauthentic Content Demonetization

When A.I. content first started appearing on YouTube they announced they would be treating it pretty much the same a Google was treating all A.I. content.

That policy was basically they did not really care how the content was made as long as that content served the purpose for which is was intended and was of reasonable quality.

That was all very well at the time for YouTube until the amount of A.I. generated content started going through the roof!

Their first step in roping the situation in was that they required the creator to identify on uploading exactly to what degree A.I. had been used making the video.

That seemed fair enough at the time however the sheer volume of A.I. content of questionable quality has forced them into a more recent development.

Most likely through their own algorithm as well as A.I. they began a bit of a purge of channels creating such content by demonetizing them for “Inauthentic Content.”

As is usually the case with these automated actions a whole bunch of innocent parties got caught up in the mess and were incorrectly demonetized.

Initially such channel owners had very little success trying to appeal these decisions however recently there seems to have been an easing of the situation.

Here’s a video from Jacky Nguyen showing how he managed to get through the appeal process successfully.

Fair Warning!

Very soon after Jacky posted the video above on dealing with an “Inauthentic Content” demonetization by YouTube he has posted the one you will find below.

Essentially it is a warning to slow down, wait and be patient if you want to deal with the situation because rushing in may result in the situation getting worse!


Shot Size for Beginners

One of the “hidden” factors in shooting videos that is strangely ever present is that of shot size.

By that we are referring to the amount of frame real estate the subject we are shooting occupies.

Very often we refer to shots as being wide, medium or closeup but the effect any of these shots has on the audience is the more important factor.

As newbies to shooting video we often tend to shoot based on what’s available, what is presented to us in a given circumstance.

The result of this is that often the shot itself doesn’t really convey the idea we had in the first place.

So here’s a rundown of the basic shot sizes with an explanation of what each one does with regards to audience perception or how it serves the video you are making.


Shot Angles for Beginners

Carrying on from the video above on shooting basics, in this one they cover “shot angle.”

This is another addition to the language of video that we all really need to understand.

As I have said before, I don’t expect amateurs to be religiously applying this information in their “How I grow Tomatoes” videos!

The reason I add it is so that we can all understand and be aware that certain angles and sizes of shot will create an effect which we may want or not want!


Why Sound Is 51% of This Scene (One Battle After Another)

This just a very interesting scene-by-scene breakdown of the audio structure being created at a fully professional level.

Other than reiterating the need to address audio as an important part of video… not much to learn here really!


Discover more from The DIY Video Editor

Subscribe to get the latest posts sent to your email.

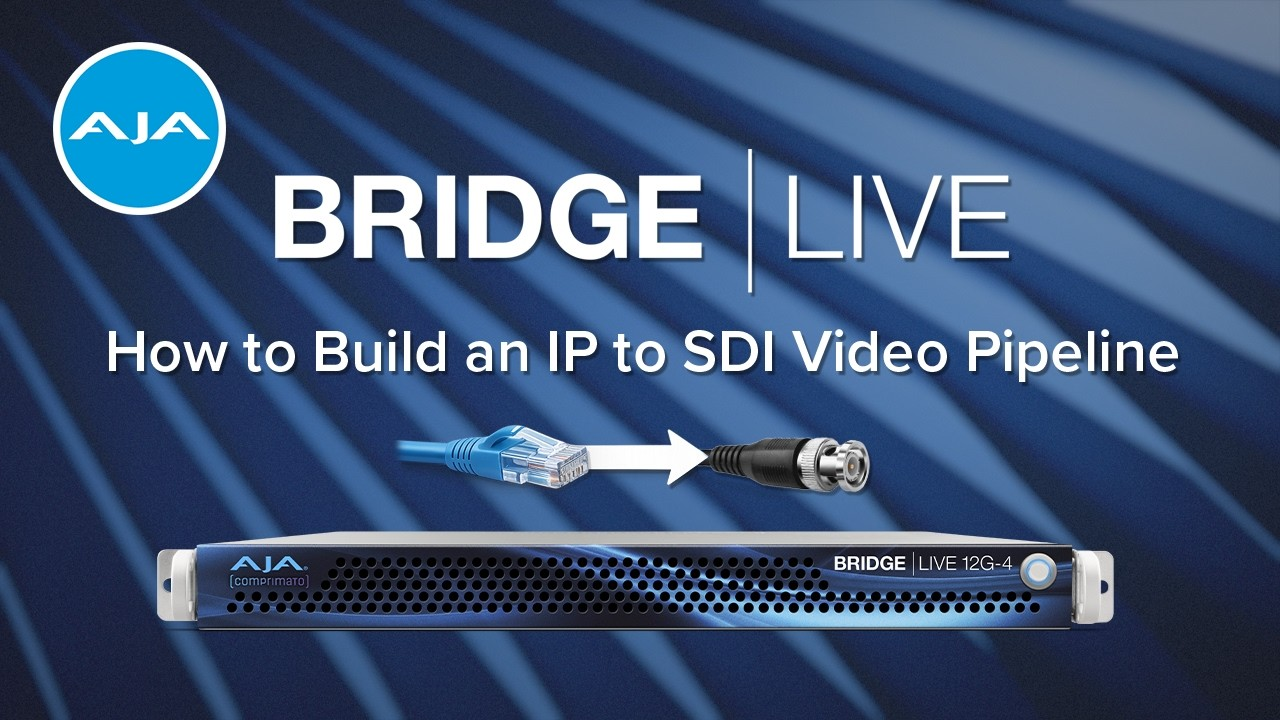
How to Convert SRT Streams to SDI with AJA BRIDGE LIVE


AJA BRIDGE LIVE enables broadcasters and production teams to convert remote SRT contribution feeds into baseband SDI for seamless integration into facility workflows. In a recent walkthrough, AJA Technical Support demonstrated how to configure a BRIDGE LIVE pipeline to receive MPEG-TS over SRT, set appropriate latency buffers for stable public internet delivery, and decode the signal directly to SDI. The process also includes configuring audio mapping and passing through metadata such as closed captions or SCTE-35, making it a complete solution for reliable remote contribution and broadcast integration. Check out the full breakdown:

Learn more about AJA here

The Friday Roundup – Gear Envy and Speed Ramping Tips


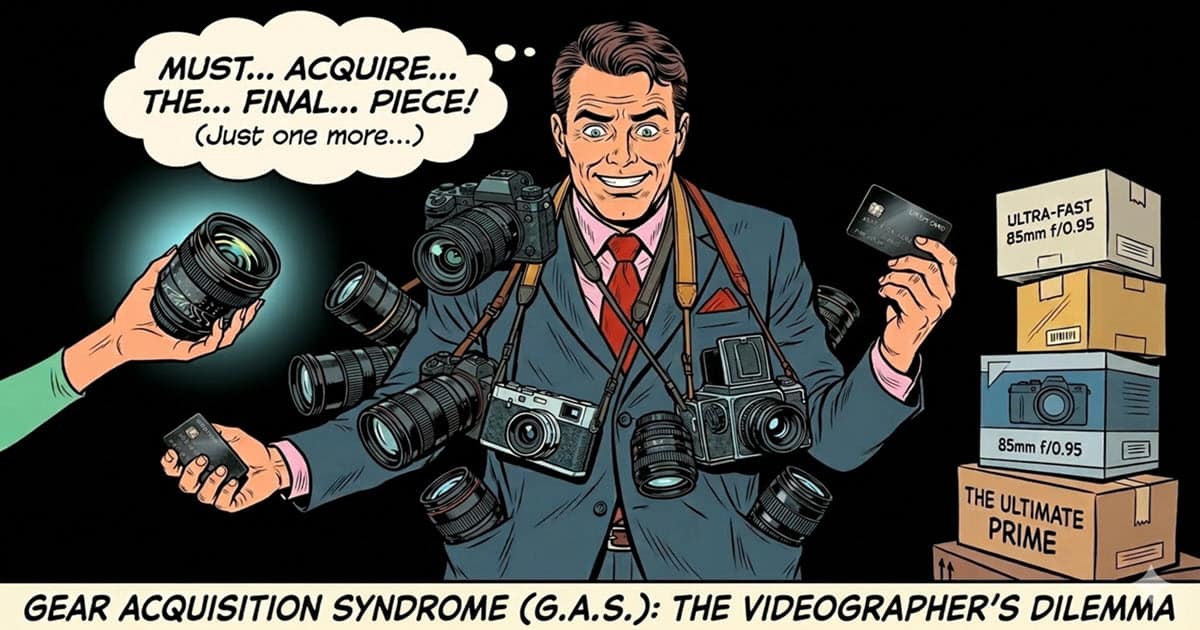
Pop art cartoon image of man buy too much camera gear.

Amateur Camera Gear Not Worth The Money in 2026

Although the title of the video below refers to “Camera Gear,” it actually goes way broader than that and is well worth watching.

The harsh reality is that in the past four or five years the changes or improvements to most cameras has been incremental and mainly focused on tiny details.

The obsession with upgrading yearly is almost entirely a false concept that is created and driven by marketing departments all over the world.

Let’s face it, most tech companies whether they are hardware or software based are built on a model that depends on new products being released annually.

That can be a new model camera or an updated version of some software but either way their profits depend on you and I buying into the latest and greatest.


How to Make Speed Ramps Actually Work

Most reasonably equipped video editing software these days will offer some kind of dedicated Speed Ramping feature.

If you are not sure what speed ramping is, it is the action of speeding up or slowing down portions of a clip to create dynamic interest.

Anyway, given that the tools necessary are widely available most people use speed ramping in a pretty basic way.

That’s fine but as is usually the case, that’s not exactly what the professionals are doing!

If you check out the video below you will see that using or not using speed ramping is actually not the whole story.

The real point is how, why and exactly where you apply speed ramping if at all to your edits.


Use PowerDirector as a Photo Editor

I came across this video demonstration this week and was surprised that a lot of people were not aware of this.

Then I realized that using a video editor as an image editor was a relatively new concept given that the control available in older video editing software wasn’t all that good.

However in the past two years or so the amount of color adjustment and control you can exercise in your average video editor has improved out of sight.

So here’s a look at what you can do with a still image in the current version of PowerDirector.


Beginner’s Guide to AI Image to Video in PowerDirector (2026)

So right now one thing that is happening in the world of A.I. as applied to video is that we are seeing more and more separate A.I. models emerging.

Whilst I guess that is a good thing from a competition and pricing perspective it also adds a degree of confusion to the subject.

The problem is that each model will have strengths and weaknesses in performing certain tasks.

In this video from CyberLink you can see what I am talking about as they go through an example of “image to video” A.I. generation for different models.


Edit Your Podcast Yourself (No Studio Needed)

An interesting “crossover” that has been going on for the past few years is the idea of podcasts being distributed as videos.

In fact some of the bigger podcasts at this point in time now have three for four camera setups and pro lighting on top of the high end mic setups!

The reasoning behind this is quite simple, has proven to be successful over time and follows a very old rule.

That rule is: “Don’t just be on the internet, be everywhere on the internet!”

So in the case of podcasts the idea is you upload that podcast to every possible service you can and then, you upload the video to every possible service as well.

Of course editing your own podcast/video at home can be quite a good deal of work if you don’t have a process.

So, here’s a process you can follow to keep things simple and efficient.


30-Minute Video Editing Challenge

Over the past few years there has been a heavy emphasis in the world of video editing software on the development of A.I.

Unfortunately when things like this enter just about any space the respective marketing departments take over and all of a sudden we are in the realm of wizzbang, ooh-ahh look at this cool thing!

The real value of A.I. in video editing is not its ability to create videos but its ability to add useful tools to make your job as a video editor easier.

A.I. cannot really “create” anything, it will always need a human to tell it what to create!

Here’s a video from the people at Filmora showing how A.I. tools can be used to help you as a creator work more efficiently.


10 Gimbal Moves to Get Cinematic Footage

If you have gotten yourself a gimbal in search of that buttery smooth handheld footage there’s something that you are probably now aware of!

First up is the fact that just loading that camera or phone onto the gimbal is not going to guarantee smooth motion especially when walking.

Turns out you still have to adjust the way you move to give the gimbal a chance.

The second point is that the gimbal is absolutely not going to capture any decent footage!

In a strange twist the real story is that you have to shoot those cinematic masterpieces and the gimbal is actually only a tool! Who knew!

Anyway, here are some tips to help you lift that gimbal game.


Ask me Anything about YouTube

So here’s the deal. If you are in any way serious or want to get serious about running a YouTube channel professionally (not just a hobby!) then you need to watch this video.

Having said that let me provide a little context.

First up you will need to set aside about two hours to watch it!

It is a Q&A so there are a lot of topics covered but more importantly it is from Derral Eves who is probably one of the most successful YouTube consultants around at the moment.

In fact Derral has been around for quite a number of years now and is an authority that is well worth listening to.


Everyone Overcomplicates Color Grading

One thing I have noticed over the years of putting together the Friday Roundup is that in some ways the constant addition of information on the internet is actually counter intuitive.

What I mean by that is that as more and more information is added a an apparancy of complexity begins to rear its ugly head!

One such subject is that of color grading although the phenomena is not restricted to that alone!

In the video below Casey walks through this subject with the specific goal of simplifying the entire process and making it way more approachable.


Discover more from The DIY Video Editor

Subscribe to get the latest posts sent to your email.

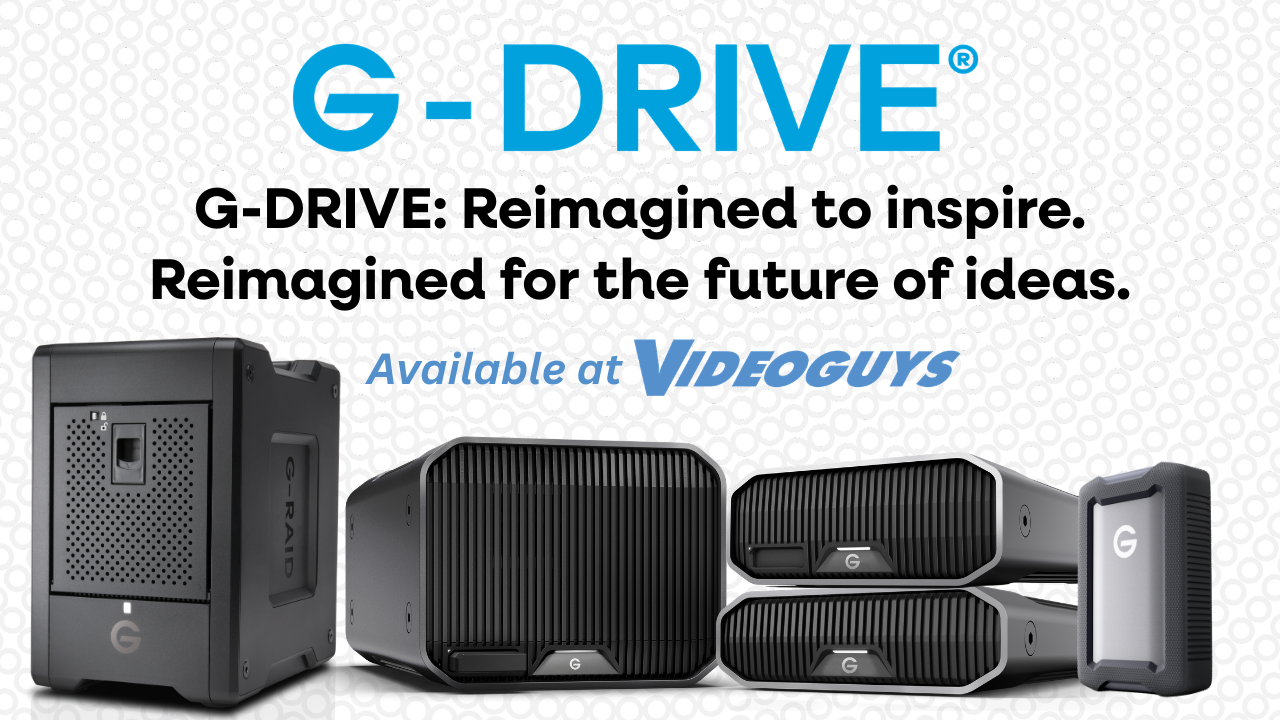
G-DRIVE Storage Solutions for Creators


  • Chase Your Vision from Location to Studio
  • 48TB – 208TB capacities in a transportable design
  • Daisy-chaining for up to 5 additional devices
  • 5-year limited warranty

starting at $4,334.99

w/ FREE Case for a limited time

  • Consolidated Backup, Super-fast Access and Real-time Video Editing

  • Transportable, hardware RAID powerhouse

  • Optimized for multi-stream workflows

  • 24TB – 104TB of high performance storage

starting at $2,669.99

w/ FREE Case for a limited time

  • Studio-grade Storage Performance
  • 7200RPM Ultrastar Enterprise-clase hard drives inside
  • RAID 0 out-of-the-box for maximizing efficiency
  • High-performance Thunderbolt™ 3 interface
  • 16TB – 52TB capacities 

starting at $934.99

  • High-performance, 2-bay enterprise-class storage system
  • Pre-configured in RAID 0 and equipped with Thunderbolt™ 3 connectivity
  • Manage your 4K, 8K, and VR video workflows with ease and reliability
  • 6TB – 26TB capacities

starting at $424.99

  • Reliable, Premium Storage in a Durable Design
  • Fast, simple backups
  • Mac-ready, Time Machine compatible
  • Pairs perfectly with iPad® USB Type-C™ models
  • 6TB – 26TB capacities

starting at $274.99

  • Built for the Wild
  • Rugged portable backup with an IP54 rain/dust rating and crush resistant up to 1000 lbs
  • USB-C™ for quick file backups and ready to go with Mac®
  • 1TB to 6TB capacity

starting at $109.99

The Friday Roundup – Doin’ the Gimbal Walk & Essential Sound FX


Silly cartoon character advising on walking with a gimbal.

How to Walk with a Gimbal for Smooth Footage

Over the past few years there have been some incredible advances made in the field of stabilizing handheld footage.

Action cameras like the GoPro and the range from DJI have brought some amazing internally driven stabilization features.

On top of that handheld gimbals have also taken things to a new level going so far as to capture gyro information that can be used in software later.

However even the most advanced stabilization system around these days, the Steadicam, requires the operator to move in a way that works best for the system.

Here are a few tips for you and I when working with gimbals.


The Only 3 Sound Effects You Need to Tell Any Story

Well in all honesty I am not really sure that these are the “only” three sound effects you need but I think the number is not the actual point here!

Just as is the case with special effects, transitions and everything else that comes with a modern video editing program, sound effects also get delivered in spades.

And also like those other things the temptation is, “Hey! I’ve got ’em, might as well use ’em!”

Well just because you can does not necessarily mean you should and there are many roads leading to what we in the industry like to call “a hot mess!”

So it’s probably best to look at this video as an introduction to the basic sound effects to use effectively and everything beyond that a something to be added with caution.


Create a scene in PowerDirector Where a Vehicle Drives into Fog

You may not actually ever need to recreate a scene of a vehicle drives into fog!

However that’s not the point!

In this tutorial you can see an example of using keyframing in combination with color grading to create an evolving scene.

In addition to that you can learn how to add and modify particles to further enhance a scene and make it work the way you want.

All of this is done in PowerDirector but none of the effects and tools to my knowledge are exclusive to that program.


What’s New in 15.3 Part 1: HSL Eyedropper Tool & Flicker Removal

Version 15.3 of Filmora has just been released into the wild.

I haven’t had a chance yet to check out all the new stuff but in the meantime here’s a video covering the two new features they are highlighting.

First is the HSL Selection tool which allows you to select a color in your video then manipulate only that color while leaving everything else untouched.

The second one is the Flicker Removal tool which is quite a handy little addition.

Sometimes you may find that there is a noticeable flicker occurring in your footage which is usually the result of either two things.

First the lighting in the scene (usually indoors) is coming from fluorescent lights that are refreshing at a rate not seen by the naked eye but appearing in the footage.

The second can be that the shutter speed or frame rate your device is set to is conflicting with the refresh rate of whatever lighting is present so again, you get flicker.

Either way this new tool allows you to remove that flicker manually to restore the footage.


How to Zoom In Your Video

When you are operating as a single camera person or just shooting yourself there is a problem that will eventually trip you up.

It is the fact that as your video progresses there is pretty much no change of camera angle as well as no change of camera distance.

This makes for a quite visually boring video from an audience perspective.

One trick to get around this is to use zoom-in’s and zoom-outs’ to break up the monotony.

Like most things in editing, this can work very well or it can end up looking totally naff!

Here are a few tips.


How to Clear Cache files in CapCut – 3 Minute Tip for Beginners

Just recently my wife decided she wanted to take over editing her short form videos for herself in an effort to stop bugging me to hurry up and get them done!

To do that she decided that she wanted to use CapCut as her editing software because she was already somewhat familiar with the program and its features.

Everything was ticking along very well for her for a while but then she noticed that her computer started to run very slowly.

After I did a little digging I discovered that CapCut was creating quite a few cache files and these had begun building up over time hence the slowdown.

So a quick cleanup got things running smoothly again but just in case we aren’t the only ones that have hit this problem, here’s a video from Jacky on how to clear those files.

Apart from that I generally find CapCut to be a good little editor especially for newbies or those wanting to keep things simple.


How to Make YouTube Videos on Your Phone in 2026 (Start to Finish)

If you have ever had an interest in starting to make videos for YouTube or some other platform then this is a great tutorial to get you going.

One of the main stopping points for people wanting to get into this is that they don’t know what they don’t know!

The reality is that no matter what you think you should be doing there always seems to be some other thing that you were supposed to do before that and it is a pattern that repeats.

So, here’s a run through from start to finish on how to go about it the right way.


What is Camera Language?

This is the first part in a series I came across this week specifically on the subject of shooting video.

Before you check it out I wanted to explain a little of my reasoning for including it in the Friday Roundup.

If you have checked out any of the rest of my website you would know that it is clearly aimed at the amateur or newbie so a video series like this one below would seem out of place.

My reasoning on things like this is pretty simple.

I regularly check out what people are teaching at a professional level even though I certainly don’t operate at that level!

Trust me, I am not delusional!

So while I may not implement everything that I learn in videos like this, I certainly gain a greater understanding of what I am doing.

In fact when I screw things up, it is the knowledge gained from videos like this that I can quickly work out how I screwed up and how to fix it!


Discover more from The DIY Video Editor

Subscribe to get the latest posts sent to your email.

The Friday Roundup – Keeping it Simple & A.I. Motion Graphics


Unimpressed by fancy effects in a video.

Why You Should Stop Making “Fancy” Videos

Almost every time I add a video from Casey to the Friday Roundup, it is going to be pretty much specific to using DaVinci Resolve in some way.

More often than not it will be something to do with color correction or using Fusion.

However this week is an exception and for the average person editing their videos, I think it is a rather important exception.

A great deal of the information we receive on the subject of creating videos comes from a place of or viewpoint of marketing.

It may not seem that way on the surface but believe me, it’s there!

Most of it takes the form of presenting you and I with a technique, an effect, an editing style, a transition or any of a bunch of other things we have to be doing to be successful.

Then we are presented with software, plugins, effects packs or whatever in order to cure our terrible inadequacies!

The reality is that probably 90% of those things are simply not true and the keys to improving your videos in a real sense are already in your hands.

If you are at a point where you think that you need to learn some fancy or complicated new process in your editing to take your videos to greater heights then please, watch this video!


AI-Generated Motion Graphics – The Results Are Crazy!

So before we get into the video below I need to point out a few things about it regarding the program itself called Remotion.

First up is the fact that you need to go through some reasonably complex steps to get this thing set up and running.

I managed to do it so that tells me pretty much anyone can if you follow the steps in the video but you do have to follow the steps.

Secondly, YES! The results are very, very good but as is the case with most things A.I, it all hangs on the prompts you give it.

A key point is interacting with the A.I. part to let it help you create those good prompts.

Anyway take a look for yourself but as someone who pretty much hates creating motion graphics, this is gold!


Two Ways to Remove Backgrounds when Working with Images in PowerDirector

This is a quick demonstration of the background removal abilities that exist within the PowerDirector interface.

A couple of things to note here are the fact that the techniques and modules demonstrated are only applicable to still images and not video.

PowerDirector does a pretty decent job using either method for removing backgrounds especially if you give it images that have clearly contrasting subjects/backgrounds.


How to Start Video Editing in 2026?

For all of us there was a point before we started video editing and just after making the decision to do so… we sat staring at a computer screen wondering how to start.

For me personally I had to start providing an employer with videos of the activities I was engaging in so I just had to dive in.

I purchased a camcorder (that’s a whole story in itself!) but then had to deal with at least basic editing.

That’s when the real confusion set in because also at that time there was very little information available for beginners on the internet.

These days it is a different story so if you are thinking about dipping your toes into the editing pool, here’s a great video tutorial to get you started.


Can This YouTube Channel Hit 7 Figures? (Live Strategy Session)

So this next tutorial video is definitely not for everyone but for those that it does apply to, it is packed with all the good stuff!

Let me clarify who it is for first.

This is for anyone that wants to approach building a successful YouTube channel as an actual business goal rather than just a fun thing to do like a hobby.

It is a live strategy session, is very technical and goes way deep into the tools and especially the analytics available to all YouTube users.

Most people scan over all that stuff and don’t really know what it all means and worse still, have no idea what actions should be taken based on those stats.

So if you are looking for a free masterclass on the subject… here you go!


I Finally Proved Views Don’t Matter Here’s the Data

This is another video I came across this week that dovetails perfectly into the longer deep dive video on YouTube channels and using stats.

It makes the very good point that most people tend to get caught up in chasing the algorithm for views and subs rather than business goals or at least the goals they had in the first place.


Finding the Perfect Key Light Angle

Lighting for video is always a bit of a pain for the average creator because more often than not we are shooting in an uncontrolled environment.

By uncontrolled I mean spaces where there is existing lighting that we really don’t have the ability to totally control.

So regardless of the shooting situation the first rule we are taught is that you have to get the key light right before you do anything else.

Very often that way easier said than done especially if you are shooting on your own.

Here’s a great demo video of how to set that first key light correctly even though shooting solo.


7 Mistakes Beginner DaVinci Resolve Editors Make

I came across this tutorial video this week and although it covers material I have shown before, I think it is well worth looking at.

If you are very new to DaVinci Resolve or are thinking about using it then this is definitely for you.

Easily the biggest barrier to using Resolve is the interface of the program.

Let’s face it, the program was and is designed for professional use so the knobs and dial and buttons and settings literally go on forever!

I know from my own experience that I had the program on my computer for months before I actually started using it.

I would open it, look at that interface, click a few buttons and then quickly shut it down and walk away!

Easily the best way to start is to follow along with a video like the one below.


Best Cameras for YouTube in 2026 (Cheap to Expensive)

So this one comes with my standard disclaimer for when it comes to camera recommendations.

I do not even attempt to keep up with the camera market as it develops because I just don’t have the time and I certainly do not have the background for it.

What I can do is watch a review video and work out whether it is worth it or not!

Whilst the video below is certainly driven by a little “salesyness,” the content is solid and these are some good suggestions for video cameras if you are looking to go there.


Discover more from The DIY Video Editor

Subscribe to get the latest posts sent to your email.