
The Friday Roundup – Exactly How to Cut and Cinematic Tips


Making bad cuts and calling it art!

Why Your Edits Feel Choppy (and how to fix it)

I would suggest that this video is vital to anyone that has heir basic shooting and editing tools under control.

You will find lots of advice on the internet about how to cut and all the different types of cuts you can use.

However most of them fall short when it comes down to the finer details of why you make a cut, when to make the cut and how you should be making those cuts.

The bottom line is that every cut decision you make will either hold your audience or cause them to momentarily drift off.

If you do the latter too many times, they leave for good and that’s not a good thing!


How I Made My Videos Look Like Movies Part 1

The following two videos from the folks at Filmora are on a subject that is one of my pet peeves when it comes to video tutorials.

The term “Cinematic” gets bandied about as if one trick, effect or whatever is going to achieve that look when it fact any pro editor or director never thinks to themselves, “Ooh! I want to make this look cinematic!”

The reality of what is being referred to here is a number of decisions and choices that ultimately lead to what we may call, Cinematic.

There are two parts to the series and it is all well worth watching.

Make Any Video Instantly Cinematic Part 2


3 Ways to Cut Video Footage – PowerDirector

Although this is a quite straightforward explanation of some of the ways you can cut your footage in PowerDirector, there is an underlying lesson to be learned.

What you should become aware of as you edit more and more is there will be a certain type of cutting that you tend to apply way more than any other.

This often comes down to personal style, your particular workflow or even the type of project you tend to work on the most.

Regardless of how it becomes your “go to” method of cutting you should, once noted, look at the action and work out if there is a keyboard shortcut you can use to carry out that function.

You will be shocked at the amount of time you can save by doing that.


How to Shape the Mood of Your Project with LUTs – PowerDirector

A feature that is pretty much common to all decent video editing software programs these days is the ability to apply LUTs.

However if you are relatively new to video editing then when the marketing people tell you that you can use LUTs it is basically a meaningless statement!

In the video below you can get a simple explanation of what a LUT actually is and how you can use them in your own projects.


Tips on Working with Texture Effects – PowerDirector

This is another great example of thinking outside the box when it comes to apply effects and using tools in your software.

This one is in PowerDirector using the texture effects to apply a “look” to existing footage.

That’s fine in itself but check out how at the end he shows how to use the opacity keyframing to transition the effect given the fact that transitions do not actually work with these effects.


How to Make a Time Lapse from Video or Photos

It used to be that creating a Time Lapse video was a pretty complex and somewhat clunky process.

The limitations of the software back in the day meant that you really had to have your ducks in a row before starting and even then crashes were almost inevitable!

These days most editing software can handle the process with relative ease.

Here’s a run through of creating a time lapse with both video and still images in the Movavi Video Editor.


How to Create Subtitles Automatically – Movavi

One stat that I can never really wrap my head around is that most people watching videos on YouTube and similar platforms are doing so without audio!

I really have no idea what those people are thinking but then again, maybe I am just showing my age.

Anyway regardless of why that is happening it brings sharply into focus the absolute need for adding subtitles to your videos to retain engagement.

Most editing software these days has introduced A.I. based transcription tools which allow you to then automatically add subtitles.

Here’s a demo of how it is done in the Movavi Video Editor.


The Actual Tools We Use to Run a 1.8M Subscriber Channel

I think most people that start a YouTube channel have dreams (delusions?) of growing that channel into a massive cash cow affording them the “creator lifestyle!”

The reality of actually doing that is usually hidden by a gazillion “How to” video offering one trick solutions to one particular aspect of the process… and usually a $30 course!

Of course none of them actually cover the full scope of what it takes to ramp up to that sixe.

Here’s a video from the guys at Primal Video who have 1.8 million subscribers showing exactly what it takes to manage and run a channel of that size.


You Need An Editing SYSTEM

Like most activities we all engage in there is an expectation with video editing that as you progress, learn and become familiar with the basic actions, things should get simpler.

However it is often the case that in fact as you progress, things get longer and way more tedious!

That is largely due to the fact that as you do learn, you begin to add more and more tools to your arsenal and more complexity to your projects.

As a result editing doesn’t get faster, it gets slower and more time consuming!

The missing ingredient here in almost every case is the lack of a system or set pattern by which you approach and deal with your projects.

Here’s some sage advice from Casey on the subject and he makes a great case for working out a system and sticking to it.


DaVinci Resolve 20 Quick Tip: Instant Motion with Dynamic Zoom

In most editing software the way you either zoom in or zoom out on a clip is by using keyframes.

You set a keyframe at a particular zoom level or none at some point then move to the next point, adjust the zoom and set another keyframe.

However in Resolve there is actually a tool that will actually automatically do that for you.

Here’s how.


Noise Reduction in DaVinci Resolve: Clean Up Audio the Right Way

This is a bit of a deep dive session done by Daniel focussed specifically on the subject of noise reduction in Da Vinci Resolve.

In the Fairlight page of Resolve you have access to some pretty sophisticated tools for this purpose.

However as is the case with everything in Resolve, you have to know what you are doing to take advantage of those tools.


Discover more from The DIY Video Editor

Subscribe to get the latest posts sent to your email.
Free Church Live Streaming & AV Event


Join us February 24–26 at 3PM EST for WorshipStreamTV, a free 3-day online event dedicated to modern church live streaming, video production, and AV workflows for houses of worship.

If you’re looking to upgrade aging PTZ cameras, improve your IMAG setup, expand your online ministry, or simplify volunteer-friendly workflows, this event is designed specifically for you.

👉 Free Registration: https://worshipstream.tv/

Why WorshipStreamTV Matters for Churches

Church live streaming and in-house video production have become essential tools for ministry. Whether you’re serving a small congregation or a large multi-campus church, having reliable, scalable, and easy-to-use technology is critical.

WorshipStreamTV focuses on helping churches:

  • Upgrade outdated PTZ systems
  • Improve IMAG (Image Magnification) quality
  • Implement AV-over-IP workflows
  • Grow online viewership
  • Simplify volunteer-operated production systems
  • Integrate LED video walls
  • Produce high-quality pre-recorded and live content

This event is built for church tech directors, media volunteers, pastors, and worship leaders who want practical, real-world solutions.

Hear from Leading Church Production Brands

Learn directly from industry leaders shaping modern worship production:

  • BirdDog
  • Kiloview
  • Panasonic
  • PTZOptics
  • QuickLink
  • Vizrt

These sessions will cover real-world workflows and tools used in churches across the country — from small sanctuaries to large auditoriums.

Topics We’ll Cover

WorshipStreamTV is packed with actionable sessions on:

  • Church IMAG & Multi-Camera Production: Learn how to improve in-room engagement with high-quality IMAG systems using PTZ cameras and broadcast-style switching.
  • AV-over-IP & NDI Workflows: Discover how IP-based production simplifies cable runs, increases flexibility, and allows scalable expansion.
  • Growing Your Church Livestream: Understand strategies for increasing engagement on YouTube, Facebook, and church platforms while maintaining professional production standards.
  • Volunteer-Friendly Control Systems: Explore intuitive switching systems and control surfaces that empower volunteers to operate confidently.
  • LED Video Walls for Churches: See how LED walls enhance worship environments and create immersive experiences.
  • Produced Content & Hybrid Ministry: Learn how to integrate pre-produced content with live worship for a seamless in-person and online experience.

Prizes — Register to Win!

When you register for WorshipStreamTV, you’ll automatically be entered to win:

  • PTZOptics Studio 4K 12X Zoom Camera
  • Elgato Stream Deck MK.2
  • A $100 Videoguys Gift Card
  • No purchase required — just register and attend!

Event Details

📅 February 24–26
⏰ 3PM EST each day
🎟 Free Online Event

👉 Reserve Your Spot Now: https://worshipstream.tv/

Complete Live Production Under $10K


Complete Live Production Under $10K | Vizrt TriCaster Mini X Bundle

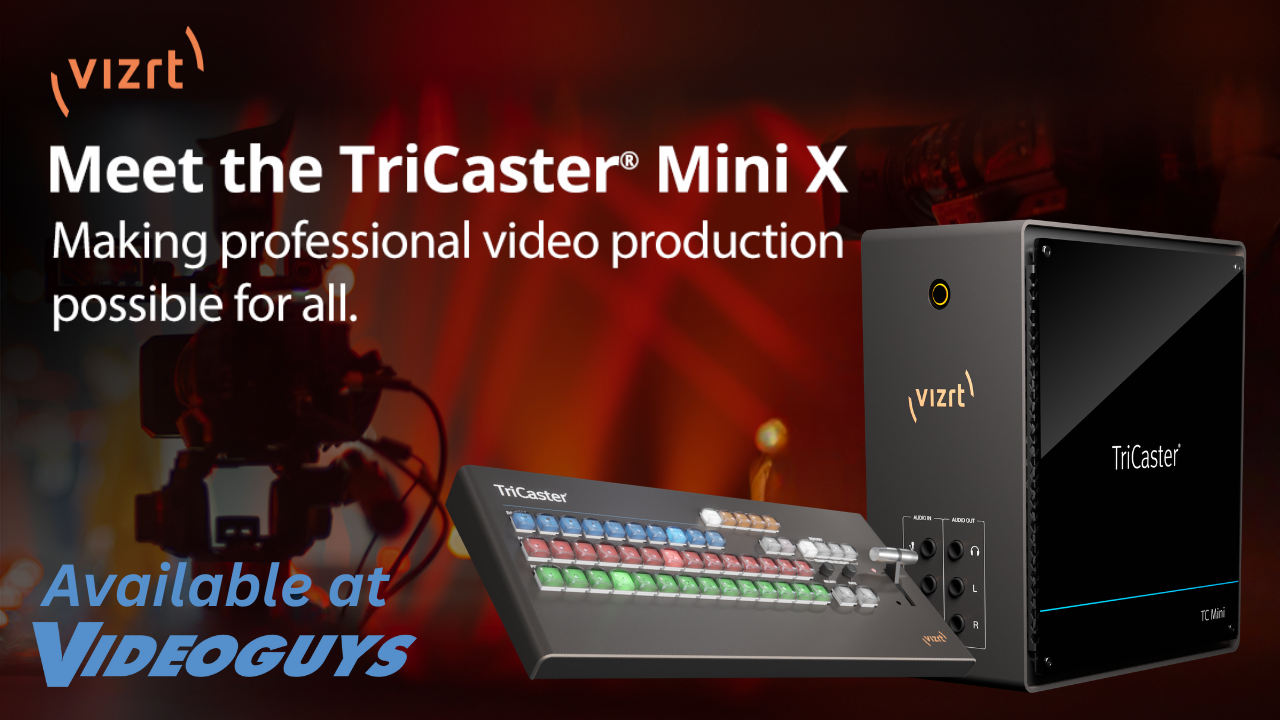
The TriCaster Mini X with Control Surface Bundle is a compact, all-in-one live production solution that lets creators produce professional-quality video from anywhere. Supporting sources from smartphones to 4K cameras, it delivers powerful software-driven workflows with studio-style control in a portable, easy-to-use system.

$10,595.00 reg.
$9,995.00 SPECIAL
Limited Time Only!

LEARN MORE

With the TriCaster Mini X you get…

  • A complete turnkey hardware & software system for streaming
  • 4 HDMI inputs & 8 x IP video inputs via NDI
  • 4K60 production capabilities
  • NDI network connectivity for flexible AV over IP workflows
  • Award winning TriCaster software
  • Viz Flowics for professional graphics

The Vizrt Advantage

Accessibility
Mini X gives producers everything they need right at their desk—switch, stream, record, add graphics, use virtual sets, and more. Professional live video production made simple for anyone with a story to tell.
Flexibility
From cameras to microphones, off-the-shelf HDMI devices connect directly to the powerful Mini X in minutes to create professional level productions – without having to purchase any new equipment.
Scalability
Built with NDI at its core, the Mini X is an easy to use, yet scalable solution that can be simplified or expanded, as necessary – even by using a Viz Connect Solo Converter – offering limitless possibilities.

Ready for Tomorrow’s Production Needs, Today

Live Link
Live Link allows users to render web pages directly into the TriCaster and pull any web page elements into a production without the need for a 3rd party application. From graphics or images on a web page to videos from your organization’s internal training platforms
All-in-One
The TriCaster Mini X continues the all-in-one desktop form factor of the TriCaster Mini with increased power and capabilities, including access to 8 external sources with 4 integrated HDMI inputs and supporting modern resolutions up to 4Kp30.
Social Media Integration
Share live and on-demand content directly to Facebook, LinkedIn, Twitter, Vimeo, YouTube, and more—complete with comments and hashtags. With integrated DataLink™, pull social posts and photos into on-screen graphics for a fully interactive experience.

LEARN MORE


Join Vizrt for WorshipStreamTV 2026!

As part of WorshipStreamTV, join Jeremy Morris, Sr. Presales Consultant at Vizrt, for an in-depth session on the TriCaster family, Viz Connect Audio, and complete production workflows powered by NDI and Vizrt solutions. Discover how Vizrt tools work together to simplify live streaming, enhance audio integration, and deliver professional-quality results for Houses of Worship. Tune in to see real-world workflows in action and learn how to elevate your production. Register now to watch!

REGISTER HERE


The Friday Roundup – A.I. to Analyze Your Videos and Stabilization.


Chinese New Year image for Year of the Horse.

OK so I guess this week I am a day late and have pretty much always been a dollar short!

By way of explanation for the delay in the Friday Roundup you really only have to look at the top image.

Most readers probably don’t know that although I am Australian I have actually been living here in Taiwan for many years now.

As a result of that around this time of year we enter the Asian version of the silly season!

So this week I scraped some stuff together but be warned… next week is looking pretty shaky!


This AI Can Actually See Inside Your Video Here’s What It Found

One of the inherent problems with shooting and editing your own videos is that at some point in the process you begin to go blind to what you are seeing and doing.

Constantly going back over the same sections or scenes or even the entire causes you brain to sort of stop looking at what you are looking at and just run from existing memory.

There are two ways around this.

The first is to get someone else to watch the video before you complete the final render and have them tell you what they see.

The second is to walk away from what you think is the final product for AT LEAST 24 hours then go back and view it with fresh eyes.

Both of these are better than nothing but both are equally prone to errors or bad choices going unnoticed despite your best efforts.

Well this week I came across this video from the guys at Primal Video demonstrating a new feature in Descript that actually does the job for you.

It is early days yet and for me Descript is a bit pricey but it is an interesting feature nonetheless.


3 Simple Ways to Stabilize Shaky Footage FAST! – PowerDirector

When I started using my Sony ZV-E10 for most of my footage I was interested at the time in stabilization in post production.

The reason for that was I was going to be shooting in 4K and some of the time at least, handheld.

Their solution was their own software called Catalyst Browse which takes the internal gyroscopic information embedded into the video file and uses that to correct any shake.

Well that all sounds very sciency but at the end of the day I actually use one of two tools that do a far better job.

One is the stabilization in DaVinci Resolve and the other in PowerDirector.

Here’s a look at the PowerDirector tool in action.


How to Highlight an Object in your Video with Special Effects in PowerDirector

There are times when you may want to highlight or at least placesome focus on some object or item within a video.

There are many ways to do this but one way in particular that is possible these days is to use a special effects applied only to that thing.

To get a better idea and some suggestions here is a demo of it being applied in PowerDirector.


How to Remove Video Background Without Green Screen (3 Easy Ways)

A.I. driven background removal is becoming more and more common at all levels of video editing software.

However if your video editor doesn’t yet have this type of tool and green screen isn’t quite cutting it then all is not lost.

In the video below you can see in action a few online alternatives to remove backgrounds as well as a look at the Movavi tool in action as well.


Shoot Like a Pro: Vertical Video for Social Media

When the world of social media started pushing all of us towards shooting video in 9:16 rather than 16:9 we all just basically flipped our phones and carried on!

The problem with that is that at a vertical video setting, the way you compose your shot changes significantly.

Here are some tips on how to shoot vertically and get great looking results.


How to Color Grade PHONE FOOTAGE – For Total Beginners

One of the inherent problems with any footage recorded on a smartphone is that it will most likely be recorded a specific way.

That “way” will involve a codec like H.264 which will compress the video information a lot as well as at lower bitrates to preserve space and ensure continuous recording.

That’s not really such a bad thing in itself however it does introduce certain limitations for when it comes to both color correction and color grading.

Because of the lower data rates there is only so far you can push it before it all falls to pieces!

That doesn’t mean you are totally unable to manipulate the color in any way but there is definitely a way to go about it to get the best results.


These 5 free Vintage ‘Film Look’ Titles are way easier to create than you think…

One of the main problems in working with DaVinci Resolve is that unless you are a totally seasoned expert you end up in the same position.

That position is that you absolutely know that whatever it is you want to do, Resolve can totally do it.

However working out HOW to do it is another matter altogether!

Then the final insult is that once you work it out, you realize is was totally simple all along!

Anyway here’s a great example of how you can create vintage titles using the bog standard inclusions in the titling module to do so.


Discover more from The DIY Video Editor

Subscribe to get the latest posts sent to your email.


Winter Specials on Live Streaming and Video Gear


Winter Specials on Live Streaming and Video Gear

Winter Specials are here, and Videoguys has unbeatable deals on the gear you need to elevate your productions. Save big on live streaming equipment, filmmaking bundles, and top-rated production tools—all at limited-time Winter Specials pricing. Upgrade your workflow and maximize your savings today. Call Videoguys at 800-323-2325 for expert advice.

Best Sellers Under $500

Control your entire setup with 15 vibrant, customizable LCD keys for fast, streamlined workflows.
$149.99

A compact, professional streaming camera with built-in Wi-Fi and a 6-hour battery, making it easy to press and stream anywhere.
$445.00

Delivers fast NVMe performance in a rugged, portable design, with iPhone 15 compatibility to easily free up space and move at top speed.
$319.99

Delivers low-latency 4K wireless video over 5GHz for professional monitoring.
$495.00

Best Sellers Under $1,000

An industry-standard professional editing solution with advanced tools, media management, and real-time collaboration for editors.
$539.99

A 15.6-inch display that makes it easier to read scripts on larger productions or for longer distances. All with just one cable.
$599.99

• # Total Ports: 10
• Port Types: 9x 1G, 1x SFP
• Total PoE Budget: 110W
• # PoE+ Ports: 8
• Mount: Desktop
$659.99

A 1080p60 fixed camera with 12x optical zoom and flexible outputs, perfect for getting started or adding into an existing production
$949.00

Best Sellers Under $1,500

A 1080p60 PTZ Camera that features flexible outputs, auto-tracking, and more.
$1,499.00

Plug-and-play encoder for on-the-go live content, no with 4K and HEVC video quality
$1,495.00

the ideal tool for PTZ camera operators, designed with a rugged, ergonomic build and a large screen displaying up to four cameras at once
$1,295.00

All in one live production system in a tablet
$1,577.99 reg.
$1,398.00 PROMO
with free 256GB SD Card $79 value
Limited Time Only!


Best Bundles!

Compact Control Surface for TriCaster Mini X delivers studio-style control
$10,99500 reg.
$9,995.00 PROMO
Limited Time Only!

Delivers seamless control in UHD and a built-in screen to view up to four cameras. Plus, it all comes in a custom protective foam case for secure, easy transport.
$5,085.00

Head out to the field or arena with this sports-friendly setup designed to optimize your coverage of the game. Comes with one Move 4K 12X PTZ camera, two Studio 4K 12X fixed cameras and a SuperJoy controller.
$5,411.00

An all-in-one, studio-ready solution for high-quality podcasts, livestreams, and content creation.
$1,679.91.00 reg.
$1,519.91 PROMO
Offer expires 3/31/26


The Friday Roundup – YouTube Intros and How to Cut


YouTube creator demanding attention.

The ‘5 Second Intro’ Is Dead, Here’s Why…

It is interesting to see how over time, the viewing habits and responses of people watching videos on YouTube has evolved.

In the recent past, the most successful style of video was the one that started with a demanding or at least wildly enthusiastically arresting intro.

The philosophy was that you captured the viewers attention instantly, grab them by the throat and never let go!

However in recent times that strategy has begun to fade in its effectiveness quite markedly.

There is a newer style that is taking over and when you look at it, it actually makes more sense.

To explore this trend more fully here’s a video from Hillier Smith explaining exactly what is going on and why it is happening.


The Only 3 Cuts You Need to Tell Any Story – PowerDirector

Ah, subject dear to my heart!

One of the problems with modern video editing software is that they offer a shedload of premade transitions to make your videos look “professional.”

In reality those things actually make you videos scream to your audience, “I am a total amateur and have no idea what I am doing!”

You can imagine what that does to audience retention!

Anyway, the pro’s actually use very few preset effects like that and limit themselves to cuts that serve the content.

Here’s a look at keeping it simple from PowerDirector University.


Three Techniques for Creating a Lower-third in PowerDirector

Lower thirds refer to any sort of text that appears at the bottom (lower third) of a video.

You most often see these on T.V. news broadcasts where there is a constant ticker tape style display running most of the time.

Lower thirds in video making are usually used to add context or added information to what is being presented in the video itself.

In PowerDirector there are a few ways to add lower thirds and in this video you can see how to access and control their content and behaviour.


What’s New in Filmora 15.2: AI Relight, Topaz Starlight & Pen Tool End Shape

OK, so this is pretty epic as far as adding awesome tools go for Filmora.

Like everyone else around town these days they have been pursuing the whole A.I thing quite aggressively.

Many of those tools have been pretty useful, and some… yeah, not so much!

However this latest addition took me by surprise.

So to set the scene the absolute gold standard for A.I. driven upscaling and restoration of old or less than ideal video footage from the beginning has been Topaz Labs.

They were pretty much the first to create such a set of tools and have led the pack ever since.

The downside has always been the price of entry historically coming in at around U.S $300 which is a little steep if your needs are quite modest.

Also historically, Topaz Labs have remained notoriously isolated as a company and have collaborated with no other companies in their field or any related fields.

So I was shocked to see that somehow Wondershare have done a deal with them to include one of their models inside Filmora version 15.2, the latest release.

This is a really, really advanced tool and very useful of you have some dodgy footage you still want to use.

Additionally they have updated the Pen Tool which I have previously covered but wait, there’s more!

They have also added another A.I. tool called the Relight tool which is yet another enhancement tool for bad footage.

Check it all out in the video below.


How to Make a Vlog Using Only AI

The reason I am including this video from the folks at Movavi is not because I am a big fan of using A.I. to totally create something from scratch.

The real reason is that it goes into great detail on exactly how you should (if you want!) use A.I. correctly.

The bottom line is that A.I is not creative!

All it really can do is follow instructions so if you give it dull unimaginative instruction, you get dull unimaginative results!

And the final point here is that you absolutely have to inspect, tweak and edit the results to get something others would want to pay attention to.


Mixing Narration and Music levels in Premiere Elements 2026

This is another in the series from Steve Grisetti covering how to effectively use Adobe Premiere Elements 2026 in your video editing.

In this video Steve goes over how you can use keyframing on the timeline to adjust and mix your audio levels so that your narration or voices in the video balance against any music.


Cheap mic? No problem – Make it Sound Better with DaVinci Resolve

Probably the two hardest techniques to master in post production of your videos are color correction and audio quality.

Most video editing software these days offer pretty good modules for working with both but the downside is that you really need to understand what you are doing!

If you don’t, it can only take seconds to take something from bad to something terrible while you have no idea how you got there!

In the video below Daniel Batal runs quite comprehensively through the whole process of taking some less than ideal audio and lifting up to a decent standard.

He does it in DaVinci Resolve which had a sophisticated audio module called Fairlight, however don’t be put off by that.

Most editors these days offer at least similar control with the important part to learn being the understanding of what lies behind the corrections and tolls he uses.


How to Create a YouTube Channel in 2026 (Step-By-Step)

One thing that you can absolutely rely on is that the procedure and steps for setting up a YouTube channel are an evolving set of principles!

You only have to go back a year or two and compare it all to today and you will see what I mean!

So in light of that here’s a fully up to date tutorial on completing the task.

One thing of note is that although this covers setting up a new channel it is of equal importance to anyone that has one already set up.

You may very well find steps or settings that have changed since you did you own so from that point of view it is well worth watching.


YouTube Inauthentic Content- What Nobody Tells You About Inauthentic Content Demonetization Policy

When people started using A.I. to create videos for YouTube there was much discussion about how good an idea that really was given that the YouTube algorithm would eventually be adjusted to detect it.

YouTube themselves came out and stated that they had no problem with that kind of content BUT!!!

That content would still have to show some kind of contribution to the platform and the viewer experience in some way.

So the bottom line was, if it is good content then they didn’t care really how it was made.

They later added a requirement for the creator to disclose to what extent any part of the video was A.I. or auto generated and this was shown when the video played.

Right now anything they detect as being of low or no real value they flag as “Inauthentic Content” and can result in demonetization or a channel ban.

So, it is best to understand what that all actually means right now.

In this video Jacky covers the entire subject and where we currently stand.


Discover more from The DIY Video Editor

Subscribe to get the latest posts sent to your email.

NDI 6.3 Is Here: Take Control of Your NDI Production


A compact, all-in-one live production solution that uses native NDI to deliver low-latency, high-quality video over standard IP networks, eliminating complex cabling while enabling fast, flexible routing to switchers, software, and recording systems.

$1,995.00

a powerful all-in-one live production system built around NDI, allowing you to connect cameras, computers, and media sources over IP for low-latency, professional switching, streaming, and recording without complex cabling.

$10,995.00 reg.

$9,995.00 SPECIAL

Limited Time Only!

A powerful live production software platform with built-in NDI® support, enabling high-quality, low-latency video transport over IP so you can easily bring in cameras, remote feeds, and computers for seamless switching, streaming, and recording.

starting at $699.00

The Friday Roundup – Nested Projects and Vlogging Cameras


Film in a nest instead of a nested project.

Nested Projects – PowerDirector Video Editing Basics

There is a particularly handy feature within PowerDirector and many other video editing programs that allows you to take an existing sequence and use it for other purposes.

So the problem here is trying to explain what it is and when you would use it!

The feature is actually called Nested Projects which of course communicates absolutely nothing!

So rather than have me stumble forward trying to explain… just watch the video cos’ it’s a really cool feature!


Best Vlogging Cameras in 2026!

As I have mentioned quite often in the past, the one category that remains missing from the D.I.Y Video Editor is a review section on cameras or video recording devices.

The reasons for that are pretty simple!

First up I have neither the time or the resources to keep up with that market especially given the rate at which it is developing.

Secondly, if you drill down the the very core of who I am, you will ultimately find a person who really doesn’t want to work that hard!

Sure I can bang out a weekly blog roundup and the occasional technical article… but that’s about peak output for me thank you very much!

So for me the best way to keep abreast of these things is to have reliable sources and in the video below you can see some camera reviews from a reliable resource.


Best Camera Apps for iPhone & Android

I think it was last week that I posted a link to an up to date review of current camera app for both iPhones and Android.

This is another one for this week from a different source so maybe they can offer a slightly different perspective.

I still think one of the best ways these days to get into shooting video is with a phone as the quality is really quite good.

Once you have done that I also think the next logical step is to get a good camera app on that same phone and take control of the footage you are using.

Maybe that will be good enough for you but if you then want to move to a more advanced camera you will already have a basic understanding of some of the settings.


How to use the GenAI Image Replacement feature in PowerDirector

This is just a straight up run through of how to use the A.I. driven Image Replacement tool in PowerDirector.

I have used this tool often myself and to be honest when it works it works great and when it doesn’t… it can be truly bizarre!

Anyway check it out for yourself in the video and you will see what I mean.


Text Behind Person Effect – Filmora 15

Ah, the old text behind the subject trick, always a reliable effect that looks pretty good!

Once you run through this tutorial once you will see just how simple it is to pull of this effect and even if you are not using Filmora, it is the same in other editing software.

The bottom line is that this effect always looks like a million bucks as long as you don’t overdo it!


Basic Training for Adobe Premiere Elements 2026, Part 8 of 8 – YouTube

Well this brings us to Part 8 of Steve Grisetti’s eight part series introducing the basics of Adobe Premiere Elements 2026.

In this final episode Steve covers the last stage of editing a project which is the final render and export covering all the options and choices available.


DaVinci Resolve 20 Quick Tip: Motion Graphics Made Easy in Resolve

Given the fact that the whole point of DaVinci Resolve is to allow professionals to create their own original effects, transitions, motion graphics etc., it is surprising just how many presets are actually inside the program!

When it comes to those presets what is also amazing is just how much control you can exercise over almost every part or characteristic of a given preset.

So if you are lazy like me and dread the thought of building motion graphics, even DaVinci Resolve has you covered!

Check out the video to see the full extent of what you can do.


Fusion Explained in PLAIN LANGUAGE – DaVinci Resolve Tutorial for Beginners

OK so let me repeat myself here for about the hundredth time.

The most powerful page or module in DaVinci Resolve is the Fusion Page.

If you are using Resolve as your editing solution and are not using the Fusion Page then you are missing out in a big way.

Having said that the Fusion Page is easily the most daunting part of Resolve and just looking at it can cause dizziness!

So, here is yet another attempt by the very nice Casey Faris to explain and demonstrate the Fusion Page in plain English!


Best Audio Tools For Creators in 2026

I wouldn’t go so far as to say this is a complete list of audio tools available at the moment but it does represent some tools I go to quite regularly.

I often have to deal with some rather rough audio that comes as part of videos that were recorded by creators “on the fly” so to speak.

Very often those creators are out and about, spot and event or something interesting so immediately hit record and away they go!

The results are usually pretty good from an image perspective but most of the time the audio is terrible because of noisy environments or onboard microphones.

So for me Adobe Podcast and Audacity are usually open and ready to go most of the time!


Discover more from The DIY Video Editor

Subscribe to get the latest posts sent to your email.

Register Now for WorshipStreamTV 2026


Register Now for WorshipStreamTV 2026 | Virtual Event for Live Streaming & Production in Houses of Worship

WorshipStreamTV is a 3-day virtual event series designed for Houses of Worship of all sizes. Live production in a religious context can offer various benefits for engaging congregations and expanding the reach of religious services. We are here to provide you with the tips, tricks, and tools you need to live stream for your House of Worship.
 
Your FREE, one-time, registration gains you access to three days of informative webinars, interviews with industry guests, live demos, chances to win prizes, & more!

REGISTER HERE

WorshipStreamTV delivers informative, expert-led webinars, insightful interviews with industry professionals, and live product demos designed specifically for Houses of Worship—giving you practical tips, proven workflows, and real-world inspiration to enhance your live streaming, elevate worship production, and better engage your congregation.

REGISTER HERE

The Friday Roundup – 2026 Camera Apps plus Zoom Tips


Nervous guy worried about zooming in.

Best Camera App for Android 2026 Top 2 Free Picks

Well it’s been a minute since the guys at Primal Video did an update on Android camera apps… so here we are!

If you have been using your phone to shoot videos, having just that little more control over how the camera behaves is a good thing.

I sometimes still use my wife’s Samsung phone to get footage on the fly and whilst it actually captures very good looking shots, it definitely has a mind of its own!

The automatic functions and settings tend to take over especially when it comes to lighting, white balance and focus.

Don’t get me wrong here, it is designed to do those things and it does them very well but often I actually don’t want that.

I nearly always go into the settings and disable those auto functions then control them myself manually.

That way I don’t get slightly varying white balance or lighting as I shoot.

Anyway, if you are looking to take the next step in getting you shots how you want them, check out this video.


3 Zoom Techniques to Level-Up Your Videos – PowerDirector

Using zooms as an effect is one of those editing actions that most try out a little but end up dropping due to the cheesy results they get!

There is a reason for that because if you look at pro edited movies or TV shows you will see zooms used regularly.

That reason is that like cuts and transitions, there are times when it can add to the action and be a great effect and there times when it is best left on the shelf.

Here’s a video from PowerDirector University explaining exactly what a zoom does and when it may or may not be useful.


How to Create Social-Ready Videos Faster with AI (2026 Workflow)

It’s all very well to be talking about A.I. models and features within video editing software but that often leads to either disappointment… or some pretty crappy videos!

The reason for that is that the marketing of A.I. tools goes mainly for that wow factor rather than actual reality.

Here’s a very good video from the folks at CyberLink that is a real walkthrough start to finish for the type of project A.I. best lends itself to.

Well that’s a pretty long title for a tutorial in manipulating what is basically the “Picture in Picture” effect but who am I to judge!

Few years back you could do this on consumer level editing software but these days you have all the tools.

Essentially this is an exercise in overlaying videos, resizing them on the screen and using keyframes to manipulate that resizing and positioning.

Worth taking a look at because those tools can be applied in all sorts of ways once you are familiar with them.


Place 4 videos on Screen with Each Expanding One at a Time

Well that’s a pretty long title for a tutorial in manipulating what is basically the “Picture in Picture” effect but who am I to judge!

A few years back you couldn’t do this on consumer level editing software but these days you have all the tools.

Essentially this is an exercise in overlaying videos, resizing them on the screen and using keyframes to manipulate that resizing and positioning.

Worth taking a look at because those tools can be applied in all sorts of ways once you are familiar with them.


Video Editing Basics for Beginners – Step-by-Step Editing Workflow

It has actually been quite a while since anyone posted a start to finish editing tutorial in Filmora so this one is well worth the watch.

There have been enormous changes and developments in Filmora over the past few years so this one is overdue.

Very often when you have been working with the same editing software for a long period of time you tend to incorporate new developments into your existing workflow.

That’s actually OK for a while but after some time you my discover that your original workflow could be improved.

What I mean by that is that often the improvements and added features are in themselves designed with improved workflow in mind.

If you keep banging on the same old way then you may possibly be missing out on those advantages.

So if you are new to Filmora or have been using it for some time, a “back to basics” tutorial can often be a good thing.


How to Share Filmora 15 Project with other People

This is a quick tutorial from Jacky for this week and to be honest, rather niche!

If you edit projects on a collaborative basis in that you share the work with another or other people, most editing software has a way of doing that easily.

Some offer cloud services or space for the project to be uploaded so that others can access it whilst other software allows you to “package” the project and all assets so that it can be sent to someone else for editing.

In this video you can see how to do that using Filmora.


How to Edit Videos Faster and Easier

Another “back to basics” tutorial but this time from the folks at Movavi.

If there is one thing I have learned over the years it is the concept of developing a workflow and regardless of what happens… STICKING TO IT!

Every time I have skipped the asset organization step at the beginning of a project, it has come back to bite me in the butt at a later point every single time.


Proper Audio Levels for Video Editors – Dialogue, Music & SFX Explained in Any Video Editor

One thing that will absolutely kill audience interest in any video you produce is bad audio.

It doesn’t matter what platform you are publishing on or how you are distributing your videos, bad audio is a killer to audience attention.

If the music is too loud compared to the dialogue or if your video is way too quiet compared to the one the viewer just watched on YouTube, that person will click away almost without fail.

There are actually standards for all these scenarios and they are surprisingly simple to stick to once you know how.
The video below is a demo of all of this done in DaVinci Resolve but applies to any video editing or audio software.


How to Build Your Own Transitions in DaVinci Resolve – No Templates Needed

So this one from Daniel Batal for this week is very near and dear to my heart!

For a long time now I have been banging on about learning to avoid pre-packaged transitions as a video editor.

The quality and customizability of those transitions you get inside your average video editing software has certainly improved, they still look pre-made to some degree.

The professional editors I know wouldn’t be caught dead using such a thing!

Every cut they make is either an exercise in simplicity like a straight cut, or a transition that is specifically created for that shot change.

Conversely, let’s face it, creating transitions can be time consuming exercise that not all of us are prepared to remain patient enough to get done!

OK, I am talking about myself here!

So in light of that here are some examples of creating effective transitions in DaVinci Resolve with not too much faffing around!


Discover more from The DIY Video Editor

Subscribe to get the latest posts sent to your email.