The max level cap in Assassin’s Creed Shadowsis so high you might not even need to worry about it.
In general, your level determines the equipment you can use, the in addition to the rating of your base stats, like health. The weapons and armor you find — plus the enemies you run into — will scale in level alongside Naoe and Yasuke. Thankfully, at least the two share experience points and level progress, so you only need to keep track of one experience meter!
Here’s what the max level cap is in Assassin’s Creed Shadows, and a rundown on what we learned during our playtime regarding leveling up.
What is the max level in Assassin’s Creed Shadows?
The max level cap in Assassin’s Creed Shadows appears to be 60, based on how Forge upgrades work at your Hideout.
You can upgrade rooms at your Hideout. As described in the game, when your Forge is upgraded to its highest rank, it allows you to upgrade weapons and armor to level 60, indicating that’s the highest level in the game. This number tracks contextually with how much of the game we’ve played so far, as of this writing, and is aligned with other players who’ve reported a similar max level.
Image: Ubisoft Quebec/Ubisoft via Polygon
Getting to level 60 is no small feat, though. After 62 hours, we’ve finished the main story, completed a bunch of optional activities (like Lost Pages and Kuji-kiri), and still only reached level 50. As a result, it stands to reason it’d take you a considerable amount of time to reach level 50. At this point, the regions have scaled to level 46, and equipment at level 51 and level 52 has started to appear.
By level 50, it takes around 18,000 experience points to level up. Naoe’s flat stats are 945 Health and 492 Attack Damage, while Yasuke’s are 2,211 Health and 985 Attack Damage. Moreover, equipped with a gear set and weapons around this level, Naoe reaches 3,947 Health and 1,969 Attack Damage, while Yasuke gets 9,104 Health and 3,784 Attack Damage.
Image: Ubisoft Quebec/Ubisoft via Polygon
So far, we’ve earned 294 mastery points, but this is also the result of a focus on clearing castles. Each castle features a number of Samurai Daisho; you’ll get one mastery points for every Samurai Daisho you assassinate. Because of that, the numbers may vary depending on how much time you spend clearing castles.
Completing castles is great for leveling up, though, since they generally give you a lot of experience (and, as a bonus, reward you with rare gear). But the biggest source of experience in the game is hunting all of the targets in one single board of your Objectives menu. Doing so involves completing a final quest. In the end, you may earn around 10,000 experience points.
But if you want some quick missions to complete and earn a little bit of experience, you should consider taking advantage of Contracts and Anomalies — not just for experience, but for bonus materials and mon as well.
The new trailer, which borrows imagery from what we saw of the game in the first trailer, follows a young girl living in a small Japanese town during the 1960s — a first for the series. Fog engulfs the town and the girl starts to see flowers before running into a shambling woman. More monsters show up and we see the girl picking up a pipe to defend herself against something off-screen, with a spore-covered house behind her.
Silent Hill f is being developed by a Taiwan-based studio with help from Japanese developers. The stream had more details on the game’s production, with appearances from writer Ryukishi07 and character and creature designer Kera. On the stream, Konami dug into its setting and how it used reference photos and sounds to help create the game’s rural town, and discussed the psychological themes it wants to explore with its young protagonist.
The trailer doesn’t have a release date, but it confirms that Silent Hill f will be released on PlayStation 5, Windows PC, and Xbox Series X. You can also wishlist it now on Steam.
Death Stranding 2: On the Beach will be released on June 26 for PlayStation 5, game director and Kojima Productions founder Hideo Kojima announced Sunday during a panel at SXSW 2025 with a lengthy new trailer for the game.
That trailer offered a new 10-minute look at Death Stranding 2 and its stars, including some fresh faces. The sequel to the 2019 action game will once again star Norman Reedus as Sam Bridges, the package-toting hero of its bizarre story. Léa Seydoux and Troy Baker will return too, as Fragile and Higgs, respectively. They’ll be joined by new characters played by Elle Fanning (Tomorrow), Shioli Kutsuna (Rainy), and George Miller (Tarman). Also joining the cast are Luca Marinelli as Neil, Debra Wilson as Doctor, and Alissa Jung as Lucy. (There’s also a cameo from Korean action star Lee Dong-seok, aka Don Lee.)
Death Stranding 2’s new trailer even appears to have a handful of nods to Kojima’s previous game franchise, Metal Gear Solid. Marinelli’s Neil looks unmistakably like Solid Snake at one point, with the giant tar creature that fuses with the DHV Magellan — becoming the Magellan Man, Kojima said — giving Metal Gear Rex/Sahelanthropus vibes. Beyond that, there’s plenty of gameplay action and story hints to chew on for Death Stranding fans.
Kojima Productions’ new trailer explains that Death Stranding 2 is set 11 months after the formation of the United Cities of America. Servers line the beach and deliveries have been automated, ostensibly putting porters like Sam out of work. Chiralium from the Beach continues to warp the environment (and the cats!), just as a new faction is spreading its influence. But none of that, it seems, will stop Sam from doing his job.
In Death Stranding 2’s first trailer at 2022’s The Game Awards, Kojima said his experiences during the 2020 COVID-19 pandemic prompted him to rework the game’s script, which will follow the events of the first game’s journey across a post-apocalyptic America ravaged by inky black monsters known as Beached Things.
The second, 10-minute trailer from a State of Play stream last year showed the delivery company Bridges worked for has dissolved and a new organization called Drawbridge has risen in its place. But as with all Kojima-led games, the exact details are murky.
Treasure maps are optional objectives in Avowed that come with terrific rewards in exchange for solving head-scratching puzzles.
Each treasure map is less a “map” and more a hastily and inscrutably sketched drawing pointing toward a vague location. If you find out where the treasure map points to and then head to that exact spot, you’ll find a chest containing a unique piece of gear.
What follows is our guide to all treasure maps in Avowed, broken up by each region, from Dawnshore through Galawain’s Tusks. We’ve also listed the rewards you get for completing each one.
How many treasure maps are there in Avowed?
There are 12 treasure maps in Avowed, three in each of the following regions: Dawnshore, Emerald Stair, Shatterscarp, and Galawain’s Tusks. If you solve all 12 maps, you’ll earn the “Pathfinder” achievement (and get some of the best gear in the game along the way).
Read on for details about all treasure maps in Avowed, or use this table of contents to navigate to the treasure maps of a specific region.
Image: Obsidian Entertainment/Xbox Game Studios via Polygon
The Captain Henqua’s Spoils treasure map points toward a cave underwater on the riverbank north of Paradis. When completed, you’ll get the Wind and Wave shield.
Image: Obsidian Entertainment/Xbox Game Studios via Polygon
The Intimidating Feline Codpiece map points toward a cliff abutting the river going north of Paradis. When completed, you’ll get the Stelgaer’s Pride armor set.
Image: Obsidian Entertainment/Xbox Game Studios via Polygon
The Woedica’s Inheritance treasure map points to a location tucked away on the eastern wall of Paradis. When completed, you’ll get the Strangler’s Gloves clothing item.
See our Woedica’s Inheritance walkthrough for a guide on how to solve this treasure map.
Emerald Stair treasure maps
There are three treasure maps in Emerald Stair: Earthly Aegis, Painter’s Regret, and Practical Pockets. Below, see details about their general locations and what rewards you get, or click through for more detailed walkthroughs for their respective solutions.
Image: Obsidian Entertainment/Xbox Game Studios via Polygon
The Earthly Aegis treasure map points to a sinkhole in the western forests of Emerald Stair. When completed, you’ll get the Nature’s Ward shield.
See our Earthly Aegis walkthrough for a guide on how to solve this treasure map.
Image: Obsidian Entertainment/Xbox Game Studios via Polygon
The Painter’s Regret treasure map points toward a river mouth west of Fior mes Ivèrno, sort of near the Waterfall Cave. When completed, you’ll get the Painter’s Brush trinket.
See our Painter’s Regret walkthrough for a guide on how to solve this treasure map.
Image: Obsidian Entertainment/Xbox Game Studios via Polygon
The Practical Pockets treasure map points toward a cave near the Ranger Headquarters. When solved, you’ll get the Hjilde’s Handy Hide armor set.
See our Practical Pockets walkthrough for a guide on how to solve this treasure map.
Shatterscarp treasure maps
There are three treasure maps in Shatterscarp: Dead Man’s Mail, Robe of the Arcane Cheater, and Seafarer’s Boots. Below, see details about their general locations and what rewards you get, or click through for more detailed walkthroughs for their respective solutions.
Image: Obsidian Entertainment/Xbox Game Studios via Polygon
The Dead Man’s Mail treasure map points toward the Shark’s Teeth fortress in the east of Shatterscarp. When completed, you’ll get the the Necropants armor set.
See our Dead Man’s Mail walkthrough for a guide on how to solve this treasure map.
Robe of the Arcane Cheater
Image: Obsidian Entertainment/Xbox Game Studios via Polygon
The Robe of the Arcane Cheater treasure map points toward a cave on the Ancient Lakebed. When completed, you’ll get the Robes of Surpassing Brilliance armor set.
Image: Obsidian Entertainment/Xbox Game Studios via Polygon
The Seafarer’s Boots treasure map points toward a creek near the Sulfur Miner’s Basecamp. When found, you’ll get the Wavebinder’s Boots clothing item.
See our Seafarer’s Boots walkthrough for a guide on how to solve this treasure map.
Galawain’s Tusks treasure maps
There are three treasure maps in Galawain’s Tusks: Ancient Arrowhead, The Blade that Hungers, and My Loyal Shield. Below, see details about their general locations and what rewards you get, or click through for more detailed walkthroughs for their respective solutions.
Image: Obsidian Entertainment/Xbox Game Studios via Polygon
The Ancient Arrowhead treasure map points toward a cluster of mountains south of Solace Keep. When found, you’ll get the Scout’s Reach trinket.
See our Ancient Arrowhead walkthrough for a guide on how to solve this treasure map.
Image: Obsidian Entertainment/Xbox Game Studios via Polygon
The Blade that Hungers treasure map points toward a tunnel north of the Ash Forest Outpost. When found, you’ll get the Umbral Needle dagger.
See our Blade that Hungers walkthrough for a guide on how to solve this treasure map.
Image: Obsidian Entertainment/Xbox Game Studios via Polygon
The My Loyal Shield treasure map points toward an Ekida ruin south of the Outcast Tower Camp. When found, you’ll get the Time’s Tarnish shield.
See our My Loyal Shield walkthrough for a guide on how to solve this treasure map.
There is a lot going on during every turn of Civilization 7. Each time you hit “next turn,” the computer is calculating the moves of other civilizations, factoring in your difficulty setting, proposing new wars, collecting new resources, selecting new items off the tech tree, and so on. Basically, math is always happening in Civilization 7. Why else did you think the turns take so damn long to calculate?
All of that behind-the-scenes complex machinery is what makes Civilization Civilization, and it’s what veterans come to the series for — a way to build out what actually feels like an empire from scratch. But all of those moving pieces can make for a very stressful first-time experience. Worse, it can make you feel like you don’t understand the game. It could even make you feel like you shouldn’t play it.
That feeling of a lack of understanding propelled me away from past Civilization games, even though I enjoyed the few matches I spent with them. But I’ve learned something after bouncing off more than one Civilization game before Civilization 7: You’re supposed to be confused.
As I mentioned before, the Civilization series is complex, and there are a lot of moving pieces happening every single turn. Confusion is a completely natural feeling when faced with a thousand potentially important pieces of information in front of you. “What does Production do? How much Science do I need to research something? What does Happiness even do? Why can my unit move two spaces sometimes and one space other times? What do you mean they’re declaring war on me?!” I get it. But those questions are normal, and the way you feel is okay. You’re definitely doing a ton of stuff “wrong,” but I have excellent news for you: You can still win at Civ if you’re doing almost everything wrong, but doing one thing right.
Image: Firaxis/2K Games via Polygon
Civilization 7 is a video game in which you learn by doing. Guides are extremely helpful for answering your specific questions, especially when the Civilopedia in-game can be less than helpful. (And to that end, you don’t want to miss our Civilization 7 guides.) But nothing teaches Civilization better than actually playing Civilization.
When you’re first starting out, you want to pick a leader that means something to you, and a civilization that you have some affinity for. You’re going to be seeing a lot of your leader, and you’re going to be working on evolving your civ, so make sure if you pick Confucius, it’s because you’ve read one of his biographies or something like that. Connections and a desire to see Rome succeed (or wherever your extended family might be from) will pull you through when the deep confusion hits.
Once you’re in the game, pick an advisor and stick with them. This will basically determine what victory path you’re going to go on. Maybe you like the idea of ruling the world by conquering it and you want to go for a Military Victory. Or maybe you’re fascinated by some of the incredible wonders of our world, or are interested in religion. Then follow the culture advisor to reach a Culture Victory.
After you’ve selected a direction for your civilization, it really is as simple as boosting that one aspect as much as possible. If you’re looking to complete the Manhattan Project and win a Science Victory, get your Science up as high as it can go. Do whatever your Science advisor says. If you don’t understand why your units are moving weird or why you’re suddenly losing a battle you thought you would win, just know that you don’t need to understand that. You just need more Science.
Image: Firaxis/2K Games via Polygon
On the default difficulty, following your advisor is potentially enough to win the entire game, and you’ll walk out the other side understanding how to win that kind of victory in the future. Then, pick another civilization, another leader, and another victory condition for your next match. As the turns go by, you’ll begin to understand the things that confused you the last time around, and you can then compound that knowledge with what you now know about Science civilizations or whatever you did the first time.
Like the cities in Civilization 7, knowledge about the game is built up, paved over, and rebuilt over time. You cannot read the Civilopedia or even our guides to fully grasp the game. You must read and play, or otherwise risk overloading yourself with information. The best and biggest advice I can give for coming into Civilization 7 is to resist that urge to restart your game because it isn’t going well. There are lessons to be learned every turn in Civilization, even ones where you lose entire armies or even cities. And even if you feel like you’re not learning as you play, I promise you are. Every turn, every age, and every match will get you that much closer to that “I think I finally get it,” moment. With enough practice, you might even fully understand it in time for Civilization 8.
Fortnite OG Chapter 1 Season 2 allows you to go “full tilt” as Tilted Towers makes its return to Fortnite.
Tilted Towers isn’t the only returning point of interest as Junk Junction, Shifty Shafts, and more are coming back. Additionally, you’ll find familiar items back in the loot pool like the small shield potion and boogie bomb.
With there being a new OG season, there is a new OG Pass for you to complete — full of new takes on classic outfits.
Below, we explain the map and loot pool changes for Fortnite OG Chapter 1 Season 2 and some of the new skins you can get in the OG Pass.
Fortnite OG Season 2 map changes
The OG Chapter 1 Season 2 map is reintroducing five points of interest from the original Chapter 1 Season 2 — Haunted Hills, Junk Junction, Shifty Shafts, Snobby Shores, and Tilted Towers. Check out the map with the returning locations below:
Fortnite OG Season 2 weapon loot pool
In OG Chapter 1 Season 2, the loot pool will grow as the season progresses. Here are all of the weapons that’ll be added:
Fortnite OG Season 2 pass skins
The OG Pass for OG Chapter 1 Season 2 features 45 tiers of rewards with the major rewards being revamped versions of fan favorite skins from the past. Cuddle Team Leader, Black Knight, and Sparkle Specialist are receiving a new look and coming back as Cuddle Team Specialist, Knight Conqueror, and Sparkle Diva. Alongside the new outfits, each outfit has an alternate style that is available to unlock in the OG Pass.
The Chapter 1 Season 2 OG Pass is available until March 25 at 3:30 a.m. EST, which will lead to the Chapter 1 Season 3 OG Pass shortly after.
“Kindled Inspiration: New Bloom’s Outfit” is one of the limited-time random quests in Infinity Nikki, and this one requires you to inspire an NPC by showing them a specific article of clothing. While the NPC does give hints as to what they’re looking for (in this case, a “paper crane-themed accessory”), if you don’t have an encyclopedic knowledge of all of the clothes in Infinity Nikki, then you may struggle to find a solution.
Note that this random quest is part of the “Companion’s Day” event, and it’ll only be available until the event ends on Feb. 25.
Below, we explain the solution for the “Kindled Inspiration: New Bloom’s Outfit” quest in Infinity Nikki, as well as where to get the required item and what the quest rewards.
Where to find the ‘Kindled Inspiration: New Bloom’s Outfit’ quest
You can find Yayin on the boat docked by Florawish. You’ll need to complete the nearby quest “Sailing Through Lens” in order for her to show up here, though.
‘Kindled Inspiration: New Bloom’s Outfit’ quest solution
Yayin is looking for a “paper crane-themed accessory.” There are actually multiple pieces that will work. The easiest one to get is the “Paired Flight” earrings, which you very likely already have. All you have to do is wear the earrings — the rest your outfit doesn’t matter.
You can also use the “Star of Wishes” necklace that you get from Giovanni in the chapter 7 story quest, according to Lisa Juliette on YouTube. It’s possible that you may also be able to use accessories from the “Wings of Wishes” outfit that was just in the gacha banner last patch, since they have a paper crane motif. (However, we haven’t been able to confirm this ourselves, since you can only submit one answer for this quest.)
Where to get the ‘Paired Flight’ necklace
You very likely already have these earrings in your inventory, as you get the sketch for the “Paired Flight” earrings as a reward for completing the “Accident at the Clothing Store” main quest, which is pretty early in the game.
‘Kindled Inspiration: New Bloom’s Outfit’ quest rewards
As a reward, you’ll get 30 Diamonds, the sketch for the “Cloudborn Cranes” bracelet accessory, 120 Shiny Bubbles, and 30,000 Bling.
The Marvel Rivals tier list is proof of an inherent truth: not every hero (or villain) is built equally. In the competitive shooter’s season 1 (which added two characters, two maps, a battle pass, and skins), every character is technically viable, but there are some who are obviously more powerful than the rest.
Below, we’ve compiled a tier list showing the current Marvel Rivals meta (as of the release of season 1), giving each character a rank from “best of the best” (S-tier) to “avoid at all costs” (F-tier). Read on for the full Marvel Rivals tier list for season 1.
Complete tier list for Marvel Rivals season 1
Image: Tiermaker via Polygon
Season 1 of Marvel Rivals sees the game in quite a healthy spot, with only six characters falling in C-tier or below. For a game with 35 heroes (soon to be 37, when the Thing and Human Torch join the roster in late February), you’re hard-pressed to find a “bad” one.
While the tier list above (which we constructed in Tiermaker) showcases a general view of the season 1 launch, we’ve broken down each rank in tables below, including brief explanations for why each character belongs in the tier we’ve placed them.
Finally, it’s worth noting here that tiers can look different at different ranks, with some high rank heroes barely being played in low ranks, and some low rank dominators falling off significantly at higher elo levels. As it’s still early in season 1, this list is likely to change within a week or so, as the meta won’t cement for a few more weeks.
S-tier characters in Marvel Rivals season 1
Image: NetEase Games via Polygon
As a rule, S-tier heroes are those that you should absolutely know how to play if you main their given role. Understanding how your Team-Up abilities work with all of these heroes is crucial to success — you’ll be seeing a lot of them in your games.
Character
Role
Why they’re S tier
Doctor Strange
Vanguard
Doctor Strange is one of the hardest-to-kill heroes in Marvel Rivals, and is exceptional at shielding his allies from big blasts. Paired with his unique portal and extremely powerful ultimate, he’s a hard pick to beat for top tank.
Hulk/Bruce Banner
Vanguard
Hulk is extremely mobile and very difficult to kill in Marvel Rivals. He’s a menace in the backline with massive damage and is able to protect his own supports with shields.
Luna Snow
Strategist
Luna Snow has the best healing ultimate in Marvel Rivals, making all combat stop the moment she hits it. On top of this, she has great healing, damage, and stuns.
Mantis
Strategist
Mantis both helps her team deal loads of damage with her boost and keeps them healthy with heals over time. Paired with the second best healing ultimate, she’s a great choice.
Hawkeye
Duelist
Hawkeye requires accurate aim, but he’s the only hero capable of regularly one-shotting squishy targets. That alone is enough for a top rank.
Hela
Duelist
Hela is one of the most consistent damage dealers in the game if you’re capable of hitting your shots. She can take down target after target and has some great Team-Ups.
Iron Man
Duelist
On his own, Iron Man is a great hero who can dish out lots of damage, with a powerful ultimate that can shut down Luna Snow. But paired with his Hulk Team-Up, his damage is unmatched.
Psylocke
Duelist
Psylocke is able to dive into the backline of the enemy team to get kills or attack from range, which makes her very versatile. Her ultimate is also extremely powerful and can shut down objective areas.
Storm
Duelist
Storm has one of the most powerful ultimates for a duelist in the game, and can guarantee kills or an empty objective zone. Paired with her quasi support abilities and season 1 buffs, she’s become a menace overnight.
A-tier characters in Marvel Rivals season 1
Image: NetEase Games via Polygon
Generally, A-tier heroes are great. They’re not the best heroes, nor do they come out on top in the. meta, but they’re extremely solid. All of these are heroes that anyone should be thankful to have on their team, but likely won’t catch a ban as you reach the higher ranks.
Character
Role
Why they’re A tier
Magneto
Vanguard
Magneto is the definition of a consistent tank. He’s very hard to kill when he’s playing selfishly, but can extend some of that safety to allies to make them much tankier during big moments.
Groot
Vanguard
Groot can technically do more damage than any other tank in the game with his powerful walls. But his real value is as a frontline beast with a ton of health and powerful crowd control.
Adam Warlock
Strategist
Adam Warlock is a very technical strategist, capable of dealing big damage and keeping his allies alive. His normal play is great, but his ultimate is capable of swinging entire games on its own.
Cloak & Dagger
Strategist
Cloak & Dagger offer very powerful heals and some pretty decent damage, all in a relatively easy-to-play package. They were good at launch, but their buffed ultimate in season 1 helps kick them up a notch.
Invisible Woman
Strategist
Invisible Woman can pump out a lot of healing and control the battlefield with her various crowd control moves. Even better, her invisibility makes her difficult to lockdown and kill.
Rocket Raccoon
Strategist
Rocket Raccoon is able to automatically revive players with his B.R.B. device, which is a very powerful effect. Paired with decent healing and decent damage, he’s a great pick when the S-tiers are unavailable.
Black Panther
Duelist
Black Panther is both fast and consistent, which is what you want in a duelist. He’s also much easier to play than most of the other duelists.
Magik
Duelist
Magik is both slippery and great at dealing with multiple backline targets at once. This makes her a real menace for duelists and strategists, and she basically requires a tank to help their team deal with her.
Namor
Duelist
Namor and his pets can deal massive amounts of damage from afar, rivaling characters like Hela. But what makes Namor so great is his immunity bubble, which lets him survive divers.
Star Lord
Duelist
Star Lord can dish out a lot of damage in a short amount of time, and he’s very fast. That’s a potent combo, and paired with his ultimate, it makes him a great choice for duelist players.
Winter Soldier
Duelist
Winter Soldier is best known for his ultimate, which he can repeat multiple times to wipe teams. However, his hook and powerful primary fire make him a menace even while charging his ultimate.
Wolverine
Duelist
Wolverine is the ultimate tank buster character, and is able to abduct high health targets and kill them away from their team. He strikes fear into the hearts of all tank mains.
B-tier characters in Marvel Rivals season 1
Image: NetEase Games via Polygon
The B-tier heroes bring a lot to the table, but are situational and niche. Some of these heroes can be A- or S-tier in the right situation, but they just aren’t of the same caliber as the heroes above them in a general setting.
Character
Role
Why they’re B tier
Peni Parker
Vanguard
Peni Parker is a very potent tank in the right situation. On defensive maps, she’s able to hold the zone better than almost any other character.
Thor
Vanguard
Thor is a fantastic bully tank, and can deal massive damage if he’s given the support he needs to survive the enemy.
Venom
Vanguard
Venom is a highly mobile dive tank, and is able to quickly reach the backline. He doesn’t deal a ton of damage, but acts as a powerful distraction for his enemies.
Loki
Strategist
Loki is a lot of work to get right, but in the right hands, he is nearly impossible to kill and pumps out a lot of healing. His ultimate is also the best in the game, as it allows him to mirror any other character.
Iron Fist
Duelist
Iron Fist has extremely high burst potential and is very slippery. He does take a bit of practice to fully understand, but a good Iron Fist can destroy your backline in seconds.
Moon Knight
Duelist
Moon Knight has a ton of area damage, making him capable of wiping and entire team if they’re not careful. His Ankhs are easy to shutdown, but they’re on a low enough cooldown that he’s always getting decent damage out.
Squirrel Girl
Duelist
Squirrel Girl is a very simple character, but her explosive nuts deal a lot of damage with very little effort. Her reworked ultimate in season 1 is also quite strong and can hunt down enemies.
The Punisher
Duelist
The Punisher is the shooter character in Marvel Rivals, and is able to shred through enemies with his two guns. His kit is a little limited, but he has what he needs to succeed in most situations.
C-tier characters in Marvel Rivals season 1
Image: NetEase Games via Polygon
The C-tier heroes are ones that just don’t seem worth playing when you compare them to the other options. However, they’re still playable, and viable on some teams or when used by certain players. You could really surprise the enemy team with a C-tier pocket pick, but you’d probably be better off learning a better hero altogether.
Character
Role
Why they’re C tier
Captain America
Vanguard
Captain America doesn’t have much of an identity in Marvel Rivals. He’s able to bully the backline fine, but he struggles to protect his team in the process.
Jeff the Land Shark
Strategist
Jeff has decent support capabilities with his normal kit, but the lack of a good healing ult really hurts him. Even so, his ultimate can win games if enemy players aren’t paying attention.
Mister Fantastic
Duelist
Mister Fantastic is a hybrid damage dealer and tank, but he’s a bit too hybrid at the moment, so he isn’t great at either role.
D-tier characters in Marvel Rivals season 1
Image: NetEase Games via Polygon
Heroes in the D-tier are, quite frankly, pretty subpar. Not so bad that you’re going to automatically lose if you have one on your team, but bad enough that you should probably be picking a better option.
Character
Role
Why they’re D tier
Scarlet Witch
Duelist
Scarlet Witch does very low damage over time, even if that damage is reliable because it doesn’t require aim. When paired with an ultimate that’s powerful but very easy to counter, she just doesn’t bring enough value to a team.
Spider-Man
Duelist
Spider-Man is capable of dishing out a lot of damage and destroying a backline, but he takes so much more work than any other dive character in the game for no additional benefit.
F-tier characters in Marvel Rivals season 1
Image: NetEase Games via Polygon
Heroes in the F-tier are bad and you shouldn’t play them. And while you should never flame your teammates in games like Marvel Rivals, you should be concerned if someone picks one of these heroes, as it’s a little too close to playing 4v5.
Character
Role
Why they’re F tier
Black Widow
Duelist
Black Widow can’t one-shot targets, she struggles to have awareness around here because she’s forced into first-person, and her ultimate is worthless. Black Widow requires a lot of buffs or a rework in order to even be viable for all but the best players.
When Sony first released the PlayStation 5, it wasn’t possible to expand the console’s storage. Thankfully, that changed with a software update that the company pushed out less than a year later. And with how big some game installs have become in recent years, it’s a good thing, too: the PS5’s built-in 667GB of space may have been good enough in the system’s first year, but now, the default drive is absolutely limiting.
The good news is a standard PCIe Gen4 x4 M.2 NVMe SSD can solve all of your PS5 storage woes. If that mess of acronyms has you recoiling, don’t worry: you’ll see that it’s not all that complicated. And if all you want to know is what the best PS5 SSDs are, we’ve got them right at the top.
Capacity: Up to 8TB | Sequential read performance: 7,100MB/s | Sequential write performance: 6,800MB/s | Connection: M.2
The Corsair MP600 Pro LPX makes it to the top of our list for the best PS5 SSD for being the complete package. It’s fast, offers excellent performance and read speeds of up to 7,100MB/s. It also comes with a pre-installed heatsink and a five-year warranty.
Best of all, the MP600 is affordable. After launching at $190, you can routinely find the 1TB variant on sale for as little as $80, while the 2TB model fluctuates in price between $110 and $150. The 4TB and 8TB models are less of a bargain. The MP600 is also not the fastest NVMe on this list. However, as far as no-fuss options go, it’s hard to beat.
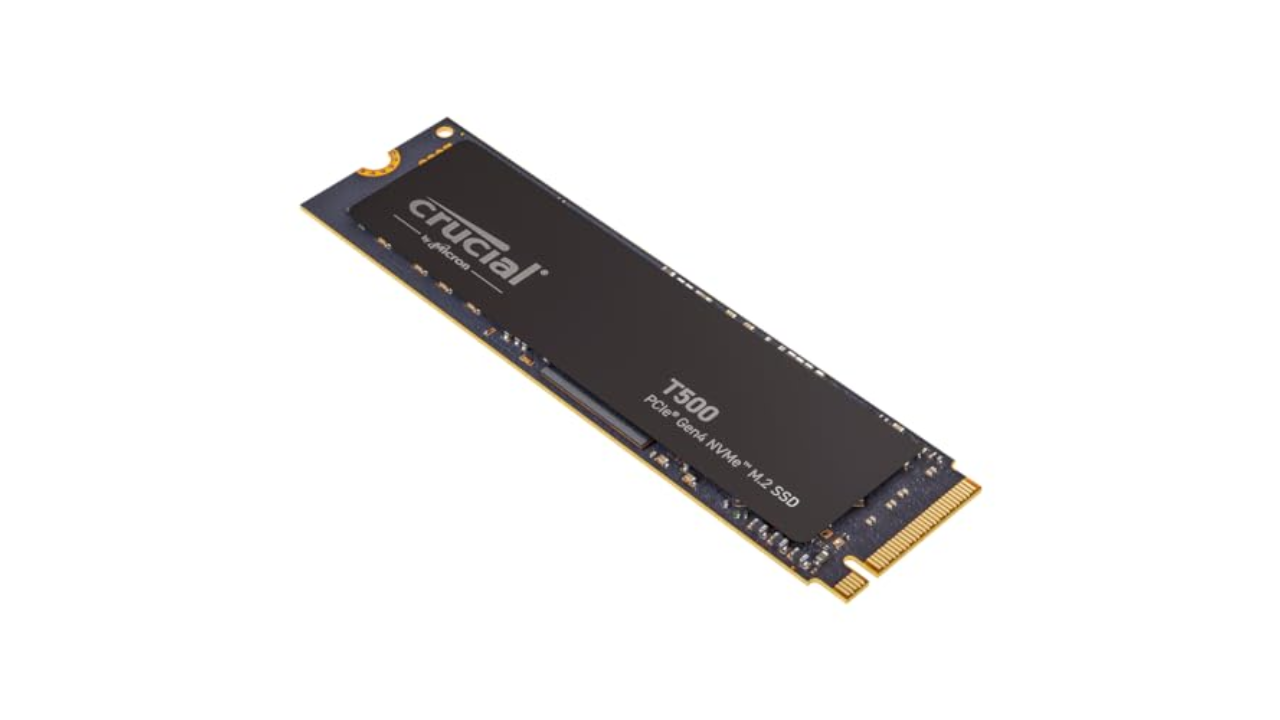
Capacity: Up to 4TB | Read performance: 7,300MB/s | Write performance: 6,800 MB/s | Connection: M.2
If you want to save a bit of money by installing your own heatsink, the Crucial T500 is a great option. With read speeds of up to 7,300MB/s, it surpasses Sony’s technical requirements, and you can frequently find the 1TB model on sale for as little as $60. Crucial also offers a version with a heatsink, so it’s worth adding both the Corsair MP600 and Crucial T500 to a price watch list and buying whichever model is cheaper when you’re ready to upgrade your PS5.
Capacity: Up to 8TB | Sequential read performance: 7,000MB/s | Sequential write performance: 6,600MB/s | Connection: M.2
Of all the SSDs on this list, the Sabrent Rocket 4 Plus is the most interesting. It comes with a unique heatsink that you install in place of the storage expansion slot’s metal cover. Sabrent claims this design improves cooling performance. As a result, expect to pay more than you would for a model with a generic heatsink, with the 1TB variant coming in at around $110 and the 2TB model costing between $220 and $280.
Capacity: Up to 4TB | Read performance: 1,050MB/s | Write performance: 1,000MB/s | Connection: USB 3.0
As I explain below, you can’t run PS5 games from an external drive — but you can use one to store any games you aren’t playing at the moment, including older PS4 games.
One of my favorite portable drives is the Samsung T7. It can write files at a speedy 1,000 MB/s. If you plan to use the drive exclusively for at-home use, you can save money by buying the regular model instead of the ruggedized Shield variant. I’ve been using T7 drives to store my photos, music and games for years, and they have yet to fail me. The latest model, the Samsung T9, boasts read/write speeds of up to 2,000MB/s.
I’ve tested most of the SSDs recommended on this list, either for PS5 or computer use. I also bought and used our top pick in my own PS5.
How much PS5 storage do I need?
The PlayStation 5 and PlayStation 5 Pro can accept internal drives with between 250GB and 8TB of storage capacity. If you already own a PS5, chances are you have a reasonable idea of how much storage you need for your game library. If you’re buying an SSD with a new PS5 or PS5 Pro, or buying for someone else, it’s more difficult to tell what you might need for a high-performance experience.
PS5 games are smaller on average than their PS4 equivalents, typically taking up between 30GB and 100GB, with some notable (and very popular) exceptions. If you’re a fan of the Call of Duty series, installing Black Ops 6and Warzone 2.0 can eat up to 240GB. In other words, a full Call of Duty install will take up more than one-third of the PS5’s internal storage. If you’re not a CoD fan, though, chances are you’ll be good to store between six to 10 games on a regular PS5 internally before running into problems.
You also need to consider your internet speed. If you live in an area with slow broadband, the “you can just download it again” rationale doesn’t really work. At my old home, a 100GB download took me around eight hours, during which time it was difficult to simultaneously watch Twitch or, say, publish articles about upgrading PS5 SSDs. Keeping games around on the off-chance you’ll want to play them at some point makes sense.
Aaron Souppouris / Engadget
Off the bat, there’s basically no point in going for a 250GB PS5 SSD. Economically, 250GB drives aren’t that much cheaper than 500GB ones — and practically, that really isn’t a lot of space for modern games to live on. 500GB drives can be a decent option, but after years of declining prices, I think the sweet spot for most people is to opt for a high-capacity 1TB or 2TB drive, which should run you at most $200. The latter will more than double the PS5 Pro’s storage without breaking the bank.
Unless you’re rolling in cash and want to flex, 4TB and 8TB models should mostly be avoided, as you’ll end up paying more per gigabyte than you would with a 1TB or 2TB drive.
While the 825GB PS5 only provides 667GB of storage, that’s largely due to storage being reserved for the operating system and caching. If you install a 1TB PS5 SSD, you’ll have, within a margin of error, 1TB of storage available for games. Out of the box, the PS5 Pro offers 1.86TB of storage for games, though you can eke out more if you delete the pre-installed Astro’s Playroom (gasp).
Since neither the PS5 Slim nor PS5 Pro feature updated CPU architecture, all of our recommendations will work with whatever PS5 model you own.
Can you play PS5 games on an external SSD?
External hard drives tend to cost less than internal SSD counterparts (and there’s a good chance you might own one already). Unfortunately, there are restrictions on what you can do with them. An external SSD connects to your PS5 via USB, and is only suitable for playing PlayStation 4 games, or storing PS5 titles. That’s useful if you have anything but the best high-speed internet — it’s faster to move a PS5 game out of “cold storage” on an external drive than it is to re-download it — or want to keep your PS4 library on hand.
Due to the limitations here, you don’t need the highest-performing model, although you should opt for SSDs over HDDs for improved transfer speeds and load times. Any basic portable drive from a reputable brand will do, with the Crucial X9 Pro and Samsung T7 being options we’ve tried and can recommend.
Which SSD cards are compatible with the PS5?
The official answer to this question is an “M.2 Socket 3 (Key M) Gen4 x4 NVME SSD.” But even within that seemingly specific description, there are additional factors to consider. The main requirements Sony has laid out for compatibility come down to speed, cooling and physical dimensions.
For speed, Sony says drives should be able to handle sequential reads at 5,500MB/s. Early testing showed that the PS5 would accept drives as slow as 4,800MB/s, and that games that tap into the SSD regularly — such as Ratchet & Clank: Rift Apart — would cause no issues. Pretty much the only thing the PS5 will outright reject is one that doesn’t match the Gen4 x4 spec.
In our opinion, though, using a drive slower than the specification is a risk that, if you don’t already have that drive lying around, is not worth taking. Just because we haven’t found issues yet doesn’t mean there won’t be games that could be problematic in the future. The price difference between these marginally slower Gen4 drives and the ones that meet Sony’s spec isn’t huge, and you might as well cover all your bases.
Slightly more complicated than speed is cooling and size. Most new SSDs are going to be just fine; the PS5 can fit 22mm-wide SSDs of virtually any length (30mm, 40mm, 60mm, 80mm or 110mm, to be precise). The vast majority of drives you find will be 22mm wide and 80mm long, so no problem there.
It should be noted that the system can fit a 25mm-wide drive, but that width must include the cooling solution. Speaking of, Sony says SSDs require “effective heat dissipation with a cooling structure, such as a heatsink.” The maximum height supported by Sony’s slot is 11.25mm, of which only 2.45mm can be “below” the drive.
This previously meant some of the most popular heatsinked Gen4 SSDs, including Corsair’s MP600 Pro LP, would not fit within the PS5’s storage expansion slot. Since Engadget first published this guide in 2021, most NVMe makers, including Samsung, have come out with PlayStation-specific models that meet those requirements. That said, if you want to save some money, bare drives are often cheaper and it’s trivial to find a cooling solution that will work for the PS5.
The only component in an NVMe SSD that really requires cooling is the controller, which without a heatsink will happily sear a (very small) steak. Most SSDs have chips on only one side, but even on double-sided SSDs, the controller is likely to be on top, as manufacturers know it needs to be positioned there to better dissipate heat.
So, head to your PC component seller of choice and pick up basically anything that meets the recommended dimensions. A good search term is “laptop NVME heatsink,” as these will be designed to fit in the confines of gaming laptops, which are even more restrictive than a PS5. They’re also typically cheaper than the ones labeled as “PS5 heatsinks.”
One recommendation is this $6 copper heatsink, which attaches to the PS5 SSD with sticky thermal interface material. It works just fine, and in performing stress tests on a PC, we couldn’t find anything metal that didn’t keep temperatures under control. When you’re searching, just make sure the solution you go for measures no more than 25mm wide or 8mm tall (including the thermal interface material) and has a simple method of installation that’s not going to cause any headaches.
One last thing: When shopping for a PS5 NVMe, there’s no reason to buy a Gen5 model over a more affordable Gen4 model. As things stand, Sony’s console can’t take advantage of the new standard, and though Gen5 drives are backward compatible, they’re more expensive than their Gen4 counterparts. Just buy the fastest and highest-capacity Gen4 model you can afford.
How to install an SSD into your PS5
If you need guidance on how to install your new NVMe into your PS5 or PS5 Pro, we have a separate guide detailing all the steps here. Installation is pretty straightforward, but our how-to can help you if you’re stuck. Just make note: Before attempting to add more storage via a PS5 SSD, ensure that you have Sony’s latest software installed.
Understanding soft caps are key to how to level up stats and runes in Elden Ring. That way, if you know the soft cap breakpoints, you’ll be able to get the optimal return from the runes you’ve spent — as opposed to receiving diminishing returns from excessive stats.
If that sounds a bit complex, don’t worry; in this guide, we’ll explain everything there is to know about soft caps in Elden Ring.
What are soft caps in Elden Ring?
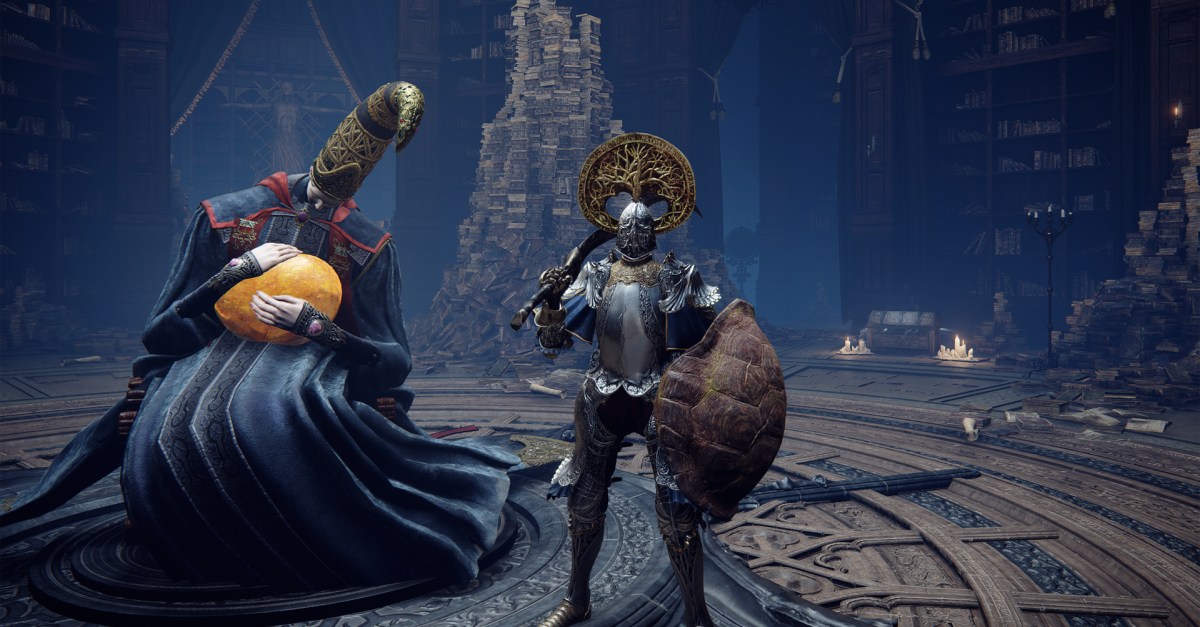
If you’re no stranger to the Lands Between and Shadow of the Erdtree’s Realm of Shadow, you probably know the drill: defeat enemies, receive runes, and use the runes to level your stats at a Site of Grace. Each individual stat can be leveled from 1 to 99, with 99 being the “hard cap” — the limit.
Beware, however, that there’s a difference between leveling a stat from level 30 to level 31 or from level 50 to level 51, as you’ll receive less benefits once you’ve crossed a certain threshold. This threshold is called a “soft cap” or a “breakpoint” in Elden Ring. When you start leveling a stat, the returns will initially remain the same or even improve with every new level, but after reaching a certain breakpoint, the stat will be soft-capped and the returns will become less and less.
Image: FromSoftware/Bandai Namco via Polygon
If you level your Vigor from level 3 to level 4, your HP will increase from 312 to 322.
If you level your Vigor from level 4 to level 5, your HP increases from 322 to 334.
As you can see, the returns per level have improved; instead of 10 HP points, you received 12 HP points the second time. These growing returns will reach their peak when leveling Vigor from level 39 to level 40, with a whopping 48 HP points gained (from 1402 HP to 1450 HP).
If you continue to level your Vigor from level 40 to level 41, though, your HP will improve from 1450 to 1476; a return of 26 HP points. It’s still an improvement, but obviously not nearly as great as the previous 48 HP points. From this point onwards, the amount of HP gained from additional Vigor levels will steadily decline. Level 40 is therefore called the first soft cap for Vigor.
And that’s not all; every Elden Ring stat has at least two soft cap points, up to as many as four. For Vigor, the amount of HP gained from higher levels will drop significantly after level 60, as you will only get between 3 and 6 HP points per level afterwards. Level 60 is therefore named the second soft cap for this stat.
Image: FromSoftware/Bandai Namco via Polygon
The existence of soft caps in Elden Ring doesn’t mean you should stop leveling a stat after reaching such a breakpoint, but it does mean that you need to mind your stat point allocation. Leveling Vigor from 40 to 60 can still be a great choice, but you might need to prioritize other stats before you do so, as the returns from those upgrades may be far greater. If you’d like to respec your current stats, visit Rennala in the Raya Lucaria library and select “Rebirth”.
Elden Ring soft caps in 2025
Before we dive into the details, here’s a quick overview of all soft cap breakpoints per stat type in Elden Ring:
Vigor: 40, 60
Mind: 50, 60
Endurance: 30, 50 (equipment load 60)
Strength: 60, 80
Dexterity: 60, 80
Intelligence: 50, 60, 80
Faith: 50, 60, 80
Arcane: 60, 80
Let’s delve into each stat, one-by-one:
Image: FromSoftware/Bandai Namco via Polygon
Level 1-40: growing returns, up to +48 HP per level.
Level 41-60: diminishing returns, between 27 and 13 HP per level.
Level 61-99: diminishing returns, between 6 and 3 HP per level.
Vigor improves HP, fire resistance, and immunity. As mentioned in the example above, Vigor has growing returns before reaching the first soft cap at level 40. This is amazing, as it means you’ll receive more and more HP with every level up until that point. Sadly, the drop-off is rather steep, going from 48 HP to 26 HP points — and even down to only 6 per level after the second soft cap at level 60.
Having a high HP is extremely useful for almost any Elden Ring build – it’s hard enough to stay alive without giving every enemy the possibility to one-shot you. We therefore recommend to hit the first soft cap of level 40, and continue to level 60 if your playstyle needs it (frontline melee builds, for example). Anything above level 60 is a waste of runes.
Image: FromSoftware/Bandai Namco via Polygon
Level 1-15: between 3 and 4 FP per level.
Level 16-35: between 5 and 6 FP per level.
Level 36-50: between 6 and 7 FP per level.
Level 51-60: diminishing returns, between 4 and 6 FP per level.
Level 60+: diminishing returns, between 2 and 3 FP per level.
Focus: only starts to improve from Mind level 31 onwards, with soft cap at level 40.
Mind improves your FP and Focus. Focus is a nice defensive stat to have (protects against sleep and madness) but FP, also known as “mana,” is far more important as it’s needed to cast spells. With that in mind, you really only need as much Mind as you require FP to cast your magic. With a fully upgraded Flask of Cerulean Tears, you can restore 220 FP — one full FP bar at Mind level 38. Therefore, Mind at +38 is therefore the “sweet spot” before hitting the FP soft cap at level 50 and Focus soft cap at level 40.
Image: FromSoftware/Bandai Namco via Polygon
Stamina level 1-30: between 1 and 2 points per level, but usually 2.
Stamina level 31-50: diminishing returns, between 1 and 2 points per level, but usually 1.
Stamina level 50+: diminishing returns, between 0 and 1 point per level.
Equipment load level 9-25: only starts to improve from Endurance level 9 onwards, with +1.6 points per level up to level 25.
Equipment load level 26-45: adds between 1 and 1.4 points.
Equipment load level 46-60: adds between 1.4 and 1.5 points.
Equipment load level 60+: soft cap with a huge drop-off, down to 1 point.
Robustness: only starts to improve from Endurance level 31 onwards, with soft cap at level 40.
Endurance improves stamina, maximum equipment load (allowing you to stay within the “medium load” range while wearing heavier armor, for example), and robustness (resistance to bleed and frostbite). The amount of stamina you’ll need depends on how much you consume; if you’re using a melee build, you’ll typically want at least +34 Endurance, a stamina and equipment load sweet spot that also offers some robustness.
If you’re an endgame player with lots of runes to spend, you may keep going until the equipment load soft cap at level 60, as this allows you to equip far better armor sets while remaining in a below-heavy load range.
Strength and Dexterity soft caps
Image: FromSoftware/Bandai Namco via Polygon
Strength armaments: soft caps are usually at level 20, 60, and 80.
Physical defense: improves at levels 30 and 40, peaking at 60. Diminishing returns after level 60.
Dexterity armaments: soft caps are usually at level 20, 60, and 80.
Incantations: soft caps at level 30 and 45.
Strength and Dexterity improve the damage dealt with armaments (weapons) scaling with these stats (usually physical/melee weapons). Although the breakpoints and minimum stats required depend on the individual armament, the physical damage soft caps are typically at level 20, 60, and 80.
At the start of your Elden Ring game, should you decide to wield a strength- or dexterity-scaling weapon, try to reach soft cap level 20 as soon as possible. Go up to 60 as you progress further (don’t forget your Vigor, Endurance, and Mind soft caps), but there’s no need to proceed past the level 80 soft cap.
Intelligence, Faith, and Arcane soft caps
Image: FromSoftware/Bandai Namco via Polygon
Intelligence armaments: soft caps are usually at level 20, 50, and 80.
Intelligence sorceries: usually level 60 and 80.
Magic defense: best benefits until level 20 and slightly less until level 35. Soft cap at level 35 and soft cap with steep drop-off at level 60.
Faith armaments: usually level 20, 50, and 80.
Faith incantations: usually level 60 and 80.
Arcane armaments: usually level 20, 60, and 80.
Arcane buildup: usually level 40 and 60.
Arcane incantations: soft caps at level 30 and 45.
Arcane vitality and holy defense: hit their first soft cap at level 15 and 20 respectively. Final soft caps are level 60 for both.
Besides improving armaments that scale with these stats, Intelligence boosts the power of your sorceries, Faith increases the power of incantations, and Arcane improves status buildup (for Arcane-scaling weapons).
Similar to Strength and Dexterity, the exact scaling depends on the armament you’re using, but you typically need to hit level 20 for the best gains in early game. Try to eventually hit the soft cap around level 50, but it’s not worth it to go beyond level 80.
The defensive attributes (vitality, magic defense, etc.) hit a very steep drop-off after level 60.