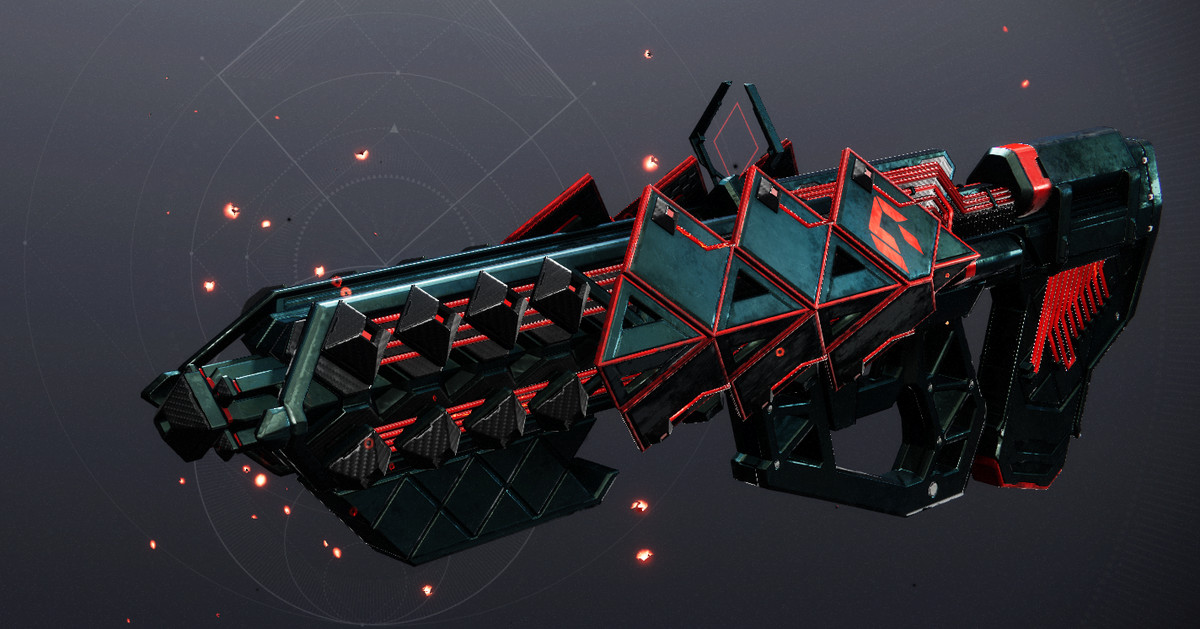
“Zero Hour” is the second secret mission to ever come to Destiny 2, and it’s finally back in the game as part of the Into the Light update and the May 14 reset. Much like the reprised “The Whisper” mission and its Whisper of the Worm reward, the updated version of “Zero Hour” rewards a fully craftable version of the Exotic pulse rifle Outbreak Perfected.
In this Destiny 2 guide, I’ll walk you through how to complete “Zero Hour” and get the pattern for Outbreak Perfected. Whether this is your first time experiencing “Zero Hour” or it’s just been too many years for you to remember the path, I’ve got you covered.
How to start ‘Zero Hour’ in Destiny 2
:format(webp):no_upscale()/cdn.vox-cdn.com/uploads/chorus_asset/file/25447644/Destiny_2_Screenshot_2024.04.23___13.46.19.14.png)
Image: Bungie via Polygon
To start “Zero Hour,” all you need to do now is talk to Ada-1.
Head to the Tower Annex — the landing point over by the Drifter — and head up to Ada-1, the vendor who normally just handles transmog. She’ll give you the “Asset Protection” quest. With the quest in hand, all you need to do is open up the “Into the Light” submenu in the Director and select “Zero Hour.”
Completing the Exotic mission and finishing the quest at Ada-1 will reward you with the pattern for Outbreak Perfected.
‘Zero Hour’ walkthrough in Destiny 2
You have 40 minutes to beat this mission on the Normal difficulty.
Navigating the Destiny 1 Tower in ‘Zero Hour’
“Zero Hour” starts out with a lot of combat as you first adventure through the Destiny 1 Tower. You’ll be dealing with some powerful Fallen here, so make sure to put on your best gear and an assortment of ad-clearing weapons. As with all dense Fallen encounters, the Riskrunner Exotic submachine gun will serve you well if you’re having trouble.
:format(webp):no_upscale()/cdn.vox-cdn.com/uploads/chorus_asset/file/16221369/D2_PC_Osiris2019_05_08_10h32m13s674.png)
Bungie via Polygon
Make your way through the bazaar and into the small vent. On the other side, you’ll be where the Speaker’s chambers once were. Clear the enemies, and move through the sweeper bot hallway.
You’ll find yourself in the courtyard, which is filled with enemies of varying type and power. There’s even a Brig here now, an enemy type that didn’t exist when the original mission came out. Take them all down to unlock the rest of the path.
:format(webp):no_upscale()/cdn.vox-cdn.com/uploads/chorus_asset/file/16221406/D2_PC_Osiris2019_05_08_10h37m40s735.png)
Bungie via Polygon
Continue through the old tower until you reach the flaming scaffolding where the original opening mission of Destiny 2 takes place. Slide under the big door next to the M and drop down the elevator shaft. Climb in the vent and follow it.
:format(webp):no_upscale()/cdn.vox-cdn.com/uploads/chorus_asset/file/16221415/D2_PC_Osiris2019_05_08_10h37m56s923.png)
Bungie via Polygon
You’ll emerge in a giant shipyard. Turn immediately left, and you’ll see a ship sitting below you. Run up to it and crouch under its nose. Follow the path and take a right into the vent. Follow the hallway you drop into and take the other vent above you. Take a left and enter another vent behind the toolbox.
:format(webp):no_upscale()/cdn.vox-cdn.com/uploads/chorus_asset/file/16221443/D2_PC_Osiris2019_05_08_10h38m55s229.png)
Bungie via Polygon
Follow the vent and take your first right. There are a few doorways below, but you only need to take the one directly under you. If you’re the first player to arrive, you’ll have a handy metal lip to stand on. If you’re following a teammate, it’ll have broken off by now. Step off the ledge, turn around, and push forward against the wall as you fall. Climb into the ledge and follow the vent.
:format(webp):no_upscale()/cdn.vox-cdn.com/uploads/chorus_asset/file/16221449/D2_PC_Osiris2019_05_08_10h39m10s228.png)
Bungie via Polygon
Jump onto the first piece of yellow scaffolding and then onto the next. Look toward the tower. There are two drain openings and a platform to your left. Depending on your class, you can either jump straight to the landing or hop your way to the landing through the drain openings.
:format(webp):no_upscale()/cdn.vox-cdn.com/uploads/chorus_asset/file/16221452/D2_PC_Osiris2019_05_08_10h39m19s507.png)
Bungie via Polygon
On the landing, look off and down toward the tower. You’ll see a small protrusion. This is your target. Jump off the landing and move toward the wall. Land on the antenna.
:format(webp):no_upscale()/cdn.vox-cdn.com/uploads/chorus_asset/file/16221454/D2_PC_Osiris2019_05_08_10h39m27s118.png)
Bungie via Polygon
Look out toward where the city and turn left. Jump on the pipes until you reach the next landing. You can pull a switch here to help your friends catch up.
:format(webp):no_upscale()/cdn.vox-cdn.com/uploads/chorus_asset/file/16221467/D2_PC_Osiris2019_05_08_10h39m47s447.png)
Bungie via Polygon
Jump onto the scaffolding above you and run up to the open vent. Jump in and follow the path. You’ll be in a big elevator shaft. Start climbing up a few flights until you’re at the second from the top. Shoot open the vent on the right and climb through.
:format(webp):no_upscale()/cdn.vox-cdn.com/uploads/chorus_asset/file/16221474/D2_PC_Osiris2019_05_08_10h40m22s667.png)
Bungie via Polygon
Now you’ll be surrounded by spinning fans, each of which have an Explosive Shank in the middle. Look for the red lights and jump into them. If you hold against the wall, you’ll save yourself from the fans. When you land, be careful — don’t hit the ground too hard and skid off into another fan. Repeat this process, carefully taking out or maneuvering around the Shanks, until you’re at the bottom of the shaft. Climb in another vent.
:format(webp):no_upscale()/cdn.vox-cdn.com/uploads/chorus_asset/file/16221481/D2_PC_Osiris2019_05_08_10h40m47s033.png)
Bungie via Polygon
You’ll now find yourself in a long hallway that looks completely blank. Jump off the ledge and onto the silver vents hanging off the wall. These are tricky to stand on, so limit your movement. Jump to the next one and finally into the open door on the far side. Once again, there is a switch here to help your friends through the puzzle if they’re lagging behind.
How to navigate the ‘Zero Hour’ maze
:format(webp):no_upscale()/cdn.vox-cdn.com/uploads/chorus_asset/file/16221501/Destiny_2_Screenshot_2019.05.07___14.47.45.26.png)
Bungie via Polygon
Follow the vents until you get to Ventilation. Walk forward and take a look at the map, which you can see clearly in the image above.
This is the maze section of “Zero Hour,” and it looks much scarier than it actually is. The white lines represent hallways you can walk through, with the red arrows denoting switches you need to hit. You start the map in the center of the bottom-most rectangle’s southern white line. When you’ve had a good look at the map, turn around and drop down two floors of vents.
You’re in the maze now, just like in the picture. We recommend sending one player right and another left, just to speed the process up. The instructions below are for the right-side player, so left-side players should just mirror my instructions.
:format(webp):no_upscale()/cdn.vox-cdn.com/uploads/chorus_asset/file/16221511/D2_PC_Osiris2019_05_08_10h42m14s294.png)
Bungie via Polygon
- Run forward and take a left. Keep running until you find a split in the hall.
- Turn right and into another rectangle.
- Follow the path and hit the first switch.
- Keep running until you reach the original hallway.
:format(webp):no_upscale()/cdn.vox-cdn.com/uploads/chorus_asset/file/16221514/D2_PC_Osiris2019_05_08_10h41m56s041.png)
Bungie via Polygon
Here, you’ll likely have to wait for a wall of electricity to pass. If the electricity is just starting to arc, you can run through. Otherwise, you’ll have to sit and brood — Darth Maul style.
:format(webp):no_upscale()/cdn.vox-cdn.com/uploads/chorus_asset/file/16221519/D2_PC_Osiris2019_05_08_10h42m07s650.png)
Bungie via Polygon
When the electricity drops, take a right turn. You should start hearing an unsettling sound about now. An electric shredder is also running the maze with you, named TR3-VR by Bungie and the Destiny community. There are some alcoves to hide in so it can pass, but just to your left you should see a giant cavern with pipes in it.
Jump on the pipes and wait for the machine to pass. You can tell if the shredder is chasing you by its sound or giant red light.
:format(webp):no_upscale()/cdn.vox-cdn.com/uploads/chorus_asset/file/16221522/D2_PC_Osiris2019_05_08_10h41m49s037.png)
Bungie via Polygon
With the machine gone, jump back over to your hallway and take a left. Follow the path until a hallway opens on the right. Go hit the switch like last time and return to your normal hallway.
:format(webp):no_upscale()/cdn.vox-cdn.com/uploads/chorus_asset/file/16221525/D2_PC_Osiris2019_05_08_10h42m48s308.png)
Bungie via Polygon
Take a right and follow the path until you can take another right. This is the exit. If you’ve hit all four switches, the doors will be open.
Run into the new room and hop on one of the elevators to your right or left. Hit the button and wait for them to slowly lift you into the rafters.
:format(webp):no_upscale()/cdn.vox-cdn.com/uploads/chorus_asset/file/16221527/D2_PC_Osiris2019_05_08_10h43m23s042.png)
Bungie via Polygon
Jump onto the platform and shoot out the vent. Head down the chute and stay in the center of the slide. Jump to slow your momentum, or risk death by splattering against a wall. When you come out of the chute, turn left and then immediately right. Crawl through the vent on the floor.
How to navigate the vault maze in ‘Zero Hour’
:format(webp):no_upscale()/cdn.vox-cdn.com/uploads/chorus_asset/file/16221533/D2_PC_Osiris2019_05_08_10h44m02s688.png)
Bungie via Polygon
You’ll be in the old Cryptarch Vault now, and the mission is nearly done.
On the opposite side of the Vault’s door, you’ll see some pipes on the wall. Next to the pipe, you’ll see the Cryptarch symbol. Go stand by it and the secret door will open. Run forward until you reach the section with white floor panels. You’ll need to step on these in the correct order or you’ll get incinerated.
There are six rows of panels, each are five panels across. We’ve numbered the panels below in order, so R1 – 1 is the farthest left panel on the first row, R1 – 2 is the farthest left panel in the second row, R3 – 5 is the farthest right of the third row, and so on.
You’ll start on the second tile from the right on the first row. From there, here’s the order you should follow, with the direction you need to head in in parentheses:
- R1 – 4 (Start)
- R2 – 4 (Forward)
- R2 – 3 (Left)
- R2 – 2 (Left)
- R2 – 1 (Left)
- R3 – 1 (Forward)
- R4 – 1 (Forward)
- R5 – 1 (Forward)
- R5 – 2 (Right)
- R5 – 3 (Right)
- R4 – 3 (Back)
- R4 – 4 (Right)
- R4 – 5 (Right)
- R5 – 5 (Forward)
- R6 – 5 (Forward)
Once you’re through the panels, head to the end of the vault.
:format(webp):no_upscale()/cdn.vox-cdn.com/uploads/chorus_asset/file/16221536/D2_PC_Osiris2019_05_08_10h44m28s763.png)
Bungie via Polygon
At the broken case, take a right and you’ll see a burned hole in the ground. Drop through it. Run forward and hop into another vent. It’s time to fight.
How to defeat Siriks in ‘Zero Hour’
:format(webp):no_upscale()/cdn.vox-cdn.com/uploads/chorus_asset/file/16221537/D2_PC_Osiris2019_05_08_10h44m50s553.png)
Bungie via Polygon
When you drop down, you’ll find a Fallen Captain wielding a Scorch Cannon: Siriks. They’re surrounded by an army of Fallen.
Take out Siriks’ Fallen allies. They’ll summon turrets, big Servitors that grant immune shields to everything (these are very annoying, so kill them first) and a ton of Shanks. Just keep killing everything until Siriks’ health is about one-third full. You’ll get a message on your screen that says “Siriks retreats… for now” and the boss will disappear.
Two Fallen Walker tanks will appear on the raised platforms on your left and right, along with some additional Fallen. Take everything out and you’ll get another ominous message: “Siriks returns… heavily armed.”
Siriks will drop back into the area in a massive Brig mech. This thing has full health, so it’s going to take some time and work to take it out. Once you manage to blast off theshield on the Brig, the boss will start lobbing massive tank and constant airstrikes. Just keep moving to dodge these attacks and you’ll eventually take it down.
With Siriks dead, head up to the chest that spawns, say hi to Mithrax, and grab the Outbreak Perfected schematic. Head back to the Tower and talk to Ada-1. She’ll give you the Outbreak Perfected, complete with the pattern attached. Ada-1 will also give you the “Outbreak Refined 1” quest, which you can complete for some additional crafted perk options on your new Outbreak Perfected.
If you already have the Catalyst for Outbreak Perfected from the original version of “Zero Hour,” you’ll instantly be able to place it on your newly crafted gun. However, if this is your first time running the mission, you’ll need to hop back in on Heroic mode in order to pick up the Catalyst and improve your Outbreak Perfected.


:format(webp):no_upscale()/cdn.vox-cdn.com/uploads/chorus_asset/file/25375223/jlee_240405_1001_ffxiv_ocean_fishing_unlock.jpg)
:format(webp):no_upscale()/cdn.vox-cdn.com/uploads/chorus_asset/file/25379603/hybodus_mount_ffxiv.jpg)