
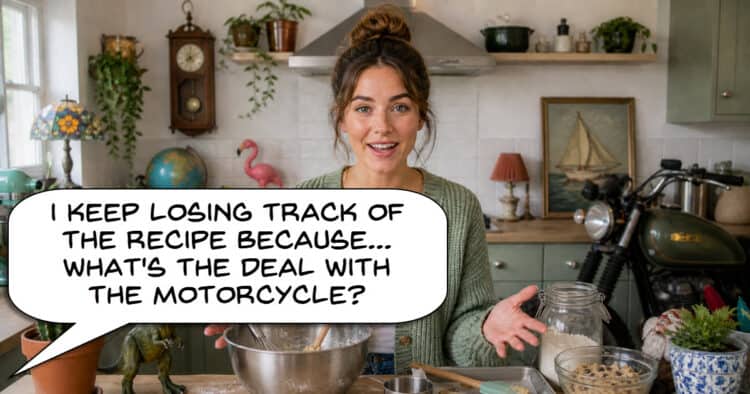
This One Change Makes You The Easiest Thing To Look At On Screen
This is a great tips video from Chris Goor again covering something a lot of people tend to miss in their videos.
The basic concept is that if you or your subject have a tendency to blend in with the background, the viewer will quickly lose focus on you or the subject.
It’s not a factor that you can control in the audience because that’s just the way us humans tend to look at things!
What you can do is be mindful of that behaviour and shoot your videos in a way that minimizes that effect.
How to Use the Instagram Edits App in 2026 (Complete Tutorial)
It’s been a while since I posted a walkthrough of the Instagram Edits App and given the constant development in the past, it’s probably overdue.
So who better than to guide you through but the guys from Primal Video who know their stuff when it comes to these online platform specific apps.
I know this site is pretty much dedicated to editing outside of apps like this but for many people, going outside of the platform they are on is not really worth the effort.
How to use AI Text to Video in PowerDirector
This is a demonstration of using A.I. tools in PowerDirector to generate some b-roll footage to fit in with an existing clip.
By the time you have finished the video there should be some things that are pretty obvious to you.
First is that like nearly all video editing apps, the A.I. generation models live outside of the software itself.
For the most part the user interface is just a go-between from your desktop to the online version of the A.I. tool so for bigger tasks there is going to be a round trip involved.
The second point is that you have to be really specific about what you want.
As you can see in the video the created clip ends with a closeup of the car when the user actually wanted a closeup of the driver.
You will also notice that the colors of the created clip are not really matching the colors of the original clip.
A quick way to become more specific with your prompts is to use another A.I service to handle parts of it.
There is a website called Visual GPT which has a tool on it that writes prompts.
If you take a still image of a frame in your video and give it to Visual GPT, it will write a detailed prompt describing the scene that any other A.I tool can understand.
You can see that tool here at: Image to Prompt.
Of course once you have that, you still have to get the action part of the prompt right!
AI Generated Features for Creating Catchy Music and Sound Effects
For me at least one of the most soul crushing aspects of video post production is locating music and sound effects for projects.
It’s not as though adding music or sound effects is something particularly hard to do.
The hard part is spending hours listening to music tracks and effects endlessly searching for what you want that will fit your project.
If you have read any of my blog posts over the years you will know I am a very cautious user and promoter of A.I. tools.
My rule is pretty straightforward, I want A.I to help ME make better videos more efficiently. I DON’T want A.I. to make the videos!
In light of that here are a few great A.I tools inside Filmora that can take some of the pain away from the process and get you there faster.
Filmora Screen Recorder Just Got Smarter! – Add Markers While Recording
This is just a little update to a few videos I did some weeks back on a Filmora update cycle.
In that cycle Filmora completely rewrote the screen recording tool that comes with the program.
They added a bunch of features including the ability to semi-transparently add a scrolling transcript to your screen that didn’t end up showing on the final recording.
Essentially it just an inbuilt teleprompter right in front of you on the screen.
A recent addition on top of that is the ability to add markers on the recording in real-time.
Although not an obvious benefit look at it this way.
You just spent 30 minutes on a screen recording of some kind or live session that could not be stopped once started.
As you are recording you are aware that there are certain points that have to be cut out, points where you know there are mistakes, mispronunciations or whatever.
You also know all of these things are going to have to be corrected in the edit at some point.
Later in editing you literally have to replay the entire video to find those point where you know you had to do something.
Now in Filmora you can add markers to that timeline as you are recording so those endless searches for stuff to fix are no more. Pretty handy!
How to Create a Multi-cam Edit – Movavi Ideas
This is another quick “ideas” video from the folks at Movavi but I thought this one was pretty interesting in how it was described.
Strictly speaking it is not really a true multi-cam project which generally involves having multiple sources and switching between those source files.
This one a pretty much a split screen effect that is built-in but in all honesty it still works.
As they say, “Fake it till you make it!”
CapCut Map Animations That Look Complicated (They’re Not)
You know back in the day kids, map animations were a royal pain in the butt!
The reason for that was that you had to have a video editing program that could handle overlays, draw graphics on the screen and allow keyframing to animate the whole shebang.
Nine times out of ten you ended up exiting your editor and opening a graphics program to do half the work then importing back into the project and on and on it went!
Then a purpose built program specifically for map animations came along, I think it was called Vasco da Gama that had the sole function of carrying out that task.
In fact I think it still exists and costs around U.S $150!!
These days its a whole new world!
So let’s take one of the most basic video editing programs around, CapCut, and see how we do it in the modern world.
3 Steps to Plan Better Shots (and Improve Storytelling)
This tutorial may be a little above the level of most of us but it does contain some very salient points regarding how you put project together.
A lot of us start by following the rule: “I will because I can and that will make me look totally cool!”
The reality is that just because you can, doesn’t necessarily mean you should!
Yes, those swirly A.I created transition are cool to look at in isolation, but do they really achieve anything for the overall project? Usually not!
In this video you can see three questions you can ask yourself before including any shot or even any effect in a project to lift your game.
The Easy Way to Edit Pro Youtube Videos in Resolve
It doesn’t really matter if you are new to DaVinci resolve or have been using it for a while, this video is really valuable.
The actual skills and knowledge you need for working effectively with Resolve are not that many.
Basic actions like moving around the timeline, adding media, cutting etc. are all quite simple to get a grasp of quickly.
The real skill in using Resolve as an editor and post production suite is having a process that you can follow.
It is Resolve’s nature to be complex because it has to cover a bewildering number of usage scenarios.
The result of that is a bewildering array of tools and buttons and knobs and heaven knows what else!
The key to staying sane and getting the job done is having a process by which you can execute those basic skills with ease and confidence.
The video below from Casey Faris does exactly that.
Be warned, it is over an hour long and covers a complete and comprehensive step by step workflow from start all the way through to a completed, polished video.
3 Free Plugins That Make Voiceovers Sound Amazing in DaVinci Resolve
There are many, many plugins out there that you can use in a lot of video editing software especially when it comes to the manipulation of audio.
Most of these plugins are created using a protocol called VST, which is just an agreed method of how to compile certain software allowing for wider compatibility.
So often you will see VST plugins being referred to and now you know what they are!
In order to install these plugins generally they just install into your operating system the same way fonts get installed.
Fonts always get installed into the Fonts folder and VST plugins have their own dedicated one.
If your video editing software supports VST plugins like DaVinci resolve or Filmora or PowerDirector, the next time you open that program, those plugins will be available.
As part of their start up procedure those programs scan those folders to see if anything new has been added.
Anyway, having fancy schmancy plugins to do stuff is all very well but if you don’t know what they are doing or how to use them, they pretty useless!
Now that I have that out of the way let’s discuss the video below.
In this video Daniel runs through his process of fixing an audio track so that it sounds great and will comply with standards the most social media platforms will accept.
Even if you are not really going to get into audio correction to this level, this is a great video for understanding how and why certain changes to an audio track can make your projects better.
Key Takeaways
- Avoid blending into the background in videos to maintain viewer focus.
- Learn how to use the Instagram Edits App effectively with updates from Primal Video.
- Utilize AI Text to Video in PowerDirector for generating b-roll footage, but ensure to provide specific prompts.
- Explore AI-generated tools in Filmora to simplify the process of finding music and sound effects for video projects.
- DaVinci Resolve offers plugins to enhance voiceovers, improving audio quality for social media compliance.