2D objects are fundamental to creating designs in AutoCAD and include many forms such as lines, arcs, circles, rectangles, and polygons.
For our AutoCAD Foundations blog series, we’re sharing four quick exercises to help get you started learning the basics of 2D objects. For the full tutorial on how to create 2D objects, you can check out the AutoCAD Foundations article.
2D Objects Exercise #1: Create a Line in AutoCAD
Let’s start at the very beginning. A line is the most common 2D object in a drawing.
Draw a Line
In this exercise, you’ll try out multiple ways to start the LINE command and draw a line.
From the ribbon, click Home tab > Draw panel > Line.
Or enter LINE at the Command prompt and press Enter.
When prompted for the first point, you can type in a coordinate or click in the drawing area where you’d like to begin the line. Once you specify your first point, the Command prompt will ask where you’d like to end the line. Here, you can type in a coordinate or click in the drawing area.
The LINE command continues to prompt you for additional points. Press Enter or the Spacebar to end the command.
2D Objects Exercise #2: How to Create a Polyline in AutoCAD
Now that you have the line down, let’s move on to a polyline. A polyline is a connected series of line or arc segments that is created as a single object. They are useful for irregular shapes; borders; contour lines; roads and rivers in maps; and more.
Polylines can be open or closed and have different starting and ending widths for each segment.
Draw a Basic Polyline
In this exercise, you’ll draw a polyline.
From the ribbon, click Home tab > Draw panel > Polyline.
Or enter PLINE at the Command prompt and press Enter.
After you specify the first point of the polyline, you can use the Width option to specify the width of all subsequent segments. You can change the width value at any time, even as you create new segments. Continue specifying additional points to define the polyline. Press Enter or the Spacebar to end the command.
2D Objects Exercise #3: How to Create a Rectangle in AutoCAD
Now, let’s move on to see how to draw closed objects such as rectangles and polygons.
Draw a Rectangle
In this exercise, you’ll draw a rectangle.
1. Do one of the following:
From the ribbon, click Home Tab > Draw Panel > Rectangle/Polygon drop-down menu > Rectangle
Or enter RECTANG at the Command prompt and press Enter
2. Specify the first and then second corner of the rectangle
2D Objects Exercise #4: How to Draw a Polygon in AutoCAD
Once you’ve mastered the rectangle, you can move on to a polygon.
Draw a Polygon
In this exercise, you’ll create a polygon.
1. Do one of the following:
From the ribbon, click Home tab > Draw panel > Rectangle/Polygon drop-down menu > Polygon
Or, enter POLYGON at the Command prompt and press Enter
2. Enter the number of sides for the polygon.
3. Specify the center of the polygon.
4. Enter c to specify a polygon circumscribed about a circle.
5. Specify the radius of the circle, either by moving the cursor and clicking in the drawing area or by entering a distance.
Learn More: How to Create 2D Objects
Ready to move on to arcs, circles, polyline arcs, donuts, ellipses, and splines? Be sure to check out the entire AutoCAD Foundations article for even more in-depth tutorials on creating these 2D objects. And stay tuned for our entire series here on the blog (or catch up on past articles!) as we highlight even more great tips for getting started with AutoCAD.
Shadow Labyrinth can be tough, and your HP Tank is an invaluable tool. On paper, it’s similar to the Flask of Crimson Tears in Elden Ring, with the big difference being that using it restores the entirety of your health bar. It’s great–the problem, however, is that for a long while, you only have access to one HP Tank.
As you traverse through the second main area of the game, which tasks you with reaching the top of the Sky-high Tree, you can come across an additional HP Tank. This, however, can be easily missed if you’re rushing through things. If you’re wondering how to get a second HP tank in Shadow Labyrinth, make sure to read the steps below promptly so you don’t have to waste time backtracking later on.
How to get a second HP Tank in Shadow Labyrinth
The location of the second HP tank in Shadow Labyrinth is in the forest area as you’re making your way through the Great Tree (also referred to as Sky-High Tree). We have a dedicated guide with a Great Tree walkthrough in case you need some guidance, as it’s easy to get lost.
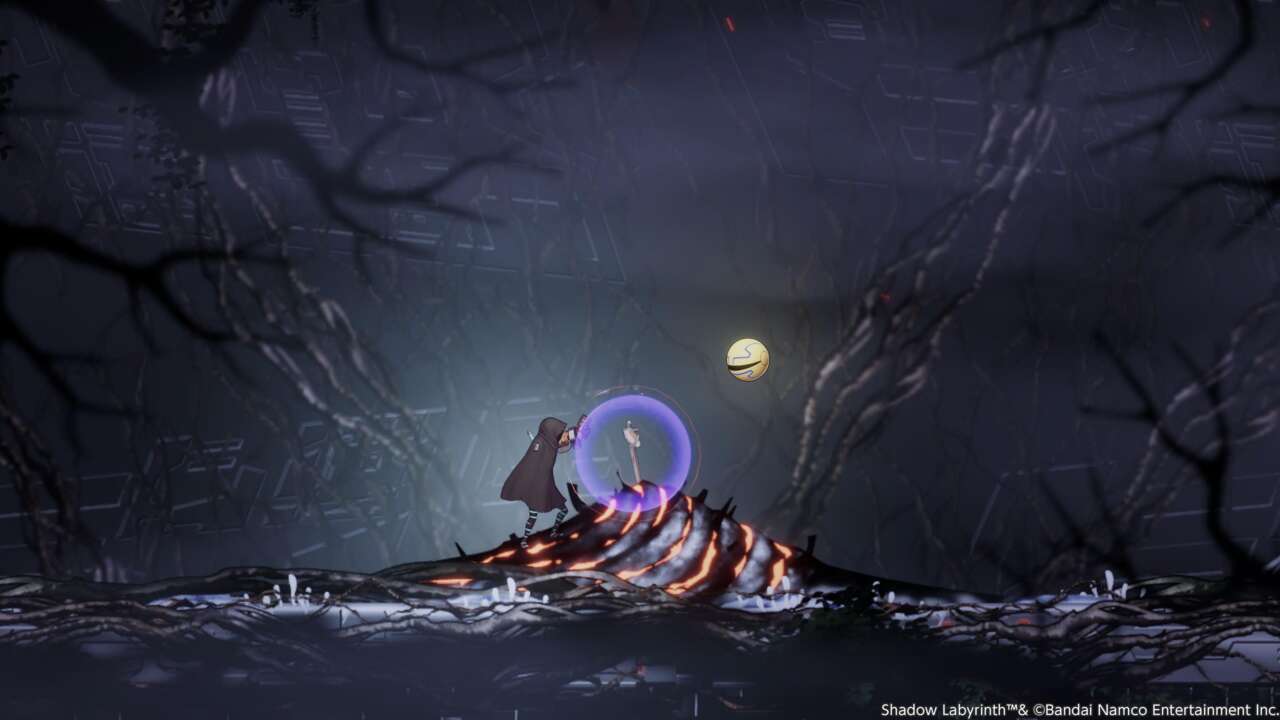
Your point of reference is in the Sky-high Tree Front area. As you progress through the level, you’ll eventually come across a long path found in the western corner. From here, you’ll reach the top and access a different region that culminates in a big boss encounter. But first, there’s another boss fight to contend with. You can find the second HP Tank in Shadow Labyrinth after defeating Duke Sirius.
From the checkpoint right at the center of the area, all you have to do is keep following the path to the right. Again, there’s a boss fight at the other end, so if you don’t have enough charges to transform into your GAIA form, I recommend taking the time to defeat the enemies in between and consume them for energy.
Then, it’s time to fight. Duke Sirius has three main attacks: As a bird, they can leap and slam the ground, so they’ll try to gap the distance with you often. Then, they will flip their wings to create small whirlwinds, which can appear individually or in pairs. Lastly, Duke can also spit fire, and the attack usually covers both sides of the ground around them.
Take Duke Sirius seriously, as the bird packs a punch.
Here’s the strategy that worked best for me: As Duke Sirius is flying down to the arena, start attacking. They always do an introductory animation, and you can get quite a few hits in while it happens. Remember to use your newly acquired attack combo–basic attack, basic attack, strong attack–to make the most of it. Then, prepare to dodge around as Duke tries to reciprocate that damage.
When the whirlwinds start, use the walls on either side of the arena to gain some height, as you can attach to them. In some instances, Duke kept spawning whirlwinds. If this happens to you, just wait for an opening and make a run for it. Once you’ve done enough damage–up until about halfway through Duke’s health bar–morph into GAIA and spam the attack button. You’ll likely take down the remaining half with GAIA alone.
Congratulations on acquiring a second HP Tank.
Once you’ve defeated Duke Sirius, you’ll get access to a long vine to the right of the arena. You can use this to get on top of the structure and follow the path all the way left to get to the area above. Before you do this, however, make sure to jump down below and grab the second HP Tank. If you need a visual reference, it also appears as a red question mark on the map.
The reason why it can be easy to miss is that the marker, as well as the icon for the item itself, is similar to other collectibles that don’t have much use. If you’ve been ignoring them thus far, make sure to do a quick stop for this one. Alternatively, if you’re already ahead, teleport or backtrack to where you fought Duke Sirius and grab it. Doing so will automatically replenish your existing HP Tank, too, so you can continue trekking even if you barely made it out of the fight alive.
This error typically means that the required SQL Server platform schema provider — specifically the one for SQL Server 2022 (Sql160DatabaseSchemaProvider) — is missing on the machine where the DACPAC deployment is being executed. In your case, even though the build pipeline is working fine and the DACPAC file is being generated successfully, the deployment fails because the target machine (likely your on-premises SQL Server or a jumpbox) doesn’t have the necessary components installed.
The key issue is that the actual deployment step is being run on the target machine (via WinRM), and not on your Azure DevOps agent. For this reason, the target machine itself needs to have the latest version of the SQL Server Data-Tier Application Framework (DACFx) that supports SQL Server 2022 (also referred to as DACFx v160). Without this, the deployment process doesn’t recognize the schema provider required by your DACPAC file, resulting in the internal error you’re seeing.
To fix this, you need to install DACFx v160 on the machine where the DACPAC is being deployed. You can download the latest DACFx installer from Microsoft’s official site here. Choose the .msi version and install it on the target server. This will include support for SQL Server 2022 deployments. Once installed, you can verify the installation using PowerShell by running Get-Command "SqlPackage.exe" and checking that it’s pointing to the correct version and path (ideally something like C:\Program Files\Microsoft SQL Server\160\DAC\bin\SqlPackage.exe).
If the built-in Azure DevOps task (SqlDacpacDeploy@2) continues to give you issues, a reliable alternative is to bypass it and run the deployment directly using SqlPackage.exe within a PowerShell task. This gives you full control over the deployment process and ensures you’re using the correct DACFx version. A simple inline PowerShell script within your pipeline can handle this, where you specify the path to your DACPAC file, your target server and database name, and your SQL authentication credentials.
Lastly, make sure that your Visual Studio database project is targeting SQL Server 2022 (v160) and that all connectivity and permissions (especially for WinRM if you’re still using the extension) are correctly configured on the deployment server.
All industries are undergoing digitization—the manufacturing industry is no exception.
The PROS Platform for Manufacturing helps you take control of your end-to-end sales process with AI-driven pricing, quoting, and selling capabilities. This industry brief reveals how leading manufacturers are using PROS to streamline operations, boost margins, and deliver exceptional dealer and customer experiences. If you’re ready to rethink pricing, revenue, and profitability in a digital-first world, this is your starting point.
What You’ll Learn:
How to optimize pricing across thousands of SKUs and channels in real time
Ways to accelerate quoting and reduce manual processes
Strategies to improve customer experience and drive loyalty
Real-world results from manufacturers who’ve increased revenue and efficiency
Download the brief now and discover how you can compete—and win—in today’s manufacturing landscape.
The Apple Maps app in iOS 26 includes some useful new features for keeping track of where you’ve been and getting alerts if there are any delays that will impact your daily commute. In this guide, we’ve rounded up a list of everything new with Maps.
Visited Places
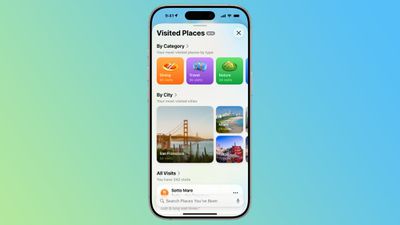
Apple Maps is able to keep track of the places that you’ve visited, either in your hometown or while traveling. It can track the restaurants, shops, parks, and landmarks that you go to, so you can look back and remember where you’ve been.
Google has long offered a timeline that automatically saves visits to places, and Apple’s new Visited Places option matches the functionality available in the Google Maps Timeline.
After you upgrade to iOS 26, the Maps app pops up an alert letting you know about the new feature, so that you can opt in or opt out.
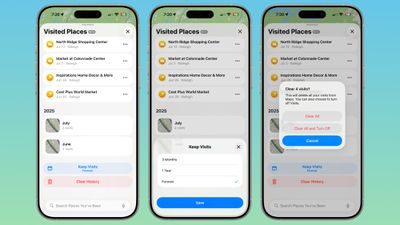
You can see your Visited Places by opening up the Maps app, tapping on your profile picture, tapping on Places, and then tapping into Visited Places. In this interface, the locations that you’ve visited are listed by month, plus there’s a search option.
There are options to change how long visits are kept (three months, one year, and forever), and to clear your current history. You can also remove locations one-by-one by tapping on them, and report incorrect location readings. When you clear your history, Apple Maps pops up an option that lets you clear everything or clear everything and turn off Visited Places entirely.
If you want to turn Visited Places off or enable it at a later date, you can do so by going to Settings > Apps > Maps > Location. From there, toggle off Visited Places. You can also access the toggle by going to Privacy and Security > Location Services > Maps.
Precise Location needs to be toggled on for Visited Places to work, and places that you’ve been are stored on-device. The information is not uploaded to Apple’s servers.
Preferred Routes
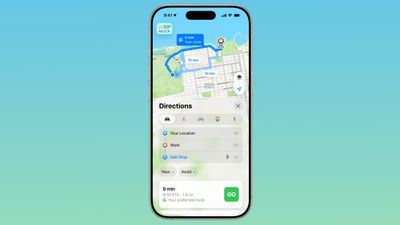
Using on-device intelligence, Apple Maps is able to learn the routes that you prefer to take to locations that you visit frequently, such as work, home, and school, and it keeps track of when you typically visit those places.
If there’s a road closure or traffic that’s going to impact your commute, the Maps app is able to alert you about the issue and offer up an alternative route so you can get there on time.
A Maps Suggestions Home Screen widget shows the same information if there are any route issues. This is an under-the-hood feature that only shows up when it’s needed, so if you have a short commute that doesn’t involve roads that frequently see traffic, you might not have it pop up.
You can turn it on or off by going to Settings > Maps > Location and toggling off the “Preferred Routes and Predicted Destinations” setting.
Liquid Glass Redesign
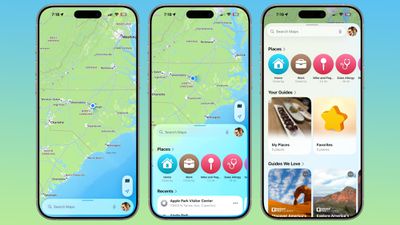
The Maps app has adopted Apple’s Liquid Glass redesign, and it brings some subtle interface changes. The search bar and navigation menu are translucent so you can see some of the Maps background behind it, and place icons are larger than before.
Icons have the layered glass look, and the various menus, cards, and buttons are more rounded than before. The Share Sheet has a popover design and it too is transparent.
The Library tab that was accessible when you tap your profile picture is now called Places, and it has improved spacing and a new Visited Places section.
Turn-by-turn directions are in a smaller pop-up bar rather than taking up the top of the Maps display, and time of arrival, length of travel, and distance are shown more prominently.
Voice Controls
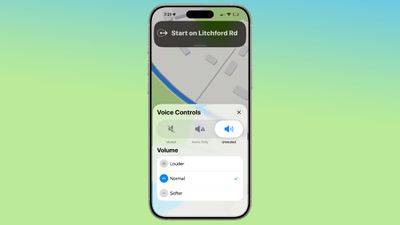
The Voice Volume section in the Maps app is now Voice Controls, and there are added toggles for Muted, Alerts Only, or Unmuted so adjusting how turn-by-turn directions are communicated is more intuitive.
These controls did exist in iOS 18, but only as toggles that had no explanation on the right side of the display when turn-by-turn directions are in progress.
Place Information
When you tap into or type a location on the Maps app, the Call, Menu, and Website buttons are now more prominently listed at the top of the interface, as are the location’s hours and the order option if one is available. There’s now a floating button to get directions to a place, and it’s always available at the bottom right of the app.
Improved Incident Reports
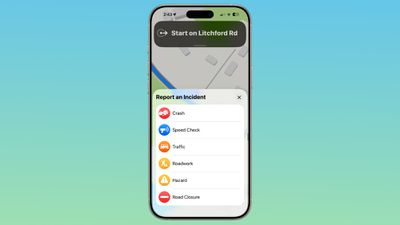
It’s easier to report an incident like a crash with a new incident button that’s located on the right side of the iPhone when getting turn-by-turn directions, and more incident types have been added.
You can report a crash, speed check, traffic, roadwork, hazard, or road closure. In iOS 18, options are limited to crash, speed check, and hazard.
Read More
We have a dedicated iOS 26 roundup that goes into detail on all of the new features that are available in the update.
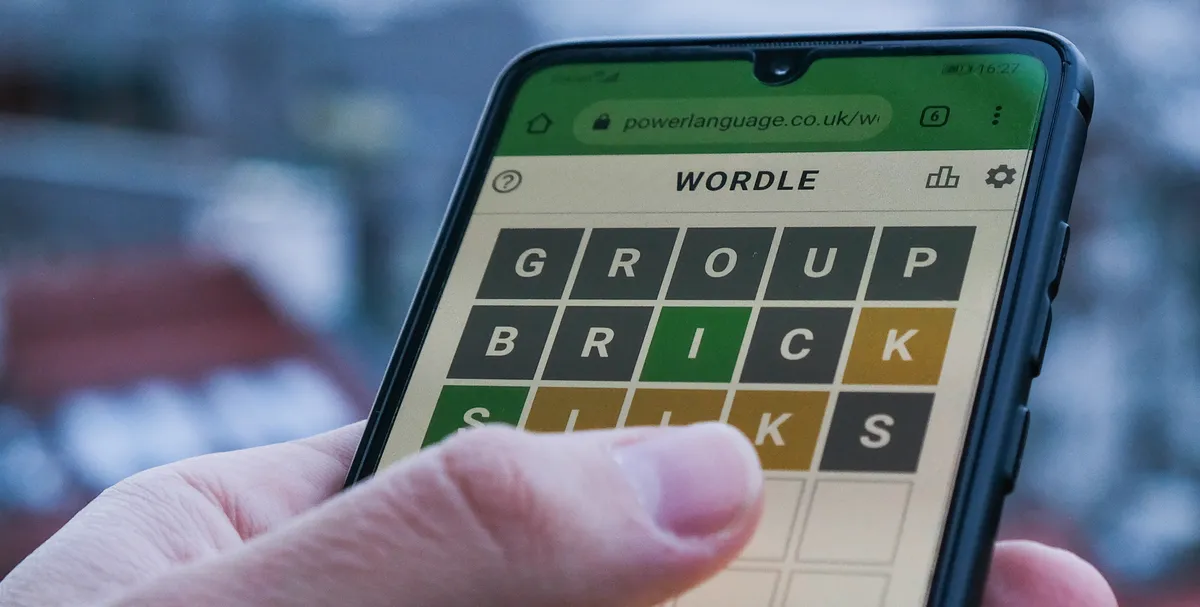
Feel free to use our clue for today’s Wordle whenever you’re feeling a bit stuck. Unleash it right at the start if you’re not sure what sort of opening word you’d like to go for, and don’t worry about spoiling the fun—it’s written to help, not immediately give the game away. You could always save it for later too, as a bit of a nudge just when you need it. Still not enough? That’s why the July 19 (1491) answer is only a click away.
Now that’s how you start the weekend. The perfect opener, the perfect second line, and an immaculate answer. All done and dusted before I even had to think about it. Brilliant. Guarantee yourself a similar experience by using however much or little of the Wordle help you can find below as you need, OK?
Today’s Wordle hint
(Image credit: Josh Wardle)
Wordle today: A hint for Saturday, July 19
These objects are sharp, pointy, and as likely to be found in movies and RPGs as they are ancient battlefields.
Is there a double letter in Wordle today?
No, there is not a double letter in today’s puzzle.
Wordle help: 3 tips for beating Wordle every day
A good starting word can be the difference between victory and defeat with the daily puzzle, but once you’ve got the basics, it’s much easier to nail down those Wordle wins. And as there’s nothing quite like a small victory to set you up for the rest of the day, here are a few tips to help set you on the right path:
A good opening guess should contain a mix of unique consonants and vowels.
Narrow down the pool of letters quickly with a tactical second guess.
Watch out for letters appearing more than once in the answer.
There’s no racing against the clock with Wordle so you don’t need to rush for the answer. Treating the game like a casual newspaper crossword can be a good tactic; that way, you can come back to it later if you’re coming up blank. Stepping away for a while might mean the difference between a win and a line of grey squares.
Today’s Wordle answer
(Image credit: Future)
What is today’s Wordle answer?
Here’s your next win. The answer to the July 19 (1491) Wordle is SWORD.
Keep up to date with the most important stories and the best deals, as picked by the PC Gamer team.
Previous Wordle answers
The last 10 Wordle answers
Past Wordle answers can give you some excellent ideas for fun starting words that keep your daily puzzle-solving fresh. They are also a good way to eliminate guesses for today’s Wordle, as the answer is unlikely to be repeated.
Here are some recent Wordle answers:
July 18: LORIS
July 17: MODAL
July 16: NERVY
July 15: FOIST
July 14: UNDID
July 13: GNOME
July 12: EXILE
July 11: BRAND
July 10: JUMPY
July 9: NOVEL
Learn more about Wordle
(Image credit: Nurphoto via Getty)
Wordle gives you six rows of five boxes each day, and you’ll need to work out which secret five-letter word is hiding inside them to keep up your winning streak.
You should start with a strong word like ARISE, or any other word that contains a good mix of common consonants and multiple vowels. You’ll also want to avoid starting words with repeating letters, as you’re wasting the chance to potentially eliminate or confirm an extra letter. Once you hit Enter, you’ll see which ones you’ve got right or wrong. If a box turns ⬛️, it means that letter isn’t in the secret word at all. 🟨 means the letter is in the word, but not in that position. 🟩 means you’ve got the right letter in the right spot.
Your second guess should compliment the starting word, using another “good” word to cover any common letters you missed last time while also trying to avoid any letter you now know for a fact isn’t present in today’s answer. With a bit of luck, you should have some coloured squares to work with and set you on the right path.
After that, it’s just a case of using what you’ve learned to narrow your guesses down to the right word. You have six tries in total and can only use real words (so no filling the boxes with EEEEE to see if there’s an E). Don’t forget letters can repeat too (ex: BOOKS).
If you need any further advice feel free to check out our Wordle tips, and if you’d like to find out which words have already been used you can scroll to the relevant section above.
Originally, Wordle was dreamed up by software engineer Josh Wardle, as a surprise for his partner who loves word games. From there it spread to his family, and finally got released to the public. The word puzzle game has since inspired tons of games like Wordle, refocusing the daily gimmick around music or math or geography. It wasn’t long before Wordle became so popular it was sold to the New York Times for seven figures. Surely it’s only a matter of time before we all solely communicate in tricolor boxes.
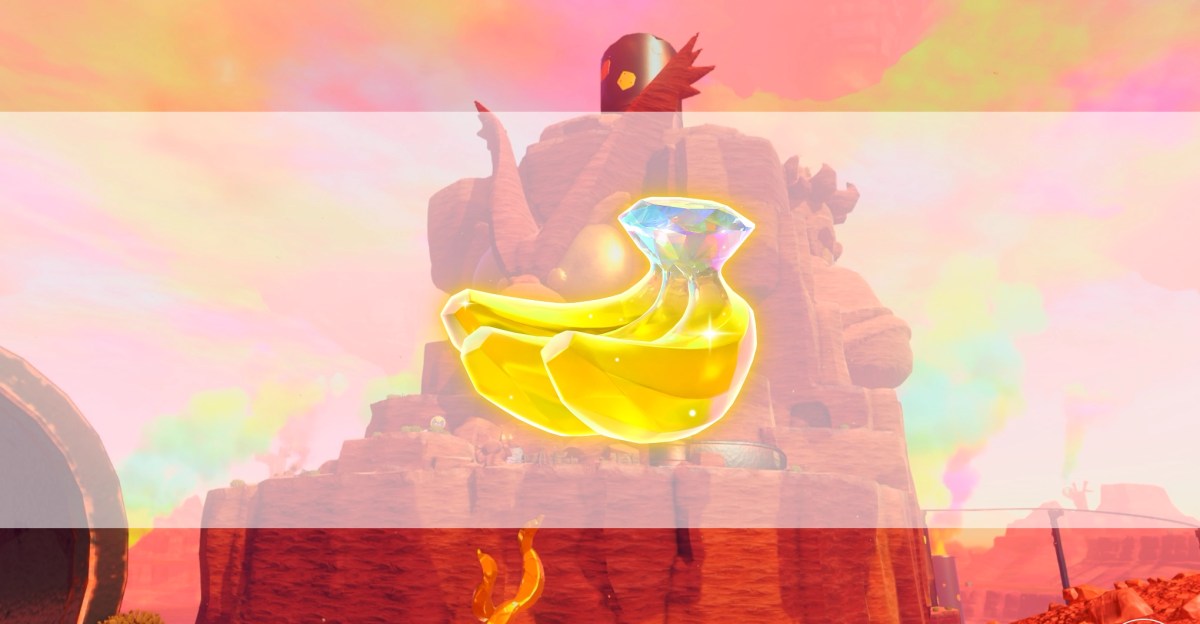
In Donkey Kong Bananza, the Canyon Layer is the third layer that you’ll crash land onto. It’s full of your crystalline friends, but now some of them are shaped like giraffes!
The Canyon Layer is home to warehouses full of Banandium Gems and smokestacks towering into the sky. The bananas in this layer are particularly difficult to find as you’ll need to weave your way up and down through the layers to collect them all.
Below, we list where to find all of the Banandium Gems in the Canyon Layer we’ve found so far in Donkey Kong Bananza. We’re still updating this guide and will add more golden bananas as we find them.
Sublayer 300 Banandium Gems
There are 60 Banandium Gems in Sublayer 300 of the Canyon Layer.
#1: Tumbled into the Canyon Layer!
Graphic: Johnny Yu/Polygon | Source images: Nintendo EPD/Nintendo via Polygon
Complete the main story quest in Hilltop Layer. When you jump down the hole into Canyon Layer, the gem will be waiting at the bottom.
#2: Behind Tallfall Cliffs
Graphic: Johnny Yu/Polygon | Source images: Nintendo EPD/Nintendo via Polygon
After you land in the Canyon Layer, dig straight down until you land in a cave below you. Before you head into the larger cavern with Banandium Gem #3, turn around to find a breakable wall. Smash your way through to find the second banana.
#3: Hanging in the Cliffs
Graphic: Johnny Yu/Polygon | Source images: Nintendo EPD/Nintendo via Polygon
From the starting area after you drop into the Canyon Layer, dig straight down. You’ll wind up in another section of the starting cave. There’s a gem hanging on the ceiling that you can climb up to and collect.
#4: Scenic Smokestack View
Graphic: Johnny Yu/Polygon | Source images: Nintendo EPD/Nintendo via Polygon
After you land in the Canyon Layer, look up to see a ladder leading to the top of the tower. Climb up the wall onto the ladder to find a Banandium Gem waiting for you at the top.
#5: Shifty Smash: Cliff Valley
Graphic: Julia Lee/Polygon | Source images: Nintendo EPD/Nintendo via Polygon
Interact with the glowing triangle and then smash the white blocks. Note that the map shows where you pick up the banana, but the actual triangle is slightly above that (from our provided map perspective).
#6: Growing from the Stone Wall
Graphic: Julia Lee/Polygon | Source images: Nintendo EPD/Nintendo via Polygon
Climb up Tallfall Cliff from the hole where the minecart it situated to find this banana sticking out of the cliffside.
#7: Buried in the Tallfall Cliffs
Graphic: Julia Lee/Polygon | Source images: Nintendo EPD/Nintendo via Polygon
Enter the hole in the minecart room in Tallfall Cliffs and dig down the left side of the “giraffe neck” (if you’re facing the barrel that shoots you back up).
Graphic: Johnny Yu/Polygon | Source images: Nintendo EPD/Nintendo via Polygon
After riding the first minecart in the Canyon Layer, you’ll find a stone home on your right. In its basement, you’ll find a Banandium Gem.
Graphic: Johnny Yu/Polygon | Source images: Nintendo EPD/Nintendo via Polygon
After you ride the first minecart, follow the path along the right edge until you run into a small rock blocking your way forward. Hop over the rock to find a small cave on your left. Head inside to find a Banandium Gem embedded into the wall.
#10: Pay Dirt Under the Plateau
Graphic: Johnny Yu/Polygon | Source images: Nintendo EPD/Nintendo via Polygon
After you ride the first minecart, climb the wall beside the Getaway and head towards the crystal shaped like a giraffe. Continue past the crystal giraffe while hugging the left edge until you hit a wall. Look over the left edge to spot a concrete barrier on the floor. Either throw a chunk of the bomb rock nearby or transform into Kong Bananza and dive punch your way through to find a Banandium Gem.
#11: Battle: Exploding Pork Platoon
Graphic: Johnny Yu/Polygon | Source images: Nintendo EPD/Nintendo via Polygon
Before you climb up the ladder to head into the Longneck Plateau Village, look to the right to see a breakable wall. Destroy it to find the entrance to the Exploding Pork Platoon battle challenge. Defeat the 10 squeeloids to receive the gem.
#12: Spinning in the Stone Pillar
Graphic: Johnny Yu/Polygon | Source images: Nintendo EPD/Nintendo via Polygon
To the side of the Style Shop in the Longneck Plateau Village, you’ll find a spinning stone pillar. Smash your way in to find a Banandium Gem.
#13: Moseyed into the Village
Graphic: Johnny Yu/Polygon | Source images: Nintendo EPD/Nintendo via Polygon
As you enter the Longneck Plateau Village, you’ll find a Banandium Gem embedded in a pile of gold beside the tuning fork.
#14: High Shelf Down Below
Graphic: Johnny Yu/Polygon | Source images: Nintendo EPD/Nintendo via Polygon
Speak with the NPC beside the gong in the Longneck Plateau Village to reveal this banana on the map. It’s located on a high shelf in the warehouse underneath the village. If you don’t land on the shelf, you can chunk jump to reach it.
Graphic: Johnny Yu/Polygon | Source images: Nintendo EPD/Nintendo via Polygon
Beside the Longneck Crystal at the Longneck Plateau Village tuning fork, you’ll find a wooden platform on the ground. Break it and drop down, where you’ll land on a flat Fractone friend. In the small pond beside the pipe, you’ll spot a sunken Banandium Gem. Dive punch the gem a few times to grab it.
1/2Graphic: Johnny Yu/Polygon | Source images: Nintendo EPD/Nintendo via Polygon
Banandium Gems 16-18 can be found inside the Thorny Blast Cave Ancient Ruin. To get to the Thorny Blast Cave, you’ll need to blow up the concrete wall in the warehouse underneath the Longneck Plateau Village. Hit the mine embedded in the wall to destroy it and follow the path to find the Thorny Blast Cave.
In the Thorny Blast Cave, this Banandium Gem is found halfway through the course.
#17: Kaboom the Hidden Room
Graphic: Johnny Yu/Polygon | Source images: Nintendo EPD/Nintendo via Polygon
After you drop down through the metal grate in the Thorny Blast Cave, turn around to find a thorny wall full of mines. Blow up the mines to reveal the Banandium Gem behind it make your way over to collect the gem.
Image: Nintendo EPD/Nintendo via Polygon
This Banandium Gem is found at the end of the Thorny Blast Cave just before the barrel.
#19: An Underground Guide
Graphic: Johnny Yu/Polygon | Source images: Nintendo EPD/Nintendo via Polygon
Head to the area beneath the Longneck Plateau Village to find a small blue fish sleeping on top of a pipe. As you approach the fish, it’ll get scared and start to eat its way through the terrain. Follow it until it reaches a dead end, and break the area directly behind it to find a Banandium Gem.
#20: Canyon Fragmentone Recovery
Graphic: Johnny Yu/Polygon | Source images: Nintendo EPD/Nintendo via Polygon
In the underground warehouse below the Longneck Plateau Village, you’ll find a Fractone shaped like a puzzle piece. Head into the tunnel behind them to find a little Fractone and slowly lead them back to the puzzle piece to unlock this gem.
#21: Canyon Fragmentone Restoration
Graphic: Johnny Yu/Polygon | Source images: Nintendo EPD/Nintendo via Polygon
In the Underground Warehouse below the Longneck Plateau Village, you’ll find a crystal shaped like a puzzle piece. In a little divot in the wall, you’ll spot two circular crystals. These crystals cannot touch the water or else they’ll return to their starting point, so you’ll need to punch a pathway through the wall to safely lead them back. Once complete, you’ll unlock the gem.
#22: Traversing the Cliff
Graphic: Johnny Yu/Polygon | Source images: Nintendo EPD/Nintendo via Polygon
Before you get on the minecart in the Longneck Plateau Village. Turn to the left and head to the edge of the cliff. If you look down, you’ll spot a Fractone. Follow them down the cliffside to find a cave opening. Enter it and destroy the wall inside to find the gem.
Graphic: Johnny Yu/Polygon | Source images: Nintendo EPD/Nintendo via Polygon
Starting from the Longneck Plateau Village tuning fork, walk to the Ancient Ruin in the back. Then, turn right and drop down off the cliff. Enter the house below and pull the giant turnip out of the ground to find a gem in a cavern below.
#24-25: Wrecked by Kong Bananza and Quickly with Kong Bananza
1/2Graphic: Johnny Yu/Polygon | Source images: Nintendo EPD/Nintendo via Polygon
In the Longneck Plateau Village, talk to the Constructone beside the blocked off ruins to clear away the rubble. Head inside and clear the challenge to receive Banandium Gem #24, Wrecked by Kong Bananza. If you finish the challenge with 20 or more seconds remaining on the clock, you’ll receive Banandium Gem #25, Quickly with Kong Bananza.
#26: Beneath the Central Pillar
Image: Nintendo EPD/Nintendo via Polygon
After you’ve completed the challenge in the Ancient Ruin. Head to the center of the platform to find a dirt patch. Dig down at that location to find the gem.
#27: Sparkling in the Secret Storeroom
Graphic: Julia Lee/Polygon | Source images: Nintendo EPD/Nintendo via Polygon
Go behind the Getaway in the Longneck Plateau Village and descend the cliffside. Make your way to the bottom to find a Banandium Gem hidden behind a wooden wall.
#28: Banandium Gem in the House
Graphic: Johnny Yu/Polygon | Source images: Nintendo EPD/Nintendo via Polygon
Follow the path through the village up to the minecart at the top of the hill. Just before you reach it, turn right and you’ll see a dirt wall you can punch through to get a hidden gem.
#29: Unstuck the Mine Cart
Graphic: Johnny Yu/Polygon | Source images: Nintendo EPD/Nintendo via Polygon
After you free the minecart in the Longneck Plateau Village from the purple void, you’ll find a banana beside it.
Graphic: Johnny Yu/Polygon | Source images: Nintendo EPD/Nintendo via Polygon
After you ride the minecart from the Longneck Plateau Village, you’ll find the Big-Wheel Balloon Hunt Ancient Ruin on your left. Enter and pop all five balloons to get this gem.
Graphic: Johnny Yu/Polygon | Source images: Nintendo EPD/Nintendo via Polygon
At the bottom of the dirt wheel, dig down to find a hole leading to a lower level containing a gem.
Graphic: Johnny Yu/Polygon | Source images: Nintendo EPD/Nintendo via Polygon
Break a hole into the dirt wheel and ride it until the rightmost point. Exit your hole to the other side of the wheel and climb along the black wall towards the opening. Head inside to find the last banana in this challenge course.
#33: Shifty Smash: Cliff’s Edge
Graphic: Johnny Yu/Polygon | Source images: Nintendo EPD/Nintendo via Polygon
After entering Big-Stretch Peak via minecart, walk straight ahead to the area with the transparent crystal. There’s a wall you can break into next to it, which well take you to a challenge node. Activate it and you’ll have 20 seconds to break three floating walls, which you can do by diving straight through them. Your reward is a gem.
#34: Sleeping by the Smokestack
Graphic: Johnny Yu/Polygon | Source images: Nintendo EPD/Nintendo via Polygon
After you ride the minecart into Big-Stretch Peak, you’ll be told by a giraffe Fractone to climb the ladder to the refinery entrance, but right before you get onto the ladder, dig downwards to find a banana.
#35: Canyon Smashin’ Stats
Graphic: Johnny Yu/Polygon | Source images: Nintendo EPD/Nintendo via Polygon
Before you climb the tall ladder to the Banandium Refinery entrance, turn to the right of the ladder to find a Fractone with a few rocks stacked on top of their head. They’ll give you a Banandium Gem if you’ve smashed 30,000 cubic meters of stone.
Graphic: Johnny Yu/Polygon | Source images: Nintendo EPD/Nintendo via Polygon
On the side of the cliff of the Banandium Refinery, you’ll find the face of Poppy Kong carved into the wall. On Poppy Kong’s right ear, you’ll find a Banandium Gem.
Graphic: Johnny Yu/Polygon | Source images: Nintendo EPD/Nintendo via Polygon
On the side of the cliff of the Banandium Refinery, you’ll find the face of Grumpy Kong carved into the wall. Inside Grumpy Kong’s right nostril, you’ll find a Banandium Gem.
#38: Hidden Beneath Scoundrels
Graphic: Julia Lee/Polygon | Source images: Nintendo EPD/Nintendo via Polygon
This gem is in a cave blocked by concrete under the stone carving of Void Kong. Use Kong Bananza to break it open, take out the baddies inside, and break another concrete wall to get to this banana.
#39: Circling the Concrete Pillar
Graphic: Johnny Yu/Polygon | Source images: Nintendo EPD/Nintendo via Polygon
Climb to the top of the Grumpy Kong statue to find a spinning concrete pillar. Smash your way through with Kong Bananza to find a banana.
#40: Battle: Sturdy Pork Platoon
Graphic: Johnny Yu/Polygon | Source images: Nintendo EPD/Nintendo via Polygon
At the top of the cliff featuring the carved faces of Void Kong, Poppy Kong, and Grumpy Kong, you’ll find a battle challenge. Head inside and defeat the five concrete squeeloids to receive a gem.
#41: Finally Within Reach
Graphic: Julia Lee/Polygon | Source images: Nintendo EPD/Nintendo via Polygon
This gem is found on the “horn” of the giraffe pipe structure by the Neckreach Smokestack Exit teeleport point.
#42: Battle: Explosive Laps
Graphic: Julia Lee/Polygon | Source images: Nintendo EPD/Nintendo via Polygon
After you defeat the Mad Mixer and exit the Neckreach Smokestack, you’ll end up on another island with Cranky Kong. On the path to the village, look to the right to find a battle challenge. Defeat the five stompoids in this minecart battle challenge to get the Banandium Gem.
#43-45: The Canyon Growtone, The Hungry Canyon Growtone, and The Sated Canyon Growtone
Graphic: Johnny Yu/Polygon | Source images: Nintendo EPD/Nintendo via Polygon
Feed the growtone tree a total of 2,000 gold to receive all three Banandium Gems.
#46: The Lift’s Secret Stop
1/2Graphic: Julia Lee/Polygon | Source images: Nintendo EPD/Nintendo via Polygon
In the Stompy Ascent challenge course (next to the Mechaneck Isle Getaway), one of the walls behind the stompoids will be made of stone. Break it open for a banana.
Image: Nintendo EPD/Nintendo via Polygon
This banana is on the path for the Stompy Ascent challenge course. You can’t miss it.
Image: Nintendo EPD/Nintendo via Polygon
This is the final banana reward for the Stompy Ascent challenge course.
#49: Cranky’s Canyon Rant
Graphic: Julia Lee/Polygon | Source images: Nintendo EPD/Nintendo via Polygon
Talk to Cranky Kong next to the Mechaneck Isle Getaway to hear his rant and get a Banandium Gem.
#50: Canyon Hide-and Seek
1/2Graphic: Julia Lee/Polygon | Source images: Nintendo EPD/Nintendo via Polygon
Enter this cave to the side of the Mechaneck Isle Getaway to find an NPC asking for you to find its four friends. One is behind the explosive rock, another is in the concrete, one is in the whole, one is in a stone wall, and another is towards the edge near a metal platform. We took a screen to give you an idea of where to smash.
Graphic: Julia Lee/Polygon | Source images: Nintendo EPD/Nintendo via Polygon
Enter this cave to the side of the Mechaneck Isle Getaway and punch the dirt pile on the ground to drop down onto a platform. Punch the blue punching bag a ton to bring the Banandium Gem over to you.
#52: Bust Through the Giraffe’s Spot
Graphic: Julia Lee/Polygon | Source images: Nintendo EPD/Nintendo via Polygon
Fall down the Click-Clack Smokestack and punch through this inconspicuous dirt hole to get a banana.
#53: Behind the Moving Walls
Graphic: Julia Lee/Polygon | Source images: Nintendo EPD/Nintendo via Polygon
Smash through the moving walls to find a Banandium Gem hiding in a small room behind them.
#54: Above the Moving Walls
Graphic: Julia Lee/Polygon | Source images: Nintendo EPD/Nintendo via Polygon
Climb up the side of the last moving wall and punch past the dirt to get to this banana.
#55: Slip into the Secret Room
Graphic: Julia Lee/Polygon | Source images: Nintendo EPD/Nintendo via Polygon
Climb up the nearby plus-shaped rotating walls and allow DK to slip into this opening from the bottom of one.
#56: Hanging from the Crane
Graphic: Julia Lee/Polygon | Source images: Nintendo EPD/Nintendo via Polygon
The banana is behind the Smokestack Getaway that you make as you climb up the Click-Clack Smokestack.
#57: The Crane’s Precious Cargo
Graphic: Julia Lee/Polygon | Source images: Nintendo EPD/Nintendo via Polygon
Break open the concrete block the crane is lifting near the Click-Clack Smokestack Roof using Kong Bananza to get this banana.
#58: Battle: Knotted-Thorn Knockout
Graphic: Julia Lee/Polygon | Source images: Nintendo EPD/Nintendo via Polygon
Around the corner from the Click-Clack Smokestack Roof, there’s an NPC you have to pay 600 gold to open this battle challenge. Take out the two stompoids to get your banana.
#59: Foreman’s Secret Stash
Graphic: Johnny Yu/Polygon | Source images: Nintendo EPD/Nintendo via Polygon
To reach this gem, you’ll first need to grab Banandium Gem #78, Under Twin-Horn Smokestacks. Continue down the metal grate hallway and climb into the barrel. You’ll get sent to a small island back on Sublayer 300 where you’ll see a dirt wall you can break through. Smash it to find a gem.
#60: Canyon Chip Exchange
Graphic: Johnny Yu/Polygon | Source images: Nintendo EPD/Nintendo via Polygon
In the Longneck Plateau Village, speak the the hexagonal Fractone in front of the Chip Exchange to trade chips and gold for gems.
Sublayer 301 Banandium Gems
There are 18 Banandium Gems in Sublayer 301 of the Canyon Layer.
Graphic: Johnny Yu/Polygon | Source images: Nintendo EPD/Nintendo via Polygon
Beat Grumpy Kong at the end of Sublayer 300 and jump into the hole to get this gem in Sublayer 301.
#62: Battle Laser-Wall Brawl
Graphic: Julia Lee/Polygon | Source images: Nintendo EPD/Nintendo via Polygon
Drop into this window and enter the battle challenge. Beat the three crockoids for a banana.
#63: The Refinery’s Hidden Hallway
Graphic: Johnny Yu/Polygon | Source images: Nintendo EPD/Nintendo via Polygon
After taking the first minecart ride, walk towards the steps to the next minecart up the hill. Before you get there, smash through the wall to the left of the sloped steps and then blow up the concrete wall within to find a gem.
#64: Peak’s Peek at the Refinery
Graphic: Julia Lee/Polygon | Source images: Nintendo EPD/Nintendo via Polygon
To get this Banandium Gem, you’ll need to enter a pipe located on Sublayer 300. The pipe is found in a cave on the side of the mountain with the Void Company’s faces on it (specifically, this is the side with Poppy Kong). Use your Kong Bananza skill to break the concrete blocking the pipe and you’ll land right on the banana in Sublayer 301.
#65: Asleep in a Dormitory
Graphic: Johnny Yu/Polygon | Source images: Nintendo EPD/Nintendo via Polygon
This gem is first spotted when you’re throwing boom rocks in the mine cart, but you’ll have to wait to claim it until you reach the Banandium Refinery Staff Dorms tuning fork. From the tuning fork, enter the building on your left and walk to the edge to find a metal contraption connecting your building to the one below. Drop down onto the building and break into the adjacent room to find the gem.
#66: Surveying the Staff Dorms
Graphic: Julia Lee/Polygon | Source images: Nintendo EPD/Nintendo via Polygon
This is another gem that you’ll need to fall to from Sublayer 300. Smash the concrete at the top of this tower in Longneck Plateau Village using Kong Bananza to fall on to this banana.
#67: Tucked Away in a Dormitory
Graphic: Julia Lee/Polygon | Source images: Nintendo EPD/Nintendo via Polygon
This banana can be found in a building to the right of the Spinning Laser Zone challenge. Inside the building closest to the edge, you’ll find a back entrance that leads to the banana.
#68: Battle: Leaps over the Laser
Graphic: Johnny Yu/Polygon | Source images: Nintendo EPD/Nintendo via Polygon
This battle challenge can be found in the area immediately after the Banandium Refinery Terrace Getaway. From the Getaway, proceed straight and take the first left. Enter the building on the right to find the entrance to the challenge.
Inside, you’ll need to defeat two stompoids to receive the gem.
1/2Graphic: Johnny Yu/Polygon | Source images: Nintendo EPD/Nintendo via Polygon
The Spinning Laser Zone challenge can be found in the area immediately after the Banandium Refinery Terrace Getaway. From the Getaway, proceed straight and take the second left to find the challenge course.
The first banana can be spotted as soon as you enter the challenge. Continue through the challenge to find this gem.
#70: Laying Low in the Laser Zone
Graphic: Johnny Yu/Polygon | Source images: Nintendo EPD/Nintendo via Polygon
Immediately after you find the first banana, you’ll enter an area full of spinning lasers. After you slam the ground to bring up the first concrete wall, you’ll spot a Banandium Gem hidden under the patch of gravel. Dig down to collect the gem.
#71: Laser-Zone End Point
Image: Nintendo EPD/Nintendo via Polygon
This gem is found at the end of the Spinning Laser Zone challenge.
#72: De-Voiding the Dorms
Graphic: Johnny Yu/Polygon | Source images: Nintendo EPD/Nintendo via Polygon
After you de-void the minecart on the way to Mad Mixer, a Banandium Gem will also get de-voided in the process.
Graphic: Julia Lee/Polygon | Source images: Nintendo EPD/Nintendo via Polygon
This Banandium Gem is a reward for beating the Mad Mixer boss, and you’ll get it as you progress through the story.
#74: Mad Mixer’s Parting Gift
Graphic: Johnny Yu/Polygon | Source images: Nintendo EPD/Nintendo via Polygon
After you defeat Mad Mixer, teeleport back to the Banandium Refinery Gravel Storage waypoint. Continue straight to find a container full of colorful gravel. Before jumping in, spot the pile of gravel that is the furthest away from you. Underneath this pile, you’ll find a Banandium Gem.
#75: Dropped into the Refinery Depths!
Graphic: Julia Lee/Polygon | Source images: Nintendo EPD/Nintendo via Polygon
You get this banana as part of the story progression, after you jump into the hole at the top of the Click-Clack Smokestack.
#76: Shifty Smash: Moving Targets
Graphic: Julia Lee/Polygon | Source images: Nintendo EPD/Nintendo via Polygon
In the area behind the Spinning Laser Zone Ancient Ruin, you’ll find a shifty triangle beside a boom rock. Complete the challenge by destroying the two floating triangles to get a gem.
#77: Treasure by the Triceratops
Graphic: Johnny Yu/Polygon | Source images: Nintendo EPD/Nintendo via Polygon
Behind the Spinning Laser Zone Ancient Ruin, you’ll find an area full of colorful gravel. Dig into the biggest pile to find a banana.
#78: Under Twin-Horn Smokestacks
Graphic: Johnny Yu/Polygon | Source images: Nintendo EPD/Nintendo via Polygon
Go to the village in Sublayer 300 via the Longneck Plateau Village tuning fork. Take a right and drop down off the cliff behind the gong. You’ll see a minecart with a Fractone miner near it. Talk to him and pay 1,000 gold to create the track. Take it to the island and smash your way through the concrete wall blocking the left smockstack. Climb up the ladder inside, climb the ceiling bridge to the right smokestack, and climb to the top of that. Break the concrete panel blocking it and you’ll land in Sublayer 301, where you’ll get a gem.
#79: Hanging Hallway Over the Refinery
Graphic: Johnny Yu/Polygon | Source images: Nintendo EPD/Nintendo via Polygon
After you enter the Longneck Plateau Village in the Canyon Layer. Head up to the rotating stone pillar behind the clothing store. If you walk up to the edge and look down to the left, you’ll notice a suspicious black pillar below you. Drop down and make your way over to the pillar to find a stake embedded into the ground. Break the stake.
AI systems are compute-intensive. Tasks like large-scale inference, model training, and real-time decision-making require powerful hardware. GPUs are central to this, accelerating workloads across every stage of the AI pipeline. NVIDIA’s Ampere architecture powers a range of GPUs built specifically for these needs, from efficient inference to large-scale training and enterprise computing.
The NVIDIA A10 and A100 GPUs are two of the most widely used options for running modern AI workloads. Both are based on the Ampere architecture but are built for different use cases. The A10 is often used for efficient inference, while the A100 is designed for large-scale training and compute-heavy tasks.
In this blog, we’ll take a closer look at the key differences between the A10 and A100, their architectural features, and when to use each one. We’ll also touch on how to think about flexibility in GPU access, especially as more teams face challenges with limited availability and scaling reliably.
NVIDIA A10
The NVIDIA A10 is built on the Ampere architecture with the GA102 chip. It features 9,216 CUDA cores, 288 third‑generation Tensor Cores supporting TF32, BF16, FP16, INT8, INT4, and 72 second‑generation RT Cores for ray tracing. The card includes 24 GB of GDDR6 memory with 600 GB/s bandwidth. With a Thermal Design Power(TDP) of 150 W and a single-slot, passively cooled design, the A10 is optimized for servers where power and space matter.
Key strengths and ideal use cases:
Inference for small to medium‑sized models Perfect for running models in the few‑billion parameter range—think Whisper, LLaMA‑2‑7B, Stable Diffusion XL and similar. Offers solid inference throughput at low cost.
Efficient sparsity support With Tensor Core sparsity, you can nearly double inference performance for compatible models without increasing compute power.
Strong performance‑to‑cost ratio Excellent balance of cost, power draw, and compute capability for workloads that do not require massive GPUs.
Virtual GPU support Compatible with NVIDIA vGPU software to run multiple isolated GPU instances from a single card. Useful for virtual desktops or shared compute environments.
Media decoding and encoding Includes one hardware encoder and two decoders, with AV1 support. Enables efficient video processing and analytics alongside AI pipelines.
Compact and efficient deployment The passive cooling and single‑slot form factor allow high-density installations without needing high-end server infrastructure.
In short, the A10 offers pragmatic performance for running small to medium-sized models, enabling cost-efficient inference and media workflows with low overhead and solid flexibility.
NVIDIA A100
The NVIDIA A100 is built on the same Ampere architecture using the GA100 chip, manufactured at 7‑nanometer scale and featuring 6,912 CUDA cores. It offers up to 80 GB of HBM2e (High-Bandwidth Memory) with over 2 TB/s bandwidth—ideal for memory-heavy workloads and preventing data bottlenecks during large model training or scientific simulations.
It delivers 432 third‑generation Tensor Cores that support FP64, TF32, BF16, FP16, INT8, and INT4 precision. TF32 enables up to 20× faster training on AI workloads without any code changes. With structured sparsity enabled, inference performance can roughly double. The GPU has a 250 W thermal design power (TDP) and supports advanced interconnects like NVLink (600 GB/s bidirectional) and Multi-Instance GPU (MIG), which allows it to be partitioned into up to seven isolated GPU instances.
Use Cases for the A100
Large-scale model training With its high memory bandwidth and NVLink support, the A100 is designed to train transformer models, large vision models, and speech systems across multiple GPUs.
Enterprise-grade inference High throughput and low latency make it suitable for large model inference in areas like autonomous systems or intelligent recommendation platforms.
High-performance computing (HPC) Supports double-precision FP64 workloads essential for scientific simulations such as weather forecasting, protein folding, and material science.
Data analytics at scale Handles big data workloads like anomaly detection and fraud analysis in real time, thanks to its massive memory and compute capabilities.
Natural Language Processing (NLP) Powers training and inference on large LLMs for tasks such as translation, summarization, and conversational AI.
The A100 is the go-to GPU for workloads that require maximum memory, interconnect bandwidth, and partitioning flexibility. It accommodates everything from massive multi-GPU training jobs to high-density, multi-tenant inference services—all on a single card.
Head-to-Head Comparison: Key Differentiators
Although both the A10 and A100 are built on NVIDIA’s Ampere architecture, they cater to distinct workload profiles:
Architecture and Core Specs
A10 uses the GA102 GPU with 9,216 CUDA cores, 288 third-generation Tensor Cores, and 72 second-generation RT Cores.
A100 is based on the larger GA100 GPU with 6,912 CUDA cores and 432 third-generation Tensor Cores.
Memory and Bandwidth
A10 has 24 GB of GDDR6 memory at 600 GB/s bandwidth.
A100 supports 40 GB or 80 GB of HBM2e memory with 1.55 TB/s (40 GB) to more than 2 TB/s (80 GB) bandwidth, which is critical for memory-heavy workloads.
Inference and Use Cases
A10 performs well for small to medium-sized models (e.g., up to 7B parameter LLMs and diffusion models). Its GDDR6 memory and Tensor Cores with sparsity deliver strong inference throughput at lower cost.
A100 excels at large-scale AI training, distributed inference, high-performance computing (HPC), and data analytics. NVLink and HBM2e make multi-node and multi-GPU workloads efficient.
Scalability and Multi-Tenancy
A10 lacks NVIDIA’s Multi-Instance GPU (MIG) and NVLink features.
A100 supports MIG (up to 7 partitions) and NVLink, enabling GPU sharing, isolation, and fast inter-GPU communication for distributed workloads.
Power and Deployment
A10 consumes 150 W, fits in a single slot, and uses passive cooling, which is ideal for high-density, low-power server setups.
A100 draws 250 W, occupies dual slots, and requires active or specialized cooling infrastructure.
Performance to Cost Trade-offs
A10 offers excellent value for inference and media workloads, delivering strong throughput with lower total cost of ownership.
A100 is a high-investment option best suited to compute- and memory-bound tasks, and is worth it when time-to-results and peak performance matter.
When to Choose Which
Choose A10 for efficient inference on small-to-medium models, virtual desktops, media encoding and decoding, and server-friendly density.
Choose A100 for large model training, HPC simulations, large-scale inference with latency targets, and flexible multi-tenant or distributed architectures using MIG or NVLink.
Feature
NVIDIA A10
NVIDIA A100
GPU Architecture
Ampere GA102
Ampere GA100
CUDA Cores
9,216
6,912
Tensor Cores
288 (supports sparsity)
432 (high throughput)
Memory
24 GB GDDR6
40 GB / 80 GB HBM2e
Memory Bandwidth
600 GB/s
1.55 TB/s to more than 2 TB/s
RT Cores
72
GPU-focus, RT present
Multi-Instance GPU (MIG)
No
Yes (up to 7 instances)
NVLink Support
No
Yes (600 GB/s per link)
Power & Form Factor
150 W, single-slot, passive
250 W, dual-slot, active
Best for
Small/medium inference, VDI, media
Large-scale training, HPC, analytics
Cost Efficiency
High for inference
High for compute-intensive workloads
Scaling AI Workloads with Flexibility and Reliability
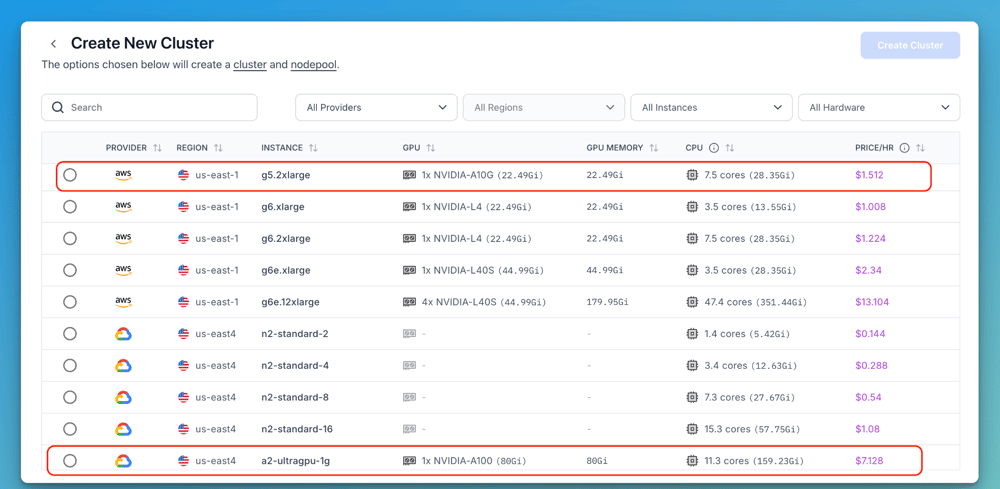
We have seen the difference between the A10 and A100 and how choosing the right GPU depends on your specific use case and performance needs. But the next question is—how do you access these GPUs for your AI workloads?
One of the growing challenges in AI and machine learning development is navigating the global GPU shortage while avoiding dependence on a single cloud provider. High-demand GPUs like the A100, with its superior performance, are not always readily available when you need them. On the other hand, while the A10 is more accessible and cost-effective, availability can still fluctuate depending on the cloud region or provider.
Clarifai’s Compute Orchestration helps solve this problem by giving you direct control over where and how your workloads run. You can choose from multiple cloud providers—AWS, GCP, Azure, Oracle, Vultr—or even your own on-prem or colo infrastructure. No lock-in. No waiting in queue.
You define the environment, pick the GPUs (A10, A100, or others), and Clarifai handles provisioning, scaling, and routing your jobs to the right compute. Whether you need cost-efficient inference or high-performance training, this approach gives you flexibility, and helps you scale without depending on a single vendor.
Conclusion
There’s no one-size-fits-all GPU. The choice between the NVIDIA A10 and A100 depends entirely on your workload type, performance needs, and budget.
The A10 is ideal for small to medium-sized models and everyday inference tasks. It handles image generation, video processing, and light training workloads well. It’s also more power-efficient and affordable, making it a solid choice for teams running cost-sensitive applications that don’t need the horsepower of a full-blown training GPU.
The A100 is built for high-end use cases like training large language models, running heavy compute jobs, or scaling across nodes. It offers significantly higher memory bandwidth and compute capacity, which pays off when working with large datasets or high-throughput pipelines.
For a breakdown of GPU costs and to compare pricing across different deployment options, visit the Clarifai Pricing page. You can also join our Discord channel anytime to connect with AI experts, get your questions answered about choosing the right GPU for your workloads, or get help optimizing your AI infrastructure.
Urban planning has moved beyond static blueprints and complex spreadsheets. 3D city modeling and visual simulations revolutionize planning, communication, and construction. They are no longer exclusively used by architects and engineers—they are now a must-have tool for acquiring public support, instilling civic participation, and driving projects forward.
Let us observe how 3D urban modeling has improved urban planning, empowered the public, and built smarter and collaborative cities.
Introduction: Visualization of the Future of Cities
Cities globally are adopting 3D urban planning to make development transparent and participatory. Planners allow residents, corporations, and policymakers to visualize changes decades before any development with realistic computer simulations of upcoming developments.
This transition closes the gap between technical planning and daily understanding, enabling more enlightened discourse and evidence-based findings.
Why 3D Modeling Is Revolutionary
Contrary to 2D plans that tend to confound or intimidate non-professionals, city 3D models provide a natural, hands-on experience. Individuals can “walk through” a proposed new park, gaze out their window at a proposed building, or receive information about new transit routes from their monitors.
This increased consciousness enables wider populace segments to make input and affect planning decisions.
Advantages of 3D Visual Simulations to Urban Planning
As cities grow increasingly complex, urban planners are turning to 3D visual simulations to bring clarity, efficiency, and collaboration into the planning process. This offers numerous advantages that improve how cities are designed, understood, and developed.
1. Clear, Realistic Presentation
3D simulations make abstract ideas concrete images. Whether looking at building massing, green space distribution, or sunlight at street level, stakeholders can understand the actual-world implications of every design decision.
2. Greater Public Participation
Citizens can physically walk through proposed projects with comments provided based on visual reality, not speculation. This converts the consultation processes into effective dialogue facilitated by 3D urban modeling technology.
3. Enhanced Decision-Making
By employing mock-ups of multiple design iterations, planners can model traffic flow, environmental effects, and infrastructure performance before plan completion, with cost and time saved during the process.
4. Stakeholder Communication
With a shared visual vocabulary, architects, inhabitants, city planners, and investors communicate better, decrease miscommunication, and perform more in line with promises.
5. Optimal Infrastructure Planning
3D urban planning allows smarter floor plan decisions, from facilities to green belts, to long-term sustainable cities.
Tools and Technologies Used
Urban planners rely on a rich tech stack to create and deploy strong 3D urban models:
SketchUp – Most commonly used for end-stage presentation and public display.
SketchUp – Popular for early-stage design and public presentation.
AutoCAD Civil 3D – Best for infrastructure, roads, and terrain.
ArcGIS CityEngine & ArcGIS Urban – Excellent tools for scenario simulation and geospatial data integration.
3ds Max & Lumion – Best for photorealistic rendering and walkthroughs.
QGIS & CityCAD – For geographic stacking, zoning, and environmental data.
Modelur & D5 Render – Used for massing, compliance checking, and rapid visualization from OpenStreetMap data.
Google Earth – Provides real-world reference and site fidelity.
All these tools enable cities to imagine development, experiment with new concepts, and involve citizens with data-driven assurance while enhancing all aspects of 3D urban planning pipelines.
Applications in Urban Planning
3D urban modeling is a visualization tool and a decision-making engine supporting dynamic and forward-thinking urban development. By simulating real-world scenarios in a virtual space, planners, policymakers, and citizens can better assess the impact of their choices across multiple dimensions of city life.
Land Use Optimization
Through 3D urban modeling, cities can experiment with zoning alternatives, types of infrastructure, and land-use plans within a virtual environment. This allows for more effective decisions that balance housing, business, transit, and parks.
Environmental and Disaster Simulations
Planners model floods, heat waves, and carbon emissions to analyze the effects of proposed developments on climate resilience and sustainability.
Complicated land-use policies are turned into graphic stories. Citizens should better know what is permitted, what can be changed, and why.
Historical and Future Scenarios
Cities can envision the past, examine the present, and model future expansion on one platform, allowing citizens to connect emotionally to their communities’ transformation.
How Cities Use Visual Simulations to Gain Public Support
Engaging residents in urban planning requires clarity, interactivity, and a genuine invitation. Visual simulations bridge the gap between technical proposals and public understanding, empowering citizens to explore, critique, and shape the future of their neighborhoods.
Building Consensus by Being Transparent
Turku, Finland’s 3D citizens’ survey, or Singapore’s digital twin, are initiatives demonstrating how visual simulations make citizens co-designers. Cities encourage reflective feedback by offering choices of alternatives, like various traffic patterns or densities of development.
Virtual Walkthroughs and Feedback Loops
Cities now post urban 3D models online, where people can walk through schemes and offer comments. From a new bike path to a public library, sight is belief and comment.
Fostering a Sense of Ownership
Citizens can understand not only what is going on but also why. This brings 3D urban planning into the hands of the public, enabling them to get involved and campaign meaningfully.
Case Highlights: Cities Leading the Way
City
3D Planning Application
Public Impact
Turku, Finland
Online participatory 3D mapping
High engagement and plan alignment with public expectations
Singapore
City-wide digital twin for infrastructure simulation
Optimized services, informed decision-making
Nashville, USA
Growth projections using interactive 3D urban models
Greater transparency and constructive stakeholder collaboration
These success stories prove that visual simulations aren’t just aesthetic but strategic.
3D Modeling for Stakeholder Collaboration
Stakeholder alignment is critical in city planning, and 3D urban modeling facilitates it.
Shared Platforms and Real-Time Collaboration
BIM and 3D GIS applications enable engineers, citizens, developers, and officials to collaborate on a standard virtual model. Changes are immediate, updates are transparent, and silos disappear.
Intuitive Communication
With everyone able to see a project, even the toughest discussions become tolerable. Visualizations are a neutral medium for coming together and working, which leads to productive conversations.
Scenario Testing and Data-Driven Feedback
Interactive models enable stakeholders to step through design options and see the trade-offs, building consensus instead of confrontation.
Environmental and Sustainability Modeling
Today’s cities need to be green, resilient, and adaptable, and 3D urban modeling plays a vital role in this process.
Simulating Climate Impacts
Designers use models to forecast how new structures influence air flow, throw shadows over existing land, or affect energy consumption.
Green Space Visualization
Cities bring sustainability to life for citizens by illustrating how green cover, tree cover, or green roofs influence the urban microclimates.
Challenges and Limitations
Impactful though 3D city planning software may be, it is not without its problems:
Cost and Resources: Complex modeling entails software and trained staff expenditures.
Digital Divide: Not all citizens can access or utilize online platforms equally.
Data Sensitivity: When abused, simulations in urban areas can reveal security or privacy vulnerabilities.
Overcoming such challenges requires guaranteeing inclusive access, strong governance, and continued investment.
Directions for 3D Urban Modeling in the Future
AI-Driven Design: Predictive simulation for traffic, pollution, or population.
Digital Twins: Linked city models in real-time that reflect urban on-ground behavior.
Metaverse Integration: Virtual Reality-based city experience engagement for planning, tourism, or education.
Citizen Co-Design: Crowdsourced city design features on gamified 3D platforms.
City planning has been changing quickly, and those who adapt to 3D urban modeling will be in control.
Conclusion: Planning with Purpose and Participation
3D city modeling is not something to incorporate later. It’s a democratic civic tool for cities that wish to be open, resilient, and inclusive. By animating technical plans, planners enable citizens to comprehend, participate in, and rally behind the built environments where they live.
Cities that leverage the potential of urban 3D models construct better infrastructure and healthier relations.
Ready to Give Your Urban Concepts Life?
IndiaCADworks assists urban planners, architects, and cities in developing engaging 3D city models that gain traction and drive projects to faster success. Our professional 3D modeling solutions are designed to suit your requirements for planning new cities, revitalizing neighborhoods, or climate planning. Explore our 3D modeling services now.
There was a good thing that had once been and a horse man who was now years removed from it, but still clung on to the idea that the magic was still there. I’ll not stray into spoiler territory, but that clinging generally didn’t go too well for old BoJack. He was a bitter, selfish, washed-up star who so often looked back, rather than looking forwards. It was to his detriment.