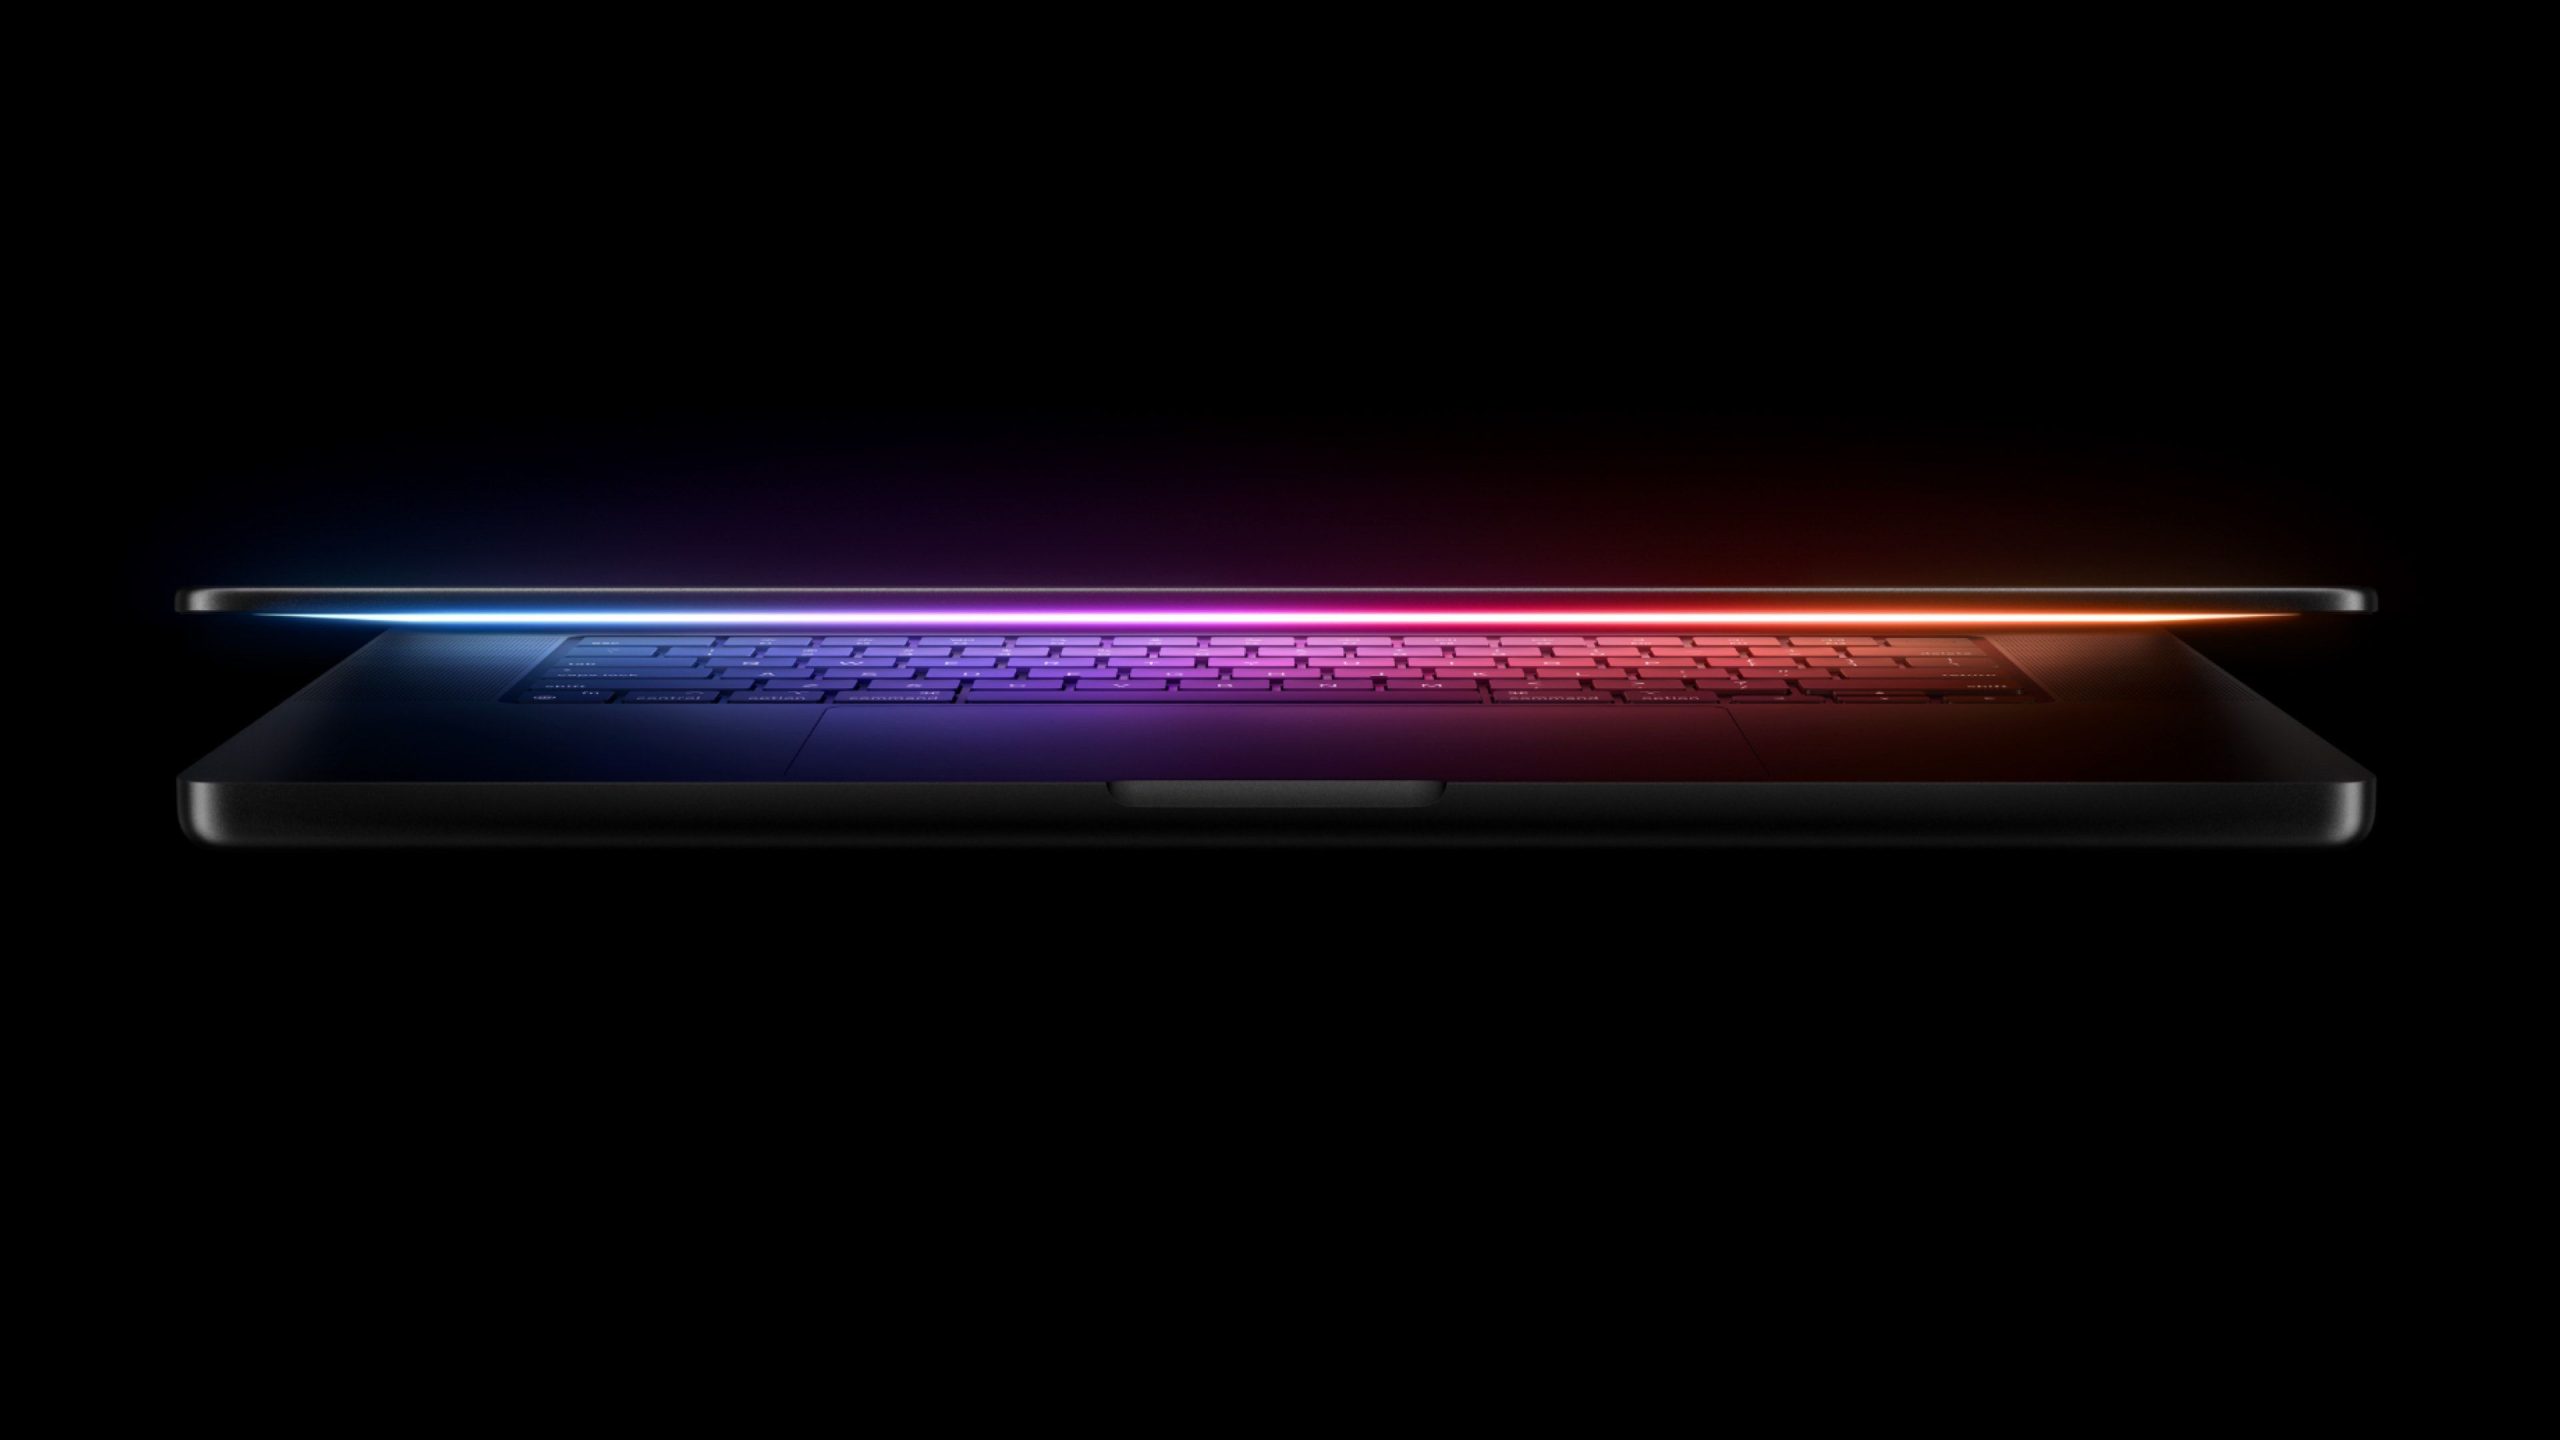
Apple refreshed the 14-inch and 16-inch MacBook Pro with M5 Pro and M5 Max models in March 2026, but depending on your needs and interests, you might want to skip this generation because there’s something better in the works.
The M5 Pro and M5 Max MacBook Pro models have faster chips, but the same design that Apple has used since 2021. An updated design with new display technology and faster performance is coming in late 2026 or early 2027.
OLED Touchscreen Display
The next MacBook Pro that comes out will be the first with an OLED display, according to rumors. iPhones have used OLED for years, and Apple launched a larger-screened OLED device with the M4 iPad Pro in 2024.
OLED has benefits over the mini-LED display in current MacBook Pro models. Pixels can be lit individually for deeper blacks, brighter colors, and no bloom from surrounding pixels. There can be power savings when compared to mini-LED displays, response times are quicker, and viewing angles are better. OLED brightness can be an issue compared to LEDs, but as OLED technology has improved, so has brightness. The combination of true black and vivid color is ideal for HDR content.
Along with OLED, the next MacBook Pro is expected to have touchscreen capabilities.
Apple said repeatedly that the Mac wouldn’t get a touchscreen, but Apple’s position has shifted. Multiple rumors suggest that touch capabilities are coming, making the Mac more like an iPad. Touch-based controls will be available alongside traditional mouse and keyboard input options.
Design Update
Some rumors suggest the OLED MacBook Pro will be thinner, and since Apple hasn’t updated the MacBook Pro design since 2021 and this is a major technology shift, some kind of design refresh is likely. Sizes will stay the same, and Apple isn’t removing the keyboard or trackpad.
Instead of a notch, the OLED MacBook Pro is expected to have a Dynamic Island that takes up less screen space. The Dynamic Island will be interactive, and it will contextually expand based on the app or Mac feature in use.
2nm Chip
The OLED MacBook Pro models will be the first to use Apple’s 2-nanometer chip technology that’s supposed to be coming in the M6-series chips.
The change in node size is expected to bring faster speeds with reduced power consumption and higher transistor density. Performance per watt will improve, and the 2nm chips will use GAA nanosheet transistors instead of FinFET. TSMC says the new transistor technology will bring improved performance and lower power consumption.
Cellular Connectivity
There have been rumors that 5G could come to Macs, and if that’s Apple’s plan, it would make a lot of sense to offer it in the OLED MacBook Pro.
Ultra Branding
OLED touch displays will be limited to the highest-end 14-inch and 16-inch MacBook Pro models because of the cost, and Apple might even use new “Ultra” branding.
It’s possible the OLED M6 model will be sold alongside the existing M5, M5 Pro, and M5 Max models rather than replacing them, and if that’s the case, we’re likely looking at a serious price increase. Apple could also refresh the entire line with M6 chip variants, reserving the OLED display for the most expensive models.
If you don’t care about OLED display technology or a touchscreen and want something lower-cost, you’re probably not going to want to hold off on purchasing.
First-Generation Tech
Some of Apple’s first-generation Macs can have more problems than expected, which was the case with the 2016 transition to the butterfly keyboard.
If you don’t want to get AppleCare+ and are concerned about first-generation problems, the M5 Pro and M5 Max MacBook Pro models are a safer bet.
Launch Date
The OLED MacBook Pro could come as soon as late 2026, but it’s looking more like Apple will hold it until early 2027. Apple is facing chip shortages that will require it to hold the MacBook Pro for longer to build up stock.
My deep-down reaction when I first heard about Heroes of Might and Magic: Olden Era was, “What’re ya doin’?” Does anybody really want a hex-based strategy game these days, particularly one whose glory days ended 20 years ago? Well, as it turns out, the answer is a resounding “yes,” as publisher Hooded Horse announced that the game sold more than 250,000 copies in its first day of early access.
That’s a big number, but it’s not the only impressive stat: 91% of the more than 3,500 user reviews on Steam are positive, adding up to a “very positive” overall rating, and it hit a peak concurrent player count of nearly 52,000 on Steam. Those are Helldivers 2 numbers, baby. HoMM:OE is also riding high on Steam’s top-selling games chart.
Over 250,000 copies sold in less than 24 hours. 91% positive reviews on Steam.
Heroes of Might and Magic: Olden Era has had an incredible launch. We’re so thrilled that players are loving this game as much as we’ve loved publishing it. 💛
Congratulations to the @unfrozenofficial.bsky.social team!
“We are still over the moon and cannot thank you enough for believing in us and our project!” Hooded Horse and developer Unfrozen wrote in a Steam update. “This is a childhood dream come true for the whole team and we promise to use this opportunity you’ve given us to the best of our abilities!”
Article continues below
From a more practical perspective, the strong start means the game has already recouped its development costs, a vital achievement for an early access game with more development ahead of it.
I should probably clarify that I didn’t expect Heroes of Might and Magic: Olden Era to be a bad game, and it’s clearly quite the opposite. PC Gamer strategy pro Fraser Brown declared when it launched that HoMM:OE “isn’t a reimagining or a divisive reinterpretation, it’s just a brilliant strategy game,” adding that even though it’s only just kicked off in early access, “it’s already great.”
What I clearly underestimated was the level of demand for a game that’s so entirely unabashed about embracing a very different, long-ago era of gaming. That’s on me, but this is one instance where I’m actually quite happy to be wrong. If you remain unconvinced, you can check it out for yourself, for free, courtesy of a demo available on Steam.
Unfrozen and Hooded Horse also dropped the first patch for Heroes of Might and Magic: Olden Era today, a small one addressing some of the issues that came up at launch. The full patch notes are below.
Keep up to date with the most important stories and the best deals, as picked by the PC Gamer team.
Bug fixes
Fixed an issue where hotkeys would fail to save or reset correctly.
Fixed the display of Credits in Simplified and Traditional Chinese, Japanese and Korean.
Fixed data loading issues for the leaderboard and profile in some versions.
Temporarily disabled detection of unsupported peripherals (such as gamepads, steering wheels, pedals) to prevent conflicts with keyboard and mouse controls. An option to enable these devices will return as an experimental feature in a future update.
Network
Optimized analytics and data saving for online games launched from the lobby.
Fixed a rare server error occuring in the lobby.
Balance
Zookeper
Fixed template rules that could cause launch errors or crash during gameplay.
Symmetry
Fixed elevation issues that caused incorrect placement of Hell Light Arena.
Fixed template rules that could cause launch errors or crash during gameplay.
Arcade
Added Dragon Utopias to the central area.
Reduced the number of Pandora’s Boxes containig creatures in the central area.
Adjusted the value of Dragon Utopias and Legendary Artifacts.
Reduced the number of points of interest with multiple rewards.
Increased the number of points of interest with single reward.
Sprint
Removed Pandora’s Boxes that grant experience.
Increased the number of artifacts.
Reduced the number of Pandora’s Boxes containing creatures in the penultimate (6th) area.
Added Dragon Utopias to the penultimate (6th) area.
Adjusted the distribution of reward values across areas 4—7.
Localization
Fixed minor typos in the Russian localization.
Removed an extra colon from main menu button in the Spanish localization.
Fixed a typo in the bug report interface in the Polish localization.
Fixed the description of Self‑Reconstruction ability for the Lich Dragon across all languages.
Fixed font size issues on the clock in Simplified and Traditional Chinese.
Fixed spacing issues in the Ukrainian localization.
Fixed several missing symbols in Simplified and Traditional Chinese, Korean, and Japanese.
Gemini Notebooks are now on mobile, and for once, Google isn’t hiding the good stuff behind a paywall.
The feature turns Gemini into a project hub, letting you group chats and files instead of juggling random threads.
Your existing NotebookLM notebooks sync to mobile, and you can save chats directly into them as sources.
Notebooks, which first appeared on the web as a research-focused tool, are now available on mobile through Google Gemini. This time, both free and paid users can use the feature directly in the app, without any paywalls.
If you didn’t catch the first launch, Google began connecting Gemini and NotebookLM back in December. At first, it was only on the web and let the chatbot use your research sources. Earlier this month, Google added notebooks right inside Gemini, giving you a place to organize files and chats by project.
Previously, only users with AI Premium, Pro, or Ultra plans could use this feature. Now, the NotebookLM team shared on X that it’s available to everyone in the Gemini mobile app.
Article continues below
How it works on your phone
These notebooks work like powerful project folders. Rather than scrolling through a long list of unrelated chats, you can group conversations and documents together. For example, if you’re planning a trip or looking into a new phone, you can keep all related chats in one notebook.
Now, your unshared notebooks from NotebookLM show up in the Gemini app, and you can save your mobile chats into those notebooks as sources.
Keep in mind that everyone can use the feature, but the number of sources you can add to each notebook depends on your subscription plan:
Free users: 50 sources
AI Plus users: 100 sources
Pro users: 300 sources
Ultra users: 600 sources
The rollout is now live for most users around the world on the Gemini app. If you’re in Europe, watch for updates. Google says more European countries will get access soon, but there’s no exact date yet.
Get the latest news from Android Central, your trusted companion in the world of Android
Android Central’s Take
I think this is a rare win for those of us who don’t want to pay for a monthly subscription just to use Google’s servers. Having a research assistant on my phone is genuinely useful for more than just summarizing emails. Still, this “gift” is also a smart way for Google to keep us using their platform. With only 50 sources per free notebook, Google is betting that we’ll eventually get annoyed by the limits and upgrade to a premium plan.
I first joined the Arise® Platform in 2015. I was moving from New York to North Carolina and searching for a remote opportunity, which wasn’t common at that time. I am a disabled veteran, and I remember seeing that the Arise® Platform was veteran-friendly. I’ve tried to build my business around military spouses so they can earn revenue. I did my research on the platform and have been using it ever since.
If I had to describe the Arise® Platform in one word, it would be autonomous. I have control over my time, my schedule, and the opportunities that are right for me. I feel a lot of independence and control over my business and what I earn. There aren’t many work opportunities where you have this level of autonomy.
Personally, my greatest achievement is being fully present for my daughter as a single mom. Growing up, she had to go to the hospital monthly, and using the Arise® Platform allowed me to be there for her. I’m also able to schedule my work around travel and be there for my extended family and their milestones. My dogs are also very important to me, and I’m able to be present with them while working from home.
Professionally, I’m proud of my growth – I’ve dedicated myself to the Arise® Platform because it works for me. I’ve been able to expand my business to other veterans, veteran spouses, and others with disabilities. I also provide instruction and support services, and it’s rewarding being able to contribute to special projects. I thrive in fast-moving environments, so this aligns perfectly with me and allows me to excel. It’s the perfect fit for me.
The Arise® Platform not only allows me to earn revenue – it keeps me from compromising my life. I used to commute hours to work, but now my commute is just walking from my kitchen to my office! I work from the comfort of my own home and that has improved my mental health.
I would recommend the platform to others for the work-life balance. I can’t imagine doing anything else. I wish more people knew about it. It requires self-discipline, but if you’re able to work independently, the Arise® Platform is for you.
After the military, I worked in corporate finance. I was going through certifications for cybersecurity, and I love tech. Then, I learned about the financial services client. I knew the caliber of support that was on the program, and I was really excited about it. I think we have the best of the best on the program! Customers are calling in for help with potential fraud on their account – you’re solving problems; you need to be accurate – but it’s always interesting. Supporting the financial services program is the most excited I’ve been to take calls.
Many times, we’re stopping fraudulent transactions. Once I had an elderly customer whose husband unfortunately passed away, and we had detected fraudulent activity on her account. We were able to get her to her financial institution and she was so appreciative. It was a true accomplishment.
Circumstances vary from person to person and Jennifer’s experience may not be representative. Jennifer, owner of USA Virtual Careers LLC, may profit if Agents sign up under her business.
Servers operated by Ubuntu and its parent company Canonical were knocked offline on Thursday morning and have remained down ever since, a situation that’s preventing the OS provider from communicating normally following the botched disclosure of a major vulnerability.
Attempts to connect to most Ubuntu and Canonical webpages and download OS updates from Ubuntu servers have consistently failed over the past 24 hours. Updates from mirror sites, however, have continued to work normally. A Canonical status page said: “Canonical’s web infrastructure is under a sustained, cross-border attack and we are working to address it.” Other than that, Ubuntu and Canonical officials have maintained radio silence since the outage began.
A decades-long scourge
A group sympathetic to the Iranian government has taken credit for the outage. According to posts on Telegram and other social media, the group is responsible for a DDoS attack using Beam, an operation that claims to test the ability of servers to operate under heavy loads but, like other “stressors,” are, in fact, fronts for services miscreants pay for to take down third-party sites. In recent days, the same pro-Iran group has taken credit for DDoSes on eBay.
A condominium, while as much of a dwelling as a townhouse or any single-unit counterpart, is often seen as a luxury in just about every big city in America. The typical target demographic of a condo isn’t just looking for a place to stay; they’re buying their way into a neighborhood of their own choosing, the right kind of amenities (usually somewhat fancier than public facilities), and the relative freedom from repair and maintenance. Even more important is the easy privacy that has become a new kind of status symbol. If you’re a builder and/or a stakeholder, how you present the condo to potential buyers plays no small part in influencing their purchase decision. The best way to deliver the presentation is with high-quality 3D rendering.
Emphasis is on “high quality” because any amateur render artist can produce a 3D rendering of a condo interior, exterior, and floor plan, but only true CAD professionals can deliver a convincingly realistic visualization to do the property and its design justice. Cad Crowd helps you enhance condo architectural presentation with high-fidelity rendering, whether static, animated, or both. In the trusted hands of the most talented render artists from Cad Crowd, you’ll get nothing short of an enhanced condo visualization, no matter the property’s size, layout, and location.
🚀 Table of contents
What’s this “enhanced” thing?
An experienced render artist can find many different ways to make sure that your renderings get all the necessary touch-ups to highlight the condo’s best features. Among the basic principles of this enhancement are as follows.
In the old days, just about every render artist slapped a simple flat picture of a fabric onto a rectangular shape and then called it a bed visualization done well. The good news is that many of those artists did catch up with modern software in the wonderful world of PBR, or physically based rendering.
Old methods like rasterization and ray tracing (which then became path tracing) were mostly geared toward “making objects look good” by focusing first on texture and geometry. Mind you, these technologies became mainstream in the early 2000s when rendering was still pretty expensive; you may think of them as old-school today, but they were the best back then. And now that we have much more capable computing power at reasonable prices, architectural rendering services done with anything less sophisticated than PBR are a big no.
What makes PBR a true game-changer in the industry is its ability to simulate how light behaves in the real world. A PBR material is an entirely different file from a flat texture. Strictly speaking, it’s not even an image file, but a collection of texture maps that’s bundled with geometry information. Compiled together, a PBR material defines specific surface properties (like roughness, metallic, base color, etc.), which then determine how light should interact with them in a realistic way. By “realistic,” it means adhering to the laws of physics. Thanks to PBR materials, and modern render engines for that matter, any object can be faithfully depicted to represent its real-life counterparts. Brushed and polished metal appears different (and correct, of course), the wooden desk has its grain, the carpet looks convincingly thick, and the bedroom floor is so slick you can almost slip and fall just by looking at it.
It all sounds very complex and all, but thankfully, we’re not here to discuss technicalities. The point is that PBR can make a rendering look like a professional photograph, maybe even better and more dramatic. If you’re a condo builder, you want to show the most flattering images of your work to potential clients. With CGI visualization around, it makes little sense to take pictures of a 1000 sq ft condo with a ridiculously expensive phone and little post-processing, then emailing it to buyers. Many people actually do that, and apparently are quite proud of what they do, not knowing that 3D rendering is a thing.
A condominium isn’t exactly cheap, either. You want to make sure that the prospects get what their money’s worth. What’s the average selling price of a condo these days, anyway? Certainly more than $150, maybe closer to $250K. Imagine yourself as a buyer; with that kind of money, no one should blame you for wanting a high-fidelity rendering or two of the merchandise. In any case, PBR materials are the least you can give. Hundreds, if not thousands, of them are freely downloadable from the Internet, so there’s no reason not to use them.
HDR the view, then PBR the textures
It may sound like a bit of a surprise to non-condo owners, but there are people who spend real money to buy a property just because it has a good view. Even more surprising is that these same people barely spend any time in their condos, and instead rent them out so that other people get to enjoy the view for a fee. But that’s what your buyers, not you builders, get to decide. So long as you make the sale for your architectural design firm, it doesn’t really concern you that much what they do with the condos.
Your deal is all about turning prospects into paying clients. Knowing that a lot of those prospects are willing to buy condos because of what they can see from behind massive glass windows, you claim that the view is part of what you sell as well, just because you can. And this means using the much-valued commodity as a highlight in the rendering. Say you’ve constructed, designed, and polished a condominium positioned on the 25th floor of a coastal building. While it’s common knowledge that anybody can just go to the beach to see the ocean, it turns out that there’s still a market for such a condominium. The challenge is that you have to reproduce the view as a rendering, in the most realistic way possible.
Since we’re talking about the view of an ocean, this challenge is a little bit on the difficult side of the spectrum. Water and the skyline are notoriously finicky to get right, and buyers today are just too savvy not to recognize a generic-looking horizon that could only come from a stock photo collection. So how can you achieve realism? Well, it’s somewhat elaborate but certainly worth the effort. Sometimes, the best reference you can get for a rendering is a photograph. The right thing to do here is to first capture an image of the horizon from the right angle and then backplate the image in a 3D model. You can’t PBR a view (maybe you can, but it’s labor-intensive considering the use case), but you certainly can use HDR (high dynamic range) to photograph the panorama. Better still, hire a professional drone pilot to capture the view from the exact elevation of the floor.
A conversion from a photograph into a 3D model might not be completely accurate, but at least you set a realistic expectation of what buyers can see from the condo when they gaze out the window. Remember that the panorama is a selling point that comes at a premium surcharge, so any buyer would assume that they have the right to take a glance at this “feature” before the deal is done. In this case, they assume correctly. But be sure to make clear that the depiction is more or less an approximation. If the 3D architectural visualization service depicts a glimmering sunset, for instance, no buyer in their right mind should expect that all they see is a sunset, because, well, it only happens once every day, and the ocean isn’t always as pretty as in the picture.
What’s important here is that the ocean or the view isn’t an integral part of the condo structure, but you can take advantage of it to enhance the visualization when presenting the property to would-be buyers. You don’t charge an extra fee because the ocean is part of the property, but because the condo gives the buyer access to a panoramic view of the ocean, as long as the building is there. It’s not likely the ocean is going out of town anytime soon, either. In short, don’t just render the condo; include the view as well. And this brings us to the next point, which is amenity.
When someone buys a condo, they own not only the space they personally inhabit but also the amenities like a social lounge, a fitness center, a parking area, a garden, sports courts, etc. All these areas fall under the category of “third spaces,” where owners may spend their free time outside of home and work settings. Everyone who lives in the building shares ownership of these third spaces with each other.
Similar to the aforementioned ocean view, it’s common for builders and developers to surcharge the price for a third space. Whether or not the condo owners ever spend time in any of the amenities, they’ve already paid the premium when they make the purchase. But unlike the aforementioned ocean view that isn’t actually part of the property, third spaces do physically exist in the building.
The availability and the quality of the third spaces are often among the most important factors that affect the buying decision. Your condos may come with a full set of modern kitchen appliances and a sparkling toilet with a bidet, but all those pet owners will still choose the next building because it has the best dog wash in town. You can perhaps make it up by installing a purpose-built dog wash station in every bathroom. But that’s beside the point here.
No matter what amenities you have to offer, it’s important to treat them as points of highlight in the condo presentation. Far too often, builders and developers include a third space in a rendering only as an afterthought. They focus on the building itself (mostly from the view of the interior design expert, unless you’re selling detached condos) and, once again, the view from the inside. Since buyers also think about the third space when choosing a condo, an afterthought is just as bad as a missed opportunity. While there’s nothing wrong with the approach, the rendering can do better with a depiction of some third spaces in the scene. It’s going to be challenging to fit everything into one rendering, but no one says you can’t use two or more images. In fact, use as many as you can to allow the buyers to have a full picture of what they’re buying. Or, have a professional render artist make an animated visualization for a walkthrough.
If you decide (which you absolutely should) to visualize the third spaces, one of the best things you can do is to include people in the rendering. An amenity is supposed to be a public space, which means it needs to be comfortably busy and vibrant without looking like an overcrowded factory floor. The keywords are “functionality” and “community” for the simple reason that third spaces are social areas. These are the places in the building where people mingle and interact with each other outside of home and work environments, especially when they’re not glued to their phones. Don’t just render the chairs and tables. Highlight the coffee machines, showcase the infinity pool on the rooftop deck, take the viewers to the gym, lead them to the children’s playroom, and take pride in the free library, even if there’s only one bookshelf there.
Access to high-quality amenities is an effective way to tell buyers that they’re getting a tangible lifestyle upgrade with their purchase. They’re not just buying four walls and a ceiling and a place to sleep, but also memberships in a private, exclusive social club nobody can join unless they also buy a condo in the same building.
This is, of course, in the sense of architectural rendering, but it’s pretty good advice in general. We’re talking specifically about the “uncanny valley” effect, resulting from an imagery of people that’s so lifeless, it’s eerie and unsettling. This is more likely to happen with an entourage, where a crowd is added solely to make it look busy. The crowds of people, animals or pets, and vehicles do fill a lot of void in the image, but they’re done so poorly to the point where every single one of them resembles a mannequin and a taxidermy rather than a living, breathing organism. The combination of entourage and uncanny valley effect can make what’s supposed to be a high-end rendering of a condominium appear like a still image taken straight from an episode of The Twilight Zone.
Humans aren’t statues. If you can get it right with a photograph, you definitely should be able to achieve the same thing with a rendering. You can, of course, download hundreds if not thousands of human 3D models from the web. In fact, a lot of them are available free of charge. Whether you use downloaded models or have some fresh figures made by an artist, you’d want to make sure that all of them are based on 3D-scanned real people by 3D visualization services. This is how you avoid presenting a visualization where the human and animal models come across as “flat,” as if they’re 2D cutouts slapped onto the scene.
Believe it or not, these cutouts are still widely used in architectural renderings, albeit in the low-fidelity kind. Cutouts often come with weird lighting that doesn’t really blend with the rest of the imagery, giving you a weird vibe because it’s obvious they don’t belong there. 3D-scanned people, thankfully, are very much manageable when exposed to a render engine. They absorb light and cast shadows just as buildings and other objects do. The result is a seamless integration between people and their surroundings, creating lifelike imagery.
Even in a static rendering, people should be doing something rather than being perfectly still. Well, the models don’t actually move about in the image, but they should at least project a hint of motion or engage in some kind of activity. You can depict them as having a conversation, walking a dog, pretending to write a movie script, smiling at their own reflection, and so on. The only exception is probably people doing yoga, as they’re usually observed being motionless for quite a while, even in real life. Also, don’t forget to dress appropriately for the occasion. You don’t want to put someone in a high-visibility raincoat lying down on the poolside in the broad daylight of a hot summer.
The idea here is to trigger an emotional response from the audience. Using imagery of people is expected to make viewers more inclined to picture themselves as part of the scene. When buyers are convinced that they see some versions of themselves in the image, whether getting sweaty in the gym or meeting a colleague in the lounge, they subconsciously connect with the environment. They no longer see the rendering merely as a visualization, but as an imagined scenario and a glimpse of a life they too can have.
If we’re really, really honest with ourselves, 2D floor plan services should really, really be a thing of the past. The only reason why architects and builders in general are still using them is that they have to, and that’s the only acceptable format if you want to apply for a building permit. Just like a complete blueprint, a 2D floor plan is indeed very technical, comprehensive, accurate, and all that, but it’s not the easiest thing to understand. If anything, it proves that not every architectural draft is a visualization. Some of them are meant solely as construction documents.
The vast majority of people, perhaps including some of your savviest buyers and investors, are unlikely to comprehend 2D floor plans even after a second or third glance. Most people are neither architects nor engineers, meaning you can’t expect your buyers to understand exactly what you’re talking about when you explain to them what those lines and shapes represent in the floor plan. If you want a visualization that your buyers can quickly interpret and actually appreciate, 3D rendering is the way to go.
While the basics of a floor plan still apply in both 2D and 3D (such as the top-down view and the invisible roof), just about everything else is different. In the 3D view, all objects are shown as 3D models that actually look like what they’re supposed to. For instance, a round coffee table in front of a sofa is not represented by a flat circle positioned next to a rectangular shape. Instead, both the table and the sofa are shown in a rendering, along with a coffee table. The same rule applies to everything else in the condo.
More importantly, a lifelike depiction of a room layout allows buyers to grasp the spatial relationships between the objects. If necessary, use a full-color format to make it more visually pleasing while maintaining accuracy. If the coffee table has a glass surface and the sofa has vibrant polka dot upholstery, a 3D floor plan can give you exactly that. And the good thing is that while you’re being playful with the room design, color, decorations, rugs, and the balcony umbrella, you can still keep everything geometrically precise.
The less unusual methods
Because every little detail matters, it’s important to also NOT forget the more typical techniques, too.
Interior rendering and staging services: It’s unfortunately not uncommon for some render artists to stage the interior in such a way that it looks almost impossibly clean and organized. Clean is good, but clinically clean makes a space feel spooky. Intentional clutter and smudges here and there are not always bad. Every condo should get those, in both rendering and real life, so that it doesn’t feel like an expensive hospital suite.
Proper landscaping: let’s clear this up, hopefully for good. The only proper landscaping for a condo is minimal but respectably well-maintained. Never go overboard with the green sphere. People don’t look to buy a condo so they can learn how to use a lawn mower. They buy it precisely because they can afford not to do a lot of landscaping.
Golden hour: It has been mentioned time and again that lighting is crucial in 3D architectural rendering. And it’s not just about allowing buyers to see everything clearly. Sometimes, a little bit of fuzziness during the golden hour does a lot of good. Because the brightness of the sky, street signs, and car headlights on the road are at the same level, the condo looks much more majestic than it really is.
Evening shot: nighttime rendering has one job, and that is to show the buyers that their properties shine like a beacon in the dark. Use as many artificial lights as it takes to make a good, yet not overly bright, combination of ambient (primary) and accent (secondary) lighting. There’s actually another type called “task lighting,” but it should only illuminate a specific work area, like a desk in a study or home office. If there’s a gaming room, be generous with the RGB.
BIM integration: say you’re presenting a condo to an engineer, or to make it even more challenging, an architect. What can you do to convince them that you’re doing everything right? Link the rendering to a BIM (Building Information Modeling) file. It’s as sophisticated as an architectural rendering can get; even the most technical client will be impressed.
As far as the technicality goes, there’s not much of a difference in the architectural rendering of a condo and a 3D house rendering service, apartment, or even a hotel room, for that matter. The most important thing is that you understand who you’re presenting the property to. In the case of a condominium, chances are you’re dealing with people in search of not only a dwelling place, but also some level of luxury and a sense of belonging in a community of peers in a private oasis. So, keep that in mind when deciding whether to use a chandelier or a flush-mount lamp for the overhead lighting.
A condominium, no matter how you put it, is always a special kind of dwelling. Given the amenities, the sense of well-managed common areas, and the high level of privacy and security, it certainly has advantages over a single-family home or an apartment. While not all condos are well-equipped, many of them do carry the promise of a good balance between independence and community life. This is exactly the balance that you need to put under the spotlight in a condo rendering. And it only makes sense to leave the challenging task of producing this kind of visualization to the professionals at Cad Crowd.
Specializing in the AEC industry, the freelancing platform is home to thousands of render artists experienced in condo rendering of all sorts. Be it static or animated, and from detailed close-ups of interior design to an all-encompassing aerial view, Cad Crowd has you covered. Request a quote today.
MacKenzie Brown is the founder and CEO of Cad Crowd. With over 18 years of experience in launching and scaling platforms specializing in CAD services, product design, manufacturing, hardware, and software development, MacKenzie is a recognized authority in the engineering industry. Under his leadership, Cad Crowd serves esteemed clients like NASA, JPL, the U.S. Navy, and Fortune 500 companies, empowering innovators with access to high-quality design and engineering talent.
Heroes of Might and Magic’s revival has been a long time coming, and it seems the wait has paid off for fans and developers alike. Heroes of Might and Magic: Olden Era launched into Steam early access yesterday to very positive user reviews and immediate sales success – so much success, in fact, that the game made its development budget back within its first 24 hours.
“24 hours have passed since we’d first opened the doors and portals to the world of HoMM: Olden Era,” the devs at Unfrozen exclaim in their Steam announcement. “Just to say this launch has been a success would be an understatement: In that short time you’ve posted over 3000 reviews and over 90% of you are happy about the game. At this minute there is over 50,000 of you playing Olden Era. Thanks to your amazing support!”
They add, “That means we broke even on development costs in just one day!”
Article continues below
Unfrozen was founded back in 2016 and launched its debut project, Iratus: Lord of the Dead in 2020. That game was another turn-based strategy title, but one that took heavy inspiration from the indie hit Darkest Dungeon. Irdatus was, by all accounts, pretty good, garnering over 8,000 Steam reviews with 85% positive feedback in the six years since launch.
Going from that kind of slow-burn success to releasing a new game in a beloved series to such immediate acclaim must be quite a leap for a small studio, but it seems everybody’s happy with how Olden Era has turned out. Our own Heroes of Might and Magic: Olden Era early access review calls it “a triumphant return for the legendary strategy RPG series,” and while there are certainly elements to polish up before the final release, this looks to be a fine foundation for something special.
Is your current ITSM tool still meeting your needs, or has your organization outgrown it? Many teams find themselves stuck with tools that are too complex, outdated, or fail to support modern collaboration. Switching tools is a major decision, but with the right roadmap, it becomes an opportunity to improve user experience and boost productivity.
This eBook provides a practical, 5-step guide to help you navigate the transition from your current solution to a tool that fits your future.
In this eBook, you will learn how to:
Determine Your Needs: Identify exactly what isn’t working with your current setup and what your “must-haves” are for a new solution.
Identify Stakeholders: Engage the right people early—from management to end-users—to ensure organization-wide buy-in.
Find a Partner, Not Just a Vendor: Learn why choosing a provider that aligns with your culture is as important as the software itself.
Request the Perfect Demo: How to prepare for a demo so you can see exactly how the tool handles your specific workflows.
Prepare Your Migration: Get a head start on the transition phase to ensure a smooth “go-live” without disrupting services.
Invincible VS is a brutal superhero 3v3 tag fighting game set in the Invincible universe, where you can battle to the death as a team of fan-favorite characters in iconic locations.
Unleash bone-breaking combos through fast combat and smart defensive tactics to leave a trail of blood and destruction. Land vicious Super moves and Ultimates to leave your opponents in a mess of blood. Beast Saga
Invincible VS features a variety of game modes including a captivating cinematic story mode with an original narrative from a writer of the animated series. Jump into Arcade and battle with your team, hone your combos in Training mode, and test your skills against the world in competitive and casual multiplayer. Show, comic fans, and fighting game lovers will experience unparalleled heroic brutality, where every earth-shattering blow will leave you feeling… Invincible.
Blocks are one of the most powerful productivity features in AutoCAD. They allow you to combine multiple objects into a single, reusable element, making your drawings cleaner, more consistent, and easier to manage. Whether you’re working with symbols, parts, detail views, or title blocks, blocks help you work faster and more accurately. In this final installment of the AutoCAD Foundation series, we’re exploring how to insert a block and more.
What Is a Block?
A block is a collection of one or more objects combined into a single object. Once created, that block can be inserted multiple times into a drawing as individual block references, all tied back to the same underlying definition.
You’ll commonly see blocks used for items such as:
Furniture and fixtures
Mechanical or electrical symbols
Standard parts and components
Detail callouts and title blocks
Examples of blocks
Using blocks offers several key advantages. Blocks help maintain consistency across drawings by ensuring uniformity for repeated elements such as symbols, parts, and title blocks. They also make editing and placement faster, since blocks can be inserted, rotated, scaled, moved, and copied much more efficiently than working with individual objects. Any changes made by editing or redefining a block are applied instantly to all of its references in the drawing.
You can also include data such as part numbers, costs, service, dates, and performance values to blocks. The data is stored in special objects called block attributes. Finally, using multiple block references instead of duplicating object geometry helps reduce overall drawing file size.
How to Insert a Block
There are four key items involved when inserting a block into a drawing.
#1. Block Definition
This data is stored in a drawing file or drawing template file in a non-graphical format. Block definitions can easily be created or imported from any drawing file. Multiple block definitions can be created in a drawing file.
Note: Block definitions don’t always need to be created just in the drawing that they will be used. A drawing file itself can represent a block definition that can be shared with other designers and inserted into any open drawing file.
#2. Block Reference
When you insert a block, you specify which block definition to create an instance or block reference from. The graphics for the block reference are drawn based on the block definition. A drawing file can also be inserted into an open drawing, when this happens a block definition based on the geometry in model space of the drawing file being inserted is created in the target drawing and then a block reference is created.
#3. Block Insertion or Base Point
When you insert a block, you specify an insertion point for the block in the drawing. The insertion point is based on the block’s base point, this is the point of the block reference attached to your cursor.
The base point is circled on the block below. Later, if you select a block that’s already been inserted, it displays a grip at the base point. You can easily move and rotate this block using this grip.
#4. Block Insertion Tool
Several different block insertion tools are available in AutoCAD including:
Block gallery on the ribbon
Blocks palette
Tool Palettes window
DesignCenter
These block insertion tools allow you to insert block references from the definitions created within the current drawing as well as insert drawing files stored on your local workstation or a shared network location.
See How to Insert a Block
Keep Going
Ready to try out how to insert a block for yourself? Check out the AutoCAD Foundations page with exercises to get started.