
Valheim 1.0 Beginner’s Guide: 12 Essential Survival Tips


Blog | Guide

New to Valheim 1.0? These beginner tips cover food, stamina, building, crafting, combat, exploration and recovering when the tenth world gets the better of you.

Valheim 1.0 brings Iron Gate’s open-world survival adventure into its complete form, with the Deep North joining a vast world of exploration, crafting, building and unforgiving combat. New enemies, weapons and challenges await, but the fundamentals still decide whether your Viking thrives or ends up making another awkward run back to a tombstone.

A handful of good habits can make those first hours considerably less painful. If you are entering the tenth world for the first time, these essential Valheim 1.0 survival tips will help you build a strong foundation, explore with confidence and make those inevitable recovery runs a little less frequent.

1. Eat for the task ahead

Food sits at the centre of survival in Valheim, but it works differently from a traditional hunger system. You will not starve if you forget to eat. Instead, food temporarily increases your maximum health and stamina, so heading into danger on an empty stomach leaves you far more vulnerable than you need to be.

You can have up to three different foods active at once. The fork icon on each item shows what it prioritises: red foods favour health, yellow foods favour stamina and white foods offer a more balanced split. Blue foods boost eitr, Valheim’s magic resource, but that is a concern for much later in your adventure.

Choose your meal to match your plans. Extra health helps when you expect to absorb or block heavy hits, while stamina-focused food is ideal for running, swimming, mining, chopping wood and using bows. For everyday exploration, a mixture is usually more useful than loading up on one stat alone.

A Viking campsite beside a glowing fire and canvas shelter in a dense forest in Valheim.

Stamina deserves particular respect. Emptying the bar while fleeing a dangerous enemy is bad enough; running out while swimming can be fatal. Keep something in reserve, watch the yellow bar and resist the urge to sprint everywhere simply because you can.

2. Keep the Rested buff active

One of the easiest ways to improve your chances is to leave home with the Rested effect active. Spend about 20 seconds resting near a fire and under shelter, and you will receive a substantial boost to health and stamina regeneration. Sleeping in a bed also grants the effect.

Your comfort level determines how long the buff lasts, so furniture and other comforts are more than decorative flourishes. Before a long journey, boss fight or resource-gathering run, take a moment to warm up at home. It is a tiny investment with an outsized payoff.

3. Respect cold nights and wet weather

Valheim’s weather is not merely cosmetic. The Cold effect reduces both health and stamina regeneration, while the Wet effect applies further penalties. Get soaked on a chilly night and those reductions stack, leaving you with fewer options when trouble arrives.

A basic campfire costs five stone and two wood. Carrying those materials gives you an emergency source of warmth, although the fire will need suitable cover in rain or strong wind. Shelter, dry clothing and a nearby flame can turn a miserable expedition into a manageable one.

4. Give campfire smoke somewhere to go

Indoor fires are useful for warmth, cooking and rest, but Valheim models smoke. Trap too much of it inside a sealed structure and your character will take damage; the fire may eventually stop working too.

Three characters work on a forges and worships in a settlement in Valheim.

Build a chimney, leave a vent or create enough open space above the fire for smoke to escape. A cosy hall is all well and good, but it should not double as a Viking smokehouse.

5. Mark everything useful on your map

Valheim’s procedurally generated world is enormous, and even the starting Meadows can be surprisingly easy to lose track of. Use custom map pins whenever you find something worth revisiting: berry patches, ore deposits, dungeons, abandoned buildings, portals, boats and good base locations are all worth marking.

A few seconds spent labelling a discovery can save a much longer search later. In multiplayer, the cartography table also lets your group share explored areas and markers, turning everyone’s wandering into useful intelligence.

6. Choose spawn points carefully

A claimed bed sets your respawn point, and only your most recently claimed bed remains active. The bed needs a roof and adequate cover before you can claim it; a nearby fire is required for sleeping, but not for setting the spawn point itself.

Small outposts near dungeons, resource-rich areas or difficult biome borders can shorten a painful recovery run. Just remember to reclaim your main bed when you return home, or your next death may send you somewhere far less convenient than expected.

7. Do not punch above your biome

Valheim does not make every enemy match your character’s skill level. Each biome contains its own threats, and the jump in difficulty can be abrupt. Starred creatures are tougher still, dealing more damage and taking much more punishment than their ordinary counterparts.

A Viking warrior confronts a towering blue troll in a sunlit forest in Valheim.

The name of your current biome appears beside the minimap. Check it when the scenery changes, especially near a border. If you wander into the Black Forest before you are ready and something large starts moving between the trees, trace your steps back to safer climes immediately.

8. Take your time in the Meadows

There is no prize for rushing out of the starting biome. The Meadows gives new players room to learn the basics while gathering food, hunting boar and deer, collecting wood and stone, and finding flint near the water.

Use that breathing space to build a secure shelter, cook a dependable food supply and craft a useful set of early tools, weapons and armour. Once those foundations are in place, the Black Forest will still be dangerous, but it will be dangerous on considerably fairer terms.

One final Meadows warning: give falling trees plenty of room. Timber obeys physics, and Valheim is perfectly happy to let your first major construction project flatten its architect.

9. Learn to love the buckler

Not all shields serve the same purpose. Bucklers trade some straightforward blocking power for a much stronger parry bonus, rewarding you for blocking just before an attack lands.

A successful parry staggers most enemies and causes them to take double damage while staggered. Practise the timing against manageable opponents before trying it on anything capable of flattening you in one swing. Once the rhythm clicks, the buckler can turn a desperate defence into a very short fight.

A mysterious cloaked creature with glowing eyes stands inside a dark stone chamber in Valheim.

10. Pick up every new material at least once

Valheim reveals recipes as you discover the required material types, so make a habit of picking up unfamiliar resources. A new type of wood, hide, ore or food ingredient may unlock several crafting and building options at once, even if you do not yet have enough of it to make anything.

Crafting stations matter too. Workbench and forge upgrades unlock new recipes and allow you to improve existing equipment, provided the upgrade structures are placed close enough to the relevant station. Check your crafting and building menus whenever you collect something new; progression is often hiding in plain sight.

11. Repair your gear before every expedition

Weapons, tools and armour lose durability through use, but repairing them at the appropriate crafting station does not consume resources. A workbench must be under a roof with enough cover before it can be used for crafting and repairs, while metal equipment will generally need a forge.

Make repairs part of your leaving-home routine. Discovering that your axe is one swing from breaking when you are halfway across the map is an avoidable form of character development. Damaged building pieces can also be repaired with the hammer when the correct crafting station is nearby.

12. Plan for death before it happens

Death leaves your equipment and inventory in a tombstone and, under the default settings, also costs skill progress. Keep a spare set of basic armour, food and weapons at home so a recovery run does not begin with your Viking cold, hungry and dressed for bed.

Once you unlock portals, build a dependable network and consider keeping an unused portal at your main base for emergencies. Carrying portal materials on longer expeditions can create a quick route home, although standard wooden portals will reject certain items marked with a crossed-out portal icon. Label every portal carefully and plan a ship or overland route when valuable cargo cannot travel with you.


Valheim 1.0 rewards preparation more than bravado. Eat well, leave home rested, maintain your equipment and keep your map and portal network organised. Build a solid foundation in the Meadows, then push into each new biome when your gear, supplies and escape plan are ready.

You will still die occasionally. That is part of the adventure. The aim is to make each death educational, recoverable and, with any luck, funny enough to justify the walk back.


John-Paul Jones

Scribbling about videogames since 2005, John-Paul Jones first stoked his love for the industry with the Atari 65XE at the age of four before proceeding onto the ZX Spectrum, Amiga and beyond. These days, he finds himself unreasonably excited about Sega’s Yakuza franchise, foreign cinema and generally trying to keep his trio of sausage dogs from burning his house down. Clearly, he is living his best life right now.

Palworld Beginner Guide: Essential Tips for Getting Started


Blog | Guide

Palworld has now hit full release, and whether you’re stepping onto Palpagos for the first time or returning after a long break, there’s a lot to get your head around. Underneath the chaos, monster-catching, base-building, and occasional legal drama, Palworld is still a survival game at heart. That means preparation matters.

If you want the headline details before diving in, check out our full breakdown of Palworld 1.0’s release date, new features, gameplay trailer, and more.

To help you get off to a strong start in Palworld 1.0, we’ve put together some practical beginner tips covering world settings, base building, Pal catching, gear, travel, and a few easy mistakes to avoid.

Check Your World Settings First

Before you properly dive in, take a minute to look through your world settings. Palworld gives you a surprising amount of control over how forgiving, grindy, or chaotic your world can be.

You can adjust things like experience gain, resource gathering, damage, stamina, and what happens when you die. If you don’t want to spend hours farming basic materials, or you’d rather focus on exploring and catching Pals, there’s no shame in tuning the experience to suit you.

The best part is that you can adjust many settings after creating a world, as long as you do it before loading back in. So if the game starts feeling too slow, too punishing, or too easy, tweak it rather than forcing yourself through a version you’re not enjoying.

Returning Players Should Check Mods And Saves

If you’re coming back for Palworld 1.0 and previously used mods, take extra care before loading an old world. Major updates can break outdated mods, and Pocketpair has specifically warned players to remove incompatible mods before playing the new version.

It’s also worth backing up your save before jumping in, especially if you’ve spent dozens of hours building bases, breeding Pals, or clearing bosses. A few minutes of caution can save a lot of heartbreak later.

Pick Your Base Location Carefully

Your first base doesn’t need to be perfect, but it should make your life easier. Look for somewhere with nearby resources, enough flat space to build, and a layout that won’t constantly trap your Pals on rocks, cliffs, or awkward terrain.

A good early base location should ideally have access to wood, stone, ore, and open building space. Being close to resources saves time, and time is one of the most valuable things in Palworld. The less you have to sprint back and forth carrying basic materials, the faster you can build, craft, and explore.

Defensibility matters too. Avoid placing your base somewhere too exposed if raids are enabled, and try not to build in a spot where enemies can easily swarm every angle.

Build For Workflow, Not Just Looks

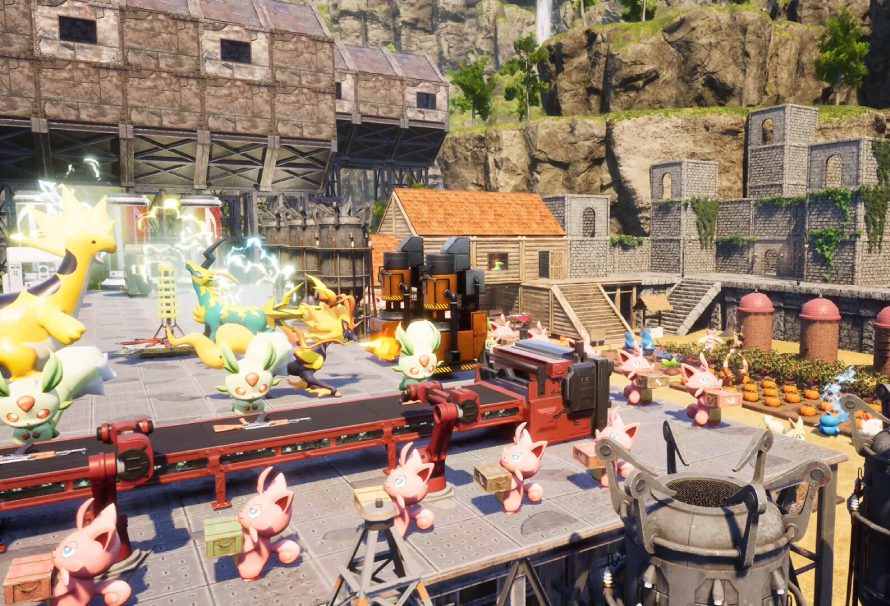
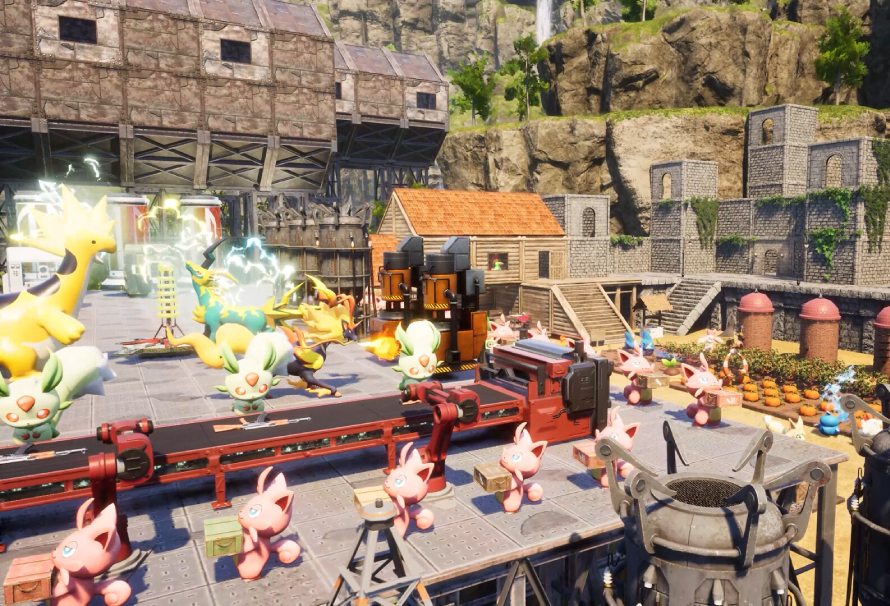
A tidy base is nice, but a functional base is better. Your Pals need to move between beds, food, workstations, storage, and resource nodes without getting stuck or wasting time.

Place storage close to production areas. Keep food accessible. Give your Pals enough room around crafting benches, farms, and mining spots. If workers keep stopping, wandering, or failing to reach tasks, your layout may be the problem rather than the Pals themselves.

As your base grows, think of it less like a house and more like a little production line. The smoother the layout, the less you’ll have to babysit it.

Follow Your Base Missions

If you’re ever unsure what to do next, check your base missions. These objectives are more than a tutorial checklist. Completing them increases your base level, which unlocks more working Pal slots and expands what your settlement can do.

A higher base level means more production, more flexibility, and more room to specialise. It also gives you a clear path through the early game, especially when Palworld starts throwing a dozen possible distractions at you.

When in doubt, progress the missions, improve the base, then head back out stronger.

Catch Plenty Of Pals

Yes, you should absolutely catch loads of Pals. Different Pals have different elements, work suitabilities, passive traits, and partner skills, so variety is incredibly useful.

Catching duplicates is also worthwhile. Extra catches can provide experience bonuses, give you better passive skill options, and help you find stronger workers or fighters. Even if you already have one of a species, another might have better traits or be more useful for breeding later.

Try to build a team that covers different elements and roles. You’ll want combat Pals, base workers, mounts, gatherers, miners, kindling specialists, and more. The broader your collection, the easier it is to respond to whatever the game throws at you.

Learn The Element Matchups

Palworld’s elemental system matters, especially once fights start getting tougher. Pals and attacks have elemental strengths and weaknesses, so bringing the right team can make a huge difference.

You don’t need to memorise everything immediately, but you should start paying attention to what works. If a boss or wild Pal is giving you trouble, swap in Pals with a better elemental matchup rather than brute-forcing the same fight over and over.

A balanced team will save you resources, reduce failed captures, and make boss fights far less stressful.

Upgrade Your Gear Regularly

Your Pals will do a lot of fighting, but you still need to look after yourself. Better armour can improve survivability, and some gear offers protection against environmental hazards like heat or cold.

Weapons matter too. Even if you prefer letting your Pals handle combat, your own damage can help finish fights, weaken targets for capture, or save you when things go sideways. Keep an eye on new crafting options as you unlock technology, and don’t forget to repair or replace gear before heading into dangerous areas.

A good rule is simple: if you’re entering a new biome or fighting stronger enemies, check your equipment first.

Travel Smart

Palworld’s map is big, and walking everywhere gets old quickly. Early on, activate every fast travel statue you find. Even if you don’t need it immediately, you’ll thank yourself later when you need to return to an area for resources, bosses, dungeons, or rare Pals.

Mounts are just as important. A reliable ground mount makes exploration faster, while a flying mount can completely change how you move through the world. Once you have access to rideable Pals, prioritise the ones you’ll actually use and craft the relevant saddle.

The less time you spend trudging across familiar ground, the more time you can spend doing the fun stuff.

Don’t Hoard Technology Points Blindly

Technology points unlock new structures, weapons, gear, saddles, and base tools, but not every unlock is equally useful right away. Prioritise upgrades that solve immediate problems.

Need better movement? Unlock a saddle for a Pal you actually own. Struggling with production? Unlock better workstations. Taking too much damage? Look at armour. Running out of food? Improve farming and cooking.

It’s easy to unlock something just because it looks shiny, but practical upgrades usually pay off faster.

Prepare Before Bosses And Dungeons

Before heading into a boss fight, dungeon, or dangerous new area, do a quick checklist. Bring food, repair your gear, rest your Pals, check your ammo or weapon durability, and make sure your team has sensible elemental coverage.

Palworld can go from peaceful resource gathering to absolute disaster very quickly. A little preparation makes those disasters much easier to survive.

Final Thoughts

Palworld gives you a lot of freedom, and that’s part of the fun. You can build a cosy production hub, chase rare Pals, optimise your team, explore every corner of the map, or simply cause a bit of creative chaos.

The best beginner advice is to make the game work for you. Adjust the settings, build somewhere practical, catch more Pals than you think you need, and keep upgrading your base, gear, and travel options. Do that, and your first steps into Palworld’s full release should be much smoother.


Jason Coles

Jason likes to focus on roguelikes and co-op games; in a dream world he’d make a living writing about Dark Souls. As well as being a writer he also does personal training and accounting and can occasionally be seen on other people’s streams. Being a big fan of fluffy things means he has two cats, both of whom refuse to let him sleep, but at least they are cute.