AC News Weekly

News Weekly is our column where we highlight and summarize some of the week’s top stories so you can catch up on the latest tech news.
This is Android Central’s News Weekly, your go-to source for a concise roundup of the week’s most significant tech stories. This is where we delve into the top headlines that provide the latest developments and innovations contributing to the digital landscape.
This week saw global Microsoft services being disrupted due to an outage, the first look at the Pixel Pro 9 and Pro 9 Fold, OnePlus launching several devices, Amazon making record-breaking sales on Prime Days, and One UI 7 could radically change Galaxy devices.
Microsoft outage brings world to a standstill
Read more here.
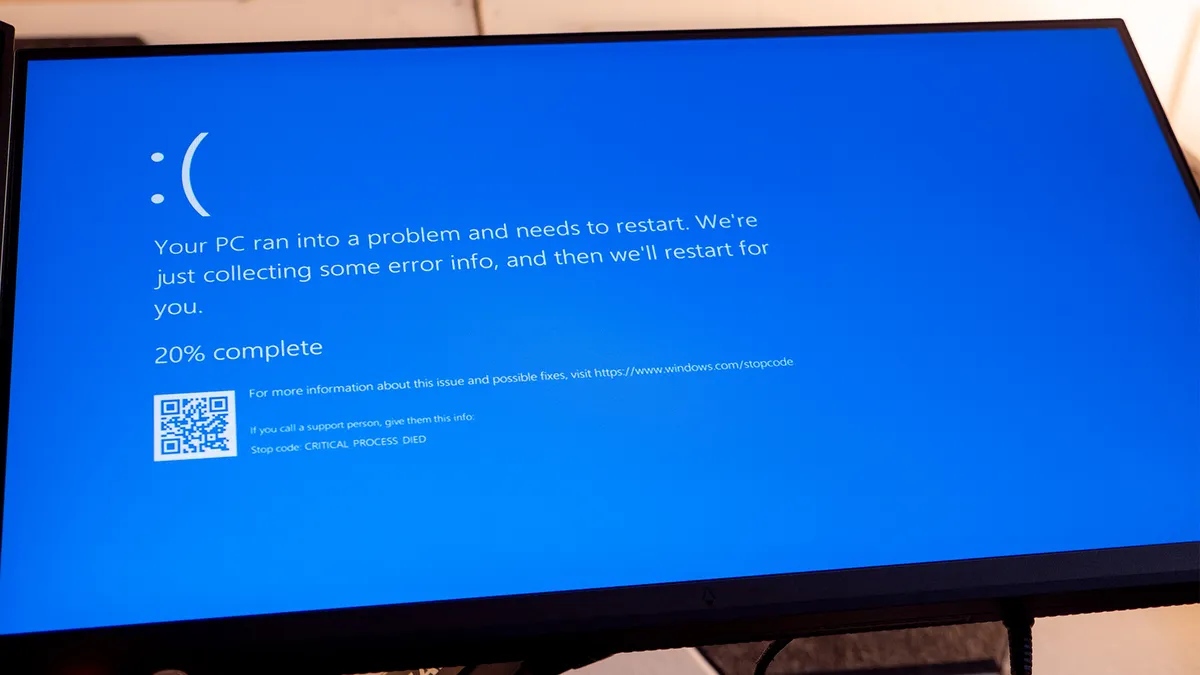
Several services, including financial institutions, flights, media, retail, rail services, and emergency response networks, were disrupted by a major outage on Friday (July 19) morning.
An update from CrowdStrike (an American cybersecurity company) caused Windows PCs and servers to get stuck in a reboot loop, displaying the blue screen of death for many businesses worldwide. Microsoft recognized the ongoing disruption and expected a quick fix; however, it’s up to CrowdStrike to fully resolve the issue.
President & CEO CrowdStrike George Kurtz posted on X, stating that CrowdStrike was working with customers impacted by the outage and apologized for the disruption.
“We understand the gravity of the situation and are deeply sorry for the inconvenience and disruption. We are working with all impacted customers to ensure that systems are back up and they can deliver the services their customers are counting on,” Kurtz said.
For now, the update has been pulled, and the company has posted a temporary fix for this outage, which will boot Windows into Safe Mode or the Windows Recovery Environment.
Pixel 9 teasers urge you to break up with your old phone
A phone built for the Gemini era. It can do a lot—even let your old phone down easy. Learn more and sign up for #MadeByGoogle updates: https://t.co/PUmAUi4YBe pic.twitter.com/I3EEXOkq3IJuly 18, 2024
Google made heads turn on Thursday (July 18) as it teased not one but two of its upcoming flagship phones. First, Google posted a quick teaser on X, giving us a glimpse of the Pixel 9 Pro in a champagne gold-like color. The device appears glossy, with rounded edges and a matte finish on its back panel. The tweet stated that the phone “is built for the Gemini era—” emphasizing the fact that its new device will be bolstered with AI.
Within hours of showing us what the Pro looked like, Google released a new video of the Pixel 9 Pro Fold, putting all the rumors to rest and confirming the design and name of its upcoming foldable Android smartphone. The company showed off the phone’s external display and its hinge mechanism when the phone is opened—and the rear camera module is set in a unique, rounded rectangular casing.
The teaser doesn’t show the rumored top-right corner hole-punch front camera, which has left everyone speculating about where the phone’s selfie camera will be placed. The Pixel Pro Fold comes in a sleek porcelain finish, which could come in multiple colorways.
We’re hoping to see just surprise drops leading up to the Made by Google event set to take place on August 13 at 1 p.m. ET.
OnePlus’s summer launch
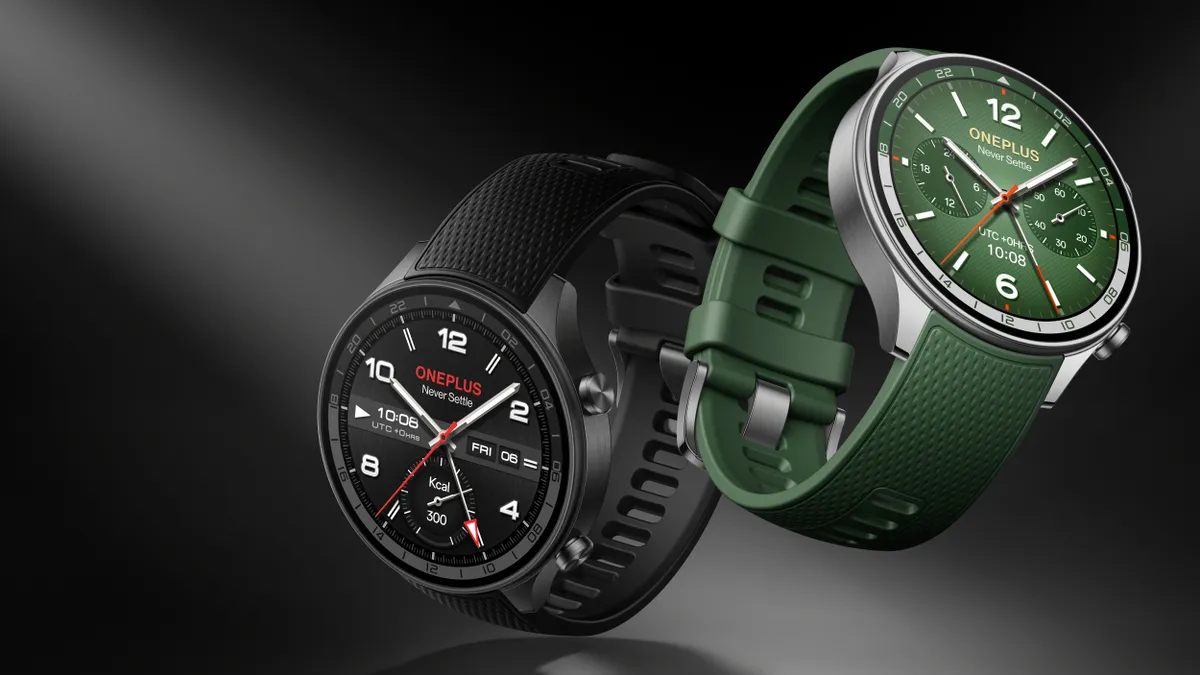
Read more about the Pad 2, Watch 2R, and Nord Buds 3 Pro.
OnePlus unveiled three new products earlier this week—bringing the OnePlus Pad 2, Watch 2R and the Nord Buds 3 Pro to U.S. and Canada markets.
The OnePlus Pad 2 features a Snapdragon 8 Gen 3 platform, an exclusive 12.1-inch large 3K display, and six stereo speakers. The device comes loaded with the AI Toolbox, which helps users accelerate their workflows. The device comes with a large 9,510mAh battery and a flash charging tech that recharges the device within 81 minutes. The sleek 6.49mm and 584g pad features a Nimbus Gray all-metal body. It comes with add-on accessories like the OnePlus Stylo 2 and the OnePlus Pad 2 Smart Keyboard.
Now coming to the Watch 2R— it features an “ergonomic” design with two physical buttons on the side of its face, similar to the Watch 2. One button will quickly navigate to the user’s stored watch apps, while the other is an “action” button for fitness tracking. The two-toned design theme, with its bezels, gives the device a classic wristwatch appeal. With a 500mAh battery, the wearable is said to deliver up to 100 hours of charge with regular use and comes with a 7.5W VOOC fast charger, which fully charges the device in 60 minutes. The watch is priced at $229 and comes in Forest Green and Gunmetal Gray colorways.
Lastly, the company also launched the Nord Buds 3 Pro, which comes with studio-grade audio with powerful bass tones and BassWave 2.0 technology. OnePlus stated that the earbuds “come with scenario-based Smart Noise Cancellation, which intelligently detects ambient sounds and selects the most suitable noise reduction mode in real-time to balance noise-canceling effectiveness and convenience.” These affordable Buds have triple microphones that promise clear and stable audio while taking voice/video calls. The new buds come in a pebble-shaped vertical case, which sports a matte finish with some metallic accents. They come in two colorways: Starry Black and Soft Jade.
Amazon boasts record Prime Day sales
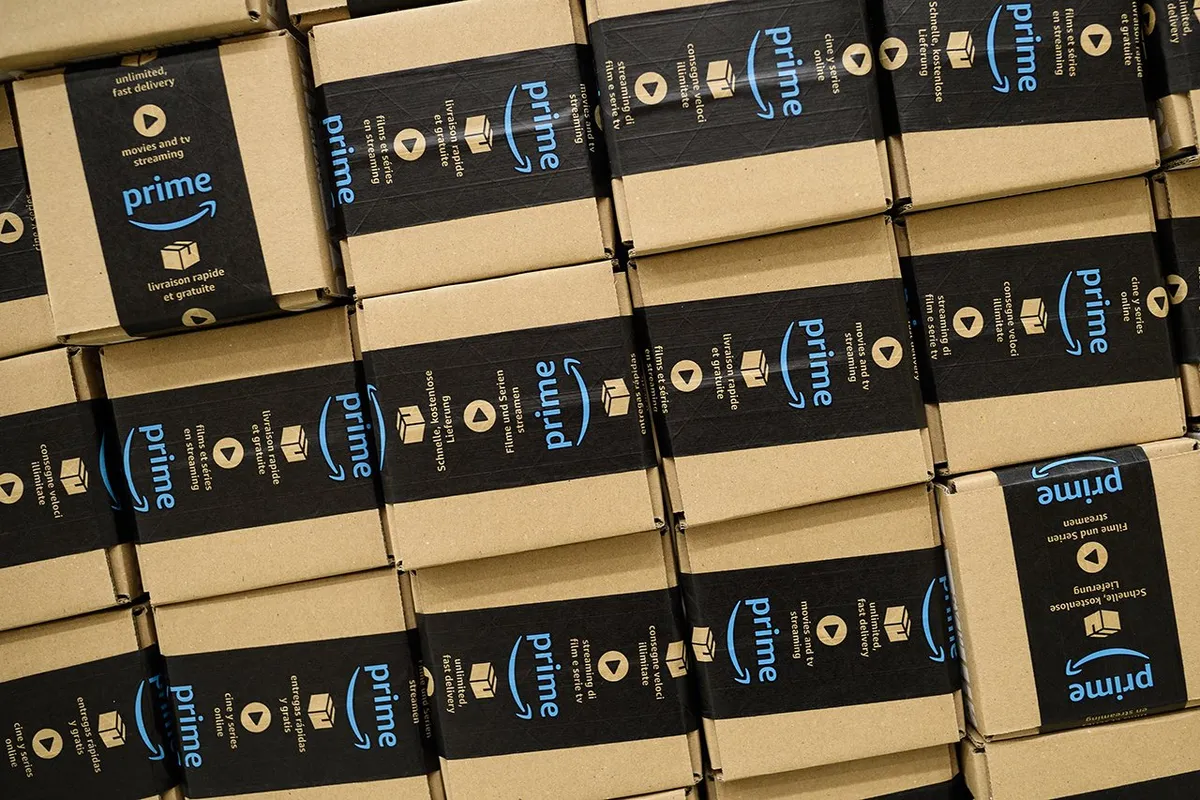
Read more here.
Amazon’s big Prime Day sales have officially ended, and the company says it had a “record-breaking event.” While Amazon hasn’t shared the exact numbers yet, its official blog said it sold more items during this two-day event than any previous Prime Day event.
Amazon said in its Prime Day recap that members took advantage of deals from brands like Sol de Janeiro, Apple, Dyson, and Ring, as well as small businesses like TruSkin, ALOHA, Blueland, and Native Pet.
We did get a glimpse into the sales numbers, as Reuters reported that shoppers in the U.S. alone spent $14.2 billion online during the two-day Amazon Prime Day event. The data comes from Adobe Analytics, which said total online sales increased 11.7% this year compared to 2023’s $12.7 billion across two days.
The publication adds that major retailers, including Walmart and Target, seem to have launched their own deals leading up to Prime Day, which may have contributed to this year’s sales. People who were looking to upgrade devices and new technology to their homes helped push online sales for the electronics category up 61%, Adobe Analytics added.
One UI 7 could change Galaxy devices

Read more here.
While Samsung’s One UI 7 update is a few months away, tipsters have started to predict what this could mean for devices.
Ice Universe on X said that One UI 7 (based on Android 15) would be the “most changed” version of the software for Samsung Galaxy devices. The tipster continued to say that the company wants to “redraw” the app icons users experience while swiping the screen.
It also looks like the company is planning on a changed icon style and drop-down menu, which will potentially give the UI a new look. On the other hand, TheOneCID suggests that Samsung could take a few design clues from iOS 18, some of which seem to refer to a completely revamped control center, similar to what Ice Universe alleged on Weibo.
Back in May, reports suggested that Samsung might’ve started internally testing its Android 15 skin on the Galaxy S24. However, it seemed that there could be delays in launching the One UI 7 since the company was still dealing with fixing the One UI 6.1.1 update.
Those are some of the biggest stories from this week. Meanwhile, here are some other stories that are worth catching up on:

