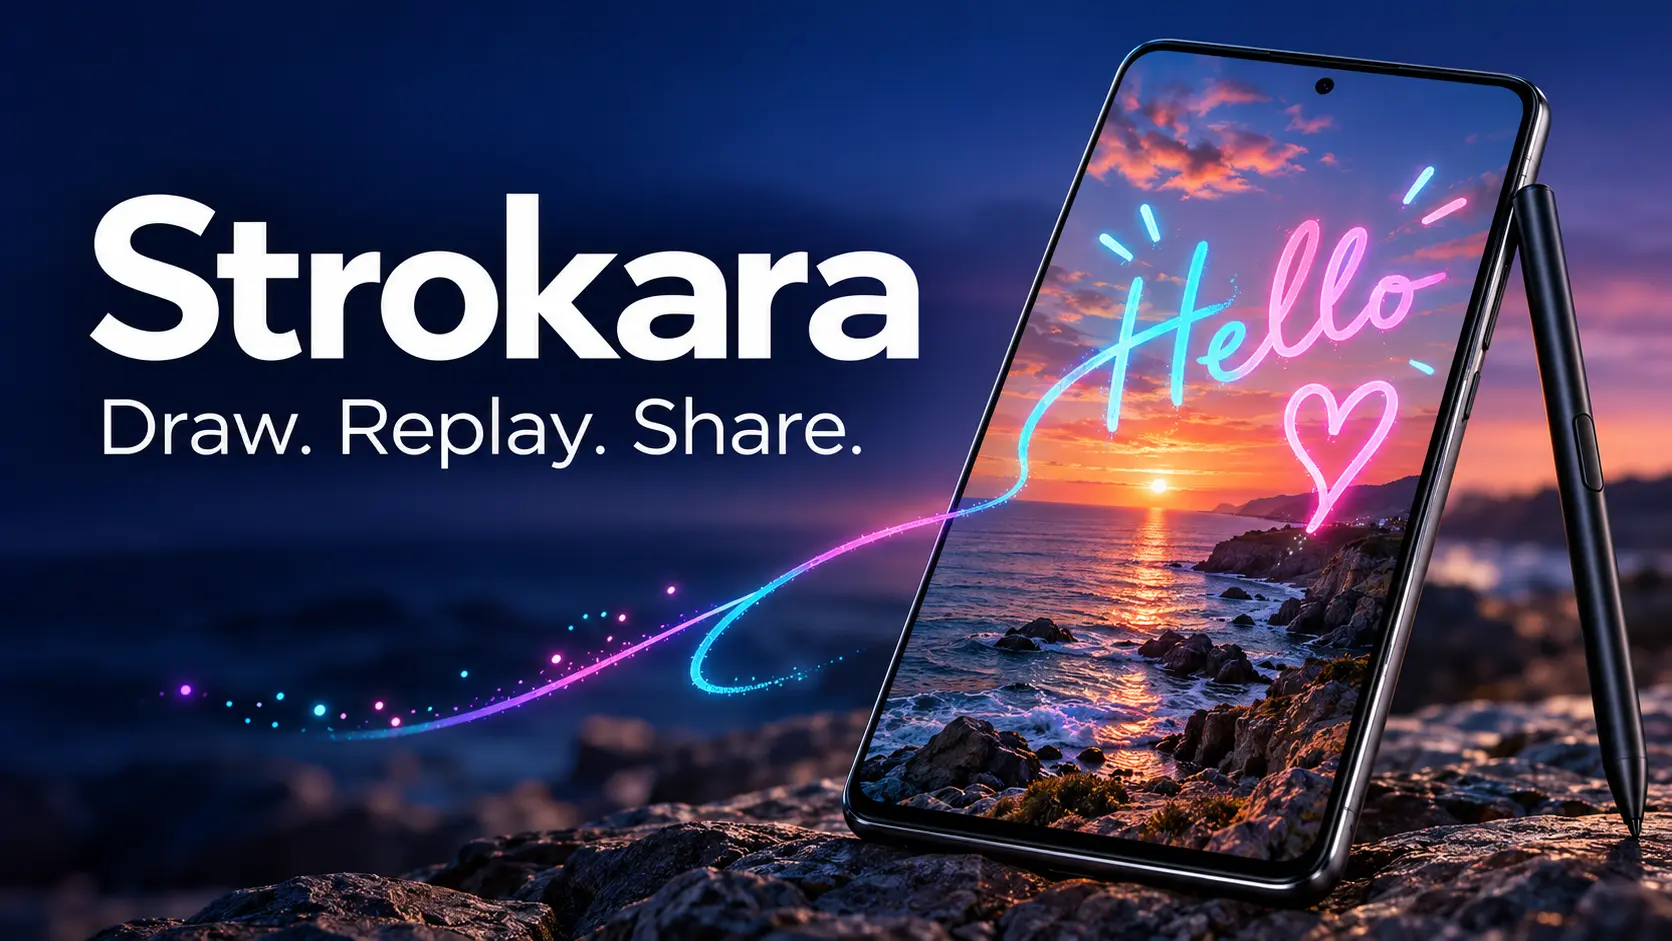
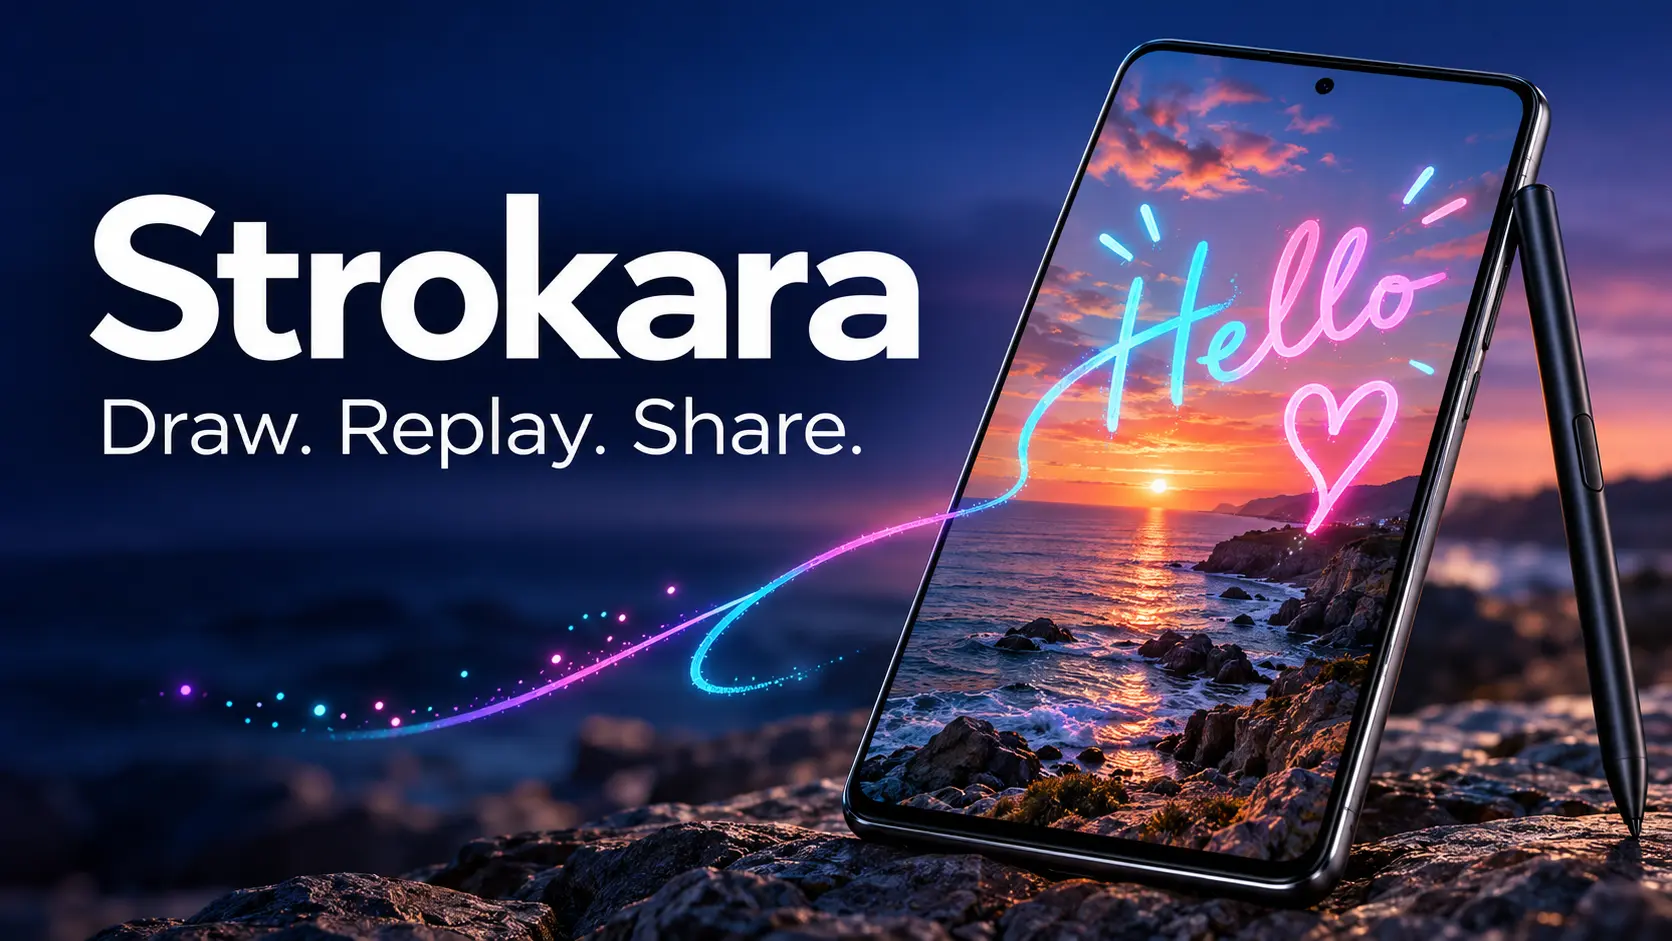
A photo captures an event but a handwritten note can add character. A birthday message, a doodle, and a signature can help turn an ordinary picture into something personal. Strokara combines these concepts in the form of an Android application designed to let users draw on pictures and present the process in the form of a re-watched animation.
In this review, the functionalities of the application are considered in the way they have been advertised by the company rather than personal tests.
The app Strokara is available on Google Play and allows the user to draw anything on any picture and play back the drawing process in the same order, and speed. In the description, the app is said to be inspired by Samsung’s Live Message but still be an independent application.
The appeal of the application is easy to understand. A prepared message will provide the user with everything at once while an animated one allows seeing the process of creation. For example, a birthday photo can come to life as a handwritten message gradually appears, while a holiday picture can be enhanced with a drawing that reveals itself stroke by stroke.
Drawing Tools That Express Personality
The complete toolkit consists of 23 brush styles, configurable stroke widths, a color wheel and 19 different fonts. The user can also insert emojis and shapes that can be resized, rotated, and moved. The image processing functions include cutting, rotating and flipping.
Flexibility in creativity is very important because different tasks require different approaches. A simple handwritten note may work well with a family photograph while a colorful variant will work well for a party invitation or a holiday card.
A simple composition will often produce the best results. It is good to use a couple of simple strokes and a few words for the animation. Too much decorative filling will make the photo difficult to see.
An Additional Reason to Use Your S Pen
Strokara allows finger-drawn illustrations, but the distinctive feature is that with the help of an S Pen users will access the pressure sensitivity feature.
This is what makes the app attractive for Galaxy users who would like to get additional creative use of their pen. Writing naturally fits into this context: the action itself will be shown to the audience.
Finger input also contributes to popularity of the idea, since one does not have to create a work of art for animated cards: even a small message written by hand or a simple outline can be warmer than a complicated art work.
Sharing and Privacy
It is easy to share the resulting creation through MP4 or GIF options, or, better to say, it is better to send them via a chat in a messenger instead of signing up for a new platform.
As stated by the developer, Strokara is capable of working offline, has no advertisements, does not require any subscription and doesn’t gather personal user information. The price is currently $2.99 according to listings in Google Play. This is what the developers say and nobody has verified their claims.
The Final Verdict
Strokara is based on a simple premise: to add a personal touch to photo messages, allowing viewers to watch sketches and handwritten messages take shape. Its target audience includes casual hobbyists, users who enjoy adding a personal touch to their messages, and S Pen fanatics seeking for something interesting to do.
The responsiveness of the app, export quality and user efficiency still need testing; however, judging by the features that are already advertised, Strokara offers an attractive idea of introducing some creativity to the common pictures.
A quick step removes the small chance of anything going wrong and requiring more of your time.
Mikhail Artamonov/Shutterstock
If your phone has a SIM tray, it’s not something you likely open often, but there are still reasons to. You may be switching to an MVNO to save money, or maybe you’re temporarily swapping out your normal SIM for a cheaper local carrier when travelling. In some cases, your carrier will send you a replacement card if yours is damaged.
Most of today’s smartphones let you switch SIMs with the phone on, so you don’t need to switch your device off for the process. But there are modest benefits if you do, and for something so quick, it’s better to be safe if you have a few minutes.
How to replace the SIM
We’re talking about physical SIM cards, which you have to remove from your phone by hand. eSIM replacement should be as simple as using a QR code, carrier app or direct transfer between different smartphones. Most eSIM-compatible phones can store many eSIMS, though only a few can be active at once.
Physical SIM card replacement involves these steps:
Optionally, power down your phone or enable airplane mode.
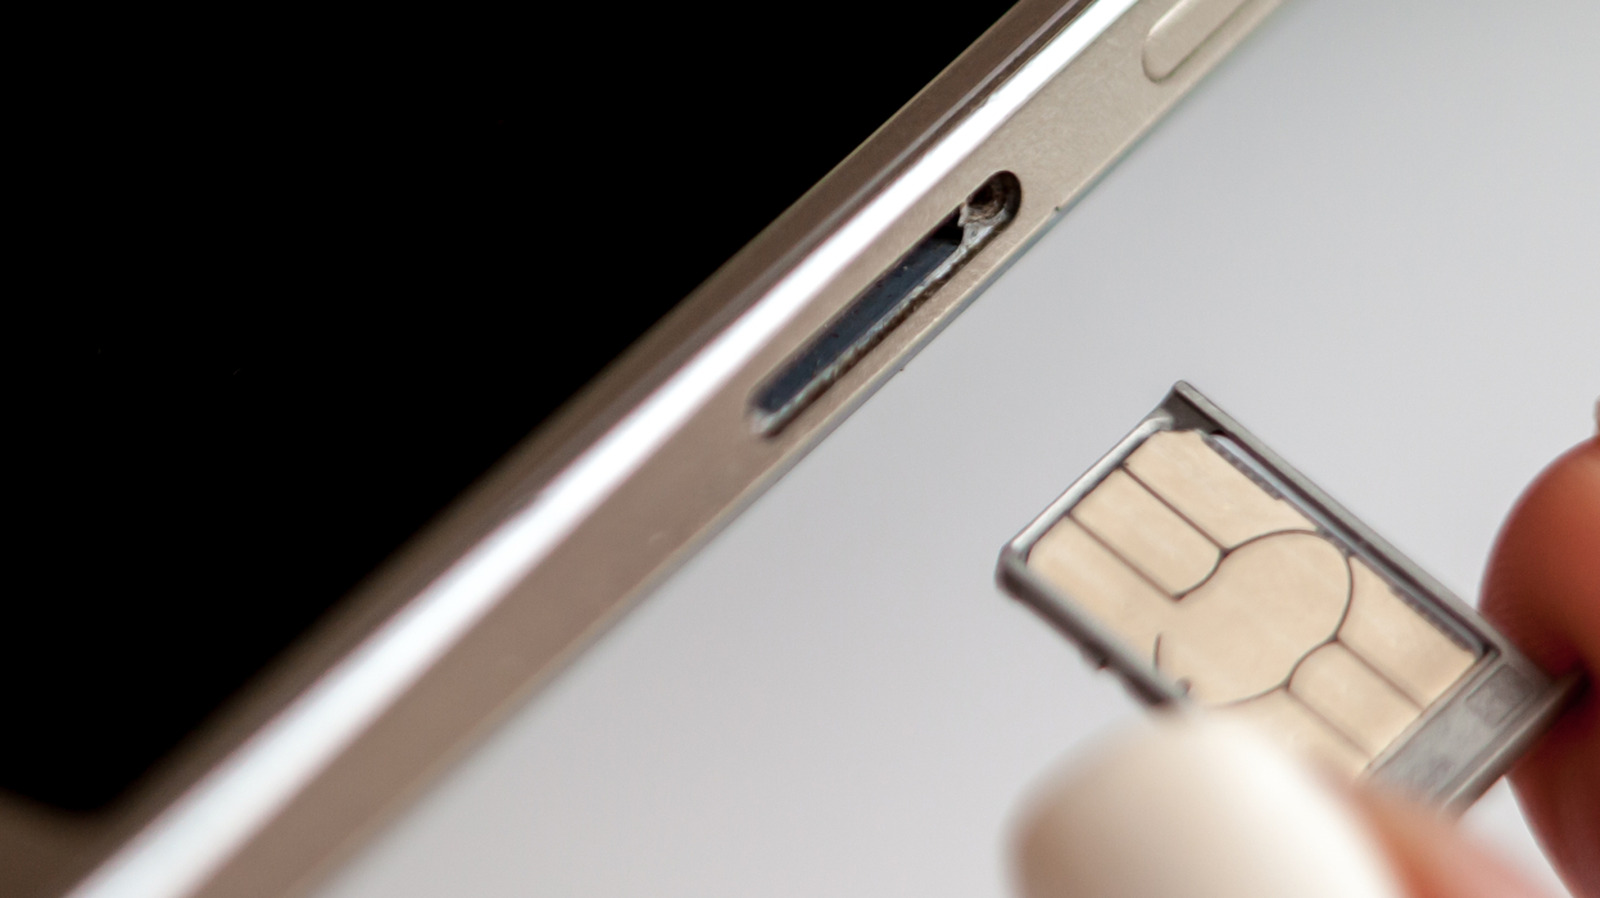
Pop the tray out, usually by gently pushing a paperclip or SIM ejector tool into the ejection pinhole on the phone.
Change the card, ensuring you use the correct card size.
Pop the tray back into place.
Enter your PIN or restart if the phone requests it.
If you have a dual-SIM phone that supports two physical cards, check which SIM you intend to swap before you begin.
While many argue eSIM is a superior technology because it requires no moving parts, others still appreciate the convenience and relative privacy true SIM cards provide. They make it easy to install and use over-the-counter pay-as-you-go SIM-based accounts, for example.
The small potential risks of SIM replacement
PeopleImages/Shutterstock
Most potential dangers of SIM replacement are physical. You might accidentally insert dirt, grime or moisture into the SIM tray, or force a larger card into a smaller slot incorrectly. You could also break the SIM tray so it no longer aligns correctly, or otherwise harm the card. A damaged SIM card or one incorrectly inserted may cause the phone to continue trying (and failing) to create a network connection, draining its battery and causing it to overheat.
Most people never encounter these problems, since slowing down and being careful does the trick. In most cases, your phone will take a moment to read the new SIM and find the network. Then it will be available for service, subject to account setup requirements.
The benefit of turning your phone off before swapping the SIM is minor. It forces your phone to look at the fresh information provided on the new card when it powers on again, helping register your device on its new network more quickly by reading the new carrier settings. This reduces the chance you’ll encounter a software-based “network error” message when you swap.
More to think about when swapping SIMs
Before the 2010s, SIM slots were usually located underneath a phone’s removable battery, which obviously required powering off the device to access. Over time, as removable batteries became less common, SIM trays were moved to the outside of phones. Early models using this setup would often show a network error if you swapped SIMs while the phone was on, but they quickly became hot-swappable and this was no longer a problem.
You don’t even need to switch your device off completely to make the phone refresh its carrier settings from the card. You’ll get a similar result if you turn on airplane mode, wait 30 seconds before swapping the SIM and turn airplane mode off again once the new SIM is inserted. This should prevent any carrier hiccups during the process.
A warning on SD cards
Unlike the iPhone, some Android devices still include a microSD card slot. In some cases, this is in the same tray as the SIM, though placement varies. If this is the case for you, as when ejecting an external drive, it’s important to unmount the microSD card before removing the SIM to prevent losing data. On Samsung devices: open the My Files app, find the SD Card, tap the three-dot menu next to it and choose Unmount. Search the Settings app or check online documentation if you’re not sure how this works for your device.
So while the benefits are slight, switching off your phone when replacing the SIM can prevent software-related glitches. If you don’t want to power down, use airplane mode instead. And in case you encounter a network error after swapping, always try restarting your device first.
Over The Hill isn’t like other games. It isn’t interested in pushing you to your absolute limits, nor is it trying to sell you on intense competition. Instead, it focuses on one thing above all else: the journey.
After one of the strangest intro sequences you’ll experience this year, you’re cut loose in a vast, open world built entirely for exploration. While there are plenty of secrets to uncover along the trail, most rewards come in the form of cosmetics and car upgrades—tooling up your vehicle so you can venture even deeper into the wilderness.
Just You, Your Off-roader, and the Open Trail
The core gameplay loop is beautifully straightforward: you take an off-roader and drive around different landscapes. That’s it.
You aren’t tearing around corners at breakneck speeds. Instead, you’re trundling along at a leisurely pace, dodging massive boulders, snapping photos of local wildlife, and keeping a keen eye out for stray goats. When the terrain turns brutal, mastering your vehicle’s winch becomes second nature to pull yourself out of muddy ruts and tricky spots.
Better Together: 4-Player Co-op
You don’t have to tackle the trail solo, either. You and up to three friends can jump into co-op together to explore the wilderness as a convoy.
While you can use your winches to haul each other out of tight jams, the real draw is simply taking in the scenic views together. If you’re looking for a game where you can unclip your brain and just let your thoughts float off into the distance, this is it.
The Verdict: Unwind with Over The Hill
If you love the idea of kicking back, taking in the outdoors, and spotting a bear in its natural habitat, Over The Hill is well worth your time. It’s a wonderful lesson in gaming relaxation and good vibes—no high-pressure objectives, no flashy tricks, just pure, low-stress exploration.
Chances are, your backlog could use a game like Over The Hill. Why not jump in and enjoy the ride?
Jason Coles
Jason likes to focus on roguelikes and co-op games; in a dream world he’d make a living writing about Dark Souls. As well as being a writer he also does personal training and accounting and can occasionally be seen on other people’s streams. Being a big fan of fluffy things means he has two cats, both of whom refuse to let him sleep, but at least they are cute.
With the devs behind RimWorld gearing up for their next game with a recent engine switch, it’d be entirely fair if you were hankering for something new (if still familiar enough) yourself. Trailblazers: Into The March is one such game, having introduced itself to us earlier this year, a mishmash of the aforementioned colony sim, Nausicaa, Moebius, Andrei Tarkovski, Jeff Vandermeer, and FTL: Faster Than Light by Edwin’s measure. And now you don’t just have to look at its trailers, because there’s a demo for you to have a go at.
“In today’s demo, we have packed in so much for you to explore. From overcoming dangerous excursions to battling threatening foes,” explain developer Strangers of the demo. “Take on contracts from the fixer and build out your perfect Trailblazing crew!” If you’ve not actually clocked roguelite colony-sim Trailblazer before today, you are said titular Trailblazer, a captain of a landship which are essentially big, honking, vaguely animal-shaped, Shadow of the Colossus sized crafts you pilot across the ground, taking on similar such opposing vessels.
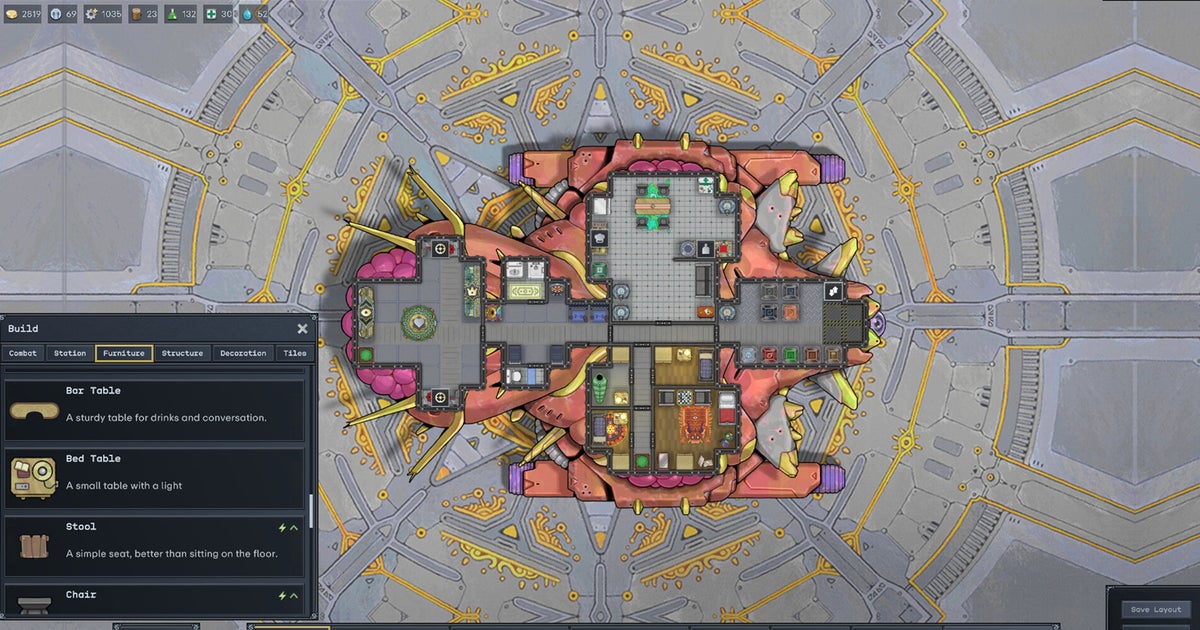
Your Landship is customizable, and it must be filled with all sorts of simulated crew members, each complete with their own backgrounds and abilities. In the macro, combat sees you commanding your ship in real-time action battles, with the option of tactical pause to be, well, tactical with. In the micro, you command your crew to see through said battles. There’s a big ole world to explore (the titular March), where you’ll be “encountering enigmatic wonders and unpredictable events along the way,” so says the game’s Steam page.
It’s got a funny mix of art too. When looking at all of your crew members aboard your ship, they resemble those tiny toy wooden puppets that collapse when you press a button beneath them. Their character portraits are a lot more detailed, but more obviously procedurally (not AI) generated, with some lush recurring character NPC portraits to show how beautiful this game can get. Neat stuff! No release date just yet, but you can check out that demo, or just throw it a wishlist, on Steam.
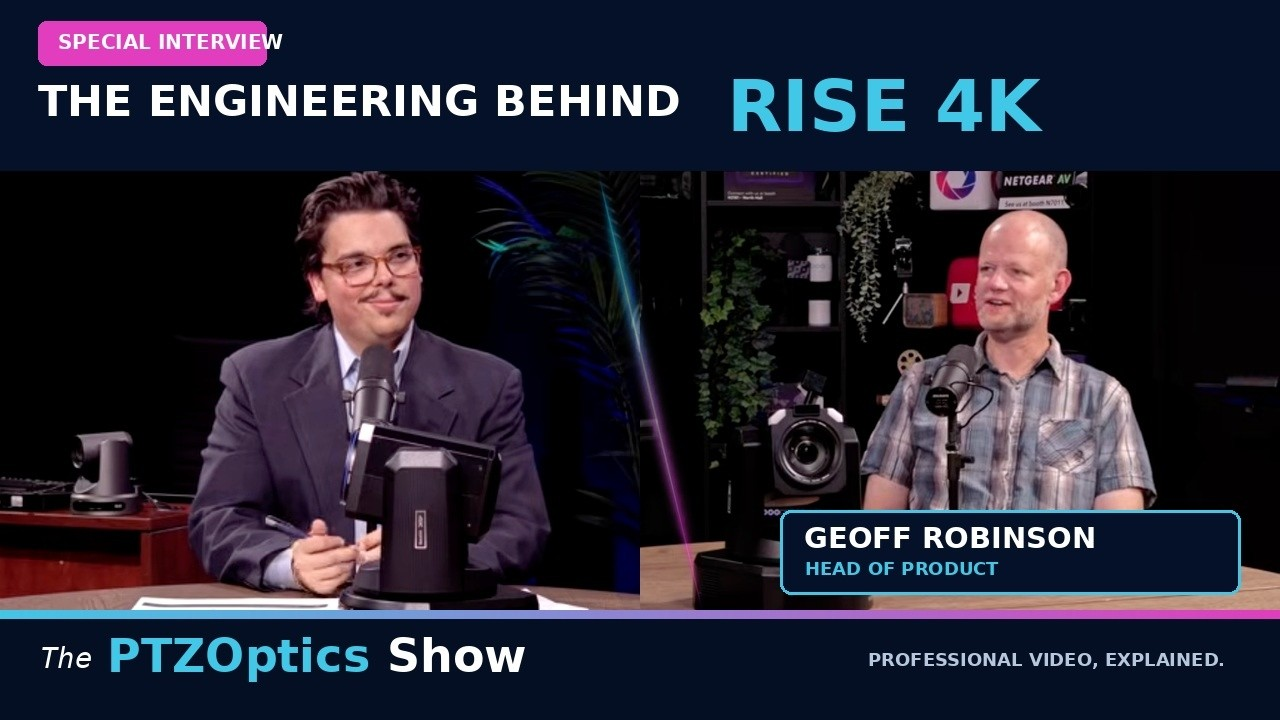
What if a PTZ camera could continue gaining new capabilities after purchase? That’s the idea behind the PTZOptics Rise 4K, a professional PTZ camera designed to combine broadcast-quality imaging with ongoing software innovation.
PTZOptics Head of Product Geoff Robinson recently discussed the engineering behind Rise 4K and how the company’s software-defined approach allows camera technology to evolve through updates. Rather than limiting a camera to its original feature set, continued development can add functionality, enhance performance, and support new production workflows.
The conversation also explored real-world PTZOptics applications, including a Move 4K installation at the City of Daytona Beach Fire Station and an immersive AV experience center at USK Electronics. For livestreamers, video producers, houses of worship, and content creators, the Rise 4K represents an approach to camera technology that emphasizes both professional image quality and long-term flexibility as production needs change.
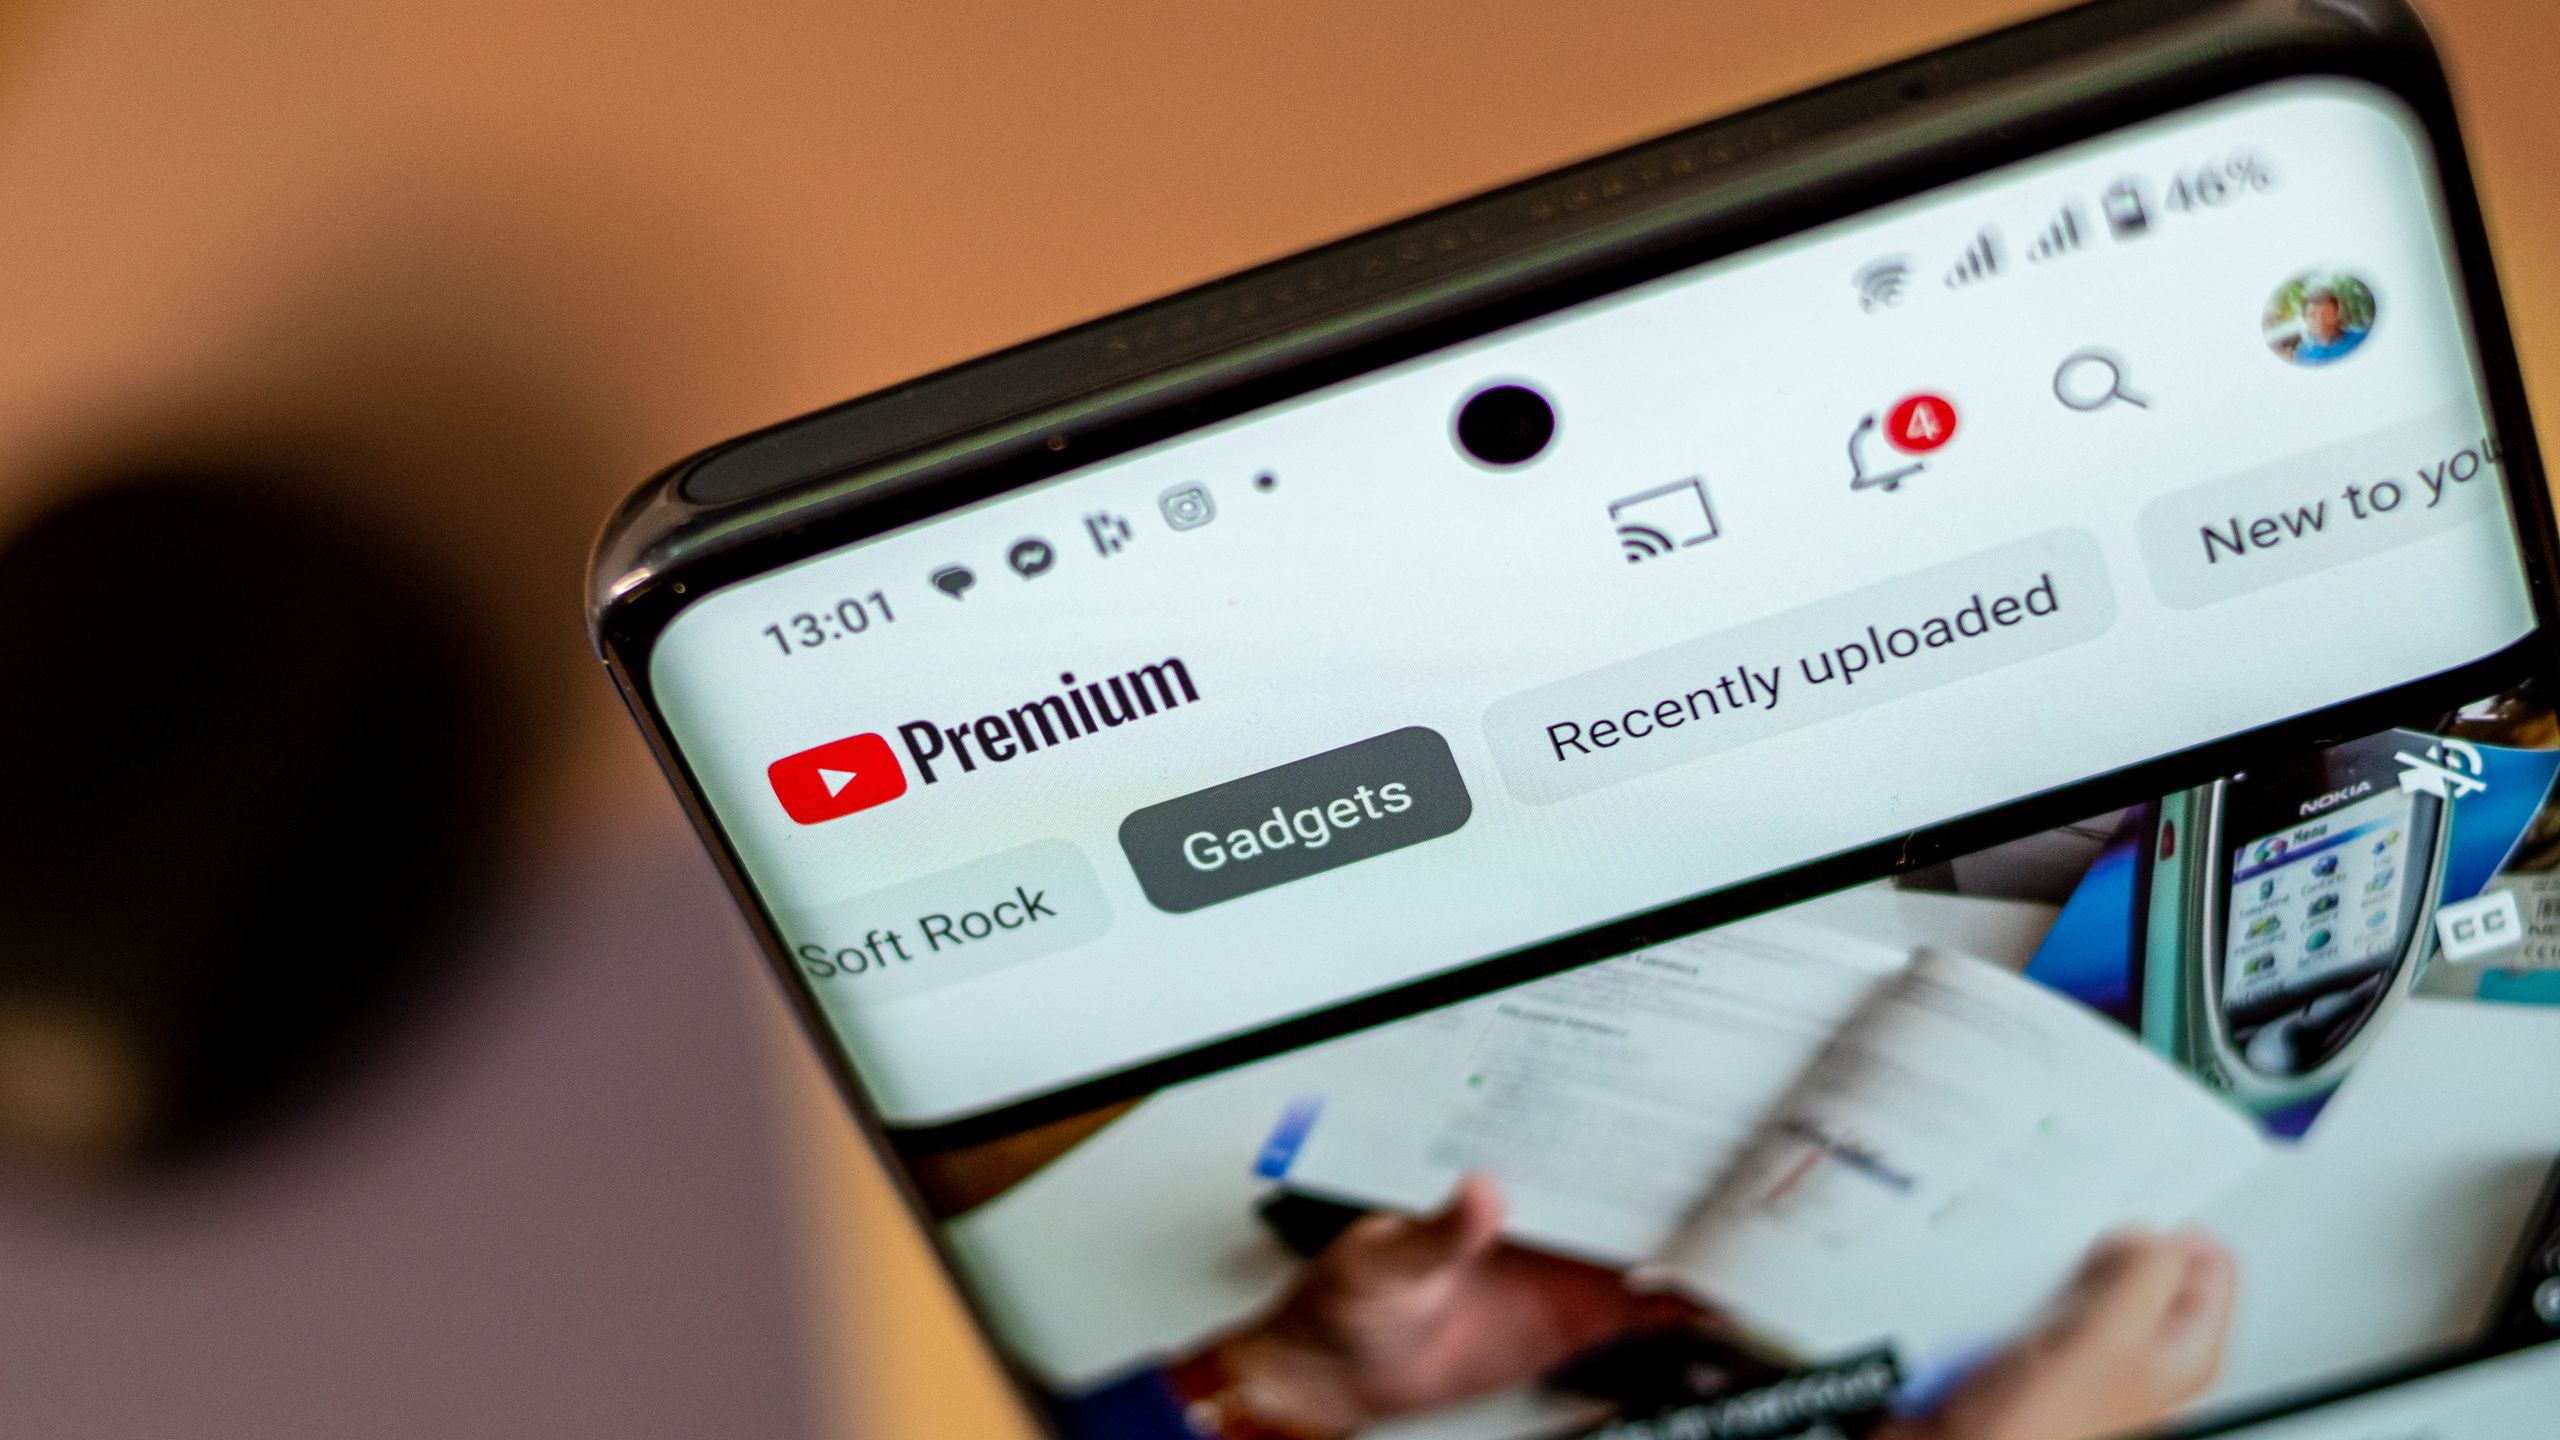
YouTube is reportedly planning to launch audiobooks for its Premium subscribers.
Audiobooks could arrive for the platform’s ad-free $16 subscription plan in 2027 if this goes without a hitch for Google/YouTube.
YouTube would run into competition with the likes of Spotify (audiobooks arrived in 2023) and Audible.
Audiobook-enjoyers might have something to celebrate on YouTube. There are rumors that the platform is looking to enter a new market for its Premium subscribers.
A post by the Wall Street Journal (paywalled) highlighted rumors that YouTube Premium could soon offer audiobooks in one of its subscription plans (via GSMArena). Supposedly, Google has been “talking with publishers” about bringing audiobooks onto the platform in 2027.
Early reports allege YouTube Premium would offer audiobooks in its ad-free plan, which currently runs consumers $16 a month. What’s interesting is that this could solve an issue: piracy. GoodEReader brought this up in its coverage, highlighting data that shows “45% of listeners” consume “audiobooks” on YouTube. The air quotes (and literal quotes) are warranted here, as the publication states these are AI-narrated, not authentic.
Latest Videos FromAndroid Central
Audiobooks in YouTube Premium would give users the best experience possible, away from false creations. However, it’s worth remembering that these are rumors, and nothing’s been confirmed by YouTube yet.
YouTube’s branching out
(Image credit: Chris Wedel/Android Central)
Android Central’s Take
This is one of those things where you can associate a product or a feature or a form of entertainment with the name. If I think Spotify, I think music. If I think Audible, I think audiobooks. When I think of YouTube… I do not think about audiobooks (nevermind the fact that I prefer reading over an audiobook). I wonder how large of a market there is for YouTube. But I guess there must be if there’s a piracy problem, and they’re using AI voices. Crazy.
Many should be well-acquainted with Audible’s audiobook offerings. In recent history, Spotify has joined that market, taking the fight directly to Audible with over 200,000 “free” titles. That was how it all started, anyway. When audiobooks launched for Spotify Premium in 2023, the platform gave its subscribers in the U.S. and the U.K. 15 hours of listening per month.
After you exceeded your limit, you could pay an additional $12.99 to get 10 more hours “or buy them a la carte.” Spotify’s library exceeded that initial 200,000 for Premium subscribers. But if you wanted more, you’d have to buy them individually. Spotify then launched its “Audiobook Access” tier for $9.99, giving users the same 15 hours of listening per month deal.
It goes without saying that YouTube will have its work cut out for it by stepping into this new world.
Get the latest news from Android Central, your trusted companion in the world of Android
If you run a business from home, the car is often part of the business. It carries samples to clients, hauls inventory to the post office, and doubles as the mobile office on sales days. So when the business moves to another state, or when the right work van turns up for sale 1,200 miles away, the question of getting that vehicle across the country stops being a personal errand and becomes a line item.
It is also a line item most owners guess at. Online quotes for the same trip can range by several hundred dollars, and the cheapest one is often the one that falls apart. Here is what car shipping actually costs, based on real prices paid rather than advertised ones, and how to put a number in the budget that holds up.
The Short Answer
At SAKAEM Logistics we built our pricing guide on a database of 335,037 completed vehicle shipments across the United States. Across all of them, the average price for a running car, SUV, or pickup on an open trailer was $1,175. The typical range was $925 to $1,380.
That range is a useful starting point, but distance moves the number more than anything else, so it is worth getting specific.
Distance Sets The Price, But Not The Way You Might Expect
On routes of roughly 1,000 miles, think Chicago to Dallas or New York to Atlanta, the typical price in our data was $870 to $1,096, with a median of about $972. That works out to just under a dollar a mile.
Double the distance and the price does not double. On routes of about 2,000 miles, the typical range was $1,109 to $1,379, with a median around $1,224, or roughly 61 cents a mile. Long hauls are cheaper per mile because the truck spends its time driving instead of loading and unloading. Short regional moves are the most expensive per mile for the same reason.
For a business owner, that has a practical consequence. If you are deciding between two vehicles for sale, one 300 miles away and one 1,500 miles away, the shipping gap between them is usually smaller than you would guess.
What Pushes The Number Up or Down
Once you know the distance, five things decide where in the range you land.
Vehicle size. A full-size pickup or cargo van takes more deck space and weight than a sedan, and it is priced that way.
Trailer type. Open trailers, the two-deck rigs you see delivering to dealerships, are the standard. Enclosed trailers protect against weather and road debris, and in our data they averaged $1,813 against $1,175 for open. Unless the vehicle is a classic or high-value, open is the sensible choice.
Running condition. A vehicle that does not run needs a winch and extra loading time, which added about $300 on average.
The route. Busy interstate corridors price tighter than remote towns, because more trucks compete for the load.
Timing. Mid-fall and mid-winter are generally the calmer months. The January snowbird rush into Florida and the summer relocation season push prices up on the busiest lanes.
Ship It Or Drive It: Run The Numbers Like a Business
Many owners assume driving is free. It is not. The IRS standard mileage rate is 70 cents a mile, which is the government’s own estimate of what it costs to operate a vehicle once fuel, wear, maintenance, and depreciation are counted. On a 2,000-mile trip, that is $1,400 in vehicle cost alone.
Add hotels and meals for three or four days on the road, then add the most expensive item for any business owner, which is three or four days of your own time not spent on clients. Against a typical shipping price of around $1,224 for the same distance, driving rarely wins on long trips. Under 500 miles or so, driving is usually cheaper. The break-even for most people lands somewhere between 500 and 800 miles.
How To Build a Budget That Holds
The most reliable way to plan is to start from real prices on your specific route rather than a national average. You can estimate your car shipping cost for any pair of states with our free calculator, which shows the range customers actually paid on that lane, including the low end and the high end. Then build the budget around the middle of that range, not the bottom.
A few habits make the number stick.
Book two to seven days ahead. That is enough time to match the vehicle with the right truck without paying for a rush. Same-day bookings are possible on busy routes but cost more.
Give a pickup window, not a pickup hour. A flexible window of a few days lets the vehicle ride on a truck that is already heading your way.
Be wary of the lowest quote. In our data, the cheapest quarter of customers paid about $662 on a 500-mile trip, $870 at 1,000 miles, and $1,174 coast to coast. A quote well below those floors usually means no carrier will take the load at that price. The result is a pickup that keeps slipping and a price that climbs after you have committed.
Do not pay a large deposit up front. A reputable broker should not charge until a vetted carrier is actually assigned to your shipment.
Buying a Work Vehicle Out Of State
The same math applies when buying a vehicle. A used cargo van or pickup from another state may offer better value, even after adding the car shipping cost. Before agreeing to the deal, get an estimate for the exact route and add it to the purchase price. Ask the seller to confirm that the vehicle runs, since non-running vehicles cost more to load. Arrange for someone you trust to sign the inspection report at pickup.
The Bottom Line
For most long-distance moves, shipping a car typically costs $925 to $1,380 on an open trailer, and it is often cheaper than driving once your time is counted. Treat it like any other business expense. Get real numbers for your route, budget for the middle of the range, and choose a provider who does not ask for money before your shipment has a truck.
Multiple states are working to legalize backyard solar setups.
After Utah, nine other states have legalized it, or are working on bills for plug-in solar.
24 other states are stalled but already working on legislation.
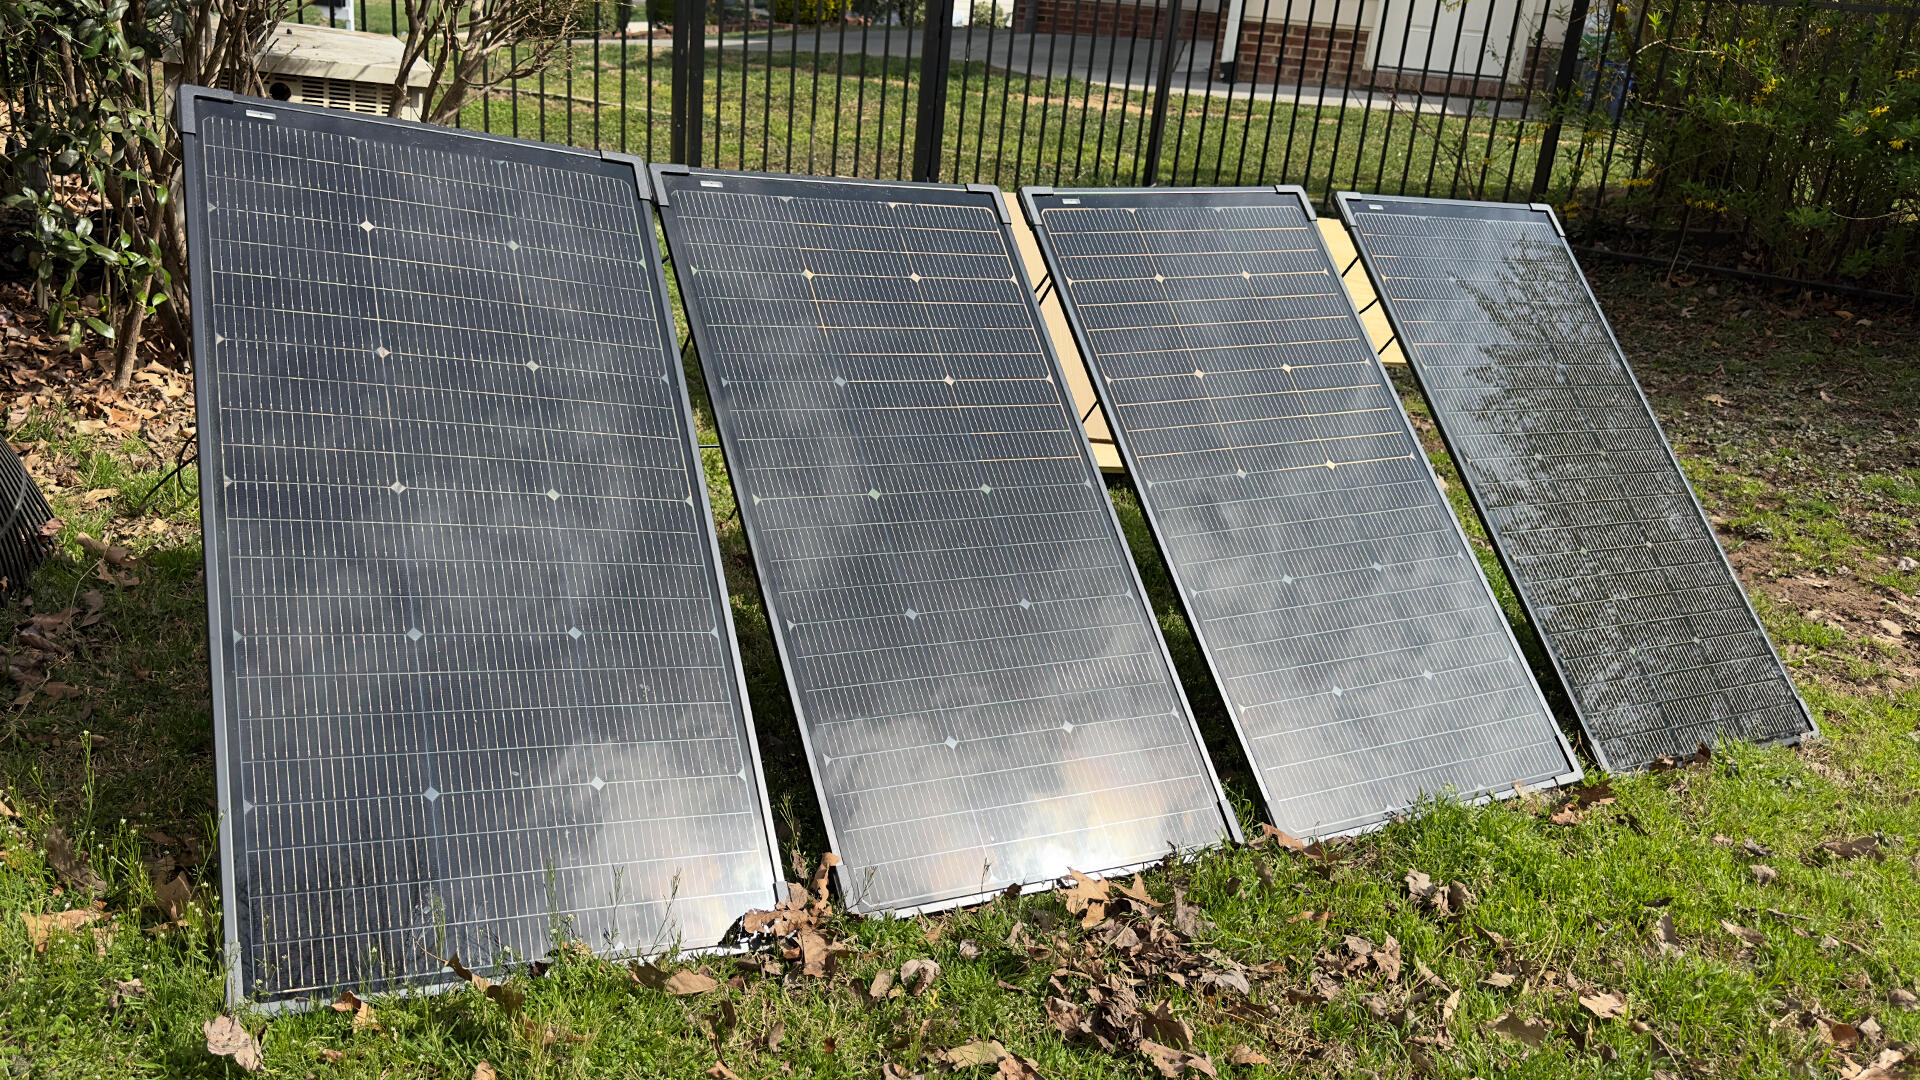
Plug-in solar systems are easy to set up and can save consumers money on their power bills, but they’re still illegal in many states. Utah was the first to legalize backyard and plug-in solar, but other states have since caught on, and more are working on their own pathway to legalization.
As we’ve covered before, these plug-in solar setups (also commonly called “backyard solar”) are plug-and-play systems consisting of one or more solar panels, an inverter, and a battery. The system connects to a home’s standard 120-volt outlet, automatically routing solar-generated electricity from the battery to the nearest running appliance.
What states have legalized plug-in solar?
Ten states have already legalized backyard and plug-in solar systems, so residents there can already purchase and install systems like the EcoFlow Stream in their homes. Here’s the current status of the states that have already successfully passed legislation, legalizing such devices for consumer use.
State
Legislation status
Utah
House bill 340: Effective May 2025
Virginia
House bill 395, Senate bill 250: Effective January 1, 2027
Colorado
House bill 26-1007: Effective August 12, 2026
Vermont
House bill 598, Senate bill 202: Effective July 1, 2026
New Hampshire
Senate bill 540: Effective January 1, 2027
Maine
Legislative document 1730: Effective July 29, 2026
What states are working to legalize plug-in solar?
About two dozen states are still in the process of legalizing plug-in solar. Some bills have stalled until the next legislative session reconvenes in 2027, while others are going through committee hearings.
Balcony solar bills H.5175 and S3143 are advancing in Massachusetts, and the SUNNY Act is pending governor approval in New York. Bills in other states like Michigan, Ohio, Pennsylvania, Rhode Island, South Carolina, and Washington, DC have reached committee hearings.
Most states have stalled plug-in solar bills until the next legislative session in 2027, including Alaska, Arizona, Delaware, Hawaii, Idaho, Illinois, Indiana, Iowa, Minnesota, Missouri, North Carolina, and Oklahoma.
Unfortunately, plug-in solar bills have failed in Georgia, New Mexico, Oregon, Washington, and Wyoming, so if you live in one of those states, these kinds of devices are technically illegal to operate. This doesn’t mean that it won’t eventually clear the legislative slate in these states, but lawmakers will need to file a new bill to reintroduce them after making necessary revisions.
Can I set up my solar panels if my state legalizes plug-in solar?
Whether you can immediately set up your balcony solar panels or not after the systems are legalized in your state will depend on your home situation.
Generally speaking, the bills in question focus on preventing utility companies from blocking plug-in solar projects. These bills can’t preempt bans on these systems by landlords or HOAs, though supplementary bills have been introduced in some states to include protections for HOAs and landlords.
Why is plug-in solar illegal?
Plug-in solar is illegal because the electrical systems in traditional American homes aren’t designed to receive power from a standard wall outlet. Rooftop solar systems are professionally installed and designed so the energy harvested by the panels flows through a circuit breaker and into your outlets. Plug-in solar, in turn, introduces electricity directly into an outlet, bypassing the electrical panel.
In a plug-in solar setup, nearby appliances draw energy supplied by the breaker and the solar inverter, but the wiring could carry more current than the breaker alone would allow before it trips. But it’s not solely about safety.
Installing your own solar panels means less reliance on local utilities. These companies are the biggest regulatory obstacle for plug-in or balcony solar setups. Their rules and regulations on solar energy are designed for rooftop panels, not plug-and-play systems, so legislation should push utility companies to change that.
There’s also the elephant in the room: utilities would make less money off their services if plug-in solar becomes widely popular. When consumers purchase less electricity, they contribute less to grid costs.
Maria Diaz is a staff writer with a passion for home automation, smart home devices, and tablets. With a background in graphic design, photography, and filmmaking, she has a bachelor’s in Mass Communication and experience in journalism and film.
See full bio
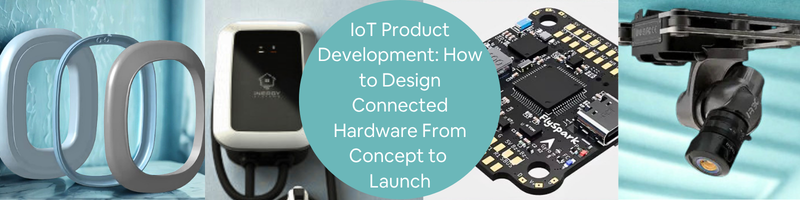
IoT product development refers to the process of building and engineering a connected physical device. This means piecing together hardware, firmware, wireless connectivity, and a cloud layer as one product. The development process of this is typically concept, PCB design services, firmware, wireless certification, and validation before mass production. Each stage matters and has a significant effect on the others; it is encouraged that they be developed in coordination rather than in isolation. Most first-timers underestimate the complexity of certification requirements, testing cycles, and timelines, not fully aware of how these could impact cost and launch timelines. To help in starting the IoT product development, Cad Crowd can help in connecting founders with vetted mechanical, electrical, and firmware engineers to make the whole process manageable and efficient.
🚀 Table of contents
What makes IoT product development different from regular hardware design?
It’s four disciplines running in parallel, not in sequence
IoT product development services is different from other regular hardware design since it runs on four engineering disciplines, working in parallel and not one after another. Disciplines include electrical engineering, firmware, mechanical design, and cloud systems. Everything has to be coordinated and continuously aligned.
It is critical to be well-coordinated, as a change could easily break another. For instance, an antenna that is poorly placed inside an enclosure could block the signal. This can be avoided when the four disciplines are working in harmony with each other. Working together as one avoids conflicts and clashes. This constant coordination can help in making a strong design.
The “product” doesn’t end at manufacturing
Compared with other traditional hardware, an IoT product is not really “finished” once it is manufactured and shipped. A physical device would just mean one part of the system. The mobile app, cloud backends, and over-the-air (OTA) updates are all parts of an actual product. Simply put, this means that the product continues to evolve and update even after a successful launch.
The update could be through software updates, new features, and other performance improvements. For connected devices, the version users buy on day one is just a starting point, not really the final version. IoT products have functionality that is continuously improving instead of being fixed at one point in manufacturing.
Selecting between a microcontroller (MCU) or system-on-chip (SoC) is one of the most critical and important decisions in product design development services. This is because it can actually define the device or product’s overall capabilities and limits. This will determine how much processing power, memory, and built-in features, like WiFi or Bluetooth, the device or product can support.
An applicable example is for developing a simple temperature sensor. It may only need a low-power 8-bit microcontroller with no wireless component. For a smart camera, a more powerful SoC can be used to handle the video processing and connectivity. The decision can affect cost, performance, and battery life, sometimes even product features.
Sensor selection drives accuracy and cost together
Sensor selection can have an impact on both accuracy and cost of an IoT product. There are different sensors such as temperature, motion, or light. They can vary in precision, power consumption, and, of course, pricing. Even if each of them serves the same basic function, it would still have a great impact on the device or product.
An application for this is a consumer air-quality monitor. It does not need laboratory-grade sensors to be useful, while industrial systems may require higher accuracy and stability. Simply speaking, it is important to know when to design more accurate and stabilized sensors. Choosing a more accurate sensor for unnecessary applications would just waste resources.
PCB design turns components into a working circuit
A PCB design is where all the selected components are turned into a working electronic system on a physical board. This PCB can connect and route power and data signals among the components and parts, including the MCU, sensors, and wireless modules like Bluetooth and WiFi.
It is important that the PCB design is done well, as it could still impact performance. It could only work if the PCB design is not poorly designed, as good materials wouldn’t be enough. Choosing a freelance PCB design experts is one of the most sensitive parts in IoT development since small mistakes could lead to non-functional devices.
Power budgeting decides whether your product survives on a battery
Power budgeting refers to determining and identifying whether an IoT product can be usable and functional in a real-life setting. This is especially applicable for battery-powered devices. Every component, like the MCU and sensors, consumes energy, and its total power draw can decide how long the device can run before it needs to be recharged or have its batteries replaced.
Most of the time, radio modules are the ones that have the biggest power consumption. Typically, devices that wake up briefly to send data and sleep right after would have a longer running time than a device that stays constantly connected. The balance between performance and energy lies in better planning in early product development.
Prototyping validates the design before tooling starts
Prototyping design servicesrefers to the stage wherein an IoT design is tested in real conditions and settings before investing in expensive manufacturing. Here, engineers use breadboards and development boards initially because it is quick and low-cost. This is where the concepts are tested to see if it’s feasible or possible in real life,
Once the concept is proven to work, the design would progress to a custom PCB. This phase is critical and important since it can expose possible issues like power instability, signal interference, or part mismatches. Identifying these issues is helpful to spot before production begins to avoid rework. Skipping a prototype can cause more costly problems later on.
What firmware architecture does an IoT device need?
Bare-metal firmware is known as the simplest type of IoT software architecture design. This is where the code runs directly on the hardware without an operating system in between. This kind of approach is more lightweight, quick, and efficient. It is ideal for simple devices that perform single, repeating tasks.
Since there’s no operating system managing tasks, the performance is predictable, and the resource usage is actually minimal. This is helpful in low-power and low-cost products. This simplicity can be difficult to handle when the device becomes complex; it could be hard to handle multiple tasks and manage storage.
A real-time operating system (RTOS) is typically used for IoT devices that need to perform multiple tasks simultaneously without causing conflicts or delays. An RTOS can schedule tasks so the device can just collect sensor data, store it, and still maintain wireless communication simultaneously. All this without a single function blocking the other one.
This actually makes RTOS-based firmware essential and important for most connected products that go beyond simple sensor and transmit setup. RTOS is a great help in improving reliability, responsiveness, and timing accuracy. It’s more helpful for systems where delays can cause errors and data loss. The most common RTOS options include Free RTOS and Zephyr; they are used for resource-limited IoT hardware.
Over-the-air update architecture has to be designed in from day one
Over-the-air (OTA) update architecture is one of the most critical parts of IoT design firmware. It has to be planned from the very beginning of the development process. OTA allows product design manufacturers to remotely update a device even after it leaves the manufacturing facility and is released. It can help enable bug fixes, performance improvements, and security patches without any physical recalls.
Adding an OTA late in the development process would just be challenging since the model or device may not be able to handle the memory it needs to fully function. It is important to plan out a well-designed system. This includes a dual-partition setup wherein one firmware version runs while the other stores the update. This serves as a safety net for the product to revert in case the update failed.
Firmware testing needs to simulate real-world conditions
It would be ideal for firmware testing to not just be done in controlled labs but rather in real-world environments, experiencing actual and real conditions and settings. It has to be simulated in real-world usage scenarios. Bench testing could be useful for checking basic functionality, but it could fail in actual settings. This could include weak signals, network drops, and low battery conditions.
A field test can help uncover hidden problems by exposing the device in a way that users may face on a daily basis. This makes it easier to spot and identify, allowing for an early fix before launching it. Including and adding field testing early in the product development process and timeline can be a more effective approach rather than treating it as the last process.
Which wireless connectivity should you choose: BLE, Wi-Fi, Cellular, or LoRa?
Bluetooth Low Energy suits short-range, battery-powered devices
When an IoT device does not necessarily need long-range connectivity, Bluetooth Low Energy (BLE) can be a suitable choice. It is mostly used for battery-operated devices, including wearables and other smart devices and home accessories. It can actually operate and function within a 100-meter range. It is designed to have little power, making it ideal to run for a longer period of time.
BLE is actually not designed for direct internet connectivity, as it can’t send data to the cloud on its own. It simply relies on a smartphone or a hub to forward data to the internet. BLE is considered a practical and efficient choice for consumer IoT products where battery life and longer-range connectivity are prioritized.
Wi-Fi delivers speed at the cost of battery life
One of the most commonly used connectivity options for IoT devices is WiFi. It is used for smart cameras, doorbells, and home displays. It does not necessarily need a separate hub or gateway. It can conveniently connect the device directly to the internet.
The downside of having this connectivity, however, is that it can consume significant power. This makes it unsuitable for long-term and battery-powered wearables or products. It usually has high energy demand, so the devices are mostly plugged into a constant power supply. The tradeoff among speed, connectivity, and power consumption is the key factor in deciding if WiFi design services is suitable for the product.
Cellular (NB-IoT/LTE-M) works anywhere there’s a tower, at a recurring cost
Cellular connectivity, like NB-IoT and LTE-M, can allow IoT devices to connect to the internet conveniently anywhere there is mobile network coverage. This can be done without the need for WiFi or a local gateway. This is more suitable and useful for applications like asset trackers and remote industrial equipment.
LTE-M is specifically designed for IoT use since it uses simpler hardware than the standard/ it is optimized for lower consumption. The tradeoff for this convenience is the cost. Each device would require a SIM card and a recurring data subscription.
LoRa wins on range and battery life for infrequent data
LoRa is focused and designed for IoT devices that would need long-range communication but with very low power consumption. It can transmit over distances of up to ten to fifteen kilometers in rural areas and one to five kilometers in urban areas. It is a more ideal setting for remote monitoring applications and devices.
The downside is that it can’t handle high-speed or high-volume data transfers, like video or streaming. It is a more suitable choice for periodic updates like environmental sensors and agricultural monitoring systems.
The right choice depends on data volume, range, and power budget together
Selecting the right choice is not usually based on preferences but depends on balancing the needs and intent of the design. Knowing which to prioritize from data needs, range, speed, and power consumption can lead to the ideal and suitable option. Each technology serves a function and purpose. BLE is best for short-range and low-power connections. WiFi works best for high-speed internal access but can consume a significant amount of energy. Cellular can offer a wide range of coverage but with recurring costs. LoRa covers longer range and minimal power use, but has low data rates.
Choosing the right connectivity is just a part of the design process; the antenna and PB design layout still needs to be engineered altogether. Cad Crowd can definitely assist you with vetted CAD professionals to partner with. Check it out now here.
How do enclosure and antenna design work together?
The enclosure material affects wireless performance
The physical housing or metal housing can block wireless performance, which is why both enclosure and antenna design are closely linked to IoT products. There are materials that can block or weaken radio frequency (RF) signals. For those reasons, most devices place their antennas near plastic sections, or they can just use plastic enclosures altogether.
It is recommended and ideal to come up with a design that considers both industrial and electrical engineering experts. Doing so can help in strengthening WiFi, Bluetooth, or cellular range. When poorly designed, the connectivity could be reduced and weakened. These are common issues faced in IoT development.
Antenna placement needs testing in the actual enclosure, not just on a bench
To know if the antenna can serve as intended, it should be tested inside the final product enclosure. It is possible that the antenna can work well on a lab bench but wouldn’t be the same once placed in a housing or near components like a battery, metal shield, or other electronics that could interfere with wireless signals. Testing in an actual enclosure can help in identifying connectivity issues before production starts. This can help them fix it early before proceeding to a more committed phase. This lessens the possibility of costly redesign.
Thermal design keeps electronics from overheating inside a sealed case
There are instances wherein an IoT device may overheat inside a sealed case. To keep it cool and reliable, a thermal design has to be planned in a way that it can manage the feat during an operation. It helps in handling the heat generated by components like processors and wireless radios.
Unmanaged heat can reduce the device or product’s performance and lifespan. This may eventually cause failures. To resolve this, engineers often use thermal pads or other heat-conductive materials to dissipate heat. This ensures that the product’s durability is still maintained and not compromised.
Mechanical tolerances matter more once electronics are involved
Mechanical tolerances matter more when there’s an electronic inside the product. This is significant and critical since every component has to fit and function precisely during its assembly. There are features like charging ports, buttons, battery compartments, and other mounting parts that need to be accurate and manufactured consistently.
Small tolerance errors or misaligned parts can cause poor performance and feel. Freelance mechanical engineers can actually identify and correct tolerance issues during the design stage. They can help in addressing tolerancing and manufacturability issues early to reduce production costs. This can overall improve the product quality and avoid further possibilities of redesigning that may be costly.
What does the cloud and app layer involve?
The cloud layer stores and processes data the device sends
A cloud layer is defined as the online system that receives, stores, and processes data sent by an IoT device. This can enable features like real-time monitoring, data history, notifications, and other remote device management. There are managed platforms like AWS IoT, Azure IoT Hub, or Google Cloud services to help in backend development and improve the overall scalability. While it was developed along with hardware, it is still important to plan the cloud infrastructure early on since it has an impact on how the device communicates.
How do you build security into an IoT product from day one?
Security-by-design starts with the firmware, not a bolt-on feature
Security should already be part of the design or architectural design services during initial stages instead of just adding it before it’s launched. In the first stages of firmware development, the engineering team should be able to plan for features like secure authentication and protected data storage. Adding those layers of security and protection can help in reducing possible complexities later. This way, the design team can smoothly create a device that is a lot safer and more reliable to counter cyber threats.
Outdated firmware is the leading cause of IoT breaches
A reliable over-the-air (OTA) update system is considered essential in modern IoT devices and products. It helps the manufacturer to remotely fix security issues and can aid in improving its performance and releasing updates without physical recalls. This is important because there could be a possibility of cyberattacks if the firmware was outdated or never patched. An updated firmware helps in reducing the possibility of vulnerabilities. It helps create an additional layer of security, reducing user and device risk.
What wireless certifications does your IoT product need before launch?
Wireless certifications are required before selling IoT devices
Before an IoT device or project can be released to the market, it has to pass the official safety and compliance regulations. In the United States, devices that use wireless features like WiFi, Bluetooth, or cellular should be able to pass FCC certifications. Meanwhile, in the European Union, CE/RED certification is needed. These certifications are needed to ensure that the device is safe to use and does not interfere with other electrical parts.
Costs and timelines could vary depending on the device complexity, lab, and region; the figures reflect ranges reported across compliance testing industry guides.
What are the stages from concept to mass production?
EVT (Engineering Validation Test)
This stage answers the objective “Does it work at all?” This refers to piecing things together, including early PCB, basic firmware, and other rough mechanical parts. This stage’s goal is to prove that the concept is feasible and actually functions. In this stage, the freelance engineers can test issues early; finding early failures means fixing them early. It helps in addressing it early to prevent costly redesign work. There are some teams that do pre-compliance checks to see if it can pass certifications.
DVT (Design Validation Test)
This stage answers the objective “Does it look and behave like the final product?” This focuses more on the transitioning of products to become real. In this phase, the PCB is defined, and the firmware is more stable. Its housing and enclosure are also close to final. The materials used in this test are close to those that are used for production. The goal of this stage is to ensure that the product does not just work or function well but also meets safety, performance, and user expectations. Bugs can be fixed early to ensure that there won’t be a possibility of expensive reworks.
This stage answers the objective “Who actually builds the product?”For every IoT product or device, a small and specialized team is needed to complete it. A specialized electrical engineer should design the PCB and choose necessary components suited to the task. This is critical since it directly impacts cost, power use, and performance. A firmware developer is needed to build the embedded software that helps run and operate the device, critical for reliability in real-world applications. An industrial designer is needed to ensure the product looks and feels good. A mechanical engineer is needed to turn the concept and design into a manufacturable enclosure that can be produced in large volumes.
An ideal approach, especially for startups, is not to hire a full-time designer but to hire specialized ones for certain stages. This is a cost-efficient approach that’s flexible enough and practical. Feeling stuck in the design concept? Blank canvas? Fill the gap and start your design concept, from concept to PCB design: Browse Cad Crowd’s vetted network of specialized engineers and professional CAD designers and get a confidential project estimate.
How long does IoT product development take from concept to launch?
Most IoT products would take about 9 to 18 months to build. This covers full phases and stages from concept design to building prototypes, as well as preparation for manufacturing. The timeline really depends on the device’s complexity.
How much does it cost to develop an IoT product?
The costs in developing IoT products depend on the complexity of the device. There are products that are more affordable, like basic sensors or pre-certified wireless modules. The cost can significantly increase based on how extensive the certification and tooling are.
What’s the biggest mistake first-time IoT teams make?
Startups often underestimate just how costly certification is and how long it takes to be approved. Most of the time, the startups focus more on designing and building the device first, then later on realize how important it is to consider certification timeline and costs. It is important to finalize key decisions to know the significant certifications and testing needed.
Conclusion
Developing an IoT device or product involves integrating hardware, firmware, connectivity, and certification into one system. It is important to note that each task is not to be handled separately but pieced together in parallel coordination. It is important for the team to plan well to ensure a successful launch. Certification and testing requirements have to be planned out early as well to avoid last-minute fixes. Knowing this reduces surprises and costly redesigns. Specialists are needed at every stage to ensure proper alignment. To help in getting the right specialist for the project stage you’re currently in, browse Cad Crowd and connect with vetted specialists tailored to your needs.
Cad Crowd connects businesses with experienced electrical engineers, firmware developers, mechanical engineers, and CAD professionals who specialize in IoT product development, PCB design, embedded systems, enclosure design, wireless connectivity, prototyping, and manufacturing preparation. Whether you’re developing a simple connected sensor or a more complex smart device, our vetted professionals can help coordinate the different stages of development and turn your concept into a functional, production-ready IoT product. Contact Cad Crowd today for a free quote and find the right engineering expertise to move your IoT project from concept to launch with confidence.
MacKenzie Brown is the founder and CEO of Cad Crowd. With over 18 years of experience in launching and scaling platforms specializing in CAD services, product design, manufacturing, hardware, and software development, MacKenzie is a recognized authority in the engineering industry. Under his leadership, Cad Crowd serves esteemed clients like NASA, JPL, the U.S. Navy, and Fortune 500 companies, empowering innovators with access to high-quality design and engineering talent.
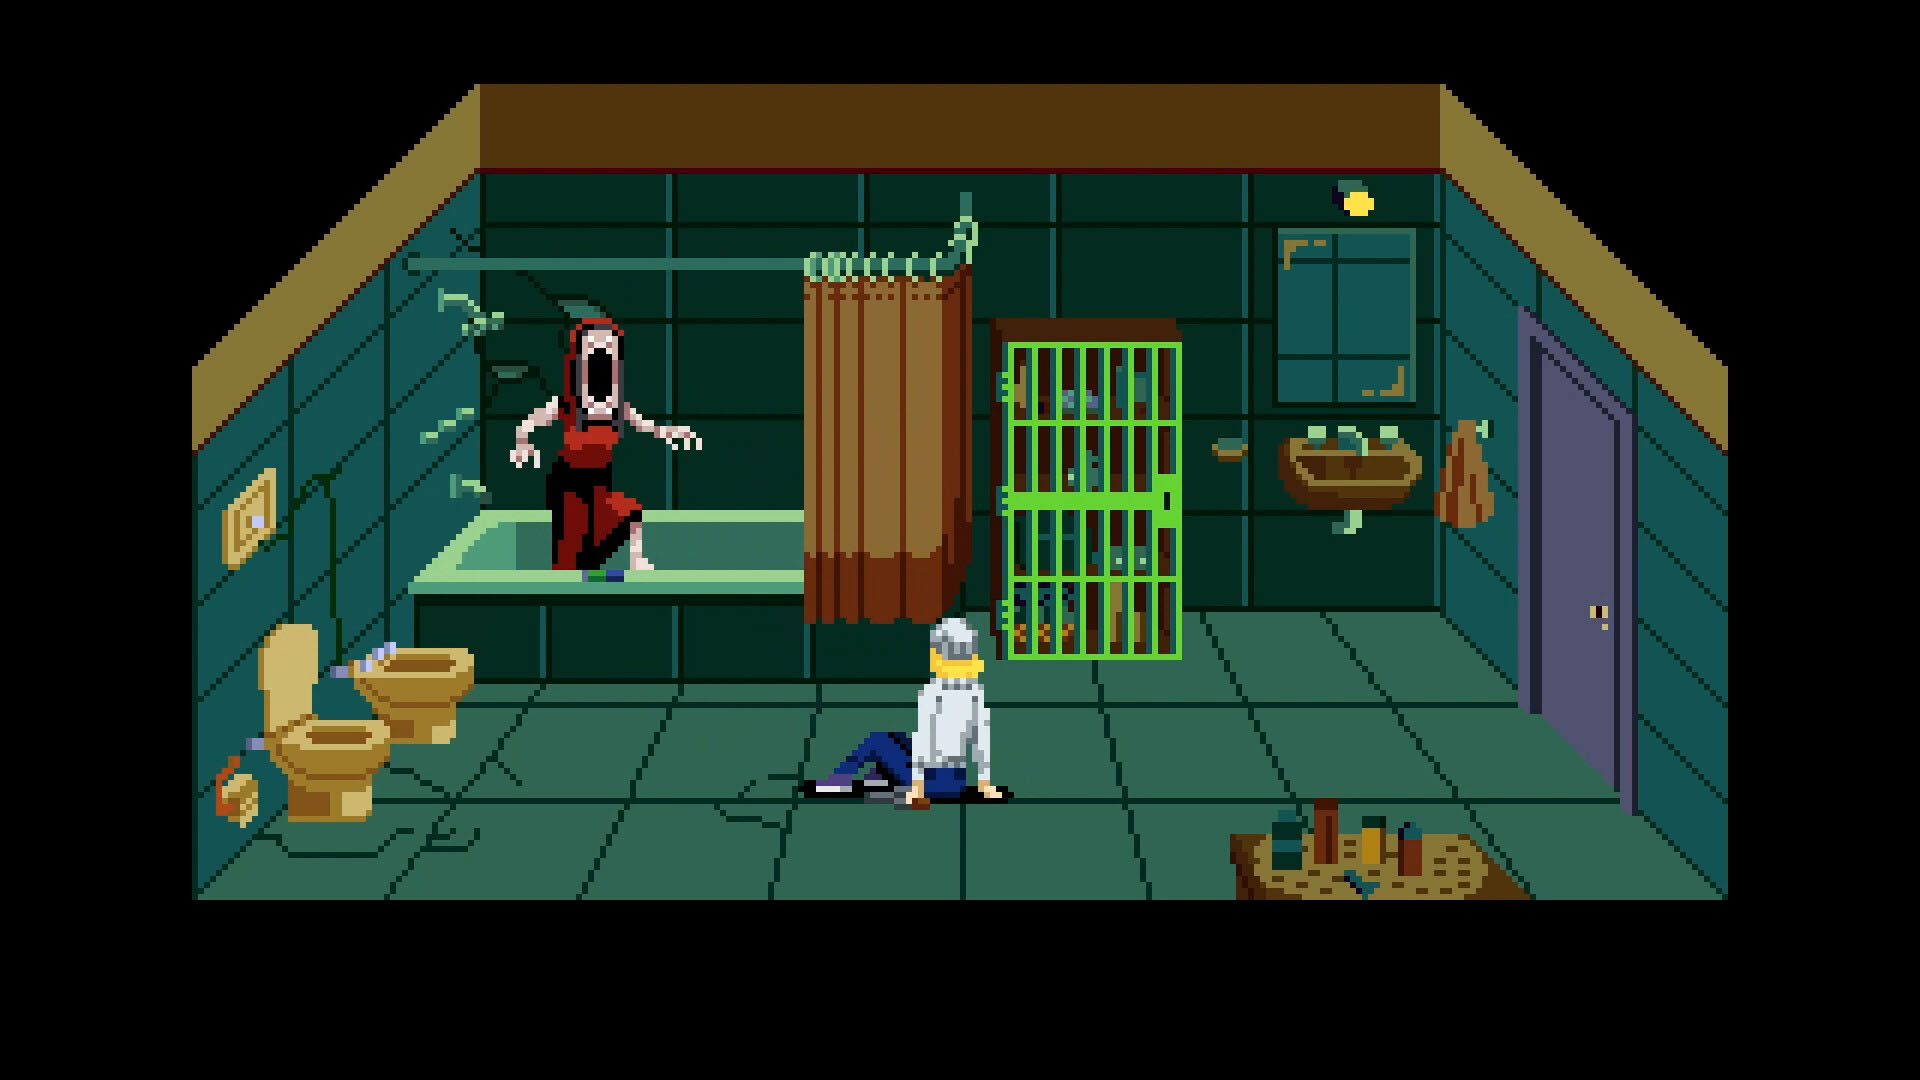
As I’m typing this, we’re in the final hellish days before the October 16 launch of TENEBRIS SOMNIA – the retro survival horror game with live-action cutscenes – coming at you from Andrés Borghi (The Black Heart) Saibot Studios (Hellbound), and published by New Blood Interactive. (FAITH: The Unholy Trinity, DUSK, Blood West).
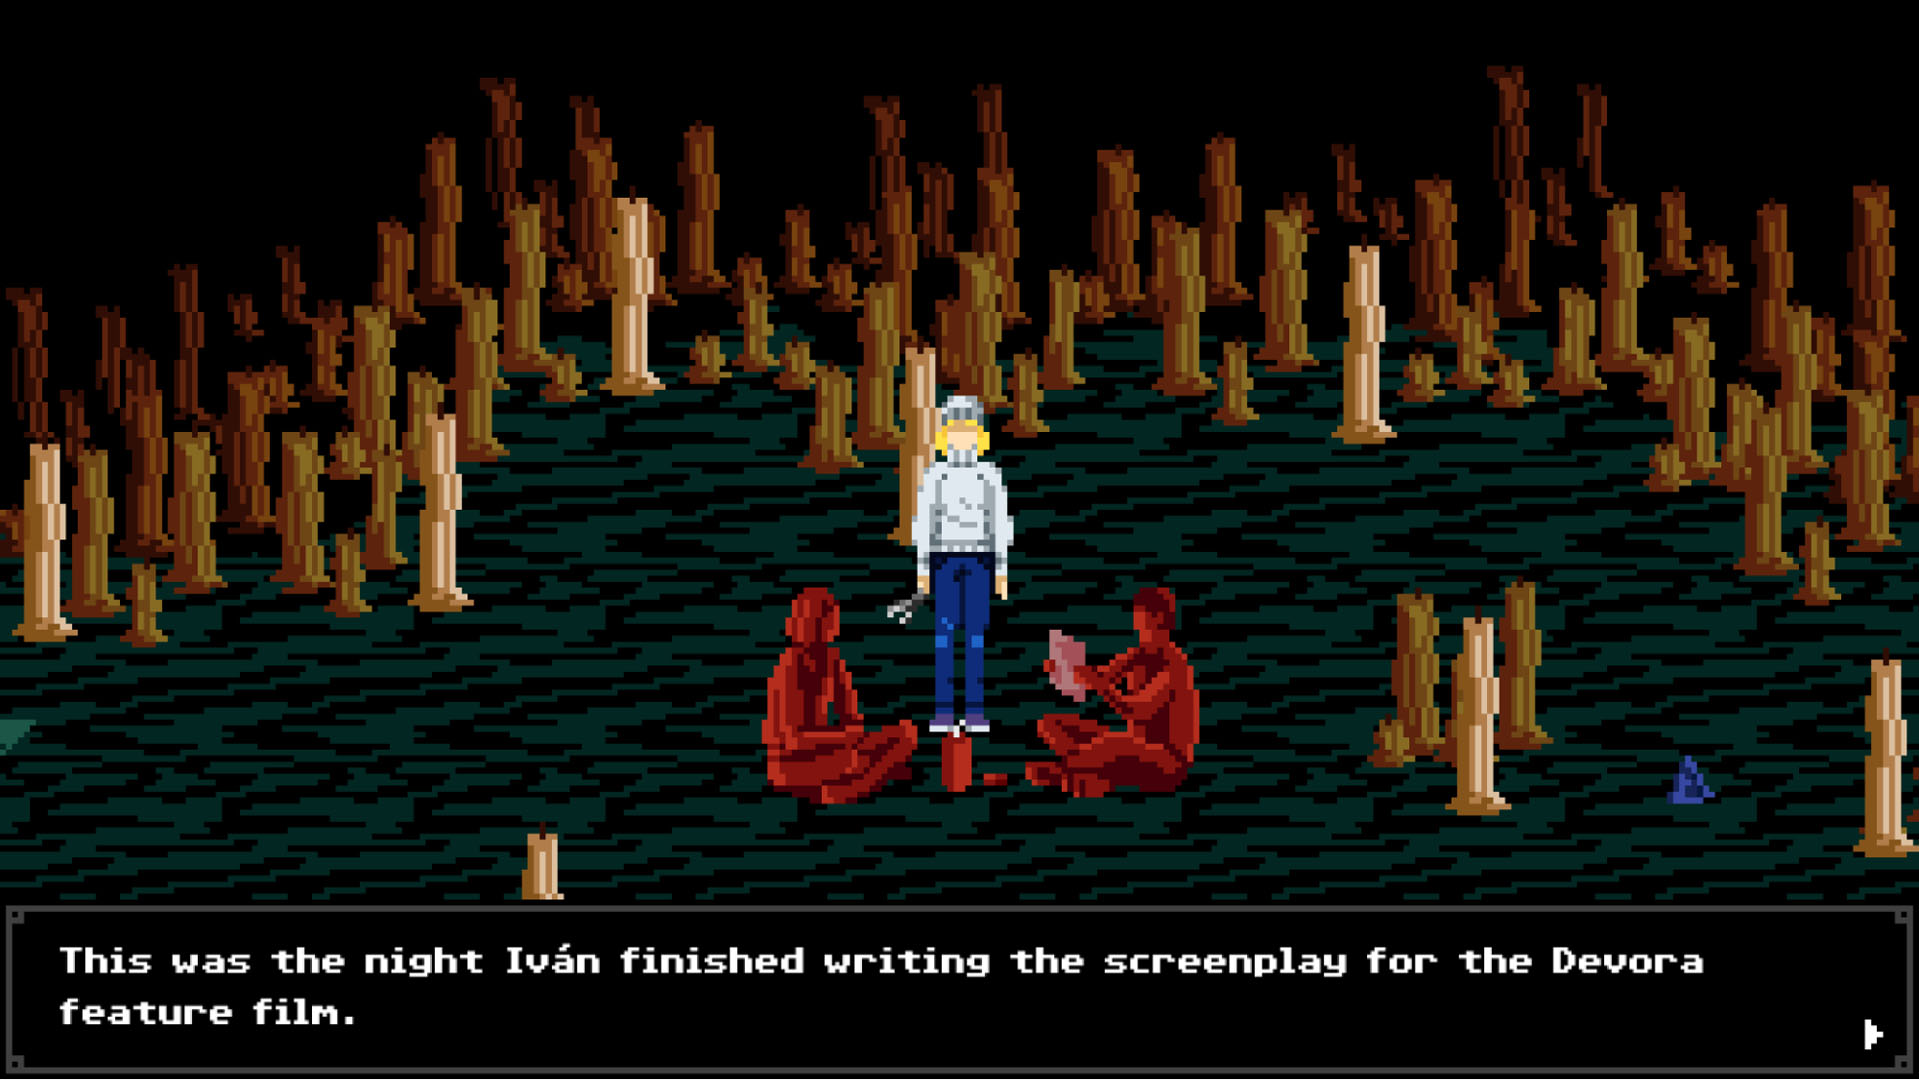
In Tenebris Somnia you play as Julia, a young woman who is having nightmares about her ex-boyfriend being torn apart by horrible monsters. Hoping to find some peace, she goes to his apartment to check on him. What she discovers is a world of horror that descends beyond her darkest dreams. What if the nightmares are real…?
One night while filmmaker and indie game developer Andrés Borghi was streaming our previous horror game FAITH: The Unholy Trinity, he got the idea to make a pixel horror game of his own with a sinister twist: the cutscenes would be live action, with real actors in real locations and real spooky special effects.
So Andrés and Saibot Studios lead Tobías Rusjan got working on a demo. Then they pitched the full game to New Blood, the only studio crazy enough to give a horror filmmaker the budget to make a survival horror game.
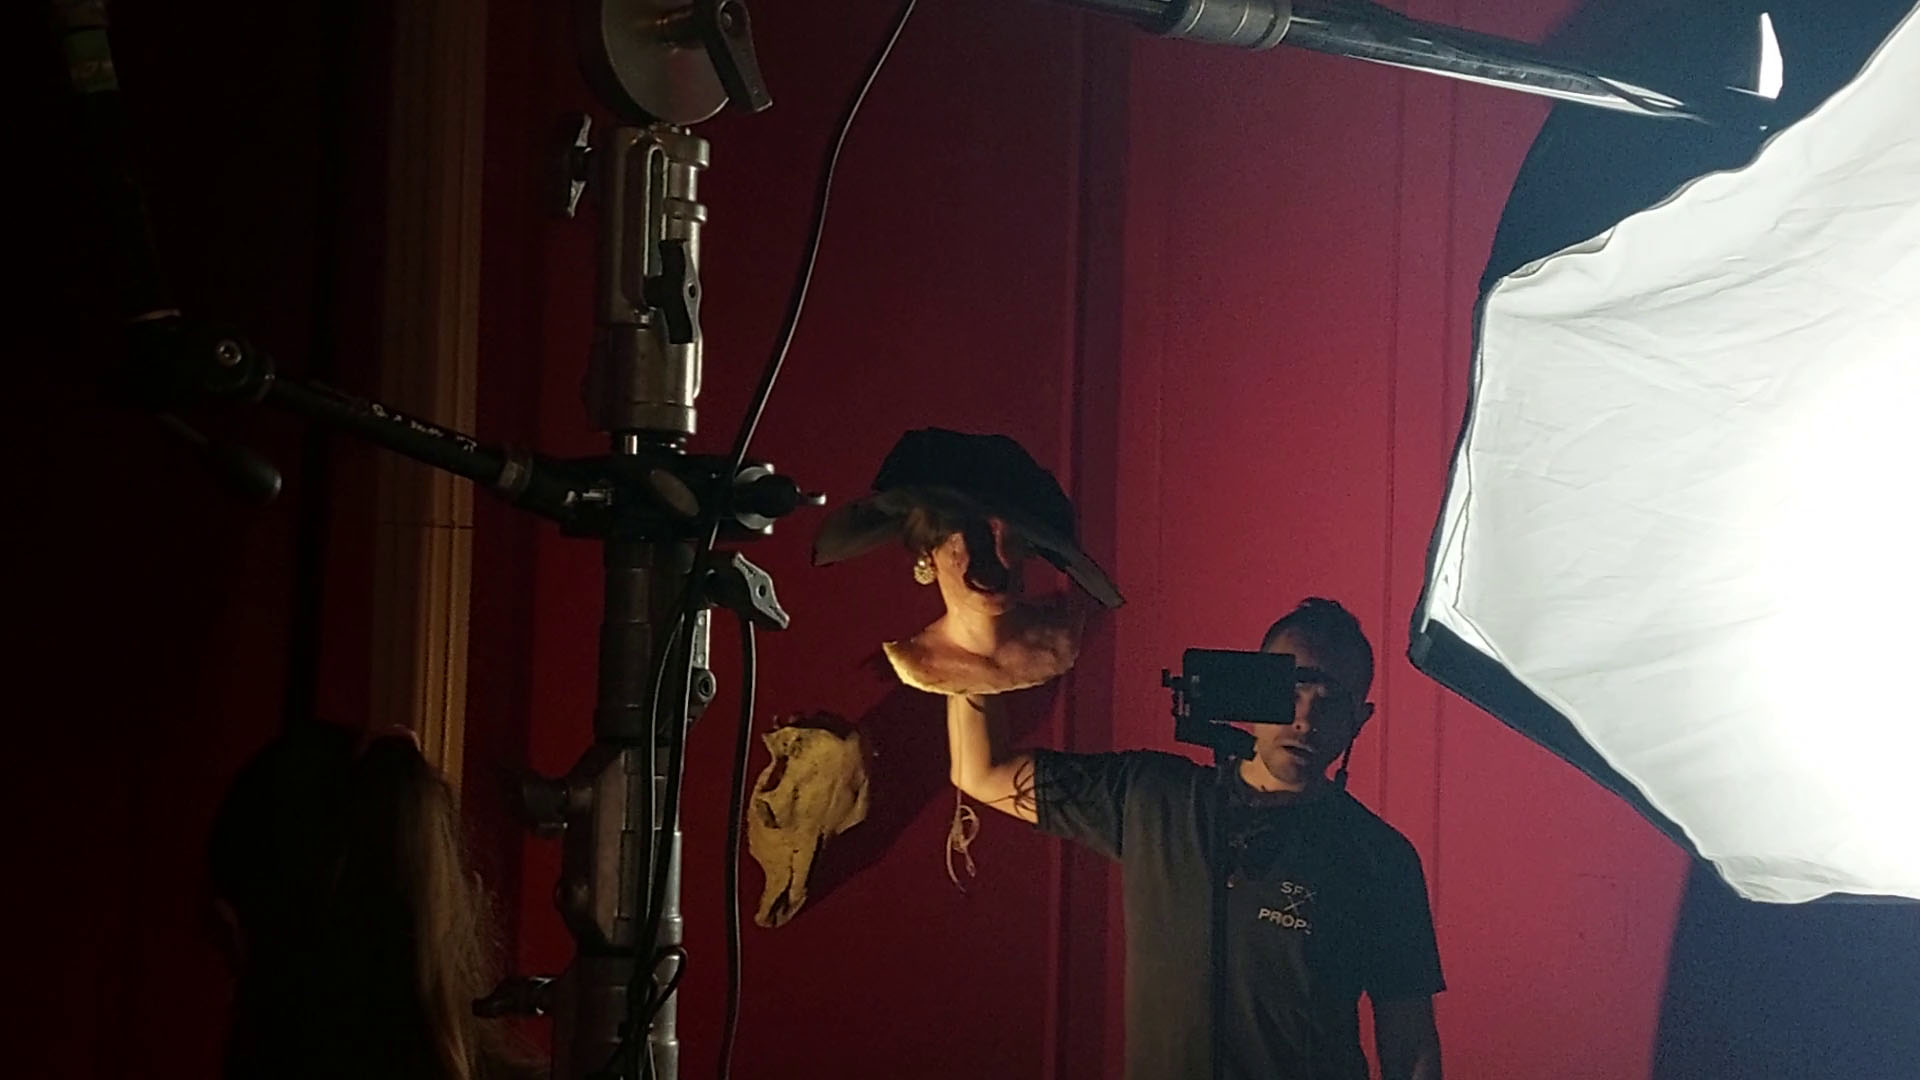
And that’s just what we did! Shortly after inking the publishing deal, we traveled to Buenos Aires to see Andrés and the film crew in action. What we saw amazed us – a legit professional camera and production crew, practical monster effects supervised by the award-winning Marcos Berta (“When Evil Lurks”), the performance by Argentine scream queen Clara Kovacic as the game’s protagonista – all meticulously storyboarded and directed by Andrés.
We witnessed the floor of a 17th-century Argentine cathedral splattered with fake blood. We watched a boom operator sprint 20 meters – and slide on his knees the final 2 meters – to get the perfect lighting effect under an actor at the perfect moment. They even guerilla-filmed several shots on the subway in the middle of the night (but don’t tell anyone). This wasn’t the low-budget FMV approach you remember from classic horror-adventure games. It was high-quality movie magic happening right in front of us. And absolutely no generative AI was used anywhere at any point in production.
That’s right, we did it the old-fashioned way. Good old human slop. Practical special effects and limited CGI. Human produced and directed, human-translated localization into English, Japanese, and Brazilian Portuguese. In-game art and animation drawn by hand, pixel by pixel, frame by frame. Audio and music by an actual human composer. Real-life living breathing human programmers. Even if we had used generative AI to take shortcuts (not that we even know how) we wouldn’t be able to call it a New Blood Interactive game with a clear conscience. Would it have saved us some money? Probably, but we would incur a much steeper cost – the trust of our fans who look to us for sincerity and authenticity. It’s just not our brand. Our players and, quite frankly, games in general, deserve better than gen AI. But enough about that.
Back to the game’s incredible cutscenes. These aren’t just cutscenes for cutscenes’ sake. In a lot of retro games, cutscenes were often a reward for making it to the end. In Tenebris Somnia, the cutscenes are directly linked to the gameplay – you never know when a cutscene will begin or end. This not only shocks the player – because now they’re encountering the horrors of the game in gruesome detail – but it keeps them in suspense at all times. You never know if the cutscene will drop you right into an enemy encounter or start right after one!
Merging pixel horror gameplay and live-action cinematics didn’t come without its challenges, however. Film sets needed to match the in-game locations, requiring careful planning and a blend of practical set-dressing and seamless CGI. Thankfully Andrés is also a talented film editor and VFX artist! To make the monster effects believable, silicon masks and prosthetics were molded out of performer’s faces and then fitted back on with makeup – a process that took several hours each time just like in a major Hollywood-style production. You can see behind-the-scenes videos on how this was done on our YouTube and Instagram. We hope to release a full making-of documentary after the game is launched!
After nearly 4 years of production we’re extremely proud of this monster we’ve created together. Tenebris Somnia offers a classic survival horror experience – scary monsters, limited resources, brutal boss fights, great sound design, puzzles to solve, and a terrifying plot to uncover. In the words of Andrés, “I hope players will come to see the cutscenes, and stay to experience the story”! It also stands alone as a genuinely scary horror game with a truly unique identity – take it from me – the guy that made FAITH!
Tenebris Somnia is available now on XBOX Series X|S and XBOX on PC. PC. Play it on console and PC at no additional cost with XBOX Play Anywhere.
Tenebris Somnia
New Blood Interactive
☆☆☆☆☆ 3
★★★★★
$24.99
$19.99
Tenebris Somnia is a 2D retro survival horror adventure game with live action cutscenes created by an award winning film crew from Argentina. Unveil the depths of a disturbing story by solving puzzles and fighting horrible creatures. …What if they aren’t just nightmares?