A growing gap is emerging between those embracing artificial intelligence and those sticking with the status quo.
The most forward-thinking agencies aren’t simply adding AI to existing services. They’re reimagining what an agency can be, developing AI-powered systems, expanding into consulting, and finding entirely new ways to deliver strategy, creative, technology, and operations.
Below, we explore several emerging agency models and services, along with how they could help your business move forward.
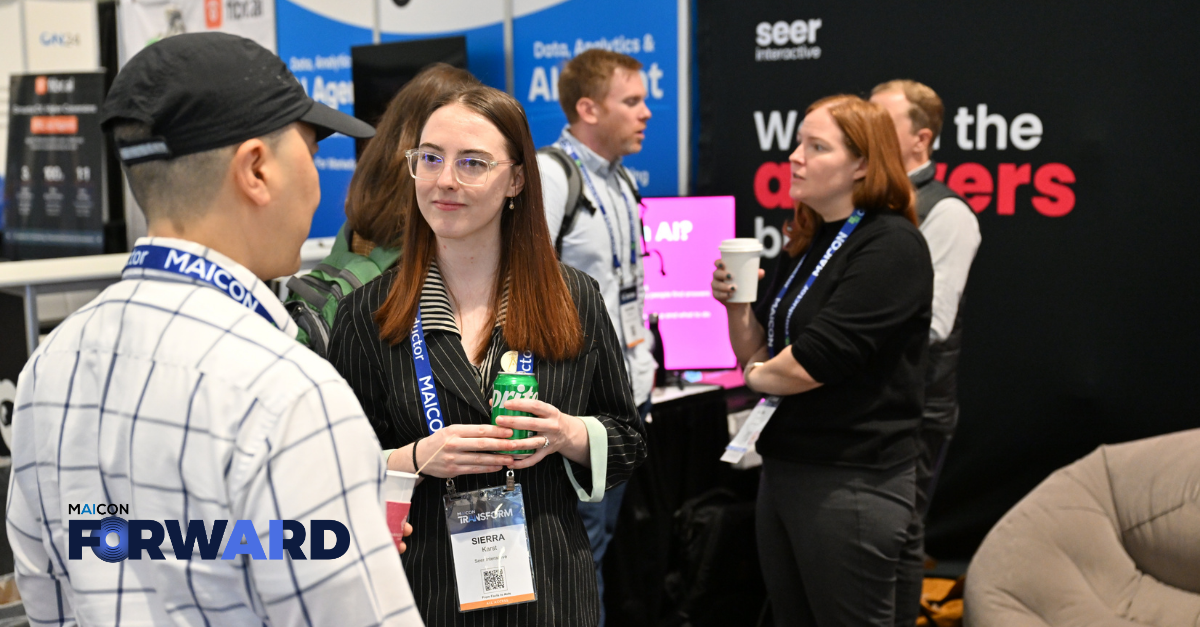
Disclaimer: We’re featuring these agencies because they’re all MAICON (Marketing AI Conference) sponsors. They represent some of the interesting ways AI is expanding what’s possible in marketing. If any of these interest you, they will be onsite at MAICON in the expo hall to talk to you about your work, challenges, and opportunities.
Meet the Agencies Redefining Marketing Services with AI
Algomarketing offers two service paths to People Transformation and/or Process Transformation. They do this by deploying senior practitioners within existing teams to study existing practices and workflows. From there, they co-build AI-native agents that can optimize and automate existing tasks. Beyond building AI enablers, Algomarketing offers coaching to help teams truly adapt and make the most of new tools at their disposal.
Demand Springis a B2B revenue marketing consultancy that helps organizations connect marketing strategy, technology, and execution to drive measurable growth. Its services span marketing strategy, revenue growth, marketing technology consulting, and AI advisory, including ABM, buyer journey optimization, SEO and AEO, marketing automation, and MarTech implementation. They help marketing teams move beyond AI experimentation by developing strategies, automating workflows, training teams, and establishing the governance needed to operationalize AI at scale.
EMMIE Collectiveprovides fractional Marketing Operations and Revenue Operations expertise, embedding experienced operators directly into client teams. Rather than functioning like a traditional agency, EMMIE provides flexible, on-demand support across platforms and functions including Marketo, HubSpot, Salesforce, Tableau, marketing automation, and data operations.
Fjorge is a digital development and technology partner that helps businesses build, launch, and maintain custom digital experiences. They offer website development, custom web applications, mobile apps, e-commerce, and ongoing technical support and maintenance. Rather than operating as a traditional marketing agency, Fjorge works behind the scenes as a development partner, often embedding with creative and marketing agencies to provide the technical expertise needed to bring complex digital ideas to life.
Intercept offers services including strategy, content and creative, digital media, sales enablement, and channel marketing, with a strong focus on enterprise tech and complex buying journeys. What sets Intercept apart is its AI-native delivery model: it uses proprietary AI tools and workflows to accelerate research, content production, personalization, campaign execution, and measurement while keeping strategy and creative human-led. ItsIntercept Labs also works with clients to test and develop new AI-driven marketing approaches.
Level Agencyuses AI orchestration to support brands with complex buying journeys and high-consideration purchases. Its services span traditional agency specialties, including digital marketing strategy, media planning, SEO and AI search, content creation, CRM and automation, and data science. The difference is in how those services are delivered. Level builds repeatable, AI-powered systems designed to connect strategy, execution, and data across the customer journey.
Seer Interactivehas been in the digital marketing space for 20+ years, working with some of the world’s biggest brands. Today, the company continues to offer a broad range of digital marketing services while expanding its work in AI research, development, and strategy. Seer builds AI into its services through internal experimentation within its very own AI Lab. That hands-on experience has also shaped SeerAdvance, its custom AI consulting offering.
Soarion Digitalis leaning into the importance of AI search, blending AI technology and human expertise to optimize client websites. They use a proven process to help clients become the go-to answer in AI search tools, starting with a new search foundation, building citation-driven content, earning third-party validation, and more. Through weekly updates, Soarion Digital grows AI referral traffic gradually.
Want to Explore What’s Next for AI and Marketing?
Join us at MAICON 2026, October 13–15 in Cleveland, Ohio, where marketing and business leaders will come together to explore what it takes to move AI from experimentation to real-world impact.
Every product in the market begins as a humble idea, perhaps a rough napkin sketch even, before it gets transformed into a fully developed commercial item everybody can buy. This very transformative journey the idea undergoes is a process we typically refer to as New Product Development (NPD). Some products start as completely new ideas, while others are more like modifications or improvements over existing designs. Either way, the transformation more or less follows the same path.
Product development is a pretty complex undertaking that involves a lot of back and forth between discovery, mistakes, refinements, and evaluations. None of those are out of the ordinary in an NPD project. You should, in fact, expect to bump into any of them at any point over the course of the development, which runs through multiple stages from market research and concept generation to manufacturing and commercialization. Outlined below is a simple step-by-step guide to a typical NPD to better understand what each stage entails.
Bringing a product from concept to commercialization often requires expertise across multiple engineering and design disciplines. Cad Crowd helps companies build that expertise by connecting them with a global network of vetted product development professionals, making it easier to move projects from early concepts to production with confidence.
Cad Crowd won’t go as far as claiming to be the only NPD experts in the country. That being said, we definitely have some of the world’s most talented and experienced professionals to boost your chances of developing and launching a successful product. Across the entire range of our NPD capabilities, we take pride in our commitment to providing bespoke services guided by the following key principles.
Customer-centric approach: detailed market research and customer feedback play a crucial role in the decision-making processes, whether on functionalities, features, aesthetics, and price points.
Cross-functional collaboration: NPD projects are inherently multidisciplinary. Cad Crowd has what it takes to assemble a versatile team consisting of professionals from various backgrounds to handle every aspect of the project through a managed collaborative effort. A multidisciplinary team is an effective way to ensure diverse perspectives and skill sets, including design, engineering, quality assurance, and marketing.
Continuous improvement: Cad Crowd offers the scalability you need to build a new product from the ground up all the way to post-launch with flexible custom services for continuous development.
Risk management is an integral part of Cad Crowd’s approach to NPD projects. One of the essential steps toward successful product development is risk identification, as early as possible in every stage, to prepare for the mitigations. Effective risk management prevents delays, errors, and potentially expensive setbacks along the way. Cad Crowd has been in business for more than 15 years, partnering with startups and established companies alike in NPD projects big and small. Whether you’re revamping an old idea or starting a big new one, Cad Crowd is ready to be your trustworthy partner all the way through.
So you have a new product idea that you think is promising enough and worth further development. The idea (of the new product) is yours to begin with, and you alone get to decide how to act on it. Unless you have the resources, the know-how, and the confidence to do an entire NPD project on your own, you definitely need to bring on board a team of professionals to handle things for you.
While the development path is pretty much the same for most products, every project must be treated as a unique effort with its own traits and challenges. Priorities shift. Timelines are altered. Budgets are growing. Drawn from Cad Crowd’s years of experience in product design and development, this step-by-step process should help you stay on track as you navigate the complexities and unpredictability of the project. Cad Crowd’s typical workflow in an NPD is as follows.
Nothing really happens until we have a proper, lengthy discussion about this idea of yours, for we have plenty of topics to delve into. There needs to be a good understanding of the idea itself, like what specific problems it tries to solve and your business objectives going forward. Bear in mind, such a discussion can only give so much detail about a possible development. It covers merely the basis, when in practice you want comprehensive answers so that you may get a good grasp of your chances of success, should the idea be feasible at all. To gain a deeper insight, we can conduct preliminary research to analyze the idea, potential concept development projects, feasibility analysis, and patent-related issues.
Assuming everything looks good and an NPD turns out to be a real prospect, the preliminary analysis is then followed by exhaustive market research on such factors as:
Target market: the general profile of consumers most likely in need of your product. These are the consumers who have problems your product can probably solve. It’s also related to product price range, which ultimately affects profitability. You shouldn’t spend too much on developing a product that you can’t sell for a profit.
Competitors: research into the existing products that offer similar solutions to yours. Instead of just making a list of competitors’ names and brands, we determine if your idea is unique enough to be a viable alternative.
SWOT analysis: an in-depth analysis of your idea’s Strengths, Weaknesses, Opportunities, and Threats. It’s best to perform the analysis early in the development project as it can help shape the product concept later on. The objective of concept generation is to build a version (or two) of the product that improves the known strengths and removes all the identified weaknesses.
After the research, it’s time to define the objectives. You want to develop the idea into a product and sell it for a profit; that much is certain. But there’s an entirely different category of objectives, such as product requirements, development timeline, and deliverables. Without well-defined goals and a schedule, it can be difficult to prioritize tasks, leading to delays and waste of resources. Cad Crowd maps out the NPD timetable along with the scope of work required for each deliverable. Mind you, things can and likely will change over the course of the project, but at least the timetable can help track progress and provide a sneak peek into what you can expect at the end of every stage. Clear objectives make things more manageable.
2. Concept development
In this phase of the development process and based on the research done in the previous stage, we already have some notions of what the product is going to be. But they’re all still vague notions at best, so we need to refine them into a more tangible concept. The NPD team, more specifically the engineers and designers, work together to visualize the concept using sketches and crude models. We take into account not just the aesthetics, but also technical specifications like materials and capabilities.
A common technique is the SCAMPER method, short for Substituting, Combining, Adapting, Modifying, Putting (to another use), Eliminating, and Rearranging. Every single word sounds exciting, but ironically enough, the whole point of the exercise is to simplify the concept design, although it doesn’t mean the product will end up being too simplistic. Instead, the product is expected to be the most practical, manufacturable process, easy-to-use design while still providing all its features and functionality.
A lot of ideas and concepts are once again sketched on paper until we arrive at the most plausible combination of form factor, dimension, materials, features, and aesthetics. We visualize the abstract, crude as it may be, to shape a unique identity for the product. Concept development also involves the integration of branding elements such as logos, colors, and typeface for an easy recognition effect when the product is finally launched to market. It might not appear as important at this point, but branding affects some design elements. The sooner you decide on the brand identity, the easier it gets to integrate those elements into the product. At the end of this stage, you get a final product concept to take to the next stage.
3. Proof of concept (PoC)
Now that the concept is simplified enough, it’s time to put the design to practice with a PoC product services. The idea is to see if your idea actually solves the problem as intended. PoC is the first step into a physical build, but it’s going to be the most basic version of what your product will be. It won’t look even remotely close to the concept.
But then again, a PoC doesn’t need to be pretty; it only needs to demonstrate that the product does work. In most cases, especially for non-electronic products, PoC is built using easily sourced materials like plywood and cardboard put together with hot glue. If there are a lot of mechanical moving parts like gears and levers, wood is probably a more suitable option.
Now, things are a little bit different if your product is an electronic device or at least has an electrical component. While the PoC needs no custom PCB design projects, it still needs to function as a product, albeit a crude version of it. The most effective workaround is to use ready-made development kits such as Raspberry Pi or Arduino. PoC, even when working perfectly as expected, is not something you should bring to market. It’s not even a proper prototype; the size is too large, the cost for mass production is too high, and the design is too messy.
Note:the development of an electronic product is noticeably more complex than a mechanical one. With electronics, it’s like you’re supposed to develop two products in one fell swoop: the custom PCB and the hardware enclosure. We’ll try to touch on this matter as much as we can in the article just to offer a glance at the added complexity.
4. Virtual prototyping
Following a successful PoC build, we’re now back to the drawing board, or the computer screen to be more precise. Virtual prototyping takes a good portion of the development effort, but it’s all done in the digital world using CAD software, so it’s just about as cost-efficient as you can expect. This is where the product concept is refined and transformed into a 3D model. It may start as either a solid or wireframe model (depending on which one works best for the purpose), before gradually becoming more realistic.
Cad Crowd is home to thousands of professional 3D modelers experienced in NPD projects of all sizes. Using advanced CAD and simulation software, we can build a virtual prototype that’s almost identical to a real-world physical object by giving it lifelike specifications like material properties, weight, textures, etc.
Accurate product characteristics are crucial in virtual prototyping because they must be tested later via simulation to see how the product performs in real-world scenarios. Simulation is also done on a computer to evaluate the product’s features, reliability, durability, and overall quality. For example, if the product (or part of a product) is supposed to be made of metal, the 3D model has to specify exactly what type of metal it is. There are many different types of metals, from aluminum and stainless steel to copper and iron, and everything else in between; they have different tensile strengths, corrosion resistance, hardness, thermal conductivity, and so forth.
Precise 3D modeling and extensive simulation offer a glimpse into how the product is supposed to look, work, and behave in the real world when it’s eventually built. Physics-based models, for instance, demonstrate (virtually) how parts, components, or the product as a whole behave when exposed to external factors like heat, cold, water, and pressure. System-level models simulate everything inside the product itself, including interactions between parts and components. Suppose the new product is a consumer good like an appliance, furniture, or hand tool. Digital simulations such as stress tests, drop tests, and fatigue analysis let you know if the product meets the durability and reliability requirements in addition to the typical wear and tear.
Virtual prototyping services enables the engineers and designers to identify weak points, performance issues, or design inefficiencies early in the development. In the event something needs tweaking or modifying in any way, the team can make changes to the model and rerun the simulation to see the impact. It’s a highly iterative process. We collect the data, evaluate the performance, make adjustments as necessary, and repeat the entire sequence as many times as it takes until the product is well-optimized. The good thing is that the entire phase involves no actual product, making it a lot more budget-efficient than the conventional experiments using physical prototypes.
For electronic products, engineers design and build the PCB as a virtual prototype first, which gives them the opportunity to try different layouts and schematic designs. They run simulations to evaluate signal integrity, electrical behavior, thermal performance, and basically identify potential issues. Only when the virtual prototype shows no sign of errors can they build a physical prototype. It’s also possible to run simulations on both the PCB and the hardware enclosure design to check proper integration, water resistance, dust resistance, and other features.
Similar to the concept generation stage, virtual prototyping is another attempt at design simplification. As far as aesthetic design is concerned, our standard approach is to aim for simplicity wherever possible, for one very good reason: manufacturability. Although making an intricate design is not much of a hassle during the virtual prototyping stage, it might lead to the wrong assumption that translating it into an actual product is going to be just as easy. In NPD, design simplification improves the chances of getting the product manufactured and launched to market in a timely fashion. This is not to suggest that complex products are impossible to fabricate or develop; they just take more time and resources.
Product complexity can in fact become a trap, especially for startups and small companies. Every single detail of a product affects the development time and cost. The more features you want, the greater the resources you must spend. For instance, a seemingly simple addition of a lanyard hole to a metal material can bring a slight increase in production cost per unit, say one dollar. It sounds pretty reasonable indeed if you plan to only manufacture several hundred units. But for a large-scale production of tens of thousands, you’re going to reach deeper into your pocket to cover the cost.
That said, you always have the final say about every aspect of the product. It doesn’t really matter if you want the aesthetic to have intricate geometry and decorative details or a more restrained style. Cad Crowd works on your behalf. We cater to your personal preferences while also making sure that the design serves in your best interest and aligns with your business objectives. Collaboration and communication make the foundation of an effective partnership. You’ll be hearing a lot of suggestions and recommendations from the team (as the job requires), and yet at the end of the day all decisions lie solely in your hands.
5. Physical prototyping
CAD and simulation cannot magically make a product better, but they help remove the guesswork before the development moves on to a physical prototype. The “perfect” product development process happens when every issue has been identified and addressed during virtual prototyping. But this is highly unlikely to happen. Physical prototyping services remain an important part of the process because you have to actually hold and use the product in the real world to be able to tell how it looks, sounds, smells, feels, or if something is amiss at all.
Almost the entire design of the first physical prototype, save for surface detailing and finishing, is based on the virtual prototype. So long as the simulations demonstrated that the product’s capabilities turned out to be at least agreeable, there’s no reason to deviate from the 3D model.
The first big step is to build “preliminary” product design, or an “alpha” prototype if you like. Unlike a PoC, even the very first iteration of a physical prototype already focuses on the use of production-grade materials, parts, and components. Let’s say your new product is a flashlight (which is an electronic device, of course) with an aluminum outer shell, a rechargeable lithium-ion battery, and a waterproof design. In a PoC version, you only have to make sure that the intended design works, although you’re allowed to use alternative components like an Arduino board connected to a 9V battery housed inside a plastic pipe. If the light turns on, you’re good to go.
Physical prototyping takes things a little bit more seriously; for example, now you have to use real aluminum tubing to contain the PCB (often a custom purpose-built board) and the battery. No matter how complex it is, Cad Crowd can handle the purchase and assembly of all parts and components, including the fabrication of a hardware enclosure using either a 3D printer or CNC machining services. We’re not at a point in the development to have a small-volume production as of yet, which typically is done using the injection molding method.
We use this alpha prototype not only to test features and functionality, but also as a tool to generate the bill of materials (BOM) and estimate production cost per unit. Again, the alpha prototype is an early version, and there’s a good chance you’ll see changes big and small.
That said, preliminary product design at least offers a glance at the expected development time, budget, certification requirements, manufacturability, and whether you can sell the product at a profit. An alpha prototype is still reasonably rough. While it doesn’t have the level of detail and finishing you typically see on a final product, it’s an instructive gauge to see how much room for improvement you have and if the design can be further simplified.
Every NPD project goes through multiple rounds of physical prototyping. As for how many rounds it takes to reach the “beta” prototype, it depends on how successful each iteration is. A simple product may need no more than three to four rounds. A complex product such as electronic devices and hi-tech wearables design will almost certainly take more. Once a physical prototype is fabricated, we put it to various real-world tests.
We don’t use simulations at this stage. All the tests for (physical prototypes) are deliberately choreographed to discover flaws, mistakes, bugs, or defects in any shape or form. In case something goes wrong, you want to find the culprit while you’re still prototyping, not when the product is already launched. At various points in this stage, the development might feel like it’s going in reverse. Each time an issue is identified, our team refers back to the virtual prototype and makes the necessary changes there. We “reproduce” the issues, repair the 3D model accordingly, and fabricate another prototype.
There will be many instances of engineering and design reviews throughout this process to make sure that the next iteration works better. No two physical prototypes are exactly alike. Every iteration is an improvement over the previous one. We produce as many as it takes (but hopefully not too many) to identify all flaws, fix them, and get things just right. At the end of this development stage, you can expect to have an iteration that meets all the established design requirements. We also work on the aesthetics and finishing details to fabricate a definitive “beta” prototype.
6. Product certifications
Most, if not all, electronic products and medical devices require certifications before you can launch them to market. Some of the most common are as follows:
FCC (Federal Communications Commission) certification indicates the product generates minimal interference to other communication devices. The certification is for products sold in the United States.
FDA (Food and Drug Administration) approval means that a medical device is regarded as safe and effective for its intended purpose. It’s also for products sold in the United States.
UL (Underwriters Laboratories) certification is necessary if the electronic product plugs directly into an AC outlet. It’s for electronics sold in the United States and Canada.
CE (Conformité Européenne) Marking serves as a declaration that the product complies with the health, safety, and environmental regulations in Europe.
Although you don’t have to certify a product until you have a final prototype, Cad Crowd never fails to put the matter under consideration throughout the development process. We build a product with certification requirements in mind from the get-go, minimizing the possibility of expensive redesign at the latter stages. Also, it’s important to note that although the certifications are mostly for the PCB components and electrical circuitry, the product must be certified with its enclosure, not just the bare electronics.
7. Final production design and manufacturing
The design is finalized, and the certifications are done. It’s time to get a contract manufacturer involved. It begins with a handover of the design from Cad Crowd to a factory partner for mass production. There can be a few more design refinements, but they should be minor and mainly geared toward manufacturing efficiency. Cad Crowd’s NPD professionals implement DFM (Design for Manufacture and Assembly) to every project exactly for this purpose. It makes little sense to make major revisions at this point when so much work has been done to get the product to its optimized state.
Included in the handover are the full-scale finished 3D model, photorealistic renderings, assembly instructions, packaging design services, pattern libraries, and other graphical elements. Cad Crowd is involved in the manufacturing process as part of the quality assurance and reviews.
You have a good supply of products ready to market. So what should you do? The easiest answer would be to create a product listing or register a shop in online marketplaces and social media. That’s what everybody is doing these days, and there’s little barrier to entry (perhaps involving a small fee). Getting the product into retail stores is a different beast entirely. It takes a lot of research, product presentation, detailed calculations on profit margins and shelf placement, and delivery expectations too.
Either way, Cad Crowd is here to provide all the marketing and post-product-launch services. We handle retailer research, buyer outreach, retail negotiations, and a whole range of marketing strategies to put your product on store shelves and give it a real fighting chance in the market against the more established competitors.
Over the course of our 15+ years of experience, Cad Crowd has developed into a massive hub of NPD professionals. We strive to build a cross-functional team filled with individuals of various specializations for every project. A multidisciplinary team can step in at any stage of a product development process, or from start to finish. With flexible hiring options and scalability on top of that, Cad Crowd excels at providing a completely bespoke partnership that caters to your specific preferences. Request a free quote today and find the right design team for your next product development project.
MacKenzie Brown is the founder and CEO of Cad Crowd. With over 18 years of experience in launching and scaling platforms specializing in CAD services, product design, manufacturing, hardware, and software development, MacKenzie is a recognized authority in the engineering industry. Under his leadership, Cad Crowd serves esteemed clients like NASA, JPL, the U.S. Navy, and Fortune 500 companies, empowering innovators with access to high-quality design and engineering talent.
The best tool you can own in life is a hammer, and in Control Resonant, fixing Manhattan requires a VERY big one to perform some percussive maintenance. The Aberrant is the melee weapon that you’ll wield in battle, and while it can take a variety of forms, it looks especially satisfying to morph it into a gigantic hammer that wouldn’t look out of place in a Looney Tunes cartoon if Rob Zombie were directing it. But what would that version of the Aberrant look like in real life? Pretty intimidating and impractical, it turns out.
Ahead of Control Resonant’s release next week, the blacksmiths of Man at Arms took a stab at building the Aberrant. In an episode of their YouTube series–and sponsored by Control Resonant developer Remedy Entertainment–the team put together a solid replica, but for the hammerhead itself, they used hollow steel panels and advanced welding techniques to recreate the Aberrant. It’s not hard to see why, because having a solid chunk of metal the size of an armchair would make it challenging to work with, let alone wield.
Even with the finished hammer employing a few techniques to keep its overall weight under control, it was still too heavy for even the burliest blacksmith to pick up or even swing around for a few test smashes. For now, it’s the world’s coolest-looking paperweight.
Launching on September 24–or September 22 if you spring for the PS5 Deluxe Edition–Control Resonant is already earning high reviews. On GameSpot’s sister site, Metacritic, the PS5 version of the game currently has a metascore of 84 from 48 reviews, making it one of the best games of 2026 according to critical consensus. One of its big draws is that it successfully blends the signature weirdness of Remedy’s growing universe of interconnected titles with highly engaging gameplay.
“Alongside the stellar art direction and a surprisingly touching story, Control Resonant’s gameplay loop feels more mainstream than anything this team has made since Max Payne,” Mark Delaney wrote in GameSpot’s Control Resonant review.
Looking for the most recent NYT Strands puzzle answers? CNET publishes daily answers and hints for The New York Times Mini Crossword, Connections, Connections: Sports Edition and Strands puzzles.
Strands is like a word find game, but without the list of words to find. Sometimes I see the theme and begin recognizing the answers right away. But for those times when I can’t seem to manage this, there’s a loophole: Strands lets you make as many words of four or more letters as you want. For every three of those words you find, the puzzle will highlight one of the answers. You’re still going to have to unscramble that answer, though, which can be very tough.
Today’s puzzle isn’t too tough, though some of the answers are tricky to unscramble. Read on for hints and all the answers.
Hint for today’s Strands puzzle
Today’s Strands theme is: Shake on it.
If that doesn’t help you, here’s a clue: Shared understanding.
Clue words to unlock in-game hints
Your goal is to find hidden words that fit the puzzle’s theme. If you’re stuck, find any words you can. Every time you find three words of four letters or more, Strands will reveal one of the theme words. These are the words I used to get those hints, but any words of four or more letters that you find will work:
These are the answers that tie into the theme. The goal of the puzzle is to find them all, including the “spangram,” a theme word that reaches from one side of the puzzle to the other. When you have all of them (I originally thought there were always eight, but learned that the number can vary), every letter on the board will be used. Here are the nonspangram answers:
PACT, TREATY, CONTRACT, COVENANT, AGREEMENT
Today’s Strands spangram
The completed NYT Strands puzzle for Sept. 18, 2026.NYT/Screenshot by CNET
Today’s Strands spangram is LETSMAKEADEAL. To find it, start with the L that’s two letters over on the top row, and wind down.
CNET editor Gael Fashingbauer Cooper, a journalist and pop-culture junkie, is co-author of “Whatever Happened to Pudding Pops? The Lost Toys, Tastes and Trends of the ’70s and ’80s,” as well as “The Totally Sweet ’90s.” She’s been a journalist since 1989, working at Mpls.St.Paul Magazine, Twin Cities Sidewalk, the Minneapolis Star Tribune, and NBC News Digital. She’s Gen X in birthdate, word and deed. If Marathon candy bars ever come back, she’ll be first in line.
See full bio
Step into the world of BLACKWOOD, a gritty third-person action thriller that blends smooth, responsive combat with cinematic storytelling. Aniimo By day, you are a seemingly ordinary store owner, managing your small DVD shop in an authentic recreation of New York, 2012. When night falls, you descend into the city’s underworld as a contract killer, caught between survival, morality, and a past that refuses to stay buried.
One Epic Story Told In Three Parts. Anton’s story takes place over the course of three Acts. Each Act is a complete part of the overall story, with new missions added in between the major acts.
Current Act Roadmap:
When you purchase BLACKWOOD, you are purchasing the full game. All future acts will be provided as free updates to existing owners. If you buy BLACKWOOD at launch, you will not need to purchase Act 2 or Act 3 separately. Act One Coming September 16, 2026.
FIGHT YOUR WAY THROUGH THE CITY Gunplay is fast, stylish, and unforgiving. Keep the Action relentless with fluid movement options like dives, rolls, and slides. Every encounter feels cinematic yet responsive, giving you the freedom to create your own moments of chaos.
MASTER BRUTAL TAKEDOWNS BLACKWOOD’s signature mechanic: countless contextual takedowns. From one-on-one hand-to-hand executions to using the environment around you, every fight is an opportunity to end your enemies with precision and style. Grounded, weighty, and satisfying to master.
A DOUBLE LIFE TO BALANCE Your store is more than just a front. It’s where you live, decorate, and roleplay a “normal” existence. Buy and sell DVDs, change outfits, interact with your apartment, and explore RPG elements that make your dual identity feel tangible. The contrast between day and night defines the world and the choices you make.
Screenshots
SystemRequirements
Minimum Requires a 64-bit processor and operating system
OS: Windows 10 / Windows 11 64-bit
Processor: AMD Ryzen 5 3600 / Intel Core i5-10400F
Memory: 16 GB RAM
Graphics: NVIDIA GTX 1650 / AMD Radeon RX 570 / Intel Arc A380
DirectX: Version 11
Storage: 30 GB available space
Support the game developers by purchasing the game on Steam
InstallationGuide
TurnOff Your Antivirus Before Installing Any Game
1 :: Download Game 2 :: Extract Game 3 :: Launch The Game 4 :: Have Fun 🙂
In 1979, Stephen King introduced the world to Castle Rock, a picturesque Maine town that hides evil within. But while plenty of King’s stories in the years since have returned to Castle Rock, none have ever recaptured the experience of that very first trip.
The Dead Zone feels different from King’s body of work. Part crime thriller with psychological and political elements, the book was adapted into a celebrated 1983 film by David Cronenberg, who shapes an already promising tale into one that is taut, insightful, and brilliant.
While Cronenberg’s interpretation of The Dead Zone is worthwhile, King’s story was also adapted into a science fiction television series by Michael and Shawn Piller, a father-son duo best known for their work in the Star Trek universe. That series ran for six seasons on the USA Network before it was canceled due to low ratings, with its final season ending on a major cliffhanger.
Even so, The Dead Zone attracted a sizable audience during its lengthy run, using a case-of-the-week framework to tell an exciting story. For anyone fond of King’s novel and interested in a competent procedural show based on his work, The Dead Zone is currently waiting to be rediscovered on YouTube, where you can watch it for free.
What is The Dead Zone series about?
Image: Lionsgate/Everett Collection
King’s novel opens with a child named Johnny Smith falling unconscious after an ice-skating accident in 1953. Although Johnny remains unscathed, he delivers a prophetic warning to someone who later undergoes an accident. Much later, once Johnny is an adult, he falls into a coma after being involved in a car crash.
Upon waking up, Johnny learns that a part of his brain has been gravely injured — creating a “dead zone” — which is why the rest of his brain is working overtime to overcompensate. The consequences are surreal in nature: Johnny begins seeing visions of the future upon touching people and objects.
The Dead Zone series retains this core premise. Johnny (Anthony Michael Hall) is a small-town teacher who begins experiencing visions after waking up from a coma that lasts six years. Although much has changed, Johnny uses his newfound abilities to help solve crimes. While he does his utmost to use his gifts for good, he is plagued with apocalyptic visions about a certain Greg Stillson (Sean Patrick Flanery), a congressional candidate who is too unstable to hold office.
The Dead Zone takes creative liberties to expand Stephen King’s world
Image: Lionsgate/Everett Collection
Although the series takes liberties to expand upon the source material, the instinct to turn King’s thriller into a tense procedural isn’t misplaced. Parts of the original story unfold like a gritty crime novel, which uses police evidence and newspaper clippings to fill in the blanks. Johnny’s arc is similar to that of a detective story and culminates once he meets Stillson, who symbolizes ultimate evil in a story about loss and trauma.
Any attempts to change the trajectory of the future come with ethical dilemmas, but Johnny has to stop Stillson, as his mere presence dooms the world. The series juggles Johnny’s smaller victories with the shadow of Stillson looming at all times, which creates an intriguing tension over the course of six seasons. Flanery’s Stillson is shrewd enough to figure out Johnny’s gifts, which adds a cat-and-mouse dynamic that the source material doesn’t feature. Although this primary rivalry feels drawn out a bit too much at first, The Dead Zone subverts expectations by having Johnny second-guess his gifts down the line.
Image: Lionsgate/Everett Collection
Sheriff Bannerman (Chris Bruno), who calls for Johnny’s help in the book, is an integral part of the show, too. An amalgamation of two characters from the book, this version of Bannerman develops a more interesting dynamic with Johnny. There’s initial resentment that melts into begrudging camaraderie, which works in favor of a more slow-burn series. There’s also the addition of Bruce Lewis (John L. Adams), Johnny’s therapist friend and voice of reason who acts as a grounded foil to our clairvoyant lead.
The Dead Zone is a competent King adaptation and an intriguing procedural at the same time. It stays true to the book in its early seasons (often right down to quoting King’s dialogue) but gradually branches out into a more robust universe that puts Johnny in a staunchly grey area.
In spite of these differences, The Dead Zone successfully captures the essence of a politically charged tale about free will versus determinism. Just when you expect tired television tropes from its procedural format, The Dead Zone pleasantly surprises with its commitment to pushing the envelope.
How Professionals Edit Videos – Workflow Best Practices
Whether you’re editing in DaVinci Resolve or any other video editing software, there is a certain sequence that should remain consistent in any editing project.
Keep in mind that the rather comprehensive tutorial below although executed in DaVinci Resolve, applies to any video editing software and just about any video editing project.
That sequence could be referred to as a workflow, a series of steps you take which are the same every time no matter what the project is.
In this video Casey goes through those steps and explains in great detail as to why each one occurs when they do.
It is an excellent overview of why each step is handled as a step unto itself and how it contributes to the overall project.
For some projects there may not be a need to do every single step but the key point is that the sequence remains the same.
How to Add AI Narration to Your Project and How to Add a Sound Effect to a Video Clip
This is a two part tutorial for CyberLink PowerDirector users involving A.I. narrations and sound effects.
If you have read any of my posts over the past year or so you would be aware that I am not a huge fan of A.I. narrations but I also understand that very often, they can get you out of a jam!
How to make a Let’s Play Video – Movavi Ideas
This is just another quickie from the folks at Movavi showing how to easily create popular effects being used currently.
This one is showing how it only take a few clicks to create a game play video with the creator in a lower screen and the gameplay itself occupying the rest of the screen.
How to Use Sound Effects in Filmora in 2026? – Add SFX Faster for Better Video Editing
OK, bear with me on some of the recent Filmora and even PowerDirector tutorials!
I know they are using their own A.I voice generators to narrate the tutorials and if you don’t like that… I really get it!
I don’t care for them much myself.
However the reality is that companies like Filmora have to create for an international audience so you can’t really blame them for using their own A.I. modules to deal with such language problems.
Anyway, narration grumbles aside, this is a good run through not just of Filmora’s audio capabilities but also of how to use audio to enhance any project.
Filmora AI Transitions V 15
It’s quite hard these days to get away from the endless promotion of all the latest and greatest A.I features.
It is clearly the current darling of marketing departments from all over the world!
To me it is getting to the point where there is so much general noise around the subject that a lot of the important signals are being lost.
In light of that here’s an example of something actually useful within the ever increasing A.I. stuff that is coming out daily.
This is a new addition to Filmora called A.I. transitions and if used intelligently can really lift the level of your projects.
Basically it takes the last frame of the first clip and the first frame of the second clip and analyzes them.
Once it understands what they are within the context of the overall video, it works out a smooth transition sequence from the first to the second.
To me this is exactly the type of action that A.I. does well with and if used judiciously can really make things pop in your videos.
4 Insane CapCut Editing Tricks You Need To Know Now
When you first start out editing in any video editing software it is frightening at first as to how much time you have to spend dong all the little things to make it all work.
For example creating and animating graphics is a great way to really add some polish to your projects but let’s face it, it seems to take forever!
The reality is that most of the software makers know this and if you scratch just a little below the surface, you will find a bunch of features that actually deal with this problem.
In the video below from Dina and Agnes you can see a few of these little shortcuts that you may not have know were there before.
They exclusively use and demonstrate CapCut but most video editors have similar abilities.
YouTube Has Changed… Let’s Talk
There are many, many so-called “gurus” on YouTube these days and let’s face it, they have pretty much always existed!
Just how many of them actually know what they are talking about is rather questionable.
One that I do know that is the real deal is Derral Eves who has been on the platform for years, has a bunch of his own successful channels on top of a huge coaching business.
In other words, he knows his stuff.
Another thing regarding YouTube itself is that it has never really stood still as far as development and changes to how it presents videos to audiences.
The only real constant for YouTube is constant change!
In this quite detailed livestream from Derral, he covers what current state of play is with the platform and how you should plan your strategy moving forward.
This One Change Makes You Feel Like A Friend To Everyone Watching You
Another excellent “tips” video from Chris Goor for this week.
In this one he covers a whole bunch of things that apply to actual camera setup with particular attention to eye lines.
The analogy he uses is to look at your shots and ask yourself whether if you were talking to a friend, would this look natural.
Film Editing for Beginners: Theory and Techniques
I am adding this video tutorial for this week’s Friday Roundup because it differs from most tutorials about editing in an important way.
Most tutorials are concerned with putting projects together or how to pull off a certain editing technique, especially when it comes to effects.
This one however takes a few steps back and takes us through the overall ideas behind how to edit footage and why certain things are done a certain way.
The real value here is not how to execute a particular things in your editing, but to understand what you should be doing in an overall sense.
Key Takeaways
A consistent video editing workflow is essential across any video editing software.
The article includes tutorials on adding AI narration, creating Let’s Play videos, and using sound effects in Filmora.
It also discusses the significance of AI transitions in Filmora and provides editing tricks using CapCut.
Derral Eves emphasizes the need to adapt to constant changes on YouTube and strategize accordingly.
Finally, the article offers a beginner’s guide to understanding video editing theory and techniques.
Geothermal startup Mazama Energy raised $135 million in an oversubscribed Series B, the startup said Thursday.
The fresh funding will help the company develop horizontal wells in super-hot rocks capable of generating 15 megawatts of electricity per well.
Mazama plans to start generating electricity sometime next year and said its first site in Oregon is capable of producing 10 gigawatts of electricity. That’s a sharp upward revision from the company’s estimate last year, when investor Vinod Khosla said the site had the potential to produce 5 gigawatts.
Enhanced geothermal startups are shaping up to be the dark horse in the battle to power AI data centers and other large loads on the grid. While tech companies and data center developers have been throwing their weight behind natural gas, geothermal startups have been quickly advancing their technology.
Unlike previous geothermal projects, enhanced geothermal startups are targeting deeper and hotter rock. Mazama, for example, has drilled past 10,000 feet in 15 days on its way to about 15,000 feet deep. At those depths, the company can access 750˚ F (400˚ C) heat, which at high pressures turns water into a “supercritical” fluid that’s neither fully liquid nor fully gas — a state that lets it absorb far more energy than ordinary steam. Mazama said that will allow each well to produce up to 10 times more power than traditional geothermal technologies.
Given the depths Mazama is targeting, the potential payoff is significant. Tapping just 1% of super-hot rock worldwide could generate more than 63 terawatts of electricity, according to the University of Twente and the Clean Air Task Force.
While work at its Oregon site is still in the early stages, the startup has already secured land for a second development. Mazama aims to complete development of the first site by 2030, at which point it says it should generate 200 megawatts of electricity.
The new round was led by Centaurus Capital and Doerr Capital, with participation from ConocoPhillips and Shell Ventures. Existing investors including Khosla Ventures and Gates Frontier returned, and new investors SiteGround Capital, H. Barton Asset Management, and the Jeffrey and Marieke Rothschild Foundation also joined the round.
Mazama was incubated at Khosla Ventures.
When you purchase through links in our articles, we may earn a small commission. This doesn’t affect our editorial independence.
Most teams get this backwards. They’ll burn a whole week building some fancy multi-step email sequence before anyone’s even checked that new leads are landing in the right pipeline. Then you end up with a CRM full of workflows firing on bad data, and reps who lose trust in the system within a fortnight.
It’s easy to see why it happens, though. Automation is the exciting bit. But if the foundation underneath it is a mess, every workflow you build will just make things worse. So before you go anywhere near sequences or drip campaigns, here’s where to actually start, and why the order you do things in matters more than how fast you do them.
Step 1: Activity Logging Comes Before Everything Else
If your CRM doesn’t know what’s happening, it can’t automate anything useful. That’s why automatic activity logging should be the very first thing you set up.
This means syncing emails, calendar events and call records so they’re captured without reps having to log them by hand. Once that activity data is flowing in on its own, you’ll get a clear picture of which accounts are being worked and which ones are going cold. Without it, every automation you build after that point is basically guessing.
Most modern CRMs can pull email and calendar data natively, but the default settings aren’t always right. Spend half an hour configuring what gets captured, what stays private and how activities link to the correct contact and account records. It’ll save you a headache later.
Step 2: Lead Assignment and Routing
Once activity capture is running, the next thing to sort out is making sure new leads reach the right person without someone manually dragging records around. That’s where lead assignment rules come in.
A basic round-robin will do the job to start with. If your team covers different territories or segments, add simple rules that match on region or company size. You’re not trying to build something perfect here. You just need to make sure no lead sits unowned for more than a few minutes.
There’s a dependency here that most people miss, too. Assignment rules only work properly when the data they route on is clean. If the “country” field is blank on half your inbound leads, a geography-based rule will misfire constantly. Fix the intake form first. Then build the routing.
Step 3: Stage Automation and Deal Hygiene
After logging and routing are solid, you can start automating your pipeline stages. This usually means things like auto-moving a deal when a meeting gets booked, flagging stale opportunities that haven’t been updated in a couple of weeks, or sending a Slack notification when a deal hits a certain value.
These automations are powerful, but they depend entirely on reps actually using stages correctly. If your team doesn’t agree on what “qualified” or “proposal sent” means, no amount of automation will save you. Define the entry criteria for each stage first, and keep the total number of stages low. Five to seven will do for most teams.
Most people go looking for advice on how to implement a CRM for teams once the automation has already started misfiring, by which point the stage definitions have been in use for months and changing them means reworking every rule built on top. Agreeing what each stage means is slow work, and it tends to be uncomfortable, because it forces reps to admit which deals aren’t as far along as their forecast implied.
Doing it early still costs you a difficult afternoon, but doing it late costs you the afternoon plus everything you’ve built since. Stages are the skeleton and automation is the muscle, so settle the definitions before a single rule fires off the back of them.
Step 4: Why Sequences Should Come Last
Email sequences and outbound cadences are the automation most people want to build first. They’re also the most likely to cause damage if the groundwork isn’t there.
A sequence that fires to the wrong contact because assignment rules weren’t set up, or that sends a “just checking in” email to a deal already in negotiation because stage data is stale, will do more harm than a manual email ever could.
Build sequences only once you trust your activity data, your routing and your pipeline stages. At that point, you’ll know exactly where a prospect sits and what’s already happened. CRM automation can then help you write sequences that respond to real context instead of assumptions, and that’s when they actually become useful.
The Dependency Chain You Can’t Skip
Think of CRM automation as a chain where each link depends on the one before it:
Activity logging – gives you visibility
Lead assignment – gives you ownership
Stage automation – gives you process
Sequences and outreach – gives you scale
Skip a link and the ones above it won’t hold. That’s why the best CRM rollouts feel boring at the start. The team is doing the unglamorous work of making sure data is clean, fields are filled in and records are linked correctly. The flashy automations come later, and when they do, they actually work.
Get the Boring Stuff Right First
There’s no shortcut here. The teams that get the most out of CRM automation are the ones that resist the urge to build complex workflows on day one. Start with logging, then routing, then stage logic, and only then move to sequences. Each layer will make the next one more effective, and you’ll avoid the classic trap of automating chaos instead of cleaning it up.
If you’ve been looking to get more gaming power out of your laptop but don’t want to pay for a replacement amid RAMpocalypse pricing, an eGPU could be your best bet. An eGPU is an external graphics processor, usually a desktop graphics card in an enclosure connected to a compatible laptop or gaming handheld through Thunderbolt or USB4. They can be pretty good at taking over rendering, meaning even thinner and weaker machines can run more demanding games with one plugged in, but there are many caveats.
A GPU run as an eGPU will typically operate slower over Thunderbolt than it would inside a desktop. The enclosure to house it costs hundreds of dollars too, and some devices, like Apple Silicon-based Macs, can’t use an eGPU for gaming at all. That said, eGPU hardware is in better shape today than it has been in years. Razer revived its eGPU line with a Thunderbolt 5 dock in July 2025, and Framework is building an eGPU kit for its Laptop 16.
How much performance is lost with an eGPU?
Teacher Photo/Shutterstock
A Thunderbolt 4 port carries 40Gbps, and Intel’s spec allots PCIe data 32 Gbps of it, an eighth of the bandwidth a desktop PCIe 4.0 x16 slot provides. Most of what the card in an eGPU enclosure does will never cross the Thunderbolt cable. Textures and shaders get loaded into VRAM once and remain there, meaning the cable only gets busy when a game pulls in new assets or sends finished frames back to the display.
Portables review site Notebookcheck tested an RTX 2080 Ti enclosure back in 2021 and found deficits ranging from seven to 32 percent when compared to a desktop. Losses did shrink to single digits at 4K on an external monitor, but rendering to a laptop is slower because finished frames travel back down the same cable. In contrast, PC Gamer tested an RTX 4070 Ti and 4090 over Thunderbolt, OCuLink and desktop PCIe. Its RTX 4070 Ti ran around 25 percent slower over Thunderbolt than OCuLink in many 1440p tests, with lower 1 percent lows and more stuttering.
PC Gamer also claimed that upgrading from the 4070 Ti to the 4090 delivered smaller gains over Thunderbolt and OCuLink compared to desktop. So, the faster the card, the more of its performance the Thunderbolt cable restricts, making a mid-range GPU the more sensible choice for an eGPU enclosure. Thunderbolt 5 provides 80 Gbps of connection bandwidth, while Razer’s $350 Core X V2 connects the GPU through PCIe 4.0 x4, nominally 64 Gbps. That gives an x16 graphics card four lanes instead of the 16 available in a suitable desktop slot.
Cost and compatibility
The Core X V2 comes with only the enclosure; no power supply, USB ports or Ethernet. You’ll need to add your own ATX PSU, and Razer now sells the missing I/O separately as a Thunderbolt 5 dock starting at $390 for the Mercury version. Throw in the graphics card itself and there’s really little point in buying all these components when you could just invest in a budget gaming rig instead. At least in doing so, you’ll be avoiding the external connection’s bandwidth limit. Thunderbolt 5 laptops are also few and far between outside premium gaming machines and mobile workstations, so connecting the enclosure to a compatible Thunderbolt 4 laptop limits the connection to 40 Gbps regardless.
OCuLink does manage to get around Thunderbolt by running bare PCIe over a cable. That’s the route Framework is taking. Its OCuLink Dev Kit exposes an eight-lane PCIe connection on the Laptop 16, rated at up to 128 Gbps. You end up sacrificing some convenience here given that OCuLink doesn’t power the host, and there’s none of the plug-and-play that makes a Thunderbolt box a one-cable dock.
Apple dropped eGPU support with its move away from Intel silicon back in 2020. No macOS release since has brought it back for graphics acceleration. However, Apple did approve TinyGPU earlier this year, a driver extension from the tinygrad project that runs newer AMD and Nvidia cards over Thunderbolt or USB4. It’s for AI workloads only, and its lack of display output means it won’t get you anywhere for gaming use cases.