Casework vs. Millwork Design: A Detailed Breakdown for Freelancers and Architectural Firms


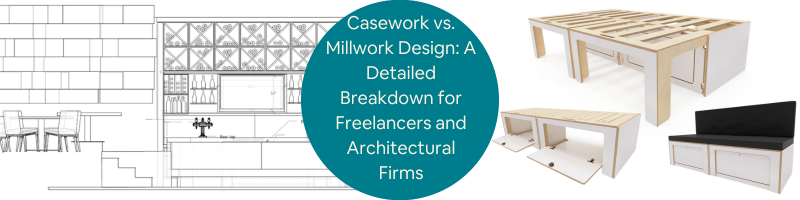
One area in interior architecture and design is usually lost in translation. It relates to the difference between casework and millwork, which can be confusing due to commonalities. In essence, these two terms consist of two essential elements involved in the construction and interior design but provide quite different uses and require more skill in specific applications.

Knowing such points could better help freelancers as well as architectural companies on projects by specifying tasks more effectively, selecting the material to use, reducing efforts for implementing designs, and achieving the best cooperation ultimately.

This article digs deep into the distinctions between casework and millwork services , including their uses, design implications, costs, and best practices for integrating each into commercial and residential projects.


:rocket: Table of contents


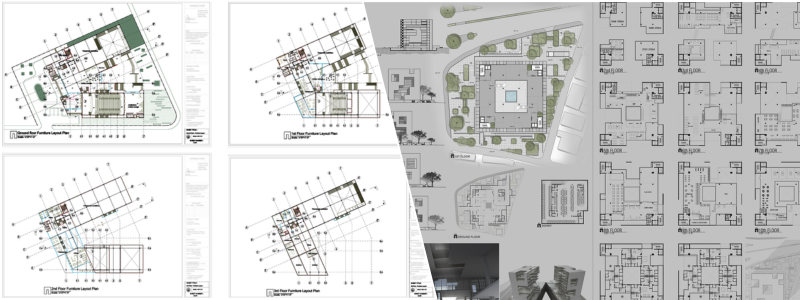
RELATED: What casework shop drawings are and why architectural design services use them

Defining casework and millwork: essential differences

Casework and millwork are part of the construction and design vocabulary, especially in interior architectural services. However, they refer to two different approaches to built-in furniture and fittings:

Casework

Casework is those modular, box-like elements that can be mass-produced and assembled on-site or prefabricated off-site. The term is also closely associated with cabinetry and other storage solutions.

Some of the key examples of casework include cabinets, bookcases, drawers, shelving units, and other types of storage. Most of the casework elements usually come in standard sizes, hence it is easy to produce them in large quantities and many different designs.

Casework is usually freestanding or semi-permanent, being removable or replaceable with no effect on the architecture of the space.

Millwork

Millwork is custom, handcrafted pieces typically constructed in a mill and then installed permanently within a building. It includes woodwork and trim that gives buildings their aesthetic character, including moldings, baseboards, window casings, staircases, and paneling.

Unlike casework, the elements of millwork are mostly custom-designed for a given space and most have some intricate details that feature to define the overall architectural style.

Millwork is normally installed as part of a permanent feature of the interior structure, hence providing an integral role in defining the character and layout of the room.

drawing flat pack bed plan

RELATED: Millwork drawings for drafting and design: complete cost, rates, and fees for firms and companies

When to use casework vs. millwork in design projects

This is, of course, useful for both freelance designers and architectural firms to learn when to use casework versus millwork so an effective project management system results in a consistent design outcome and cost-effective means for execution. Consideration shall be made for:

Scale and scope of project

It is much more ideal and beneficial for projects wherein they need functional storage to take place which may be quickly built and installed in the site. For large-scale projects, it has found itself to be able to execute consistency for many rooms and locations by casework approach.

Millwork excels at designs that are defined by aesthetic detail and customization. Luxury residential projects or high-end commercial spaces frequently utilize millwork to introduce unique features such as unique moldings or custom wood paneling.

Customization requirements

Millwork is perfect for spaces that demand some distinct character or architectural cohesiveness because it is in its very nature custom. This creates alignment with most clients’ specific design preferences.

Casework is a cost-effective and feasible option in case customization is not such an issue. However, nowadays most manufacturing firms provide semi-custom casework that balances the degree of personalization with the requirements of keeping the costs within limits.

Time constraints

Casework is a prefabricated product and, hence, it can be manufactured and installed much faster than custom millwork, which is essentially about intricate craftsmanship and lengthy lead times.

In case of tight deadlines, the freelancers and firms look for casework to complete within the deadline. In case a project demands detailed design and if there is enough time in hand, millwork would provide a unique character with longevity.

Budget

Casework is always cheaper than millwork due to standardization in the production process. In the case of budget constraints, casework can offer a more realistic solution with functionality intact but without compromising the quality.

Millwork costs more as this is the work custom to each other, and usually with high-value woods or any other kind of design desired, making it pricey but for all luxury jobs and to acquire an atmosphere in those places or designs required; this one may pay some more amount for this to last a long time as the same.

RELATED: How architectural millwork design and drafting services can easily achieve company success

Materials and finishes: what is best?

Understanding which of the materials to use on casework and millwork best realizes your goals, whether durability and style or both, would be the most effective outcome.

Casework materials

Casework is typically constructed of very rugged yet cost-effective materials used most of the time such as MDF (medium-density fiberboard), particle board, and plywood, often topped off with laminate, veneer, or melamine.

Strength, low cost, and maintenance-friendliness mark these material types, being used in mostly high-traffic areas: kitchens, bathrooms, and offices.

Solid wood or high-end veneers may be used in high-end casework, but these are expensive and add much to the cost.

Millwork materials

Millwork is typically constructed of solid wood, though the most common woods used are oak, walnut, mahogany, and cherry. These woods provide a beautiful yet durable result.

Finishing millwork may include staining and varnishing, but more elaborate finishes can involve hand-carving or painting depending on the finish that will be used.

High-quality millwork also has treatments to accentuate the natural characteristics of wood. These are either glossy or matte finishes that play with the grain.

coffee table

RELATED: Hiring freelance woodworking drafting and design services: All you need to know

Cost comparison: what freelancers and firms should expect

Casework and millwork are not the same regarding material, labor, customization, and installation.

Casework costs

Casework is generally cheaper, primarily in its modular manufacturing. Cost per unit will vary by materials, finish, and manufacturer.

The most basic types of casework average $100-$500 per unit for a prefabricated design. The cost of custom is higher than this but less expensive than millwork.

Millwork prices

Millwork is custom-made in nature, hence it requires more budgets. Labor is a very high-cost component because millwork involves skilled artisans to make complicated designs.

Millwork can be pretty expensive. Decorative molding services and custom cabinetry can run into thousands. However, millwork has long-term value in terms of its quality, durability, and timeless appeal.

Installation techniques: tips for seamless execution

Installation methods of casework and millwork show their differences in use and permanence in a design project.

Installing casework

The installation of casework is not that complex since the units are designed to standard measurements and can be installed on walls or floors without difficulty.

The modular system has the advantage of speedy installation, which is also the case in commercial establishments, where uniformity and saving time are of the essence.

Installing millwork

Millwork installation requires exactness as each part is built to fit into a room. It usually is undertaken by specialists like skilled woodworkers or millworkers; thus, each component finds its way perfectly within the design and architecture of the room well.

Because it does not readily come out, millwork must be very well contemplated during the design stage as a function of other architectural components that have to do with walls, ceilings, and flooring.

RELATED: Fabrication shop drawing services: all you need to know

In the contemporary design landscape, casework and millwork share the spotlight:

Current trends in casework tend toward lines that are smooth and sleek, with a focus on Scandinavian or modern-industrial aesthetic appeal, including clean lines, recessed handles, and matte or semi-matte finish.

Sustainable materials and finishes in casework design are increasingly being used to meet the trend for greener interior applications in both residential and commercial building projects.

Millwork is gaining popularity in luxury design with a focus on craftsmanship and artisanal quality. Modern millwork blends traditional techniques with contemporary aesthetics to create statement pieces that elevate interiors.

Dark wood tones, intricate paneling, and accent moldings are popular in residential millwork, while commercial projects often incorporate custom staircases and built-in seating that blends functionality with visual appeal.

shop drawing cabinet

Choosing between casework and millwork: practical advice for freelancers and firms

For freelancers and architectural firms, the choice between casework and millwork would depend on the budget, scope of the project, and aesthetic. Here are some key tips to guide this decision:

Evaluate client needs

Determine whether the client values customization and aesthetic details, which would indicate millwork, or if they prioritize functionality and cost-efficiency, suggesting casework.

Consider project constraints

Sometimes, because of a tight timeline and budget, casework might be favored, but when the scope is more flexible, bespoke millwork elements add a personal, timeless feel.

Hybrid approach

Usually, a successful design is a hybrid of casework and millwork. For example, a storage module casework can be used, and custom millwork for a focal point like moldings, trim, or even a dramatic staircase.

RELATED: 4 Tips to improve cabinet shop drawings for manufacturing efficiency at companies

Wrapping it up

As such, it is essential for freelancers and architectural firms to achieve a balance between casework and millwork. A couple of them tend to have different benefits and cater to different design aspects functionalities and budgets. It is rather suitable for spaces with heavy flow because it is modular efficient and also budget-friendly. Millwork is that kind that requires custom elegance and durability; it usually becomes a hallmark of luxury interiors.

Yet knowing the strengths of each allows design professionals to gain from both casework and millwork when creating such functional yet visually beautiful spaces. Whether it was in crafting minute details of any custom millwork or an outfitting room with practical casework, rich possibilities now exist to transform interior spaces into lasting, powerful designs.

How Cad Crowd can help

Freelancers and architectural firms will eventually reach the point where they need to determine whether they need casework or millwork design. Good thing that Cad Crowd is here to help connect you with the best professionals in the field. Request a quote today.

author avatar

MacKenzie Brown is the founder and CEO of Cad Crowd. With over 18 years of experience in launching and scaling platforms specializing in CAD services, product design, manufacturing, hardware, and software development, MacKenzie is a recognized authority in the engineering industry. Under his leadership, Cad Crowd serves esteemed clients like NASA, JPL, the U.S. Navy, and Fortune 500 companies, empowering innovators with access to high-quality design and engineering talent.

Connect with me: LinkedInXCad Crowd

Contract Engineering 101: A 5-Step Guide to Becoming a Freelance Engineer


Engineering has always been a dynamic field of work, but freelance engineers have found another way to take the freedom and flexibility with respect to their work. Freelance engineers provide companies with expertise on contract and carry out specific projects.

This practice of contract engineering has nothing to do with long-term employment, and therefore there is an all-around outlet toward diverse opportunities. It extends far beyond technology and manufacturing into environmental or civil engineering.

Freelancing may be a whole new ball game for engineers who are interested in it. Have no fear; below are 5 steps that would help you walk your path to becoming a successful freelancer, from finding clients all the way to managing a project and finances.


:rocket: Table of contents


Step 1: Know what you specialize in and your expertise

Before entering the freelance market, decide on the area of specialty you will specialize in and where you would like to focus. It is a very broad field of engineering with different specialties like mechanical and electrical engineering services, civil and software engineering. A defined niche enhances credibility but also makes it easier for clients to see the value you bring.

How to define your niche

Skills self-assessment: Reflect on your completed projects, the skills you have to offer, and what excites you in engineering. Do you find thrill in designing complex structures, developing renewable energy solutions, or writing automation software?

Hot Engineering Niche Analysis in freelancer markets: Sources such as Upwork, Freelancer, and LinkedIn would give a good basis for knowing what skills and kinds of projects are trending in the market. Obtain your certifications. This will add much value to your profile since you’ll be a certified professional in your niches.

Consider this for instance, an electrical engineer who is a certified Project Management Professional, knowledgeable systematic contractor. Your special skill that takes one-time investment, some training, and some software tools, pays more with more clients and better remunerated projects.

RELATED: 10 reasons to hire a freelance engineering and production design team

bill of materials elevator door

Step 2: get set up with business essentials

With this clarity of the niche you are working within, the next step would be setting a foundation for the freelance engineering business. Creating a business structure, buying necessary tools, and others are steps that would help get you started and established as a professional contractor.

Important business essentials to consider

Legal business structure: Select a form of business structure. For example, most freelance engineers operate under one of two forms, being sole proprietors or LLCs. An LLC, being more expensive to establish, still offers liability protection and will potentially offer tax benefits as well.

Contracts and documents: You can develop a good contract template to show the terms you have agreed upon with clients. That normally includes the scope of the project, timelines, payment terms, and intellectual property rights. At this stage, you may need legal advice to prevent the potential confusion that may lead to the loss of some benefit you deserve.

Insurance: Get professional liability insurance, especially on high-stake projects. That is because they can sue you, should an error occur.

Tools of the trade: Depending on your area of specialization, you will most likely require design software like AutoCAD or SolidWorks or hardware for testing and prototyping. You invest in the right tools since they often determine the quality and efficiency of your work.

You take time to set up these basics as a sign of credibility to clients and get ready for the hands-on side of freelance engineering.

RELATED: 25 excellent freelance design services created by remote experts

Step 3: market yourself effectively

Marketing strategies are required for freelance engineering. Personal branding is something that most engineers underestimate; yet, it would make them stand out in the very competitive freelance market. With a good online presence and active networking, increasing your visibility will attract the ideal clients.

Marketing strategies for freelance engineers

Portfolio is a must: This would comprise past projects, design services, technical skills, and results which would be done online. As you are new, academic projects or some experience developed in a full-time position may help.

Professional profile development: Build strong professional profiles on sites like LinkedIn, Upwork, or industry-specific sites. This would include constructing profiles with respect to some of the certifications achieved and achievements and relevant skills plus active participation in webinars and local industry events. This builds great connections with other freelancers and potential clients.

Content marketing: You can be an authority blogging or article posting. Show the world that you are knowledgeable about matters concerning clients, such as improvement in efficiency or the lastest advances in technology, and you will become a source of credibility and will draw interest.

Your marketing will take some time to earn the fruits of its labor, but you build your brand with consistent efforts ensuring surety of returns.

Rotor Core Machining Center

Step 4: find and manage clients

Freelancing gives engineers the freedom to choose their projects, but managing the right clients and relationships can be a daunting task. Communication and updates with long-term success depend upon delivering good projects.

How to find and manage clients properly

Other platforms from where one can source engineering jobs include LinkedIn, Upwork, and Freelancer platforms. The other is companies that might need one to support their engineering aspect or work with smaller outfits which may require some manpower project-to-project.

Set the expectations: After having had a preliminary discussion with clients, you lay out your timelines, budget, and lines of communication. Using your template of contract, you could then solidify such terms and prevent any misunderstandings.

Tools to manage a project: You can opt for Trello, Asana, or Notion. These will keep track of a project by providing proper tracking of task management and letting clients know about the current situation through regular progress reports, completion of certain milestones, and delays.

Client Communication: Communicate openly. Respond to emails immediately; keep the client informed of where you are in a project; and ask for his or her opinion. Happy clients can come back with another assignment or send you other prospects.

Building good client relations is key to successful freelancing. Happy clients can also give you repeat business or serve as a valuable reference for future projects.

RELATED: Top 30 mechanical engineering expert recruiters and agencies for the US

Step 5: run your finances like a boss

Discussing the finances of being a freelancer is scary; however, this is an essential part that lets a project run for the long haul. The management of taxes, lean months, and planning income requires some sort of discipline as well as foresight by engineers.

Financial tips for freelance engineers

Set your rates: You can set your rates based on the amount of market research you do, the amount of expertise required, and the complexity of the work you’re offering. Do not forget to factor in overheads like software licenses, taxes, and insurance.

Invoicing and payment terms: Always establish clear invoicing policies with your clients. Some freelancers demand advance deposits or payments on the completion of milestones to ensure they get paid for each phase of the project.

Tax planning: Freelancers must pay taxes themselves, hence the consultation of a tax advisor with information on the deduction and best practices for freelancing. Many set aside part of every payment to use for taxes.

Savings and Investments: In order to maintain an emergency fund in case of changing income streams between jobs, one would want to put money into some sort of retirement account. These can be IRAs, SEPs, or 401(k) plans designed for the self-employed.

Taking control of your finances will protect you from the natural ups and downs of freelancing and prepare you for long-term growth.

gear centrifugal pump heart valve

RELATED: What are environmental engineering costs, consulting rates & pricing for companies?

Bonus tips for staying competitive as a freelance engineer

The freelance engineering market is tough, particularly within niche areas like reverse engineering services. For additional tips on how to keep your business relevant and thriving consider the following:

Continuous learning: Due to the change in technology as well as the pace of engineering methodologies, it’s essential to keep oneself abreast with what is current within the industry and applications in use as well as updating software tools related to those applications.

Customer review: As you close every project, take the opportunity to ask clients for feedback for your work. This process, especially the final stage, is priceless because you would hear straight from them. Ask them to speak up about what works best for them and in which aspects they feel improvement can be made.

Adapt to market changes: Stay flexible about the changing demands of the freelance market. For example, if you find the trend of a surge in the demand for eco-friendly engineering solutions, then do whatever it takes to have a sustainable aspect in your working field.

Indeed, it’s exciting to be a freelance engineer: All the flexibility, creative freedom, and financial independence. Five easy steps will prepare you for the ups and downs in contract engineering and pave the way for a promising future.

Take each step slowly because freelancing does require dedication and discipline, but the rewards could make it all worthwhile. Learn the curve, market yourself well, and nurture every client relationship and soon you will find yourself in this ever-growing world of freelance engineering.

How Cad Crowd can help

Freelance engineering jobs can look pretty intimidating as a new career. At the core of it all, though, it just really requires just a couple of steps, skills, and learning to get people to top ranks. Over at Cad Crowd, connecting you to the best possible pool of freelance engineers is important, but so is helping those who aspire to be one to achieve their dreams.

Request a quote and find the best engineers today.

author avatar

MacKenzie Brown is the founder and CEO of Cad Crowd. With over 18 years of experience in launching and scaling platforms specializing in CAD services, product design, manufacturing, hardware, and software development, MacKenzie is a recognized authority in the engineering industry. Under his leadership, Cad Crowd serves esteemed clients like NASA, JPL, the U.S. Navy, and Fortune 500 companies, empowering innovators with access to high-quality design and engineering talent.

Connect with me: LinkedInXCad Crowd

How Companies Use Design for Assembly Services for Product Manufacturing


Methodologies that will allow you to cut costs and optimize your current processes are truly godsend lifesavers, especially in this fast-paced and dynamic manufacturing landscape. This is where Design for Assembly, or simply DFA, comes in and truly enhances the processes in place.

DFA represents a significant change in how companies approach and apply modifications in the process of creating products, from the drawing board to the assembly line. By applying different methods to implement assembly practicalities and design insights, DFA brings about a bunch of benefits to improve both your manufacturing process and final products.


:rocket: Table of contents


PC Fan Assembly

RELATED: How to design effective assembly drawings for consumer products and manufacturing companies

What is design for assembly? 

Design for assembly, or DFA, is an engineering approach that simplifies product design to make the assembly process faster, easier, and more affordable. Its main objective is to reduce the complexity of the assembly process, minimize operation errors, and ensure an accurate and error-free assembly process.

Primary DFA principles

Design for assembly principles are founded on the objective of creating an error-free, cost-effective, and efficient assembly process. The following is a comprehensive breakdown of these DFA principles.

  • Design for ease of access

The main objective of this principle is to ensure easy access to the parts and a seamless assembly of the components. It reduces the risk of errors that may be due to restricted visibility or access to each part and overall view of the whole mechanism. It also minimizes potential damage to adjacent parts during the assembly and thrives on eliminating the need for specialized equipment to have a more customer or client-friendly end product.

  • Define multifunctional parts

Having parts that can serve more than one purpose incredibly enhances even the tiniest aspects and details of your product. Reduced parts can also minimize the size and weight, for example, which can be beneficial for products or projects in industries such as automotive or aerospace, where both factors greatly impact performance. It reduces the number of parts and saves money by removing the need for many specialized parts.

  • Guarantee self-locating parts

The objective is to design parts so that they can all fit together in a single orientation, making the assembly process intuitive. This minimizes the possibility of wrong assembly, which may result in product failures or faults. It also decreases the need for complex fixtures or jigs. Because of the intuitive fitting of parts together, it can also streamline the training process for the assembly workers.

This principle aims to design parts whenever possible that can be joined together without using additional tools, adhesives, or fasteners. Techniques such as interlocking designs and snap-fits are often used.

This eliminates the cost and time often associated with securing and inserting different fasteners. It also lessens the risk of missing or loose fasteners, which helps enhance the product’s reliability. This can also simplify disassembly for recycling or repair.

The purpose is to make parts easy to place, pick up, and orient during assembly. This decreases the odds of damage or errors caused by improper or excessive handling. It also improves the efficiency of the automated assembly process while reducing effort and time.

  • Trim down the number of parts

The main concept here is to minimize the number of different parts in the product. A reduced number of parts can lead to several key benefits:

  1. Faster assembly times because of fewer parts to handle and join
  2. Lesser potential points of faults or failure to improve product reliability
  3. Reduced manufacturing costs because of the lesser need for processing and materials
  4. Simplified process of procurement and inventory

The aim here is to ensure standardization of parts across multiple product ranges or products. It helps achieve economies of scale in the production of parts. It makes production more flexible because standard parts can cater to different product lines. It simplifies inventory management as it reduces the variety of parts that should be stocked.

turbocharger shaft wheel assembly

RELATED: Design for Manufacturing and Assembly tips (DFMA) — Cut your product design company’s production costs

Benefits of design for assembly in product manufacturing

There is more to DFA than being a mere set of guidelines. This philosophy profoundly impacts the conceptualization, design, and assembly of products. Proper integration of DFA can offer numerous benefits both to the actual process of manufacturing and the finished product.

Cost savings

There are several areas where DFA can help save on costs during product manufacturing:

Fewer distinct parts mean more streamlined management of inventory, resulting in reduced warehousing and holding costs.

Simplified assembly procedures will result in fewer man-hours required for assembly. Decreased assembly errors can also reduce wastage and rework.

DFA can dramatically reduce the required raw materials by reducing the number of parts and using multifunctional parts.

Eco-friendly manufacturing

  • Simplified disassembly for recycling

Products made using DFA principles are usually easier to disassemble at the end of their lifecycle, which facilitates component reuse or recycling.

Fewer resources such as auxiliary materials or energy are used up during the production process when the design for ease of assembly is optimized.

Lesser quantities of components and reduced assembly errors may result in reduced wastage in terms of defective products or raw materials.

Improved customer satisfaction

The savings made possible by DFA usually allow manufacturers to provide competitive pricing that translates to value for money for consumers.

The benefit for end users of the product is not just a premium look and feel, as it also boasts excellent reliability.

Enhanced reliability and quality of products

Parts designed with assembly in mind often have a more seamless fit, resulting in a refined appearance for the final product.

A product with fewer parts naturally has fewer potential failure points, making it more reliable.

  • Reduced errors in assembly 

Since parts are designed for intuitive and easy assembly, the chances of errors during the assembly process are reduced.

RELATED: Key differences between prototyping and prototype engineering for companies & firms

Faster time-to-market

A faster assembly process means a shorter timeframe for manufacturing products ready for the market.

Decreased assembly errors will result in fewer units sent back for corrections, which can speed up the overall production timeline.

Enhanced training and worker morale

Workers will experience less frustration and a better sense of achievement when products are easier to assemble.

Temporary or new staff members can be quickly onboarded because the intuitive design can simplify the learning curve.

Increased productive flexibility

Most principles of DFA lean towards a modular design to allow easy variations or upgrades of products without the need to revamp the entire assembly process.

With the changing market demands, manufacturers can easily scale production down or up with the help of efficient assembly and standardized parts.

RELATED: Preparing your firm’s product design for manufacturing: how to streamline development and reduce costs

Modern manufacturing and DFA

Modern manufacturing is characterized by shrinking product lifecycles, a pressing need for sustainable practices, and rapid innovation. DFA has emerged as a key strategy to guide the product manufacturing and design processes amidst all these dynamics.

Here are the different ways that DFA can integrate and interact with the landscape of modern manufacturing:

  • Adaptability to changes in the market

Integrating DFA principles with modern methods such as 3D printing and 3D modeling solutions can pave the way for quick prototyping. Rapid iteration can speed up product development and ensure timely entry into the market.

Alignment with Industry 4.0

In today’s Big Data era, DFA allows manufacturers to acquire insights from the assembly data that help optimize the design for predictive maintenance and better assembly outcomes.

Smart integration

With the rise of Industry 4.0, the world of manufacturing is becoming increasingly interwoven with different digital technologies. DFA can complement this trend by streamlining assembly processes, making them more conducive to robotic assembly and automation.

Eco-conscious manufacturing

Since it’s easier to disassemble products designed using DFA principles, they can support the circular economy model by allowing effective components to be reused and recycled.

Today’s consumers have become more eco-conscious than ever, prompting manufacturers to switch to more sustainable practices. Since DFA focuses on the efficient use of resources and reduced wastage, it perfectly aligns with mandates on green manufacturing.

  • Improved consumer experience
parts for assembly

RELATED: 4 tips to improve cabinet shop drawings for manufacturing efficiency at companies

The Bottom Line

Seeing DFA as just a cost-cutting tool will only undercut its holistic effects on the manufacturing landscape. This reshapes the mindset on design, fosters a balanced relationship between manufacturers and designers, and guarantees a stand-out end product in terms of performance and quality.

With more and more industries dealing with challenges such as rapid technological advancements, sustainability concerns, and changing consumer needs, taking advantage of DFA principles offers a more proactive approach to dealing with these challenges.

How Cad Crowd can help

Embracing design-for-assemblement services for product manufacturing is no longer a mere strategic move; it is a key investment in quality manufacturing in the future. Cad Crowd will connect you with the best services that can turn your products into reality.

author avatar

MacKenzie Brown is the founder and CEO of Cad Crowd. With over 18 years of experience in launching and scaling platforms specializing in CAD services, product design, manufacturing, hardware, and software development, MacKenzie is a recognized authority in the engineering industry. Under his leadership, Cad Crowd serves esteemed clients like NASA, JPL, the U.S. Navy, and Fortune 500 companies, empowering innovators with access to high-quality design and engineering talent.

Connect with me: LinkedInXCad Crowd

How to Outsource 3D Rendering Services for Your Company to Visualization Studios for 2025


Among the many solutions by companies that strive to make their design processes more efficient, of higher quality, and creative, outsourcing 3D rendering services is one of the most popular solutions. Being an architect, real estate developer, or product designer, with a professional 3D visualization studio, saves much more time and reduces cost associated with it to bring your ideas into incredible detail and realism. This trend shall continue its trajectory in 2025 with the increased demand for high-quality visual content across various industries.

But how do you succeed in the outsourcing of 3D rendering services by a visualization studio? Here, we will go through the essential steps, considerations, and benefits that will guide you in making an informed decision that works with your goals and ambitions of the company.


:rocket: Table of contents


What is 3D rendering and why do you need it?

Before diving into the outsourcing procedure, let’s first briefly explain what 3D rendering is and why it’s so vital for your business.

A 3D rendering is a process that generates a photo-real or stylized image from a 3D model. Such a process is based on complex software tools and makes possible the depiction of scenes, lighting, texture, and environments in a close-to-life presentation. In today’s world, 3D rendering is applied in a number of industries for various purposes:

• Architecture: Virtual tours and real building renderings.

• Property: Pictures of properties, real estate, with provisions that will be constructed.

• Product: Prototypes and designs of any product for use in marketing or approval by a client.

• Entertainment and Multimedia: including animation, video games, special effects

The difference in the hyper competitive market that high-quality visuals make will have your business stand out among competitors when showing products, services, or architectural designs.

However, maintaining an internal 3D rendering team is also resource-intensive and expensive, especially when it involves specialized skills and high-end hardware. Outsourcing to a visualization studio could be more cost-efficient, flexible, and scalable.

RELATED: 3D modeling vs. 3D rendering services

3D serene home

Why outsourcing 3D rendering services is a smart move for your company

Here’s why outsourcing 3D rendering services is beneficial for your business in 2025:

1. Access to Expertise: These visualization studios hire very skilled people with expert skills and education in 3D rendering. By outsourcing, you will be able to make sure you get the best possible output from industry professionals, usually sooner, and paying more attention.

2. Cost Efficiency: Paying for a full-time in-house team and ensuring you have the right people with the required expertise in a business is very costly. Outsourcing gives you the chance to pay only for services required at an expense that would result in reduced overhead costs.

3. Higher Speed of Turnaround: Technologies in 3D rendering studios are so advanced that their teams can finish projects much sooner than an in-house team could. Weeks may pass before in-house teams get things done, but in outsourcing, turnaround is more accelerated.

4. Kept Free Time for Strategic Business Activities: Out-sourcing allows your in-house teams to keep time free for higher-priority strategic business activities such as strategy formation, product development, or customer engagement. The technical work can then be left to the professionals.

5. Scalability: 3D rendering services required for your needs can easily be scaled up or down depending on the scope of your project. Huge projects are undertaken by studios with serious workloads. Small projects can be selectively outsourced to create flexibility without commitment.

With these strong reasons in mind, let’s see how you can outsource 3D rendering services effectively.

RELATED: Integrating 3D rendering with photography for architectural development companies 

How to effectively outsource 3D rendering services

Here is a quick step-by-step guide to outsourcing 3D rendering services:

Review your 3D rendering needs

The first step in outsourcing 3D rendering services is to determine your exact needs. These include such factors as the type of rendering you require, which could be architectural visualizations, product renderings, and so on. The type of rendering will determine what kind of people and software you need.

  • Scope of project: Is it a one-shot project, or an ongoing renderings project? As much detail as you can give your studio on the scale and complexity of your project will immediately help narrow it down for them in finding one that meets your needs.
  • Level of detail: 3D renderings vary from model to fully detailed photorealistic images. Define as you approach the studio for your needs.

Knowing what you need clearly will make communication of expectations easier, so you end up with the studio that specializes in specific services that you need.

List possible 3D rendering studios

Once you have a sense of needs, the next essential step is to identify potential visualization studios. Here’s how you can do it:

Online search: Find the Top 3D rendering studios on the web. Websites, portfolios, and reviews can help you examine the style and the class of work as well as the specialty of the studio you are considering.

  • Industry network: If in an architecture or real estate line, you can reach out to your colleagues or industry forums for recommendations about which studios are best. Networking could just lead you to the most trusted studios that have much experience in your field.
  • Portfolio scanning: Scan through some studios that have been proposed. Identify cases of work that will be equivalent to level and quality needed. Take a considerable amount of time to notice how close their previous work is to your project’s vision. Research studios that have rendered 3D for firms like yours.
3D rendering of diamond and sapphire rings

Studio capability and technology evaluation

Not all 3D rendering studios are alike. One needs to be cautious while evaluating the capabilities of any such prior to collaborating. The following points must be considered:

  • Software skills: As much as possible, ensure that the studio has the skills to go with industry-standard software like 3ds Max, V-Ray, SketchUp, or Blender. It is the advanced software that gives them the ability to create detailed and quality renderings.
  • Technical resources: Check if they own the right kind of hardware and infrastructure, from high-end computers to rendering farms, to handle big jobs or complex pieces of work.
  • Process and workflow: Ask their process for the workflow and project management process. Do they have defined processes in place, such as stage development, feedback, revisions, and final delivery? The more structured the workflow tends to be, the less likely there will be errors and the work will fit together.

By vetting these factors diligently, you ensure the studio has what it needs to be able to do its best.

RELATED: Utilizing 3D rendering services for companies in architectural property development

Communicate your expectations clearly

Clear communication is the lifeblood of any outsourced project. When discussing your project with a visualization studio, make sure you:

  • Create a detailed brief: Share with them what your project’s goals and desired outcomes are as well as the specific requirements. Include reference images, CAD files, blueprints, or other visual aids that will help the studio understand your vision.
  • Craft and plan for timelines: Break some realities with the timelines, according to the studio’s capacity and your needs. Contain in that timeframe a revision and a feedback loop.
  • Have budget guidelines: Talk about the budget beforehand so there’s no confusion in the later stages. Moreover, know how the studio works in terms of pricing; whether it is per image, per project, or any kind of additional revisions that need to be done, or expedited services.

A clear, well-documented agreement on all these points will ensure smoother cooperation and at least minimize risks of delays or miscommunication.

Test project

Right before such an important project, you might ask the studio to do a smaller test rendering. This is where you can gauge the quality of work, the turnaround time, and how responsive they actually are. You can understand how much they get your needs and how much more they pay attention to your feedback.

A test project also allows you to review the workflow and communication of the studio with your expectations.

Coordinating collaboration

Once you outsource your 3D rendering project, managing the cooperation correctly comes in the important checklist. Consider the following:

  • Check-ins: Have scheduled check-ins to ensure the work is on schedule and track of the plan. As much as possible, utilize collaboration tools or project management software to track the timeline and revisions.
  • Constructive feedback: If the item needs revisions, speak up. A good studio will appreciate specific details which help in fine-tuning the work towards your expectations.
  • Quality control: Look at the quality of your renderings every so often, observing whether or not they meet your expectations. Don’t hesitate to change what doesn’t meet your demands.

The bottom line is that a collaborative and open relationship with your visualization studio makes all the difference.

RELATED: Creating exterior renderings using 3D exterior rendering services for architects

3D rendering of wheel suspensions

Conclusion: why outsourcing 3D rendering will be the future

Outsourcing your 3D rendering services in 2025 is the efficient and cost-effective way of creating the right high-quality visual content that your company needs. By approaching the process strategically-through need assessments, selection of the right studio, effective communication, and effective management of collaboration-you will ensure a successful outsourcing experience.

With the technology used in 3D rendering being evergreen, outsourcing continues proving to be a must-have for companies interested in being competitive, bringing their projects to life in unprecedented realism, and delivering exceptional visuals.

How Cad Crowd can help

Your company can gain world-class design capabilities without the headache of having to build an in-house team. This means you’re left to do what matters most: grow your business. Let us help you do exactly that. Contact Cad Crowd and request a quote today.

author avatar

MacKenzie Brown is the founder and CEO of Cad Crowd. With over 18 years of experience in launching and scaling platforms specializing in CAD services, product design, manufacturing, hardware, and software development, MacKenzie is a recognized authority in the engineering industry. Under his leadership, Cad Crowd serves esteemed clients like NASA, JPL, the U.S. Navy, and Fortune 500 companies, empowering innovators with access to high-quality design and engineering talent.

Connect with me: LinkedInXCad Crowd

Expert 3D Store Rendering and Floor Plan Design Services: Attracting Retail Customers


Retail stores don’t just offer products to their customers. Owners should also make sure that their location is accessible with all the items displayed clearly while using the most effective techniques for visual merchandising. Making sure that the layout of a retail store is engaging and accessible means that visitors will be more inclined to browse for other products and may even become regular shoppers in the future.

This article explores the core principles of 3D store rendering and floor plan design services and how they can help attract more retail customers.


:rocket: Table of contents


3D gallery jewelry store

Store layouts are as unique as the storefronts themselves. It’s common for retailers to either space out their items to allow casual browsing or densely pack everything on a store floor.

Many of them also use signage to guide customers in navigating the area. And then some just let the products speak for themselves. Combining several traditional layouts is also common practice in many retail stores.

Retailers should always consider their industry category, available floor size, and their brand’s overall tone. From there, it will only take a few steps to implement the following practices for 3D store rendering and floor plan design services as needed.

RELATED: Integrating 3D rendering with photography for architectural development companies 

Decompression zone and store exterior

Every retail store, regardless of its industry category and size, shares one thing in common, and that is none other than its entrance. A retail store’s exterior can capture the interest of customers through outdoor signage or display windows to encourage bystanders to stop and enter. Store exteriors are also perfect opportunities to market special products, line-ups, or promotions that appeal to the audience.

The moment they enter the threshold, customers will step into the decompression zone. The decompression zone is a 15-foot space that acclimatizes the customers to the new area and offers them that first impression of the things they can expect.

Retail owners can use this decompression zone to help customers feel more at ease and guide them in their store navigation. Some retailers often ensure that every department can be seen from the decompression zone for customers to know exactly where to go. Other retailers also use signage as a direction guide or put the most popular items on the power wall that will be instantly seen and noticed by customers.

Whatever the case is, it’s a must to incorporate human psychology into the layout. The moment they enter the decompression zone, most customers turn right to start exploring the shop. This is the reason why power walls are usually put exactly to the right. Checkouts, on the other hand, are located to the left so that they are the last thing customers will see before they leave.

Free-flow

Free-flow layouts don’t follow any expected traffic pattern outside those that human behavior dictates. This unique quality is what makes free flow different from a truly unplanned design. Specific rules are still followed even though it might not look that way to the human eye.

Retailers can put their displays and products in any appropriate arrangement while leaving sufficient open space where customers can move around comfortably. Rather than structured aisles, the products fit into clusters aligned with the principles of shopping.

High-value items, for instance, are still placed to the right of the store entrance and staples are put to the back. No aisles or barriers keep the free-flow departments apart from each other.

Free-flow layouts are designed to be highly experimental and are a great choice for retailers who want to showcase various promotional displays.

The only downside is that it limits the available space for items. This layout is common in small boutique shops or open parts of bigger stores like a bookstore display area.

Grid

Grid is the most common layout and floor plan design in retail stores seen in supermarkets, grocery stores, pharmacies, and more. Retailers who use a grid layout arrange items into densely-filled aisles for customers to browse at their own time and leisure. The arrangement reduces space, maximizes the display of products, and is typically the most familiar choice for customers.

Although categories can be organized in any way, an effective layout puts staple and everyday purchases at the store’s rear portion. Promotional displays and items are placed at the front that customers will pass on their way to commonly bought products. This approach makes it more likely for customers to buy additional products on impulse or add to the current items in their cart.

Grid layouts, regardless of the arrangement, are recommended for storing large quantities of merchandise while keeping a predictable traffic flow. Sadly, customers have a hard time finding the items they want fast in the grid layout. Experimenting with this layout may present you with challenges as well.

RELATED: How 3D rendering is transforming the property development industry for companies?

Herringbone

Herringbone is a store layout and floor pan design that looks like the grid once optimized for cramped floor areas. This is made up of an open central pathway that leads from checkout entrances. It is an approach suitable for small hardware shops and community libraries.

Although herringbone grids maximize the use of small spaces, they limit the visibility of products. Putting promotional displays at the end of every grid is a great way to address this downside.

Loop

Loop store layout directs customers along one path past every available item before they reach the checkout. The approach makes the most out of the overall exposure of products and helps streamline customer traffic. However, it also limits browsing opportunities during high traffic volumes. Loops are standard in specialty shops, gift shops, and museums.

Finding the perfect layout and floor plan for a retail space often calls for some experimentation. Sadly, this is not practical all the time. Good thing that retailers can now take advantage of 3D store rendering and floor plan design services that can develop and optimize these layouts even on the fly.

Benefits of 3D store rendering and floor plan design services

Attracting retail customers and retaining them is always a top priority in today’s extremely competitive retail industry. 3D store rendering and floor plan design services that create meticulous 3D visualizations of stores are now critical partners for interior designers, architects, and retailers in developing visually functional and appealing retail spaces.

The following are some of the key benefits of attracting retail customers with the help of 3D store rendering and floor plan design services.

3d store aisle

RELATED: 3D furniture rendering services for companies and firms, cost, rates, pricing

Digital renovation makes everything easy

3D store rendering and floor plan design services can help compare updated and existing designs side by side. This is a big help if there is a need to update an existing store’s design. It helps convince investors of the convenience of the renovation and restoration of the space.

Effective marketing solution

3D store rendering and floor plan design make sure that the image of the store will be as lifelike as the artistic rendering. Computer visualization allows companies to showcase their commercial premises and products in the most enticing way possible.

This helps launch the product’s sales online before the construction of the store is completed or way before the manufacturing of the product itself.

Accurate illustrations

Photographs will always be great auxiliary materials for designers and construction teams. But here’s the dilemma: how will you take a photo of something that doesn’t even exist yet? This is where you can simulate reality with the help of 3D store rendering.

These images save you from those expensive mistakes, including the installation of the wrong materials and structures. 3D store rendering is your best option if you want to make sure that the designer’s idea will reach the builders correctly without any distortions.

Speedy redesign

3D store renders are photorealistic and detailed. They help designers pinpoint and address the limitations of the concept and allow them to develop its potential and strengths. Significant layout changes during the rendering phase will not just guide their designers in enhancing their ideas while allowing store owners themselves to save themselves from additional costs during the implementation of the concept.

Virtual staging

3D store renders can be used to showcase the fullest potential of the space and layout. This is an effective way of staging the area to entice more stakeholders and investors.

The Bottom Line

3D store rendering and floor plan design services have changed the design and construction of modern retail spaces. These can help you by cost savings, efficient space planning, better client communication, and realistic visualization.

As today’s everchanging retail industry, 3D rendering is expected to play a key role in developing store settings that are not just visually enticing but also highly functional at the same time. These 3D renders cater to the different shopping behaviors and needs of consumers.

RELATED: How 3D rendering enhances great architectural design presentations for companies

How Cad Crowd can help

Cad Crowd offers professional 3D floor plan rendering, 3D floor plan design services, and 3D commercial rendering services that can help store owners achieve their goals.

author avatar

MacKenzie Brown is the founder and CEO of Cad Crowd. With over 18 years of experience in launching and scaling platforms specializing in CAD services, product design, manufacturing, hardware, and software development, MacKenzie is a recognized authority in the engineering industry. Under his leadership, Cad Crowd serves esteemed clients like NASA, JPL, the U.S. Navy, and Fortune 500 companies, empowering innovators with access to high-quality design and engineering talent.

Connect with me: LinkedInXCad Crowd

Expert Tips for Choosing Freelance Android App Development Services for Your Company


The search for the best freelance Android app designers is never an easy task. After all, every freelance Android app designer is unique and different from the rest. But one thing is for sure: whether you’re a multinational company, a small business, or a start-up, you need to look for the right freelance Android app developer who can transform your dream application into reality. 

Why your company needs a freelance mobile app developer

Regardless of its shape, size, or type, businesses need a more responsive mobile app than ever. As the eCommerce platform continues to grow, it’s almost inevitable for businesses to develop mobile apps. Android app developers and designers are enjoying a high demand because of the Android OS’s notable popularity compared to its counterparts. As a result, companies that specialize in mobile app development strive hard to cater to the market and its ever-growing and ever-changing demands. 

But once again, it can be challenging to choose a reliable and trustworthy app development service. Since the mobile development process involves several stages that require the participation and collaboration of an entire team of skilled 3D design experts, no one can blame you if you’re confused when it’s time to look for a decent mobile app developer. Continue reading this guide to learn some expert tips for choosing freelance Android app development services for your company that won’t leave you disappointed with the results. 

RELATED: The best 3D modeling CAD software for designers

1. Review past projects 

Checking and going through the previous projects of an app development service can give you a good idea of the quality of their delivery and overall approach. The working portfolio of freelance developers speaks a lot about their work. Start by going through the app’s functionality, the time it took to finish the project, and the designing capabilities of the developer. These will help you understand and confirm whether the developer can meet your company’s app’s requirements. While you’re at it, do not forget to go through the feedback, ratings, and reviews for the app itself. 

2. Get in touch with previous clients

Just checking the past projects of a freelance Android app designer is not always enough. You might also want to consider reaching out to previous clients. Doing so will tell you how the developer treated and dealt with past clients. It will also help you understand how the designer works once they receive the project, their level of responsiveness, the frequency of communication with the client, how they handle challenges, and the like.  

3. Inquire about post-development support and tasks

Before hiring a freelance app designer, you should also take your time to ask about common post-development tasks, including app testing, app submission, support, maintenance, bug fixing, and other post-development concerns, before you decide to hand your project to the developer. While no app might be perfect, this is the least you can do to ensure that yours will be almost close to perfection. 

RELATED: 10 Product design software that are easy to learn

4. Ensure top-notch app performance and quality 

Users never like apps that take too long to respond. That’s why it is crucial to ensure that your chosen freelance Android app development service can come up with an app that is both intuitive and fast at the same time. 

5. Look for reusable high-performance code 

It’s a no-brainer that a freelance Android app developer should be proficient and well-versed in various languages, such as JavaScript and Kotlin. Additionally, it is essential that they know how to create a code that they can keep in an understandable and reusable environment. Through this, debugging and making the necessary changes will be simple and smooth. Moreover, future implementations of due updates and other similar changes will be more manageable.

6. Confirm understanding of material design basics

A prospective Android app developer must also understand and preferably have real-world experiences in working based on the Material Design principles and guidelines of Google that can help them craft user-friendly and appealing interfaces. This modern set of guidelines on material design helps ensure an effective form of the UI/UX design of the app with minimal effort. 

7. Check for comprehension of SDLC and business processes 

Modern development projects always require a good understanding of SDLC or software development lifecycle and business process. You can save more money and time in the long run if your chosen freelance Android software programmers/developers can pinpoint possible issues and challenges during the development process. 

RELATED: Reasons your CAD services company should use robust design software

app-development-services

8. Avoid focusing on the price tag alone

In the hopes of winning the race, many businesses tend to work with the cheapest freelance Android app designers they can find, only to be disappointed with a low-quality app that they received. In turn, this would be completely useless for their business. Rather than opting for those low-budget developers, hiring a freelance Android app developer who can come up with a high-quality and feature-rich app at the most competitive price would be more efficient and advantageous. 

9. Verify the use of an innovative approach 

Make sure you also look into the approach of the freelance Android app developer that you’re planning to hire. To ensure that the provider is adept in their service, always check if they understand the specific needs of your business. See to it that the development service can also improvise designs and offer a top-of-the-line user experience combined with groundbreaking ideas. 

10. Go for a certified and reputable developer 

Hiring a freelance Android app developer may sound risky, but as long as you choose a certified and reputable one, there is simply no reason for you to worry. Use your wise judgment and carefully consider every potential candidate before you settle for one. 

11. Guarantee ability to pinpoint and solve bugs 

Once the code is up and ready, the app designer will be in charge of identifying bugs and errors and getting rid of them accordingly. Once the app gets deployed, the designer will also continue to be in charge of troubleshooting. 

RELATED: Top 20 3D design software programs used by 3D services firms & freelance 3D modelers

12. Ask about the designer 

It would not do you any good if you settle for the first designer you meet. Take your time interviewing each candidate, and do not be afraid to ask more about them, such as their services and other related experiences. There’s nothing wrong with this, so go ahead and raise those questions running through your mind. 

13. Check for experience and proficiency 

Would you entrust your health to a doctor not licensed to treat patients? Definitely no! When it comes to app design and development, it’s never wise to put its fate into the hands of someone who is a complete beginner in the field. Always consider the proficiency and experience of the freelance Android app developer you’re eyeing to hire. Don’t forget that developing a business-centric and market-centric app is not an easy task. It is something that should be done with the utmost proficiency that only experienced designers can offer. 

14. Go through privacy agreements and NDAs 

Work with a freelance Android app developer only after you’ve signed the privacy agreements and NDAs. Signing these bonds with your chosen designer gives you peace of mind, knowing that your business’s confidential data will be safe and secure. You also need to guarantee that you have complete control and property rights of your app to prevent discrepancies in the future. 

15. Consider sufficient knowledge of different open-source platforms 

As an open-source platform, Android gives developers the flexibility to design apps that cater to the specific needs of the users. For this reason, the developer you choose must have a sound knowledge of these different open-source platforms. Be sure to look for a freelance Android app designer who is familiar and well-versed with the various open-source libraries. 

RELATED: Top 101 new product design and development firms for services in the US

android-app-designers

16. Pick a designer who stays up-to-date with trends and tech

The world of technology develops fast, with new technologies and tools getting introduced into the market almost every day. These include supplement software solutions and new knowledge complete with new features. When hiring a freelance app designer, see to it that they keep up with the most state-of-the-art technologies to help you stay ahead of the competition with the most interactive and updated solutions. 

17. Prioritize user needs

When developing an app, a freelance Android app developer should always focus on user needs and requirements. They should come up with a solution that will satisfy users, offer them comfort, and look more appealing to them.

18. Ability to work with different APIs 

Application programming interface or API allows speedy communication between different computer programs. The programmers communicate with different services, using numerous APIs for this particular purpose. It allows quick operation of different programs opened at the same time. These APIs should always be among the key strengths of an excellent freelance Android app developer. 

19. Capacity to handle various databases 

Almost all apps right now hold massive volumes of data. It’s critical to synchronize all of them between the outer database and internal storage when the app is offline. With that, a good command of these different databases is a must for the freelance Android app designer you will hire. 

How Cad Crowd can help 

Are you looking to elevate your company’s mobile presence with a top-notch Android app? Look no further! Cad Crowd is your gateway to expert Android app development services. Take advantage of the opportunity to harness the power of cutting-edge technology for your business. Get in touch with Cad Crowd’s skilled professionals and secure the future of your company’s mobile app development. Begin your success story now. Contact us today, and let’s build your dream Android app together!

CAD Files in Action: Industries and Companies Adopting Popular CAD File Formats


Today’s post explores CAD files and the companies and firms that adopt popular CAD file formats. Before the rise of CAD, paper and pencil were the only combination designers had access to. 3D designs and prototypes were all carried out manually. The result was the slow development of designs and the tedious prototype creation process. Without a doubt, the entire manual process required expensive trials and errors. 

But with the introduction of CAD technologies, the entire design, development, and prototyping process has become easier, faster, and cheaper. As a result, it’s simple to address design concerns and can be done so throughout the design process itself. Instead of the usual drawing, CAD files have become the ultimate weapon for 3D designers to bring their CAD designs to life. 

RELATED: CAD design and 3D modeling rundown

What are CAD files?

Computer-aided design or CAD files are the outputs of CAD software that contain information about the designed objects. These files might be made up of 3D or 2D data and are commonly used by designers, manufacturers, digital artists, engineers, and scientists. The format is the defining characteristic of CAD files. There are kernel, native, and neutral CAD file formats. Neutral file formats were elaborated as readable according to industry standards by most CAD modeling platforms.

These formats have publicly available specifications and are maintained by consortiums or companies. Meanwhile, major CAD vendors produce native formats. Third-party CAD tools conversion is necessary to import these files. Finally, kernel formats are derived from renowned geometric modeling kernels. CAD modeling kernels are components of modeling software. That defines how a shape is mathematically described by it. Kernel formats are recommended for software built on top of the kernel that corresponds to it. Here are some of the industries and companies adopting popular CAD file formats:

RELATED: Discover Why your business should use CAD services instead of manual drafting

Interior design

CAD files allow 3D interior design firms to breathe life into their visions through detailed and intricate digital designs. It allows them to present designs to their clients, from every detail to the smallest ones. They can also showcase the final look of the project upon completion. 

Architecture

Buildings are massive and costly projects. Flawless planning is critical when developing something as expensive and huge as a building. It is another case where CAD files come in handy. In addition to the actual layout and architecture of a structure, the CAD files can also be used to identify the correct specifications, such as weights, volumes, and measurements, even before the start of the actual construction. 

2D drawings and floor plan services can be used in the field once the construction starts. Meanwhile, the 3D architectural visualizations are used to gauge the accuracy of 2D plans and help backers envision the completed project to increase the chances of them funding it. It is especially true for office buildings as well as other commercial structures. However, home designers and builders also increasingly use CAD files and 3D visualizations these days. 

RELATED: Benefits of 3D floor plan rendering and design services for architects and companies

Landscaping

Landscaping companies also use CAD files to conceptualize their outdoor creations and identify the correct placement and location of different landscaping elements such as gardens, patios, fences, trees, and more. Companies can employ 3D landscape rendering designers to visualize their designs.

3d-landscaping-services

Automotive

Sophisticated CAD software and files are also used in different aspects and areas of automotive design. CAD companies for the automotive industry are used to produce 3D prototypes of new styles of car bodies and to design car parts such as engines, tires, upholstery, circuitry boards, and others. Data from CAD files can be fed into CNC machines that cut steel and robots that help construct vehicles on assembly lines. 

RELATED: Revolutionizing the automotive industry using 3D printed cars and innovative services 

Medical 

CAD files are also used by prosthetic design and CAD services for medical applications for prosthetics construction or reconstruction of different body parts. Some of these are even printed out using specialized medical 3D printers. Traditionally, CAD has been used to help engineer designs and models for analysis, representation, and manufacturing. The advancements in biomedicine and information technology have paved the way for new CAD uses and applications with many essential and novel biomedical applications.

The CAD files are used for tissue engineering, where the CAD-based bio-tissue informatics model offers crucial data on tissue biophysical, biochemical, and biological properties for the design, fabrication, and modeling of complex substitutes for tissues. 

Civil Engineering

Today’s urban planners also use CAD files to plan infrastructures in urban areas, including bridges, office complexes, industrial units, parks, and more. It is another aspect where 3D CAD is used most of the time. The urban planning process requires taxpayer dollars and funding. Many people find it hard to envision the appearance of a playground or park based on a 2D drawing alone. It’s even more difficult for them to visualize what a massive professional stadium will look like upon completion. This is where civil engineering professionals can help. If the planners hope for financial support and backing for a taxpayer referendum, CAD files are the best approach. 

RELATED: Civil engineering consulting services, cost, rates, and pricing for companies

Fashion Design

Even though most of today’s reputable fashion designers choose to craft their designs for their unique creations by hand at first, fashion CAD files are often used in the latter phases of the design process. CAD files are also almost always used by industries specializing in ready-to-wear garments. The files are used to identify the most efficient fabric cuts and to change the pattern scale for various sizes.

With the help of virtual models, the files can also be used to present how the item fits and moves when worn. 3D cad fashion design professionals can make the necessary changes to the design afterward. During the manufacturing stage, the cloths can then be cut, typically in large layers, with the help of CNC machines to speed up the whole process. 

RELATED: Fashion industry: benefits of 3D design technology for product development services 

Dentistry 

Did you get a tooth crown in the past decade? If yes, then chances are your dentist took advantage of technological advancements in CAD technologies. For 30 years, CAD files have been used in dentistry to digitize dental structures and oral cavities for virtual designs of complex and simple prosthetic units. However, the only difference is that this time, thanks to the rise of dental 3D printers and special dental materials, the structure is made right in the dentist’s office while you wait instead of being sent out to a laboratory first for construction. Dental CAD printing and design technologies can offer unmatched anatomical accuracy even while you wait. 

3d-printing-services

Forensics 

Just like how your well-loved CSI show uses CAD technologies to solve their cases, their counterparts in the real world do so as well. The role of 3D CAD design and 2D drafting services in forensic sciences is to help estimate a person’s age, analyze the injuries incurred, and identify the victim postmortem. Most of the time, postmortem identification involves comparing dental records in the form of models and radiographs of a person before death or ante mortem to that of postmortem or after death. 

RELATED: The history and future of 3D CAD design & modeling

On the other hand, injury analysis may involve comparing bone contusions or fragments to the types of known injuries or weapons. Forensic sciences can also use CAD files to help in 3D reconstruction of the investigation of crime scenes. 

Law

3D CAD reconstructions of crime scenes and accidents that resemble those used in forensics can be used even in courtrooms to assist the jurors in visualizing the events put on trial. 

Mapping

As a form of CAD, computer-aided mapping is especially related to cartography and mapping. This is typically used by GIS mapping experts to generate utility, parcel, and street maps that can be used with GIS or on their own. Even though GIS and CAD are similar to each other, the two have some notable distinctions. Most importantly, CAD is designed to edit and create graphic entities. In general, CAD also has minimal database capacities, but this might not ring true in the case of 3D CAD.

RELATED: Is 3D modeling and rendering the future for architectural design firms?

On the other hand, GIS is the spatial database where graphics are used to display the analytical results, wherein graphic editing is the secondary ability. It is essential to note that several CAD programs come with GIS functionality as an add-on to their core functions in graphic editing. 

Aerospace

The aerospace field is undoubtedly one of the most high-tech modern industries that use CAD files. The aerospace industry includes aircraft, missiles, satellites, and space vehicle manufacturers. Since these products come with colossal price tags, with a single aerospace item easily costing several million dollars, aerospace engineering services and CAD files play a crucial role in the design process.

Before the construction of the actual product, every single detail is planned and virtualized as thoroughly as possible with the help of sophisticated CAD design software. Advancements in computing technologies have undoubtedly paved the way for the continuous rise of CAD files in applications beyond the scope of conventional AEC design. 

RELATED: How the aerospace industry is using CAD design services: drafting, modeling, and prototyping

How Cad Crowd can help

Get in touch with Cad Crowd today and tap into the massive pool of CAD design professionals specializing in CAD files that can be used in various industries and by different companies. Contact us for a free quote.

Exploring the Pros and Cons of Digital Concept Designs in 2D CAD for Companies


Believe it or not, many organizations still use paper-based methods when exploring initial concept designs. Although there’s nothing wrong with it, especially during the early stages of concept work, it has its own set of limitations. Making paper concept designs for the subsequent development stages will involve more work and effort. Investigating and evaluating different design options is also tricky.

On the other hand, it’s still more straightforward and affordable to stick with 2D CAD. It’s also a great option if you’re just getting started. This article reviews the pros and cons of digital concept designs in 2D CAD for companies.

What is 2D CAD?

2D CAD is a CAD or computer-aided design file that features a two-dimensional representation of a part or object. 2D CAD drafting services are often used in the manufacturing and engineering industries to communicate and present design details to the rest of the people in the production process.

2D CAD drawing software allows engineers and designers to develop precise and accurate drawings of assemblies and parts. These drawings can include annotations, dimensions, measurements, and other information critical for manufacturing. 2D CAD drawings are typically used to develop blueprints, schematics, and technical drawings. These also come in handy to specify tolerances, communicate the intent of the design, and convey other essential details to those who are part of the production process.

It’s possible to save 2D CAD drawing files in different formats, such as PDF, DXF, and DWG. These files are also shareable electronically with everyone in the production process, simplifying collaboration and allowing changes to be made whenever necessary. With the help of 2D CAD, engineers can also create detailed drawings in 2D for CNC machining parts.

RELATED: Architectural Plans, CAD Drawing Costs & Architect Service Pricing

How to make 2D drawings in CAD

pros1

Below are the basic steps involved in drawing in 2D CAD:

  1. Open a new 2D CAD drawing file in the CAD software. Select the suitable scale and units for the drawing.
  2. Create a new layer for the drawing first. It will help organize the drawing and let you control its different parts and elements.
  3. Use suitable drawing tools to start drawing the 2D geometry. Many CAD software tools let you draw lines, rectangles, arcs, circles, and other geometric shapes.
  4. Refine and modify the drawing as necessary with the editing tools. You can use different tools to tweak existing geometry, including chamfer, extend, fillet, and trim.
  5. Include annotations and dimensions in the drawing. The dimensions are used to specify the location and size of the geometry. Annotations are used to include additional details about the drawing.
  6. Add layers to control the visibility of different parts of the drawing. Different line types and colors can be assigned to different layers to simplify distinguishing between different parts of the drawing.
  7. Save the drawing in the suitable file format. Typically, 2D CAD software supports different file formats like PDF, DXF, and DWG.

RELATED: CAD File Conversion Costs, File Type Conversion Rates & Services Pricing

Popular 2D CAD programs

pros2-1

The market is now filled with different 2D CAD programs. The following are some of the easiest to learn and most user-friendly:

DraftSight is a professional-grade 2D CAD program with a free version for personal use. Its user interface looks and feels familiar and provides extensive editing and drawing tools.

It is an open-source and free 2D CAD program that is easy to use and has basic features and drawing tools.

SketchUp is a popular 3D modeling tool, but it also comes with 2D CAD drawing capabilities. It has an intuitive and simple interface and is usually used for interior design and architectural projects.

Tinkercad is a free 3D modeling and design tool with 2D capabilities. This is developed for beginners and provides a simple, easy-to-use drag-and-drop interface.

Pros of 2D CAD for digital concept designs

Cost-effective

2D CAD solutions are considered more cost-effective than advanced 3D CAD. The cost of working with a 2D CAD expert is also reduced because you can get the output of your project in less time. The designs are also easy to understand and can meet expectations in just one go. This saves you from worries because you no longer have to hire experts for pricey alterations. In addition, 2D CAD drawing software is typically cheaper than 3D CAD software.

Easy to learn

2D CAD drawing is simpler than 3D modeling so that you can learn it quickly. While 3D CAD tools provide designers with different functions, most are not necessarily required to produce drawings for component plans, piping, assembly, and more. On the other hand, 2D CAD tools only contain essential functions that are easy to operate and understand (i.e., line weights, line types, layers, etc).

Error-free

Since the number of manual calculations is reduced, 2D CAD has minimal room for mistakes and errors. Design engineers can digitally develop different mechanical components with exact dimensions and tweak them according to the requirements.

2D CAD tools can also automatically calculate the specific changes made in various factors. It also includes inputs on the designs built in the past. You can get faster and more accurate iterations of existing designs with minimal manual inputs.

Faster processing

The files of 2D CAD drawings are smaller than 3D models, making their processing and sharing faster than ever.

pros3

Flexible design

One of the most notable perks of using 2D CAD is that you can quickly amend the designs. Unlike the conventional paper-based models, it will only take a few clicks to alter the layout on the digital platform. You can experiment with different options until you find the design satisfactory. A skilled drafter can create a realistic reproduction of the final product and present how the different elements will fit and blend in a defined space.

Precision

2D CAD drawings are often exact, allowing designers to specify exact dimensions and measurements.

QCAD

QCAD is a 2D CAD program made explicitly for new CAD users. QCAD has an intuitive and straightforward interface with basic editing and drawing tools.

Time-saving

2D CAD software can calculate the most updated or added calculations with minimal manual input. This allows the designer to focus on the areas that need more attention. Digital drawings can also be shared faster among all the involved teams. This will ensure that everyone is always on the same page, and if a team member ever finds any change or error, it can be solved immediately. It makes developing designs of materials, fabrication detailing, manufacturing, or other units quicker than ever.

Versatility

2D CAD drawings apply to many applications, such as architecture, graphic design, and engineering.

RELATED: Why You Should Outsource to CAD Drawing and Drafting Services

Cons of 2D CAD for digital concept designs

Limited visualization

2D CAD drawings can only offer a flat, two-dimensional view of objects. As a result, they cannot convey any perspective or depth.

Inadequate information

2D CAD drawings cannot convey all the details in a 3D model, including the material’s volume, weight, and properties.

Insufficient interactivity

2D CAD drawings are static, which means that you cannot manipulate them in the same way that you do with 3D models.

Restricted simulation

You cannot use 2D CAD drawings to simulate the performance of an object under real-world conditions such as fluid flow, strain, and stress.

Minimal options for design

2D CAD drawings are only limited to flat shapes in two dimensions. They cannot convey or present more complex assemblies or geometries.

pros4

When should you use 2D CAD drawings over 3D models?

  • Designs are only required for one component.
  • The project has tight completion deadlines.
  • The drawings need less space.
  • The models don’t require any 3D functionality.

Can you combine 2D with 3D CAD?

Using 3D and 2D together can help you optimize the project faster and easier. It is a hybrid approach that can lower manual updates and enhance interoperability.

2D CAD can also help develop drawings for the shop floor requirements and even share them with the rest of the team members. 3D CAD tools, on the other hand, can help perform error detection, visualization, and design analysis.

How Cad Crowd can help

Even with the rise of 3D CAD models, engineering CAD designs still require 2D CAD drawings. The design engineers continue to use 2D drafting in almost 50% of the entire CAD software utilization. Cad Crowd is a platform used to find professionals specializing in 2D CAD design services and 3D CAD.