Black Ops 6 is the latest entry in the very long-running Black Ops wing of Activision’s Call of Duty series. Specializing more in alternate history and spy craft than other Call of Duty games, Black Ops 6 launches with a new campaign set during the height of the Gulf War. As usual, the game will offer a campaign, multiplayer, and a zombies mode.
Here’s what time Black Ops 6 releases, including a breakdown of when it’s available on which platforms, if you can play it on Game Pass or not, and a brief overview of what’s new.
What time does Black Ops 6 release on PC?
Image: Activision
Black Ops 6 releases on Windows PC (both Steam and Battle.net) at 9 p.m. PDT on Thursday, Oct. 24. Here’s when that is in your time zone, or you can check the image above:
9 p.m. PDT on Oct. 24 for the West Coast of North America
12 a.m. EDTon Oct. 25 for the East Coast of North America
5 a.m. BST on Oct. 25 for the U.K.
6 a.m. CESTon Oct. 25 for Western Europe/Paris
1 p.m. JSTon Oct. 25 for Tokyo
Black Ops 6 is currently available to pre-load for all playerson all platforms.
What time does Black Ops 6 release on PlayStation, Xbox, and Microsoft Store?
Image: Activision
For PlayStation, Xbox, and Microsoft Store PC players, things are a little weird. Activision is giving a release window for the game, from 4 a.m. – 11 p.m. PT on Oct. 24.
At the very least, Black Ops 6 should be available before midnight PT on Oct. 25, but it could also launch several hours earlier. At the moment, your best bet is to follow the Call of Duty blog or Call of Duty’s official social media accounts, though we’ll update this guide if Activision provides more clarity.
Is Black Ops 6 on Game Pass?
Yes, Black Ops 6 is the first Call of Duty game to launch on Xbox Game Pass, following Microsoft’s official acquisition of Activision Blizzard last year. However, there is a minor catch here. Game Pass Core and Game Pass Standard subscribers will not gain access to Call of Duty: Black Ops 6 at launch.
The game will only launch for PC Game Pass and Xbox Game Pass Ultimate subscribers. If you already have one of those tiers, you’ll be able to play on launch day alongside everyone else. If not, you’ll need to upgrade to a higher Game Pass tier or purchase the game separately.
What’s new in Black Ops 6?
Image: Activision
Black Ops 6 is the return of the subseries started more than a decade ago, and takes the alternate history and applies it to the Gulf War and early ‘90s America. The game comes with the three big Call of Duty staples, as usual: campaign, multiplayer, and zombies. Unlike last year’s title, this zombies mode returns to its classic round-based variant.
The big new feature for this game is omnimovement, which drastically improves players’ ability to maneuver the battlefield in and out of combat.
It’s been a while since we’ve seen much from Wizards of the Coast and Archetype Entertainment’s Exodus, the upcoming sci-fi role-playing game from former BioWare developers. Sure, the studio has been dropping lore and concept art since revealing Exodus at last year’s The Game Awards, but a new trailer for the game released Wednesday offers a much-needed reminder of Archetype’s upcoming project.
Archetype’s latest reveal for Exodus is timed to Spooky Season — and is thus appropriately terrifying. The game’s new cinematic trailer introduces the Mara-Yama, an alien threat that travels in fleshy ships and relentlessly pursues and overwhelms its victims. Think Star Trek’s the Borg, but instead of voyaging through space in black cubes, Exodus’ unrelenting predator species gets around in ships that use grotesque extremities like a physical tractor beam.
According to some moody narration, courtesy of actor Matthew McConaughey (Interstellar), the Mara-Yama “feed on fear, delight in cruelty, and revel in the agony of their prey. They aren’t just hunters — they are sadistic predators who savor every moment of psychological torment they inflict.” The name Mara-Yama is a reference to the deities Mara and Yama, representations of death and the underworld in Dharmic religions.
While these cosmic horrors may not be appealing, necessarily, they have stoked my interested in Exodus. I’m digging the coldness-and-cruelty-of-space-demons thing that McConaughey’s vibing about here.
Apparently, we’re going to be hearing a lot more from McConaughey; he’s portraying a character named C.C. Orlev for Exodus. The developer describes him as a “self-proclaimed spokesman” for Exodus, and an infamous character in the game’s fiction.
Exodus does not have a release date. It’s currently in development for PlayStation 5, Windows PC, and Xbox Series X, and, according to executive creative director James Ohlen, is just the start of a new universe.
Archetype’s debut title is part of a billion-dollar bet on internal game development at parent company Hasbro. In addition to Archetype Entertainment, Hasbro has Atomic Arcade, which is working on a G.I. Joe game starring Snake Eyes; Invoke Studios, which is developing a Dungeons & Dragons game; and Skeleton Key, which is working on “something spooky.”
Life Is Strange: Double Exposure simultaneously serves as a welcoming return and an exciting leap forward, as fan-favorite protagonist Max Caulfield steps back into the spotlight with new friends, a fresh mystery, and reality-bending abilities. I took the game for a spin during Gamescom and the demo revealed, to my surprise, that Double Exposure may be the series’ most mechanically intriguing entry yet.
With the game set a decade after the events of the original Life Is Strange, the now-adult Max has left Arcadia Bay and works as an artist-in-residence at Caledon University in upstate Vermont. She’s formed a new friend circle in Moses, a science enthusiast, and Safi, daughter of the university’s president. Since the cataclysmic events at Arcadia Bay, of which both endings will funnel into this narrative, Max has sworn never to use her time-rewind power again. However, her new peace becomes shattered when Safi is mysteriously murdered, prompting Max to attempt to save her by winding back the clock for the first time in years. For reasons unknown, the lengthy period of inactivity has caused Max’s power to evolve, and she manages to tear through the fabric of time and space to access an alternate timeline where Safi still lives but remains in mortal danger. Thus, Double Exposure becomes a double murder mystery with players utilizing Max’s newfound Shift power to jump between timelines to discover the identity of the killer in one reality while preventing Safi’s murder in the other.
The Gamescom demo takes place shortly after Safi’s murder. I won’t spoil the narrative details, but Max must retrieve Safi’s camera from a classroom while avoiding detection by a snooping detective. While the room is locked in her current timeline, the same may not be true in the alternate reality. Keeping track of which timeline you occupy is easy thanks to an icon in the upper-left corner labeling the reality as “Living” or “Dead,” referencing Safi’s fate in that world. Using Max’s Pulse ability, another new trick that lets her detect and reveal ghostly elements from the other timeline without doing a full swap, I find a glowing weak point between realities where switching timelines becomes possible. Making the jump sees Max pull apart the current reality like she’s opening a pair of curtains to instantaneously cross over to the other side. The snappiness of this transition makes for a cool visual.
Getting my hands on Safi’s camera becomes an involved exercise in exploring the two-story room, finding clues and hitting dead ends that can only be circumvented by switching to the other timeline. Elements such as the room’s layout, the characters’ current activities and moods, and the location of important items differ in each timeline, and the crux of puzzle-solving involves figuring out how gathering information in one world answers a question in the opposite one.
What begins as a simple search for a safe spirals into using an astronomy chart to find a vital constellation referenced by Moses, then activating a projector to overlay a star chart on a classroom mural in such a manner that the orientation of the constellation reveals the hidden location of the safe’s item. Solving this single puzzle requires several timeline shifts to unravel smaller riddles that logically build toward the solution.
Upon solving this puzzle, the detective forces his way into the classroom, triggering a stealth sequence where I need to escape the room undetected. Simply sneaking past him isn’t enough; I need a loud object to create a distraction, and it can only be found in the Living reality. Since the patrolling investigator blocks certain routes in the cluttered, box-ridden room, getting past him requires a few strategic uses of Shift, as he’s not present in the Living timeline.
While Double Exposure seems to test your noodle more than previous entries, it still heavily emphasizes managing character relationships and steering the story through dialogue choices. However, timeline hopping adds some spice to this formula. While a character may be hesitant to reveal a crucial personal secret in one timeline, their counterpart may be more forthcoming, offering information that can give Max the upper hand. Resorting to using knowledge Max technically shouldn’t possess may not go over well, though, adding a thoughtful wrinkle to conversations.
The Double Exposure Gamescom demo sold me on Shift as a fun mechanic, and I’m excited to see how the game further leverages it to tell its tale. Tack on the return of Max and I’m itching to see how this multiversal murder mystery unravels.
Like many other sports gamers, I have been eagerly awaiting the release of EA Sports College Football 25for what feels like decades. Now it’s finally here in early access, and I’m overjoyed. I’ve been loving my time with the game, in both Ultimate Team and Dynasty modes, but there’s one particular bone I have to pick with the option system that’s holding me back from being fully enamored with the new entry.
Option offenses are crucial to any good football video game, but especially at the collegiate level, where many teams run option-based offenses. For years, EA’s preferred controller input for a read option — where the quarterback makes a read on the defense to determine whether to hold on to the ball or hand it off — has been the same: Tap X (or A on Xbox) to hand it off, or do nothing to keep it.
For some reason, EA Sports College Football 25 has inverted this long-standing tradition. Instead, you tap X/A for the quarterback to pull the ball back and keep it, or press nothing to hand it off. I’m starting to get used to it, but this involves overcoming years of muscle memory in both this franchise and the Madden games. I’ve made dozens of mistakes in the option game already — keeping it when I meant to hand it off, or vice versa — and I would conservatively estimate that it’s cost me 45 yards, two touchdowns, and probably two gray hairs in an otherwise fantastic gameplay experience.
For me, it just makes more sense to press a button to give the ball rather than press a button to keep it. I can understand that, in theory, the action of pulling the ball back is more significant for the quarterback than giving it away. But in these games, you aren’t just playing the quarterback; you’re controlling the offense. And handing off the ball seems more like an action than not handing it off, making that the more fitting place for a button press. And at the end of the day, years of muscle memory will triumph, especially with a blitzing linebacker in your face.
College Football 25 has plenty of control optimization options already. You can change the new passing or kicking systems back to the old controls. Why not add a toggle to change the option controls? The game has lots of quality-of-life upgrades, like running out the clock instantly on quarterback kneels, when applicable. Let’s add one more and bring back the old option controls.
It seems like no world — physical nor digital — is immune to the girly pop flair of NewJeans. The globally famous K-pop group made its debut in PlayerUnknown’s Battlegrounds as part of the 30.1 update on Wednesday. The collaboration adds each member of the group as a playable character, adorable accessories to dress up your characters, emotes for popular dances set to songs like “OMG,” and more. Equal parts bizarre and wonderful, the PUBG update has already captured the fascination of fans online.
Krafton released the NewJeans x PUBG: Battlegrounds collaboration on Wednesday to Windows PC users and will release it to console users on June 20. The PC patch has introduced some environmental changes as well. For example, the Taego School has been transformed into a sparkly rainbow wonderland and there’s now a pink and purple truck stage on the starting island of every 8 km map. You can play as any member of NewJeans — Minji, Hanni, Danielle, Haerin, or Hyein — and dress your character up in adorable pastel accessories. You can view all the details on the PUBG site.
The collaboration brings a vibrant pop of color to the gritty world of PUBG. Just like other live-service games, PUBG is no stranger to surprising collaborations. PUBG has featured collaborations with the anime series Neon Genesis Evangelion and other games like Angry Birds. Despite that, the NewJeans collab manages to stick out from previous events and now people online are sharing videos showing the girls emoting in the game. The dances just look that good. Here is a video of Minji from NewJeans doing several dances from songs like “Super Shy” and “OMG.”
It’s only been a day, but people have already started to make memes of the girl group in the game. This video features several moments, including one where Haerin dances on a knocked out played and then shoots them at point blank range.
I personally can’t get this video of several characters joining in on dancing the choreo for “Hype Boy” out of my head.
There’s a lot to check out, so if a ton of Bunnies suddenly found themselves interested in trying out PUBG, I wouldn’t blame them.
If you’re looking to level up your crafters and gatherers in Final Fantasy 14, completing weekly custom deliveries to eager clients is a great way to amass both EXP and scrips (the crafting/gathering currency).
Below, we explain how custom deliveries work in FFXIV and how to unlock them all.
Custom deliveries in FFXIV, explained
Custom deliveries are weekly quests you can complete to earn lots of crafting and gathering EXP and scrips. You’ll also gain satisfaction for each character you do deliveries for and their satisfaction levels will rise, teaching you more about the character. You can only complete a total of 12 custom deliveries per week and six per specific NPC. Deliveries reset every Tuesday morning.
Every week the clients will ask for a list of items that you can either craft or gather. You can check what items they want without even talking to them via opening the “duty” menu, selecting “timers,” and then selecting “custom deliveries.” (It’ll only show you the clients if you have them unlocked, though.)
Image: Square Enix via Polygon
You can buy all the materials needed for crafting from nearby merchants. For example, Zhloe and Adkiragh’s materials are bought from the Scrap Salvager in Idyllshire and Kurenai’s materials can be purchased from the Blue Merchant across from her in Tamamizu.
For gathering, you can check where the gathering nodes are by opening the custom delivery menu for that client, selecting the fish or gatherable, and selecting “display location” or “search for item by gathering method” respectively.
The higher collectability your crafted or gathered turn-in has, the more EXP and scrips you’ll get in return. Scrips can be used to purchase important crafting materials, materia, décor, and other useful loot from Scrip Exchange NPCs. Notably, you can use scrips to get some of the materials you need for your Heavensward Anima relic weapon.
Also, once you max out the client’s satisfaction, you can glamour them, dressing them up in whatever outfit you want. You can do this for all the clients except M’naago and Ehll Tou.
Rewards from custom deliveries
While EXP and scrips is a bountiful enough reward, some of the custom deliveries give out special rewards that are worth grabbing:
To get the above rewards, you’ll need to reach max satisfaction with these clients and complete a quest (given by the client) after doing so.
You’ll also get two titles from each client after reaching max satisfaction with them and after delivering 150 collectables to them.
Where to unlock all custom deliveries in FFXIV
Before you unlock custom deliveries, you need to unlock collectables, if you haven’t already. You can do this by completing the quest “Inscrutable Tastes” from Morgayne in the Foundation (Ishgard). You will also need to be at least level 50 in a crafting or gathering job to unlock collectables, but the first custom delivery client is available starting at level 55.
You will also have to complete these short conversation quests to unlock scrip exchanges and vendors for each expansion:
Heavensward: “Go West, Craftsman” from Lydirlona in Mor Dhona
Stormblood: “Reach Long and Prosper” from Galiena in Rhalgr’s Reach
Shadowbringers: “The Boutique Always Wins” from Mowen in Eulmore
Endwalker: “Expanding House of Splendors” from Ofpilona in Radz-at-Han
Two of the clients require you to unlock The Firmament, the hub for Ishgard Restoration. You can do this by completing the quest “Towards the Firmament” via the Recruitment Notice flyer near the Ishgard Aetheryte. You’ll need to complete most of this questline to unlock Ehll Tou and you’ll actually need all of it to unlock Charlemend, so you might as well do it all (unless you hate Charlemend for some reason).
Image: Square Enix via Polygon
As usual, these quests (and the ones to unlock the actual deliveries) are marked with a blue quest marker with a plus sign, so you should be able to find it just by opening your map and seeking out that icon.
Below, you can see where to unlock all of the custom deliveries in FFXIV.
Requires Stormblood expansion, The Firmament unlocked via “Towards the Firmament” side quest, side quest line for Ishgard Restoration completed up until at least Ehll Tou appears, Ehll Tou side quest “If Songs had Wings” completed
If you’re just starting out in the massive world of Final Fantasy 14, we have tons of guides to help you. We have a beginner’s guide to get you started, along with guides detailing when you’ll get your mount and which Grand Company you should join.
Senua’s Saga: Hellblade 2 is here to continue, well, Senua’s saga. Hellblade 2 picks up an indeterminate amount of time after 2017’s Hellblade: Senua’s Sacrifice.
The events of Hellblade 1 have a definite effect on Hellblade 2 — specifically on Senua — but do you have to have played Hellblade: Senua’s Sacrifice to enjoy Senua’s Saga: Hellblade 2? Let’s break it down.
Should you play Hellblade 1 before playing Hellblade 2?
The short answer is: You don’t have to play Hellblade 1 before playing Hellblade 2.
There’s a handy (skippable) recap movie when you start a new game of Senua’s Saga: Hellblade 2. What’s more, the events of the Senua’s Sacrifice are more backdrop than foundational to the events of Senua’s Saga — they’re good to know and they flesh out the world, but they’re not strictly necessary.
Image: Ninja Theory/Xbox Game Studios via Polygon
Regardless, when you start a new game, you’ll get a five-minute video with carved megalith visuals that covers all of the events of Hellblade 1. It’s thorough enough to get you up to speed for Hellblade 2 without too many questions.
If you missed anything in the video, though, here’s the crash course to get you ready for Senua’s Saga: Hellblade 2: Senua hears voices (the Furies). Her mother heard voices too. Senua’s father was a bad man and killed her mother because he thought the voices were evil. Senua fell in love, but it didn’t go well. People died. Senua continued to hear voices, and now had another voice in her head — her father’s (The Darkness and, later, the Shadow). Senua went to Hel(l) to retrieve her lost love and kill a god. She was half-successful, finally learning to accept loss as part of life (but still stabbing a god). She learned to live with the voices as a part of her.
That last part is why the voices you’ll hear throughout Hellblade 2 are kind of neither encouraging or discouraging — they’ve taken on a role more as observers or commenters (or a Greek chorus) than as antagonists.
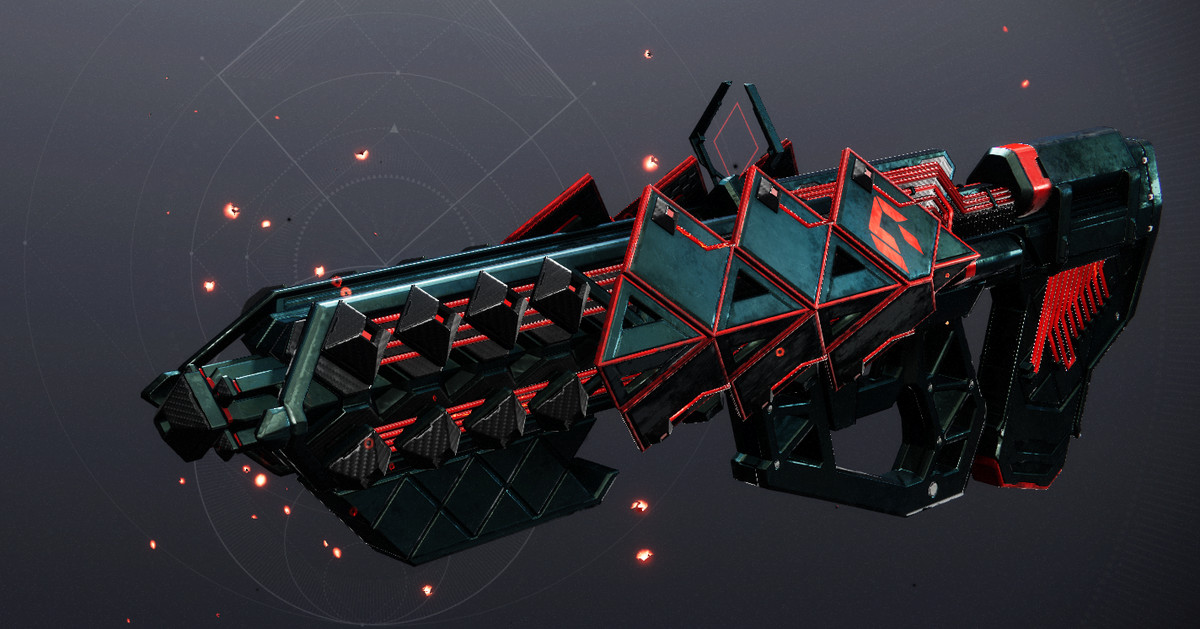
“Zero Hour” is the second secret mission to ever come to Destiny 2, and it’s finally back in the game as part of the Into the Light update and the May 14 reset. Much like the reprised “The Whisper” mission and its Whisper of the Worm reward, the updated version of “Zero Hour” rewards a fully craftable version of the Exotic pulse rifle Outbreak Perfected.
In this Destiny 2 guide, I’ll walk you through how to complete “Zero Hour” and get the pattern for Outbreak Perfected. Whether this is your first time experiencing “Zero Hour” or it’s just been too many years for you to remember the path, I’ve got you covered.
How to start ‘Zero Hour’ in Destiny 2
Image: Bungie via Polygon
To start “Zero Hour,” all you need to do now is talk to Ada-1.
Head to the Tower Annex — the landing point over by the Drifter — and head up to Ada-1, the vendor who normally just handles transmog. She’ll give you the “Asset Protection” quest. With the quest in hand, all you need to do is open up the “Into the Light” submenu in the Director and select “Zero Hour.”
Completing the Exotic mission and finishing the quest at Ada-1 will reward you with the pattern for Outbreak Perfected.
‘Zero Hour’ walkthrough in Destiny 2
You have 40 minutes to beat this mission on the Normal difficulty.
Navigating the Destiny 1 Tower in ‘Zero Hour’
“Zero Hour” starts out with a lot of combat as you first adventure through the Destiny 1 Tower. You’ll be dealing with some powerful Fallen here, so make sure to put on your best gear and an assortment of ad-clearing weapons. As with all dense Fallen encounters, the Riskrunner Exotic submachine gun will serve you well if you’re having trouble.
Bungie via Polygon
Make your way through the bazaar and into the small vent. On the other side, you’ll be where the Speaker’s chambers once were. Clear the enemies, and move through the sweeper bot hallway.
You’ll find yourself in the courtyard, which is filled with enemies of varying type and power. There’s even a Brig here now, an enemy type that didn’t exist when the original mission came out. Take them all down to unlock the rest of the path.
Bungie via Polygon
Continue through the old tower until you reach the flaming scaffolding where the original opening mission of Destiny 2 takes place. Slide under the big door next to the M and drop down the elevator shaft. Climb in the vent and follow it.
Bungie via Polygon
You’ll emerge in a giant shipyard. Turn immediately left, and you’ll see a ship sitting below you. Run up to it and crouch under its nose. Follow the path and take a right into the vent. Follow the hallway you drop into and take the other vent above you. Take a left and enter another vent behind the toolbox.
Bungie via Polygon
Follow the vent and take your first right. There are a few doorways below, but you only need to take the one directly under you. If you’re the first player to arrive, you’ll have a handy metal lip to stand on. If you’re following a teammate, it’ll have broken off by now. Step off the ledge, turn around, and push forward against the wall as you fall. Climb into the ledge and follow the vent.
Bungie via Polygon
Jump onto the first piece of yellow scaffolding and then onto the next. Look toward the tower. There are two drain openings and a platform to your left. Depending on your class, you can either jump straight to the landing or hop your way to the landing through the drain openings.
Bungie via Polygon
On the landing, look off and down toward the tower. You’ll see a small protrusion. This is your target. Jump off the landing and move toward the wall. Land on the antenna.
Bungie via Polygon
Look out toward where the city and turn left. Jump on the pipes until you reach the next landing. You can pull a switch here to help your friends catch up.
Bungie via Polygon
Jump onto the scaffolding above you and run up to the open vent. Jump in and follow the path. You’ll be in a big elevator shaft. Start climbing up a few flights until you’re at the second from the top. Shoot open the vent on the right and climb through.
Bungie via Polygon
Now you’ll be surrounded by spinning fans, each of which have an Explosive Shank in the middle. Look for the red lights and jump into them. If you hold against the wall, you’ll save yourself from the fans. When you land, be careful — don’t hit the ground too hard and skid off into another fan. Repeat this process, carefully taking out or maneuvering around the Shanks, until you’re at the bottom of the shaft. Climb in another vent.
Bungie via Polygon
You’ll now find yourself in a long hallway that looks completely blank. Jump off the ledge and onto the silver vents hanging off the wall. These are tricky to stand on, so limit your movement. Jump to the next one and finally into the open door on the far side. Once again, there is a switch here to help your friends through the puzzle if they’re lagging behind.
How to navigate the ‘Zero Hour’ maze
Bungie via Polygon
Follow the vents until you get to Ventilation. Walk forward and take a look at the map, which you can see clearly in the image above.
This is the maze section of “Zero Hour,” and it looks much scarier than it actually is. The white lines represent hallways you can walk through, with the red arrows denoting switches you need to hit. You start the map in the center of the bottom-most rectangle’s southern white line. When you’ve had a good look at the map, turn around and drop down two floors of vents.
You’re in the maze now, just like in the picture. We recommend sending one player right and another left, just to speed the process up. The instructions below are for the right-side player, so left-side players should just mirror my instructions.
Bungie via Polygon
Run forward and take a left. Keep running until you find a split in the hall.
Turn right and into another rectangle.
Follow the path and hit the first switch.
Keep running until you reach the original hallway.
Bungie via Polygon
Here, you’ll likely have to wait for a wall of electricity to pass. If the electricity is just starting to arc, you can run through. Otherwise, you’ll have to sit and brood — Darth Maul style.
Bungie via Polygon
When the electricity drops, take a right turn. You should start hearing an unsettling sound about now. An electric shredder is also running the maze with you, named TR3-VR by Bungie and the Destiny community. There are some alcoves to hide in so it can pass, but just to your left you should see a giant cavern with pipes in it.
Jump on the pipes and wait for the machine to pass. You can tell if the shredder is chasing you by its sound or giant red light.
Bungie via Polygon
With the machine gone, jump back over to your hallway and take a left. Follow the path until a hallway opens on the right. Go hit the switch like last time and return to your normal hallway.
Bungie via Polygon
Take a right and follow the path until you can take another right. This is the exit. If you’ve hit all four switches, the doors will be open.
Run into the new room and hop on one of the elevators to your right or left. Hit the button and wait for them to slowly lift you into the rafters.
Bungie via Polygon
Jump onto the platform and shoot out the vent. Head down the chute and stay in the center of the slide. Jump to slow your momentum, or risk death by splattering against a wall. When you come out of the chute, turn left and then immediately right. Crawl through the vent on the floor.
How to navigate the vault maze in ‘Zero Hour’
Bungie via Polygon
You’ll be in the old Cryptarch Vault now, and the mission is nearly done.
On the opposite side of the Vault’s door, you’ll see some pipes on the wall. Next to the pipe, you’ll see the Cryptarch symbol. Go stand by it and the secret door will open. Run forward until you reach the section with white floor panels. You’ll need to step on these in the correct order or you’ll get incinerated.
There are six rows of panels, each are five panels across. We’ve numbered the panels below in order, so R1 – 1 is the farthest left panel on the first row, R1 – 2 is the farthest left panel in the second row, R3 – 5 is the farthest right of the third row, and so on.
You’ll start on the second tile from the right on the first row. From there, here’s the order you should follow, with the direction you need to head in in parentheses:
R1 – 4 (Start)
R2 – 4 (Forward)
R2 – 3 (Left)
R2 – 2 (Left)
R2 – 1 (Left)
R3 – 1 (Forward)
R4 – 1 (Forward)
R5 – 1 (Forward)
R5 – 2 (Right)
R5 – 3 (Right)
R4 – 3 (Back)
R4 – 4 (Right)
R4 – 5 (Right)
R5 – 5 (Forward)
R6 – 5 (Forward)
Once you’re through the panels, head to the end of the vault.
Bungie via Polygon
At the broken case, take a right and you’ll see a burned hole in the ground. Drop through it. Run forward and hop into another vent. It’s time to fight.
How to defeat Siriks in ‘Zero Hour’
Bungie via Polygon
When you drop down, you’ll find a Fallen Captain wielding a Scorch Cannon: Siriks. They’re surrounded by an army of Fallen.
Take out Siriks’ Fallen allies. They’ll summon turrets, big Servitors that grant immune shields to everything (these are very annoying, so kill them first) and a ton of Shanks. Just keep killing everything until Siriks’ health is about one-third full. You’ll get a message on your screen that says “Siriks retreats… for now” and the boss will disappear.
Two Fallen Walker tanks will appear on the raised platforms on your left and right, along with some additional Fallen. Take everything out and you’ll get another ominous message: “Siriks returns… heavily armed.”
Siriks will drop back into the area in a massive Brig mech. This thing has full health, so it’s going to take some time and work to take it out. Once you manage to blast off theshield on the Brig, the boss will start lobbing massive tank and constant airstrikes. Just keep moving to dodge these attacks and you’ll eventually take it down.
With Siriks dead, head up to the chest that spawns, say hi to Mithrax, and grab the Outbreak Perfected schematic. Head back to the Tower and talk to Ada-1. She’ll give you the Outbreak Perfected, complete with the pattern attached. Ada-1 will also give you the “Outbreak Refined 1” quest, which you can complete for some additional crafted perk options on your new Outbreak Perfected.
If you already have the Catalyst for Outbreak Perfected from the original version of “Zero Hour,” you’ll instantly be able to place it on your newly crafted gun. However, if this is your first time running the mission, you’ll need to hop back in on Heroic mode in order to pick up the Catalyst and improve your Outbreak Perfected.
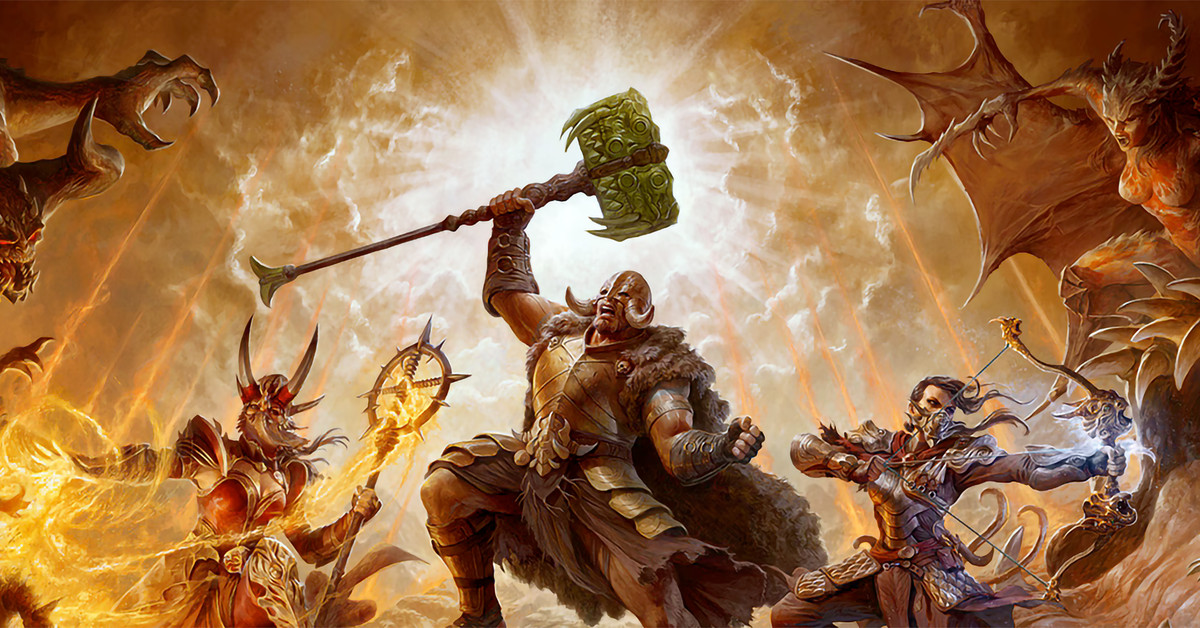
Diablo 4 season 4, formally called Loot Reborn, is coming. As the title suggests, it’s bringing a revamp to the loot system, some new blacksmithing mechanics, a new take on the Helltides mechanic, and a deadly plot involving the Iron Wolves mercenary company.
Here’s when Diablo 4 season 4 starts in your time zone, and details on what to expect from Diablo 4 season 4.
Diablo 4 season 4 release time in your time zone
Diablo 4 season 4 starts at 10 a.m. PT on Tuesday, May 14, according to a Blizzard blog post. Here’s when that is in your time zone:
10 a.m. PDT for the West Coast of North America
1 p.m. EDT for the East Coast of North America
6 p.m. BST for the U.K.
7 p.m. CEST for Western Europe/Paris
2 a.m. JST on May 15 for Tokyo
What’s new in Diablo 4 season 4?
Like the name suggests, Diablo 4 Season 4’s Loot Reborn is mostly about items:
Affixes are getting simplified descriptions with more straightforward effects.
Tempering and Masterwork let a blacksmith customize, swap, and improve your affixes using the new Tempering Manual and Crafting Manual items.
You’ll be rewarded with several of those Tempering Manuals when you fight along with the Iron Wolves mercenary company in Kehjistan.
Masterworking will require a specific material that can only be found in the new, timed, World Tier 4, 200-level challenge, The Pit of Artificers.
The Helltide will now include a threat mechanic inspired by Season of Blood that culminates in the player becoming Hell-marked and drawing the attention of a Hellborn. Collect their Baleful Hearts to start the Accursed Ritual and face the Blood Maiden for a valuable reward.
Ocean fishing is a fun and relaxing Final Fantasy 14 side activity, though it can be stressful if you don’t know what you’re doing. Getting on a boat with friends to reel in big catches is a unique experience, but you can only ocean fish during certain times of the day.
You do not need to own any expansions to ocean fish and you can participate even if you’re playing the free trial. Yippee!
Below, we explain how to unlock ocean fishing in FFXIV. We’ll also tell you the ocean fishing schedule, what bait to use while you ocean fish, and tips to score big and rake in rewards.
What is ocean fishing?
Ocean fishing is like an alliance raid, but for fishing. You’ll board a big boat that’ll take you through three different parts of the water and you’ll have to complete objectives for extra points.
You’ll be put into a full party, with two other parties on your boat. The goal is to catch fish to score big during the time limit.
It’s not all just catching big, rare fish, though. Catching special “spectral” fish has a chance to trigger a spectral current. These spectral currents allow you to catch even more fish with higher point values, so triggering one of these is nearly always the goal.
There are also a handful of objectives to try to complete during the expedition, like catching a lot of sharks or jellyfish.
How to unlock ocean fishing in FFXIV
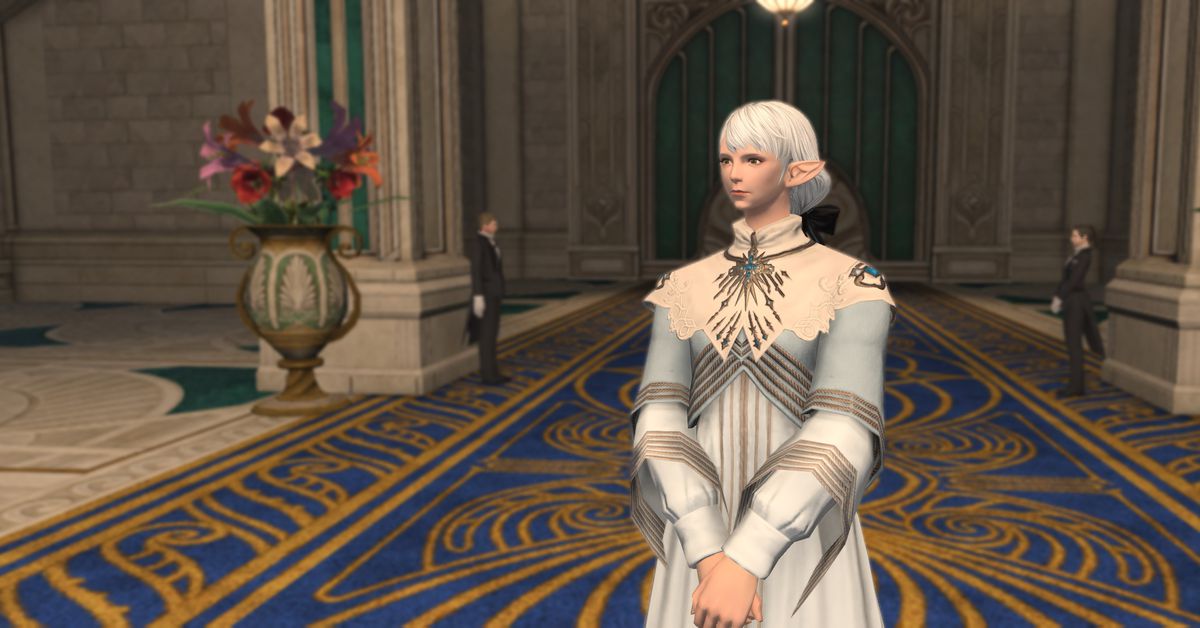
In order to start your grand ocean fishing adventure, you’ll need to unlock the Fisher job, which you can do by heading to the Fisherman’s Guild in Limsa Lominsa. You’ll also need to complete the next Fisher quest, “My First Fishing Rod.” You can ocean fish even if your Fisher is at level 1. (In fact, ocean fishing is a really easy way to level Fisher up super fast.)
Once you have your Fisher ready to go, you’ll just need to complete the quest “All the Fish in the Sea” in Limsa Lominsa, which starts at the NPC Fhilsnoe below:
Graphic: Julia Lee/Polygon | Source images: Square Enix
Once you finish that quest, you can queue for ocean fishing via Dryskthota at the Limsa Lominsa Ferry Docks (west of the Arcanist’s Guild Aetheryte), as long as it’s time to ocean fish.
Note that you will not be able to take the Ruby route through the Stormblood locations until you beat the Stormblood expansion.
Ocean fishing schedule
Unfortunately, you can’t ocean fish whenever you want to. Ocean fishing abides by a schedule and you can only register for it for fifteen minutes from the top of the real world hour, every other hour. For example, if the registration period starts at 2 p.m., you have until 2:15 to queue for ocean fishing. If you miss this period, you’ll have to wait until 4 p.m.
While we would recommend looking out for the odd or even hours, the exact time changes depending on daylight savings and on your timezone, so we actually recommend Lulu’s Tools, which has a live ocean fishing schedule, even noting which objectives and routes the next few boats will take.
Which bait to use while ocean fishing
There are three main bait types used during ocean fishing: krill, ragworm, and plump worm. You can nab all three of these baits from the merchant on the docks where you queue for ocean fishing. You should stock up and buy a ton of each of the three.
In every ocean fishing experience we’ve had, there has always been somebody in the group who will use alliance chat (the orange chat) to say which bait to use —or, alternatively, somebody who will tell you which bait to use if you ask. However, if you don’t want to rely on these genius fishing strangers every time you get on the boat, here are the best baits to trigger spectral currents by location:
Bloodbrine Sea: krill
The Ciedalaes: ragworm
Galadion Bay: plump worm
Rhotano Sea: plump worm
Rothlyt Sound: plump worm
Northern Strait of Merlthor: ragworm
Southern Strait of Merlthor: krill
Sirensong Sea: plump worm
Kugane Coast: ragworm
Ruby Sea: krill
One River: krill
In a very broad sense, these three baits will keep you covered. There are some specific catches that take a different bait from the three, but for the sake of simplicity and scoring points, using these three baits should lead you to success.
How to get a high score in ocean fishing
You can min-max in ocean fishing, and while scoring big also relies on luck, there are a few things you can do to help boost your score:
Empty your inventory to prepare for the fishing trip, as you’ll be hauling in lots of unique fish that take up a ton of inventory slots. Do not use the “release list” feature to automatically discard fish, as the animation that plays to discard the fish wastes your precious time on the boat.
Bring and use Cordials and Hi-Cordials to restore your GP. You should be using your fishing skills, whether you’re using Patience, Powerful and Precision Hookset, or other fishing skills. You should not just be using your basic Hook skill.
Don’t forget to use Thalaik’s Favor, a level 15 skill that gives you back 150 GP in exchange for three stacks of Angler’s Art (a buff you get for just catching big fish).
Use Chum between catches during spectral currents to get fish to bite faster.
Don’t stress too much about your point value while fishing, as there are a ton of bonuses at the end that’ll shoot your score up. You’ll be surprised about how many bonuses you may get at the end.
Just by following the above, we’ve been able to score above 10,000 points (which is all you need to get the mount and minions).
Ocean fishing rewards
Every time you finish ocean fishing, you’ll get a boatload of EXP, as well as gatherers’ scrips (if you’re high enough level to have them). Notably, there are a few exclusive rewards to ocean fishing that are locked behind specific achievements.
The following achievements give minions and mounts:
On a Boat IV: Earn a cumulative total of 1 million points while ocean fishing (Much-coveted Mora minion)
No More Fish in the Sea I: Score at least 5,000 points during a single ocean fishing voyage on the Indigo route (The Major-General minion)
No more Fish in the Sea II: Score at least 10,000 points during a single ocean fishing voyage on the Indigo route (Hybodus Horn for the mount)
Near, Far, Wherever Fish Are II: Score at least 10,000 points during a single ocean fishing voyage on the Ruby route (Mossasaurus minion)





:format(webp):no_upscale()/cdn.vox-cdn.com/uploads/chorus_asset/file/25480751/ffxiv_dx11_2024_06_06_14_11_38.png)
:format(webp):no_upscale()/cdn.vox-cdn.com/uploads/chorus_asset/file/25480766/jlee_240605_1001_ffxiv_blue_quest2.jpg)

:format(webp):no_upscale()/cdn.vox-cdn.com/uploads/chorus_asset/file/25460557/Hellblade_2_play_first_2.jpg)
:format(webp):no_upscale()/cdn.vox-cdn.com/uploads/chorus_asset/file/25447644/Destiny_2_Screenshot_2024.04.23___13.46.19.14.png)
:format(webp):no_upscale()/cdn.vox-cdn.com/uploads/chorus_asset/file/16221369/D2_PC_Osiris2019_05_08_10h32m13s674.png)
:format(webp):no_upscale()/cdn.vox-cdn.com/uploads/chorus_asset/file/16221406/D2_PC_Osiris2019_05_08_10h37m40s735.png)
:format(webp):no_upscale()/cdn.vox-cdn.com/uploads/chorus_asset/file/16221415/D2_PC_Osiris2019_05_08_10h37m56s923.png)
:format(webp):no_upscale()/cdn.vox-cdn.com/uploads/chorus_asset/file/16221443/D2_PC_Osiris2019_05_08_10h38m55s229.png)
:format(webp):no_upscale()/cdn.vox-cdn.com/uploads/chorus_asset/file/16221449/D2_PC_Osiris2019_05_08_10h39m10s228.png)
:format(webp):no_upscale()/cdn.vox-cdn.com/uploads/chorus_asset/file/16221452/D2_PC_Osiris2019_05_08_10h39m19s507.png)
:format(webp):no_upscale()/cdn.vox-cdn.com/uploads/chorus_asset/file/16221454/D2_PC_Osiris2019_05_08_10h39m27s118.png)
:format(webp):no_upscale()/cdn.vox-cdn.com/uploads/chorus_asset/file/16221467/D2_PC_Osiris2019_05_08_10h39m47s447.png)
:format(webp):no_upscale()/cdn.vox-cdn.com/uploads/chorus_asset/file/16221474/D2_PC_Osiris2019_05_08_10h40m22s667.png)
:format(webp):no_upscale()/cdn.vox-cdn.com/uploads/chorus_asset/file/16221481/D2_PC_Osiris2019_05_08_10h40m47s033.png)
:format(webp):no_upscale()/cdn.vox-cdn.com/uploads/chorus_asset/file/16221501/Destiny_2_Screenshot_2019.05.07___14.47.45.26.png)
:format(webp):no_upscale()/cdn.vox-cdn.com/uploads/chorus_asset/file/16221511/D2_PC_Osiris2019_05_08_10h42m14s294.png)
:format(webp):no_upscale()/cdn.vox-cdn.com/uploads/chorus_asset/file/16221514/D2_PC_Osiris2019_05_08_10h41m56s041.png)
:format(webp):no_upscale()/cdn.vox-cdn.com/uploads/chorus_asset/file/16221519/D2_PC_Osiris2019_05_08_10h42m07s650.png)
:format(webp):no_upscale()/cdn.vox-cdn.com/uploads/chorus_asset/file/16221522/D2_PC_Osiris2019_05_08_10h41m49s037.png)
:format(webp):no_upscale()/cdn.vox-cdn.com/uploads/chorus_asset/file/16221525/D2_PC_Osiris2019_05_08_10h42m48s308.png)
:format(webp):no_upscale()/cdn.vox-cdn.com/uploads/chorus_asset/file/16221527/D2_PC_Osiris2019_05_08_10h43m23s042.png)
:format(webp):no_upscale()/cdn.vox-cdn.com/uploads/chorus_asset/file/16221533/D2_PC_Osiris2019_05_08_10h44m02s688.png)
:format(webp):no_upscale()/cdn.vox-cdn.com/uploads/chorus_asset/file/16221536/D2_PC_Osiris2019_05_08_10h44m28s763.png)
:format(webp):no_upscale()/cdn.vox-cdn.com/uploads/chorus_asset/file/16221537/D2_PC_Osiris2019_05_08_10h44m50s553.png)

:format(webp):no_upscale()/cdn.vox-cdn.com/uploads/chorus_asset/file/25375223/jlee_240405_1001_ffxiv_ocean_fishing_unlock.jpg)
:format(webp):no_upscale()/cdn.vox-cdn.com/uploads/chorus_asset/file/25379603/hybodus_mount_ffxiv.jpg)