What Are New Product Development Costs, Design Services Rates, And Pricing for Your Company?


An idea only lives in your mind until it gets materialized. No matter how brilliant and groundbreaking the idea is, the path to transforming a concept into a tangible product can be tricky, except when you get help from a reputable design agency or an industrial designer. Sometimes, it is helpful to take a step back before getting carried away by excitement and figure out how much money could be involved in a product development.

It is difficult to say whether the cost will exceed any given amount. The problem is that even small changes in the product’s dimension, prototyping method, material, and appearance can trigger a series of significant expenses unless you have professionals to take things under control. Every product development process presents its challenges, and the exact cost depends on a collection of factors such as design complexity, selection of materials, prototyping technique, and timeline to completion. Hiring a design firm sounds like an additional expense, but it probably is the only thing to prevent you from overspending in the first place.

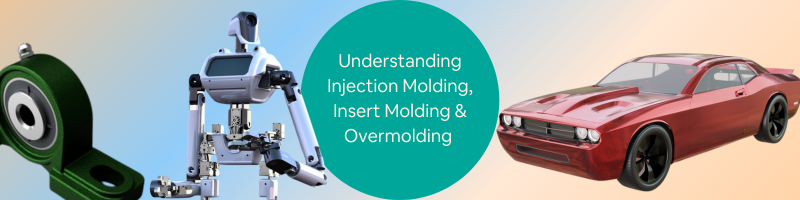
The Average Cost of Product Development

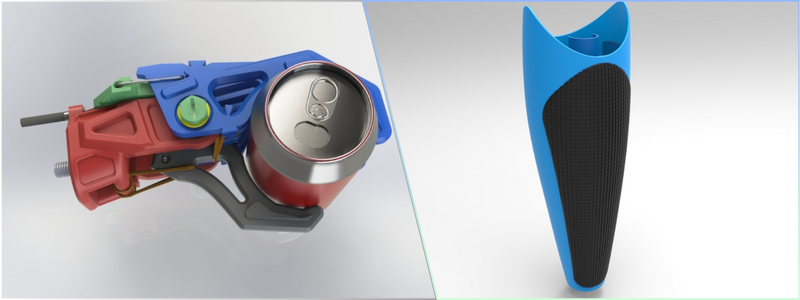
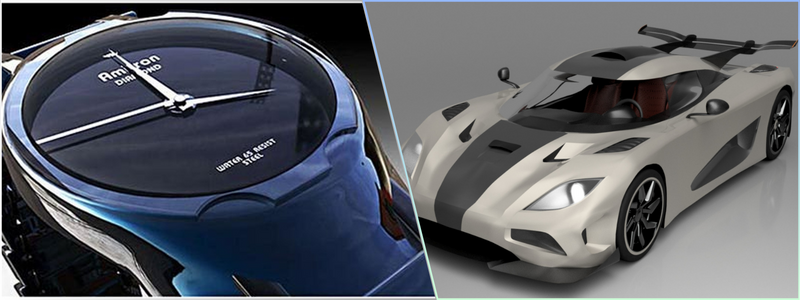
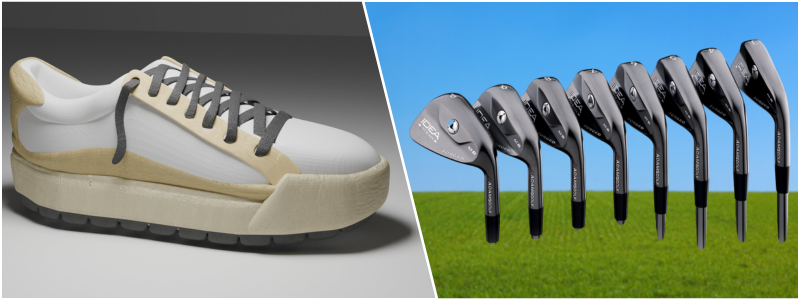
If you want a general estimate, the ballpark figure would be $30,000 for a modestly complex non-electronic product with a completely brand-new design rather than a copy of an existing one. For example, you are developing a unique round-shaped Rubik’s Cube (so it is not a cube at all) of which the individual pieces – when properly arranged – would resemble the look of Planet Earth seen from space or the new product in question a miniature V-block internal combustion engine with real moving parts like valves and pistons. Still, it has an unusual configuration of 13 cylinders.

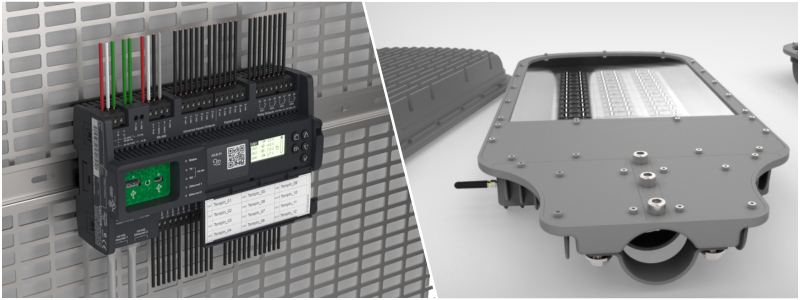
The $30,000 mark is likely the minimum to develop a relatively simple product. The money should cover every process, including design, prototype, performance/usability test, and (very) low-volume production of the product’s final version. Mass manufacturing and launching a new product require much more money. Also, the more sophisticated the product is, the higher the investment. Developing a modern complex electronic product is notoriously expensive, reaching hundreds of thousands to millions of dollars; much goes to electrical engineering alone. One of the most notable examples is the iRobot Roomba Vacuum Cleaner, which cost a jaw-dropping $50 million to develop.

On the other hand, a non-electronic product development is typically more budget-friendly than an electric gadget or anything controllable via a smartphone app. For instance, designing a simple kitchen utensil might cost around $ 5,000 to $ 10,000, while a more complex consumer electronics product could range from $ 20,000 to $ 50,000. Hiring a firm to handle the development process might cost anywhere from $30,000 to $60,000 in the United States and Canada. For the money, the firm can help turn your idea into an attractive, functioning, “manufacturable” product design. The services generally include CAD modeling and visualization, prototyping, and manufacturing schematics. If you partner with a firm, the cost might even cover the expenses for market research.

RELATED: Prototyping for Product Development & Investor Presentations

Industrial Designer’s Rates

2-3

Designing and developing a product involves a series of tasks that fall within the expertise of an industrial designer. According to the BLS (Bureau of Labor Statistics), an industrial designer typically undertakes the following exercises:

  • Consult with clients about product design parameters
  • Sketch design ideas and produce 3D models or visualizations
  • Create physical prototypes
  • Conduct usability tests to identify issues and collect information on users’ satisfaction with the product.
  • Research materials and equipment to be used for manufacturing
  • Perform design analysis to evaluate functions, safety, appearance, and practicality
  • Present a finished design or final prototype

An industrial engineer may work with other professionals from related fields, such as mechanical engineers and prototype design engineers, to determine whether the design is manufacturable at an efficient cost. Some industrial designers are self-employed, so you can hire one without working with a design firm. The hourly rate of an industrial designer can vary depending on factors such as their experience, location, and the project’s complexity. Based on the latest available data (May 2020) from BLS, the median wage of industrial designers in the United States is $36.50 per hour.

Industrial Designers’ Pay (United States)

Percentile Annual Hourly Rate
Highest 10% $125,780 $60.47
Median $75,910 $36.50
Lowest 10% $43,680 $21.00

Note that the median wage only estimates the profession’s typical (rather than average) rate. Experienced industrial designers most likely occupy the highest 10% category.

The work of an industrial designer ends when the product design is certified for safety and ready for mass production. However, certification and manufacturing are beyond the scope of the hourly rate. An industrial designer can help you handle the certification process, establish a partnership with a manufacturer, and oversee the production run. Still, all those things require funds outside the industrial designer’s budget.

RELATED: What are Industrial Design Rates & Costs at Product Design Services Firms?

Certification

1-2

No matter how experienced and reputable, an industrial engineer cannot certify your product for safety or compliance with national and international standards. You will need third-party certification agencies to inspect the product and issue the relevant certifications. The cost of certifications can vary depending on the product specifications. For example, a basic safety certification for a non-electronic product might cost around $ 500, while a more comprehensive certification for an electronic product could exceed $ 10,000. The cost varies from less than $100 to more than $15,000, depending on the product specifications.

Suppose the plan is to sell the product in the United States, Canada, Europe, or any of those regions. In that case, certifications can improve the chances of making sales, given the market’s competitive nature. Certifications are only crucial for electronic products. However, this is only partially true because even simple things like mechanical toys and showerheads are subject to various standards relevant to the products’ intended usage. Some of the most common certifications that may apply for non-electronic products include:

  • UL (Underwriters Laboratories) badge indicates that a product meets the standards set by the organizations, including but not limited to the flammability of plastic materials and fire endurance.
  • CSA (Canadian Standards Association) mark signifies compliance with functional safety standards applicable in Canada and the United States. The association also certifies products made through environmentally friendly manufacturing processes and mechanical components equipped with reliable safety measures to prevent dangerous failures.
  • WaterSense logo proclaims the product’s conformity with EPA’s standards for efficiency and performance. The certification is issuable to non-electronic products such as showerheads or faucets.
  • Green Seal stamp declares the product’s low environmental impact as observed from its minimum toxicity and resource conservation.

Unless the safety, efficiency, and performance standards require compliance by law, product certifications for those aspects are voluntary. That said, your product could get certified by recognized organizations to gain a competitive advantage.

RELATED: What Certifications are Used for New Electronic Hardware Products & PCB Design Services?

Low Cost yet Efficient

Everyone, from the tiniest startups to the largest corporations, wants to keep development costs low and get optimized results. There is no need to waste money when you can save it. One of the primary keys to efficiency is lean product development practices. A lean process involves minimum waste and a short development cycle without sacrificing product quality.

While it is not impossible to keep it lean on your own, there is the likelihood of overlooking essential details that can make a design more efficient. Furthermore, you may need more tools to exercise the principle, such as CAD systems, CNC machines, a high-grade 3D printer, and general expertise in market research. Another thing to consider is how a tiny error in modeling or a seemingly minor compromise in the material can lead to costly design revisions.

Although an experienced industrial engineer might only personally own some possible tools for physical prototyping, he likely knows how to access all the required resources efficiently. The same applies to a design firm with a complete product development facility. Even if the firm doesn’t have an extensive facility, it has the experience of partnering with prototype makers, material suppliers, and custom manufacturing companies. More importantly, an individual industrial designer or a design firm understands how complex and intricate a product development process can be; they know how to minimize the cost by keeping the unnecessaries at bay and focusing on the essentials.

1-3

Collaborative Effort

Good product developers should keep you involved throughout the process, from the concept phase to certifications, until the design is ready for manufacturing. Based on your description of the product idea, they will be able to offer a comprehensive quote on the development cost. After the initial discussions, an experienced product engineer can define all the steps required to build the product and how much each step should cost. To avoid unpleasant surprises, you will get a full expense breakdown from the get-go.

End Note

Engineering designer services answer all the questions presented by the market research. There is some truth in how the market can dictate a new product, but engineering expertise opens the door to creativity. Following the concept creation and market research, it is the industrial engineer’s turn to take over the process and devise a solution to tackle every challenge the market may throw at your idea.

Turning Ideas into Reality: A Guide to Bring Your Invention to Life with Design Firms


How do you turn your bright ideas into tangible reality?

Compared to what most people think, products are developed over time. Before something comes to fruition, it goes through a long and arduous process to ensure it serves its purpose, performs its function, and exudes excellent aesthetics. Great ideas can change an entire industry when given the chance. As an inventor, you must take reasonable action to bring your product to market. This article is a step-by-step guide to bringing your invention to life.

1. Prepare yourself and conceptualize the invention

The number one step in turning your invention into reality is to have a concept of your invention in mind. During the earliest phases of invention, the key is to have a clear concept and idea of your invention. Investors should know where they expect their idea to go. They also need to see it clearly for accessible communication.

If you’re lingering on an invention idea, you have to be prepared from the get-go. Here are some critical questions you need to ask yourself:

  • Does the market have other similar products that fulfill the needs of customers?
  • Have I conducted sufficient research on my target customers?
  • Do I have a good enough idea to have a spot in the crowded marketplace?
  • Do I have a clear enough product idea, or do I need help clarifying my vision?

If you’re still having trouble, you can also get new invention design services, wherein you consult with freelancers to help you with your project on a personalized level. If you have clear answers to all these questions, you can proceed to the second step in making your invention.

2. Document the idea

At this point, you already have a clear image of your concept and have finished your research. This in-depth research helped you clarify the idea further and hone in on target customers. You’ve proven that you have a sound idea and that there is a potential market for it.

The next move for you to take is to document the idea to finally turn your invention into reality. Below are several steps you have to take as you document your idea:

  • Get an inventor’s journal where you can write down your invention idea. This journal is a bound notebook whose pages are consecutively numbered and cannot be reinserted or removed.
  • Add details about your invention’s concept, design, and potential marketability in the inventor’s journal.
  • Time and date everything in the journal and look for a witness to sign it.
  • Take photos of the invention with a watermark of the date you captured it.

Taking the crucial steps to document your idea can serve as your protection in the long run if an inevitable contestant for an idea shows up.

RELATED: Elevating Your Company Using CAD Product Design Services During Product Development

3. Conduct market and product research

invention1

After documenting your idea and being ready to proceed, your next step is conducting market and product research. Most inventors don’t make money from their ideas since they don’t conduct research.

This product research helps you understand if the idea already exists. The following are the critical steps involved in product research:

  • Browse art databases to verify that your ideas and drawings don’t exist in art form yet.
  • Check with the National Patent Office to see if your renderings and ideas don’t exist.
  • Research the marketplace for similar items and confirm if the market still has gaps that need to be filled.

Market research can help you check if the market already has a product to answer customers’ pain points. Here are the steps to take during market research:

  • Come up with online surveys to help discover customers’ pain points.
  • Consider hosting casual focus groups with potential customers.
  • Gather all feedback and use this to identify if you have a sound invention idea.

4. Design the product

After performing market and product research, you can now design your product. Below are the fundamental principles that investors should use during product design.

How would you like to communicate your product idea visually? Consider how the idea will look on a tablet or paper. Brainstorming in design is about defining the problem and developing many ideas. It’s critical to have answers to solve as many issues as possible. Critical eyes don’t have a place at this point.

This is the stage where it’s vital to have a good sense of direction. This might involve having loosely outlined tasks you will complete in the next few weeks. It can also include listing industrial design firms you can contact when you need assistance during prototyping. No matter what it is, you can stay on track if you have expectations.

Sketching is an ideal way to hone in on your design vision for your idea. These sketches don’t need to be perfect; rough ones are even better if they show how you envision the product after completion.

RELATED: Prototyping for Product Development & Investor Presentations

5. Manufacture your prototype

invention2

While creating your intended product’s design was a significant step, a prototype is just as crucial. Accordingly, freelance prototype design services help bring your invention to life. There are three steps typically involved in prototype manufacturing. These include the following:

  • Prepare a concept sketch of the appearance and function of your prototype.
  • Turn your idea into a 3D digital model
  • Develop a physical model of the invention
  • Look for a manufacturer that can help in large-scale building and testing of your prototype

6. Prepare an application for a provisional patent

Congratulations! Your idea has the potential to become a tangible product! This is when you must ensure it will stay yours and yours alone. A provisional patent is incredibly beneficial for an inventor. Inventors can apply for a provisional patent without a disclosure agreement, oath, declaration, or official patent claim.

Applications for provisional patents have a waiting period of 12 months before the patent becomes legally binding. This period begins right on the day the patent is filed. Inventors must also file for non-provisional patent applications to take advantage of early filing. This process can take up much of your energy and attention; hence, you may opt to get patent services to assist you throughout the application process.

RELATED: How to Calculate a Product Development Cost Estimate for New Products

7. Look for a reliable manufacturer (Not mandatory for licensing)

Finding a potential product manufacturer is the next step in making your invention a reality. Before doing so, however, you need to iron out a few details.

  • Decide on the type of manufacturer you plan to work with. There are three main types of manufacturers. The first are manufacturers that produce products according to your product ideas. The second type involves suppliers, distributors, or wholesalers who purchase existing products and brands. The third type comprises dropshipping companies that can supply products and fulfill the orders of existing products and brands.
  • Determine if you would like to opt for an international or domestic manufacturer. International manufacturers are your best option if you focus more on long-term global reach. Meanwhile, domestic manufacturers are ideal for inventors who are conscious of the environment and wish to prioritize quality control.
  • Identify what you plan to offer as an inventor. Do you welcome the idea of custom orders? If so, the manufacturer should offer this. What is your preferred lead time or the time between the order placement and shipping? How much do you plan to spend on shipping costs? How much is your target cost per unit? Do the manufacturers you’re considering have a defect policy in place? What kind of factory conditions do they have? Are these ethical or sustainable?
  • Choose payment and quantities for your orders. What target number of product units do you plan to produce at first? Suppliers have a minimum commitment, so agreeing with the number is important. Other manufacturers also require upfront payment to start production. Consider your preference and budget, check for possible negotiation, and decide.
invention3

8. License or sell the product

Licensing or selling the product is the best option for small manufacturers or investors. With product licensing, inventors can sell product ideas to manufacturing companies. You then earn a profit in exchange for selling your concept to them through a percentage of every sale made.

The following are the main benefits of licensing or selling your product:

  • It opens doors for additional income opportunities.
  • Prevent risks and challenges associated with product development, like lack of money or experience to produce the items.

However, you also need to consider a few drawbacks, such as the following:

  • There is a slight chance for the inventor to gain wealth if they sell their idea to a big company. To be rich, consider other options.
  • The company that you sold your idea to will be its new owner. Once they develop a new, improved version of the invention, you may not receive any royalties from this.

RELATED: The Advantages of Product Licensing: How to Get Your Invention Made Without Starting a Business

How Cad Crowd can help

If you need help turning your invention into a reality, Cad Crowd can connect you with the right professionals who can transform your ideas into tangible products.

Can 3D Modeling Services for Lifestyle Product Images Boost Company Marketing?


Lifestyle product images capture accurate representations of their actual use. Thanks to these images, customers can envision themselves using the product, making them more connected to it and to the brand that manufactured it. The key purpose of lifestyle product images is to evoke emotions among customers, convey the story of your brand, and establish a brand identity. Continue reading to learn how to utilize 3D modeling services for lifestyle product images to ultimately boost your company’s marketing efforts.

Why do you need lifestyle product images?

Your company’s advertising team has a long list of goals to achieve for your products and set them apart from the rest. Lifestyle product images give advertisers the ability to highlight the unique features of their products to make them more authentic and relatable for consumers. Here are the top reasons why your company needs lifestyle product images:

RELATED: How 3D product renderings help promote products on Amazon & Shopify

Position your brand better 

Your company can use lifestyle product images to allow customers to see your products more contextually. It comes in handy in positioning your brand and setting it apart from the rest.

Improve the recall value of your brand 

One of the most important goals of product advertising is brand awareness. Lifestyle product images designed by professional product concept designers serve as an effective tool to emphasize the distinct features of your product that make it more memorable. It then helps advertisers achieve three goals: introduce the brand to potential customers, convince them to buy from your brand, and remind them about your brand. 

Boost your sales 

Lifestyle product images can also increase your sales as they help you form an emotional connection and showcase the benefits of your products. In addition, you can also increase the perceived value of your product if you display how to use it in a real-life scenario. Lifestyle product images enhance the willingness of customers to pay because they now see your item as something they need to have. 

RELATED: How 3D product rendering and CGI help social media marketing for your company

Validate the cost of high-end items 

It’s only natural for high-end items to have premium price tags. After all, they are considered to have better features, higher quality, and more expert craftsmanship. Once executed correctly, lifestyle product images from 3D design services for high-end pieces can make it easier for you to convey the qualities and features of the product. It helps customers better understand your product, which justifies the price as a result. 

Top-of-the-line items appeal to people who want to project a particular lifestyle and immerse themselves in the sense of individuality. Lifestyle product images create this feeling of exclusivity that makes the product more enticing to the eyes of consumers who wish to lead a particular lifestyle. 

Promote loyalty among customers 

Emotions are the key driving factor in the purchasing behavior of today’s customers. Most purchasing decisions depend on emotional aspects. Your company can take advantage of lifestyle product images to form an emotional bond with your potential customers. With the help of these lifestyle product images, your product can look more authentic. It will help you generate leads and engage your target audience to gain their trust and turn them into loyal customers of your business. 

RELATED: Mastering 3D product modeling: company techniques and tips for stunning visuals 

3d-product-modeling-firm-2

Lower risk of returns 

Lifestyle product images and 3D product demo firms can offer a more complete view of your products and demonstrate their usage. It helps your customers to gain a better understanding of the functionality and features of your items. These lifestyle product images are pivotal for reaching a well-educated decision and lowering the risk of returns. 

How 3D modeling services change lifestyle product images

3D modeling is the three-dimensional representation of products made with the help of CGI or computer-generated imagery software. Since 3D technology was first used in lifestyle product images, it has successfully improved how the images are made and used across different industries. Lifestyle product images can showcase products in a more interactive, immersive, and realistic way. It allows your customers to gain a better understanding of your products and their features as they get to see and view them in detail from different angles. 

3D product rendering services for lifestyle product images allow efficient and quick production of more realistic images, as well as product animation that once required lots of money and time. These services changed how the products are made and showcased to customers, resulting in increased engagement and a boost to the company’s marketing.

RELATED: How Companies Utilize 3D Product Modeling Services for Compelling Product Imagery

Benefits of 3D modeling services for lifestyle product images

Here are some reasons why more and more companies are now using 3D modeling services for lifestyle product images for their firm’s marketing campaigns and efforts. 

Customize all you want

CGI allows 3D artists and designers to experiment with numerous variations and iterations of sizes and colors without spending a lot of time and money on several photoshoot sessions. Aside from this, the improved level of personalization and customization that lifestyle product images allow also helps form a more emotional connection with potential customers.

Ensuring consistency in all your product images, especially when several items are in question, can be a bit challenging. With 3D modeling, however, all images for your lifestyle products are made in digitally controlled settings that can help you achieve cohesiveness and a more consistent look across the entire product line. 

Improved cost-efficiency 

CGI also eliminates the money and time that would have been otherwise spent on physical prototypes. It’s because CGI technology allows you to produce 3D models that you can then use to create more images from various angles in different environments. 

RELATED: How to use 3D product modeling and 3D product photography for company advertising 

Speed up time to market 

With CGI technology allowing designers to quickly process and iterate product designs, it speeds up the time of bringing the product to the market. This is all thanks to the ability and flexibility to complete several revisions, resulting in quicker market time with the help of lifestyle product images. If revisions are necessary, for instance, it saves you from re-shooting everything from scratch because every modification is made with the help of 3D product modeling designers using 3D modeling software. So, once you’ve incorporated all the needed changes, you’re already good to go. 

3d design company

Better flexibility 

Depending on the needs of the customer, 3D modeling can give more freedom for iterations and rapid prototyping to allow retailers to improve and refine the design of their products. If you have always wanted to showcase your product in different settings but don’t want to bother with the hassle of preparing and shooting scenes or hiring models, you would be better off hiring 3D modeling services for your lifestyle product images. It’s the best means of showcasing your products for various uses and applications. 

Enhance efficiency and overall quality 

3D modeling gives businesses total control over texture, lighting, as well as other details that enhance the overall quality of the product. 3D models can also offer more valuable insight into the behavior of the product while it is in use. 3D modeling services such as lifestyle product images improve the efficiency of businesses because they can make more informed decisions regarding advertising, marketing, and other relevant strategies. 

RELATED: 3D CAD: 3D product modeling services cost, rates, and pricing for companies and firms

Allow interactive encounters

Like product configurators and virtual try-ons, CGI technology lets customers customize and visualize the products in real-time. It then enriches the overall experience for customers because they gain a better understanding of how the product looks in the existing environment, whether it is an office or home setting. 

Helpful marketing materials 

Your products convey the story of your brand, and marketing is the fastest way of communicating just that to your customers. There is no better way to present your abilities than by providing hyper-realistic lifestyle product images. With the help of trusted 3D modeling services, your company can expect to receive top-notch lifestyle product images for marketing purposes. 

It’s easy and quick 

Thanks to 3D modeling services, businesses can save themselves from the need to spend long hours in Photoshop. This modern technology speeds up the procedure of developing lifestyle product images. 

RELATED: How to design a 3D product visualization that converts company leads into clients 

Evoke realism

CGI also helps create premium quality and hyper-realistic lifestyle product images that you can use as long as you want for different purposes, whether for your online accounts or your physical catalogs. Using 3D modeling designers for lifestyle product images, you can create accurate product representations, especially those focusing on texture and minor details. These meticulously generated lifestyle product images help your customers gain more insights regarding your product as far as functionality and looks are concerned. 

More sustainable

With the help of 3D modeling services for lifestyle product images, your company also gets the chance to protect and preserve the planet. It’s all thanks to the elimination of the need for physical sets, props, and prototypes during the entire manufacturing process. 

RELATED: 5 Ways how rapid product development & prototyping benefits your company

How Cad Crowd can help

Your marketing efforts may simply go down the drain if you don’t use the right tools at your disposal. With the help of 3D modeling services for lifestyle product images, you can look forward to a more effective marketing campaign that you wouldn’t be able to achieve otherwise. Cad Crowd has an extensive database of top-notch 3D modeling services for your lifestyle product images that can ultimately help you reach your marketing goals in no time!

Freelance CAD Prosthetic Designer: Cost, Rates, and Pricing for Individuals and Companies


Today’s post covers CAD prosthetic designer cost, rates, and pricing for companies and individuals. Before the invention and rapid adoption of 3D printing, the only way to produce prostheses was by conventional casting, injection molding services, or combining those two. Either method requires a lengthy manufacturing process from the initial evaluation of a patient, measurement, cast production, socketing test, fitting, and cosmetic restoration. A prosthesis must undergo several iterations (prototypes) before the final product is ready.

Since each patient needs a custom model (or socket for a prosthetic limb), a new device must be made from a different mold. It was not until the late 1980s that the medical world began recognizing the huge potential advantages of CAD/CAM methods to produce prosthetic devices. When 3D printing came along, it became possible to reduce the total turnaround time and labor cost to a great degree.

RELATED: How 3D printed prosthetics are changing lives

One of the most time-consuming tasks in the conventional manufacturing process of prosthetic limbs is the socket design. Each socket is unique and made specifically for the individual wearing the device. It is through the socket that the wearer’s body weight is transferred or distributed as naturally as possible to the ground to reduce discomfort. For upper-limb prosthesis, there needs to be knee an artificial knee joint to improve mobility. Here, the expertise of a freelance CAD prosthetic designer comes into play, crafting personalized designs for prosthetic solutions.

3D Printed Prosthesis

World Health Organization estimates that only around 5-10% of people (approximately 1 out of 10) who need prostheses have access to those devices. Much of the problems are due to high cost and availability. A functional and customized prosthesis can cost $120,000 or more. Many amputees cannot even afford the $2,500 traditional barebone options manufactured with conventional molding without any additional functionality. Prosthesis manufacturing optimization by 3D printing design companies can cut the cost to a considerable extent.

RELATED: How the healthcare industry uses 3D printing and 3D bioprinting for treating patients

Financial constraints have always been the main problem that stands in the way of patients needing prostheses. In a world where only a tiny percentage of people who need prostheses have access to the devices, there needs to be a middle ground to ease accessibility without putting too much of a financial burden on the manufacturer or fabricator. And this is where 3D scanning services and printing come in. 

medical-device-design-development-services

The cost of material to produce a prosthetic socket for adults amounts to only around $100, and the 3D printing process itself is $20; the cost only covers the manufacturing of the socket. It is worth noting that a transfemoral (above-knee) prosthesis also requires a knee joint and a structure called a pylon composed of lightweight metals or carbon fiber. Be that as it may, the total cost should not be anywhere near the $2,500 mark.

Let us say a shock-absorbing pylon and adapters are priced collectively at $200, a rotating knee joint with 100kg weight capacity at a conservative $300, and a simple artificial foot at a generous $200; the final product costs $820. With shipping and taxes, the maker can sell a complete device with a profit margin of $1000. Nearly all the design works are for the socket, while all other parts are ready-made. Of course, the prosthesis will not be as aesthetically pleasing or technologically advanced as its branded alternatives, but the functionality is all there.

RELATED: 3D scanning services: how much will it cost my company?

A smaller prosthesis, such as an ear replacement, should be even more affordable. Several years ago, researchers at the Queensland University of Technology proved they could manufacture an affordable soft tissue prosthesis using a low-cost desktop 3D scanner and printer. Silicone was the material of choice. All the consumables that went into the production process were worth no more than $3, and they paid $116 for two hours of labor. The researchers also built another version of the same prosthesis with a casting method using a 3D-printed ABS mold, which cost $155 for labor and consumables.

Either option was still more affordable than the traditional hand-crafted prostheses, ranging from $2,000 to $7,000 and taking at least 14 hours of labor. Everything sounds great, but there are a few potential drawbacks. 3D printing is not an instant process. While the scanning and designing processes are possibly done in just several hours, the printing alone may take 24 hours to complete. The prostheses are also limited in terms of material options. Chances are they are printed from PLA or ABS instead of powder metal, but it is necessary to sacrifice structural rigidity to save costs. 

RELATED: How to design medical products that people actually want

Another downside is that not every 3D printing company might be technically qualified to build prostheses for medical purposes. Unless the prostheses are meant to replace soft tissues or for cosmetic purposes like ears and noses, the most qualified people to make the devices are licensed prosthetists and orthotists. Obtaining the license is not easy because they must complete a master’s degree in the field and obtain the certifications to practice. They are professionals trained to design and fabricate prescribed prosthetic devices. Adjusting, repairing, and replacing prosthetic devices are also parts of their duties.

Design Cost

The BLS says that the average median pay for prosthetists and orthotists (2022, latest data available) is $77,000 a year or around $37 per hour. Prosthetists specialize in artificial limbs and other body parts, whereas orthotists work on supportive devices such as knee braces. The good thing is that prosthetists and orthotists are utilizing 3D scanning and printing technologies to do their jobs.

RELATED: Medical device design: a guide to service pricing, costs, and rates for companies 

Although their clinics likely don’t have a complete 3D printing facility, they can collaborate with prosthetic design services and local manufacturers to simplify workflow and reduce turnaround time. For example, the production of an above-knee prosthesis typically goes through the following steps:

  1. A prosthetist scans the patient’s residual limb at the clinic. 3D scanning is the most reliable technology to produce a 3D model of the mold (for the prosthetic socket). It will create a digital, accurate copy of the residual limb surface geometry and dimension for proper fitting. 3D scanning only takes a few minutes.
  1. CAD software transforms the scanned image into a custom 3D model. It might involve cleaning up and post-processing before the file can be converted into printable format. The step takes about 2 hours.
  1. The finished ready-to-print prosthesis model is sent to a 3D printing shop for manufacturing. The model should be ready in 2 – 5 business days after post-processing and cleaning up. 
  1. The manufactured prosthesis is ready to use and sent back to the clinic. The overall turnaround time is between 1 – 2 weeks. 

The first and second steps make for the biggest design tasks, where a prosthetist or orthotist scans and creates the 3D model of the device to be manufactured. The hourly rate mentioned above only covers those services. If priced on a per-project basis and done by Autocad design professionals (instead of prosthetist/orthotist), the cost for 3D scanning and conversion into print-ready 3D images typically falls in the $120 – $150 range.

RELATED: Cad Crowd 3D Design – Stay Healthy with Medical Product Development Services

prosthetic-design-and-cad-services

High-end 3D printing

Just because 3D-printed prostheses are more affordable than traditional injection-molded variants does not necessarily mean everything is cheap for everyone. Product options and prices are parts of a spectrum, so it is not entirely unlike other businesses. While it is possible to manufacture a functional above-knee prosthesis for under $1,000, the final product is likely a basic variant made of easily sourced material. It has the functionality of a prosthesis, and in many cases, nothing else is more important.

The business side of 3D printed prostheses runs from individual freelancers producing artificial limbs out of hard plastic to state-of-the-art facilities creating ISO-certified prosthetic devices. At the higher end of the spectrum, it is not uncommon to see above-knee carbon fiber or aerospace-grade aluminum prostheses. Companies operating at this level are essentially doing the same thing as their peers in the automotive industry. Some prostheses come with sensors to collect muscle data and adjust shock absorption accordingly.

RELATED: How various companies and industries embrace 3D rendering services and applications

They are almost robotic, with independent control for movement and grip. Starting prices are closer to $10,000 than to $1,000. For instance, Unlimited Tomorrow (one of the most well-known prosthesis manufacturers based in the U.S.) sells its prosthetic arm for nearly $8,000. Like most technologies, worldwide adoption is expected to impact prices. Lower manufacturing costs and readily available materials may permit the use of advanced prostheses in developing economies, where the devices are currently cost-prohibitive. 

Development and Future

Manufacturing technologies for prosthetic devices have advanced significantly over the last 20 years. Much of the developments can be credited to CAD drafting services and 3D printing methods. It is not only about design visualization by a freelance CAD prosthetic designer on computers and additive manufacturing but also the engineering/invention of new materials to help with pressure dissipation and cushioning. Gel materials and carbon fiber composites, which have been used for decades in the automotive and shoe industries to produce parts, are also implemented into prosthetic manufacturing.

RELATED: How design firms use prototypes to develop critical new medical devices

In modern above-knee prosthetic limbs, the pylon also has a shock absorption mechanism to improve the patient’s biomechanical performance. Certain materials are water/moisture resistant, making the prosthetics suitable for beach or shower use.One of the most exciting studies in the field is the implementation of brain-controlled prostheses. The idea is to connect prosthetic devices with electrode arrays placed in the patient’s brain, muscles, or nerves to control limb movement. It is intended to allow the patients to control their prostheses in a much more naturally comfortable fashion.

Researchers at the University of Chicago are taking a step further by using touch sensors and brain-controlled mechanisms in prosthetic arms. With a combination of sensory feedback and natural movement, prosthetic devices – in the future – may function to enhance human physical abilities.

How Cad Crowd can help

Cad Crowd makes it easier than ever to connect with designers to help you develop your prosthetic arm, foot, leg, eye, or joint. We help clients with design for 3D printing, injection molding, or any other manufacturing technology. We also offer contract manufacturing services to help you get your product made. Contact us for a free quote.

Overmolding Design Success: Strategic Considerations for Company Prototype Designs


Today’s post covers overmolding design success tips for designing company prototypes. Can you quickly tell the quality of a pair of pliers by just looking at it? Will the battery pack of a drill drain fast after you pull the trigger? Can you determine a product’s overall integrity based on its appearance or how it feels in your hands? Believe it or not, you’re not the only one who doubts some products before you touch or use them. Even the most minor design details can provide insight into the material’s sturdiness and the quality of the engineering design services and applications used. 

Before a product comes to fruition, companies create several prototype designs, where overmolding enters the picture. Overmolding is a feature that can take the appearance and feel of a product to the next level. It enhances aesthetics, performance, and functionality, making it more popular and in demand among manufacturing prototype design firms for portable devices, medical devices, and consumer products. Continue reading to know more about the strategic considerations to ensure a successful overmolding design:

RELATED: Different kinds of prototypes and how to use them for your design project

What is overmolding?

Overmolding refers to the process of making one part using the combination of two or several different materials. The first material, the substrate, is often fully or partially covered by overmold or subsequent materials throughout the manufacturing process. The substrate can be anything, including a molded plastic part, a machined metal part, or even existing products such as electrical connectors, screws, or threaded inserts. This first piece will soon transform into one continuous part of often mechanically interlocked and chemically bonded materials of different types. 

Overmold materials, usually plastic, begin in pellet form. The design for additive manufacturing company combines the pellets with additives such as foaming agents, colorants, and other fillers. These are heated afterward to their melting point before they’re injected in liquid form into the mold tooling. There are several limitations on the types of materials suitable for use for overmolding. If you’re overmolding a metal part with plastic, any plastic can be used. There might be compatibility issues if you’re overmolding a plastic part with a different type of plastic, TPE, or rubber.

RELATED: 10 Injection molding design mistakes to avoid while working with CAD design services & engineering firms

The material manufacturer often releases compatibility charts for overmolding. As a unique process of custom injection molding and casting services, overmolding leads to the seamless mixture of several materials into one product or part. It often involves a plastic-base and rigid component overload with rubber-like, pliable, and thin TPE or thermoplastic elastomer exterior layer or other types of materials with the use of either two-shot or multiple-shot molding method or a single-shot or insert molding. After considering its benefits, plastic overmolding may be ideal for your company’s projects. 

Common uses and applications of overloading 

Overmolding is used for different reasons that may vary based on the specifics of a particular project. Some of the common materials where the process is used include personal care items and tool handgrips. Below are several typical applications of overmolding:

Plastic over plastic 

Molding a rigid plastic substrate is the first step. Another rigid plastic will be molded around or onto the substrate. These plastics may differ in resin or color. 

Rubber over plastic 

A rigid plastic substrate is molded first. TPE or soft rubber is molded around or onto the substrate. It typically creates a soft grip spot on a tricky area. 

RELATED: How to design products for injection molding & prototyping firms

Plastic over metal 

A metal substrate is formed, cast, or machined. The substrate will be inserted into the injection molding tool. The plastic is molded around or onto the metal. It is usually used for capturing metal components in the plastic part.

prototype-design-services

Rubber over metal

A metal substrate is cast, formed, or machined. The substrate will be inserted into the injection molding tool. The TPE or rubber will be molded around or onto the metal. It is usually used to create a soft grip surface. However, there are compatibility issues and limitations when using different materials. It also doesn’t mean that you can only use two materials. It’s common for 3D product modeling companies to design products where one part uses three materials to achieve grip surfaces and color breaks. 

The overmolding process 

The substrate part or material is typically placed into the injection molding tool. The overmold material is then shot around, onto, or into the substrate. Once the overmold material solidifies or cures, the two materials will be combined to form a single part. It is often a good idea for the mold material and substrate to interlock in a particular mechanical capacity. It will help ensure the two materials are physically held together and not just chemically bonded. 

RELATED: Which manufacturing technology is right for your new invention?

Strategic considerations before overmolding design 

Although the overmolding process is cost-effective and can offer outstanding adhesion between the materials, proper planning is required to ensure its success. The machinist, for example, should choose suitable materials to achieve optimum adhesion and carry out the function of the part. It is one of the main reasons why the machinist should have proper planning of the overmolding design guide. 

Since the design is often complex, you must be extra careful when developing the overmold design.
Consider the following elements that contribute to the success of the design, ensuring its effective realization.

The function of the part 

A complete understanding of the part’s intended function plays a significant role in successfully designing an overmolding part. For this to be possible, you must ask several questions about the part. 

RELATED: An overview of injection mold materials and SPI standards for companies and firms

1. What is the proposed objective or purpose of the part?

The design process must first understand the purpose of designing the part. Since overmolding has several uses and applications, knowing the goal of the product is essential to determine the suitable process to use. If you’re planning to have a seal molded on a water-resistant case, the goal of the product is a waterproof seal. 

2. What kind of exposure will the part endure and deal with? 

You also need to consider the kind and amount of exposure the product will be dealing with when it’s in the line of duty before you develop a design. If the part endures harsh radiation such as UV light, this type of product can use certain plastics. 

RELATED: Injection molding tips for cost-effective prototypes and mass-manufacturing by a mold design firm

3. Why do you want to mold the part over?

The main reason why you plan to use overmolding for the part can help you determine the complexity of the design. If you hire an injection mold designer to develop a TPE overmolding design guide for rubber-like or TPE to be cast on a product handle, the proposed gadget could be for grip, comfort, ergonomics, or vibration absorption. A satisfactory answer to this question will help you determine the most appropriate material and map out a correct overmolding design guide. 

4. Will the part receive a large-scale production?

If the part is planned for large-scale production, you must consider it when developing your overmolding design guide. For example, an overmolding part intended for vibration dampening will feature a thick wall that will require a longer cycle time and more materials to produce each part. Making this kind of product can get quite costly, although it might be worth the investment if you only need several pieces. 

RELATED: Prototype injection molding: 7 materials commonly used by design firms

product-modeling-company

Scenario 

Once you have confirmed that the function of the part will fit in with the design, your next step for the 3D design services is to evaluate the instances where it will be used and their effect on the physical features. The following are the four most common scenarios where overmolding products are used:

1. Grip addition to a substrate 

Different products, including kitchen utensils, garden hoses, and drills, require a certain amount and level of grip that allows users to control the product even under wet conditions. In cases like this, the most recommended way to add grip to such products is to cast rubber-like plastic over the handles. This process only needs a little material and may only need production in low quantities more often than not.  

2. Comfort 

When the grip is added to a substrate, this also acts as a source of comfort every time the product is used. The scenario is the same as the first point in most cases. The rubber grips used on bicycle handles are the perfect example of products that combine the two scenarios. 

RELATED: Mold design tips for manufacturing — mass-manufacture your company products at the lowest possible cost

3. Sealing

This scenario requires longer cycle times and more materials to make an overwhelming product. These seals often feature water-resistant properties and must achieve optimum substrate adhesion. Before you design this type of part, looking for the material that will create the maximum adhesion with the substrate and offer the highest form of waterproof abilities is essential. 

4. Vibration dampening

This specific type of usage not only has the longest cycle time but also needs the most amounts of materials. The TPE part that will be produced must have an adequate thickness for absorbing the vibrations of the substrate you plan to cast it on. This scenario is applied to most high-energy machines, such as drills and pumps. 

How Cad Crowd can help with overmolding design

Contact Cad Crowd to help you find the best overmolding experts to help you with the following prototype designs for your company. Get a free quote now.

Understanding Injection Molding, Insert Molding, and Overmolding for Companies


Have you ever wondered why most tools are easy to hold and grip? It’s all thanks to the introduction of processes, including injection molding and casting services, insert molding and overmolding. However, if you’re not part of the industry or haven’t heard of these terms, they can be confusing. It’s understandable because insert molding and overmolding are two types of injection molding. Continue reading below to learn more about injection molding, insert molding and overmolding processes.

What is injection molding?

Molten plastic is injected into a mold during injection molding. The mold will then cool down, and the plastic will become solid. Companies use injection molding to produce various products, such as consumer goods, automotive parts, and medical devices. 

RELATED: How to design products for injection molding & prototyping firms

How does injection molding work?

A popular technique used by manufacturing design firms, injection molding is used to create parts by injecting molten materials into molds. This is a relatively common process for plastics, although it applies to glass, ceramics, and metals.During this process, the mold of the product is made first. A mold is a hollowed-out block that will give shape to the liquid or molten material. The mold will then be placed on the injection molding machine. 

The plastic pellets will be heated until they melt. This molten plastic will go under high pressure into the mold. While the material hardens as it cools, it will take on the mold cavity’s shape. Once the plastic cools down and solidifies, the product or part will be ejected from the mold. Injection molding allows the creation of parts of all sizes and shapes. Molds can also be designed to produce more complex internal features. This ability to develop intricate designs is why injection molding is applicable in different industries. 

RELATED: 10 Injection molding design mistakes to avoid while working with CAD design services & engineering firms

What is insert molding?

The manufacturing process of insert molding involves adding parts, mainly metal, on top of the molded parts. Insert molding consists of the use of inserts in the injection molding process. This process is done before the product is cured and helps cut down the processes required during assembly following molding. After the parts that will be molded on top of the product are obtained, another layer will be accepted after the parts are inserted into the mold. 

Insert molding can be carried out in two ways: automated and manual. Manual insert molding is relatively cheaper than automatic insert molding. But as far as consistency is concerned, automated insert molding is the ideal choice. It reduces human errors and increases efficiency. Introducing inserts onto the mold cores cast using the automated or manual process will result in plasticizing the plastic pellets after the mold halves are closed.

The pieces will be ejected from the mold after the plastic hardens. The inserts will then be encapsulated in the parts. An excellent example of insert molding is the addition of a plastic layer over the screwdriver’s metal part for the plastic handle to be produced. 

RELATED: Which manufacturing technology is right for your new invention?

product-design-and-development-company

What is overmolding?

Overmolding is a manufacturing process involving a seamless combination of different materials into a single item or part. The overmolding process involves two essential steps. Molding and curing the substrate, typically plastic, is the first step. This is followed by direct molding the layer over the initial layer to produce a single product. Product design companies designing a toothbrush is a typical example of overmolding, where a basal layer is formed first, followed by a rubber layer. 

Overmolding can significantly reduce production costs. Some of the critical components of the process include the rigid plastic base covered by a flexible, thin, rubber-like material. This manufacturing process has astounding versatility as it is helpful for different home items, including toothbrushes, hand tools, and razors. 

Advantages of injection molding 

1. High and efficient production 

After the molds are developed, it speeds up the process, with cycle times only requiring 10 seconds. This ideal option for high- and medium-volume production runs from 10,000 parts to more than 100,000, depending on the molds used. 

RELATED: An overview of injection mold materials and SPI standards for companies and firms

2. Intricate detail

High-pressure injection forces molten plastic into the mold, enabling the creation of intricate and detailed shapes.

3. More choices of materials 

Choose from a diverse array of plastic materials tailored to meet the specific properties required for the final part.

4. Minimal to no post-production 

Little to no post-production is required since the parts often have pleasing aesthetics. 

5. Lower cost per part

The cost per part is meager for high-output production runs. 

6. Reduced waste 

Unlike most manufacturing methods, very little waste is produced during molding. 

RELATED: Injection molding tips for cost-effective prototypes and mass-manufacturing by a mold design firm

7. Repeatability

Identical products can be manufactured repeatedly. It’s a good choice for parts with high reliability and tolerances across high volumes. 

Disadvantages of injection molding 

1. Design limitations

There are several design elements a product designer need to consider during injection molding. These include controlling the thickness of the wall, preventing sharp edges and undercuts, and using radii and drafts to eject the parts. 

2. High initial cost 

A substantial capital cost might be required for higher volumes of production that require a great deal of machining and time to produce. 

3. Longer initial lead times

Some tools may take several weeks to be produced, so consider using other technologies like CNC machining services or 3D printing, especially for lower production runs. 

prototype-design-firm

4. Not cost-effective for small production runs

Injection molding might be unsuitable for smaller production runs when other manufacturing processes are more suitable. 

RELATED: How to save money on injection molding: 10 tips from an engineering design firm

Advantages of insert molding 

1. Lower cost 

Insert molding makes it possible to create thousands of parts of products in just one day. Its economic significance leads to reduced costs for the entire molding production process. 

2. Faster assembly time 

The assembly of products needed in CNC machining is often challenging. However, insert molding can do away with the need for assembly. The overall production cost is reduced because no assembly time is involved. 

3. Multipurpose parts

The parts produced by 3D modeling design services for machine parts using insert molding can serve various purposes depending on the specific function that the product is intended to serve. The combination of metal and plastic parts will benefit not only the end users of the product but even the manufacturers. The use of plastic parts can also improve the design’s flexibility and make it lighter than metal. 

RELATED: 3D printing technologies for modeling and prototyping

Disadvantages of insert molding

1. Multiple technologies for manufacturing 

Machining processes such as die casting are required for custom-designed inserts. This is made before the start of the actual process of insert molding. This results in a higher cost per part. 

2. The complexity of part design

The injection molding designers must be familiar with the design of the technology’s manufacturing principles for them to produce custom-made metal inserts in insert molding. This is the only time when it becomes practical to integrate the involved technologies. 

Advantages of overmolding 

1. Eliminate the need for adhesives 

Adhesives are no longer required in overmolding since the different parts get the chance to fuse during the process. This will increase the durability of the parts or products produced. It also results in an overall reduction in production costs. 

RELATED: A product designer’s guide to design for manufacturability

2. Better product performance

Adding other suitable quality materials to a product can significantly improve its performance. Those products that go through overmolding have two edges in terms of materials over the traditional products used in most industries. This will, therefore, enhance the performance of the products made using overmolding. 

3. Improved flexibility of materials 

Combining several parts is required in overmolding, increasing the part’s flexibility because it leverages each of the benefits of the involved materials. Design for manufacturing and assembly firms can also use an overmolding design guide to enhance flexibility further. 

RELATED: Design for manufacturing and assembly tips (DFMA) — cut your product design company’s production costs

Disadvantages of overmolding 

1. De-bonding

The risk of delamination may occur if two different parts are bonded together in an injection mold. Delamination may take place if there is a change in the range of optimal temperatures. Mechanical interlocks will be required when the available heat fails to bond the two materials successfully. 

2. Multiple processes of production 

Two steps are involved during manufacturing using overmolding, which can increase the cycle time of each part. The production cost may also be higher than just molding one part in one process. Overmolding also needs more tools compared to single molding because the process involves two steps. 

How Cad Crowd can help 

Injection molding and its two specific types, insert molding and overmolding, are efficient and helpful processes. These techniques help produce different parts with various uses and applications. Before embarking on your project, it’s vital to assess these methods to make a well-informed decision. Knowing what type of finished part you plan to make and its specific application will help you identify the proper process. Cad Crowd offers injection molding and casting services and can help you find specialists to guide you through every step to ensure successful production.  Contact us for a free quote.

Consumer Electronics Show (CES) Recap 2024: Las Vegas Inventors and Design Firms Recap


The Consumer Electronics Show, popularly known as CES, is a much-anticipated yearly event that showcases the newest, hottest, and most exciting inventions and innovations in the world of technology. 2024 is no different, as the CES once again highlighted the zenith of technological innovation to give the public a glimpse of the future. This year, the event held in Las Vegas was a one-of-a-kind display of ingenious creativity where companies from various parts of the world came together to introduce their latest inventions and innovations. 

Here’s a quick recap of some of the most captivating and exciting CES exhibits this year for Las Vegas Inventors and Design Firms:

Consumer Electronics Show (CES) recap 2024: Las Vegas inventors and design firms recap

Innovative In-Car Eye-Tracking Technology by Bosch

bosch-in-car-eye-tracking-system

Bosch unveiled an innovative new and exciting use of eye-tracking technology in vehicles that goes beyond safety. Eye-tracking was originally a part of driver assistance systems, but this time, Bosch now sees it as a means to add enjoyment to the driving experience with two notable uses: 

Its first use is simple and has something to do with driver fatigue. Imagine yourself feeling sleepy and tired while driving on your way home, and your car’s eye-tracking notices it, so it offers to prepare an espresso for you once you arrive. This is possible because the vehicle is connected to your home’s automatic espresso machine to ensure that a freshly brewed cup of coffee will welcome you when you enter the door. 

Its second function is more state-of-the-art as it adds context to the drive. The eye-tracking system will notice what you’re looking at outside while driving and give you details about it. For example, the system might inform you of the opening hours of a coffee shop you passed by. It can also give you a quick recap of the history behind an interesting building that caught your eye. This feature transforms your usual drive into something more engaging, informative, and fun. 

Bosch.com

EcoFlow Delta Ultra Invention

Ecoflow-Delta-Ultra

One standout during the CES 2024 is the EcoFlow Delta Ultra, which offers a giant leap forward in how modern homes are powered. It was showcased in a cozy setting that resembles a house to highlight its mix of cutting-edge technology and practicality. At its core, the Delta Ultra invention is an inverter and battery system for the entire house meant to take advantage of the energy of rooftop solar panels. It stores and keeps solar power so homeowners can use it to run their residences. One of its cool features is its ability to pull electricity from the grid when it is more affordable and send back power once prices soar. 

The invention can also work with your home’s existing switches, but it shines out the most if you pair it with Smart Home Panel 2. With more and more houses getting solar panels, EcoFlow Delta Ultra is an all-encompassing, powerful, and stylish way of handling energy use in homes. To make things even better, the product is not a mere concept because you can now buy it and start your way of managing your home’s energy. 

Ecoflow.com

Gyrogear GyroGlove Invention

Gyrogear-Gyroglove

The Gyrogear GyroGlove is hailed as among the top product inventions during CES 2024 for a good reason: it is an innovative breakthrough meant to help people with disabilities. This invention is specifically made for people suffering from hand tremors, such as Parkinson’s patients. An advanced gyroscope is used to steady the hands. 

GyroGlove’s innovative product design makers, Gyrgear, are now in talks with top medical officers at different insurance companies in the US. The GyroGlove invention has also been approved by the US FDA and the Therapeutic Goods Administration of Australia as a medical device. Various global standards groups are certified to prove its effectiveness and safety. It’s a significant invention that will make daily life easier for people with motor challenges. 

Gyrogear.co

Hydrogen Initiative of Hyundai 

Hyundai-Hydrogen-initiative

Hyundai shared its exciting plan during the CES 2024 to manufacture 3 million tons of hydrogen for the company’s steel mills by 2030. Becoming a leader in the ever-growing hydrogen economy is an ambitious move. It’s been a while since the company started to invest in hydrogen fuel cells and successfully introduced electric vehicles or EVs. However, with the tough competition and some challenges in the innovative market of battery EVs, the company decided to focus more on hydrogen to be on top of the game. 

This significant step towards hydrogen is not only about cars alone. It can also change industries, including maritime shipping and steelmaking. Hyundai placed big bets on hydrogen despite the infancy of the technology. It’s a shift in their technology and a strategic move for the future of green technology and the automotive sector. 

Hyundai.com

Gaming, Robotics, and AI Innovations by NVIDIA

Nvidia-AI-innovation

A gaming and AI tech leader, NVIDIA, revealed so many exciting new advancements at CES 2024 that will change the realm of gaming, generative AI, robotics, and content creation. It focused on generative AI’s power, proving NVIDIA’s significant role in this field. Several key things discussed include the launch of the TensorRT-LLM library for Windows. It allows large language models to function better on RTX PCs and the new Chat with the RTX playground. The innovation enables users to enhance the reality and accuracy of generative AI models by combining them with various data sources. 

NVIDIA also showcased its progress in digital avatar technology with the Avatar Cloud Engine or ACE. It uses generative AI to produce realistic digital avatars for PC and online use. The company also partnered up with Getty Images to introduce iStock’s generative AI service run by NVIDIA Picasso for producing 4K images from text. It uses an AI model trained on the massive library of Getty Images. They also introduced the GeForce RTX 40 SUPER Series GPUs aimed to improve generative AI and gaming.

These GPUs, such as the RTX 4070 Ti SUPER and RTX 4080 SUPER, offer faster memory, more [power, and more significant boosts in performance for high-end content creation and gaming. The collaboration of NVIDIA with OBS and Twitched for Enhanced Broadcasting and the RTX Remix’s open beta proves their focus on enhancing gaming. The company is also all in on AI with the RTX laptops and the extensive use of RTX tech in more than 500 apps and games, which include those from Blizzard and Activision. 

They also have a Day Pass membership and the Cloud G-SYNC technology for GeForce NOW. NVIDIA also launched the Isaac platform, which focuses on more innovative robotics and shows its dedication to breakthroughs in various areas. The announcements by NVIDIA at CES 2024 prove that the company leads the way in technology to offer distinct experiences for creators, tech enthusiasts, and gamers worldwide. 

Nvidia.com

GREEN IMPACT Initiative by Panasonic

Panasonic-green-impact-initiative

Panasonic made a ripple at CES 2024 with its focus on innovation and sustainability. They unveiled the Panasonic GREEN IMPACT initiative. It is a notable move towards carbon footprint reduction and support for a circular economy. The initiative covers an extensive array of solutions for a society with zero carbon dioxide, such as using renewable energy, the development of high-performance electrodes for hydrogen, intelligent systems for energy use management, and air-to-water heat pumps. Panasonic also announced its exciting partnerships with other companies, such as Infinity and Fisker, in the mobility and automotive industries.

They unveiled sustainable audio systems and the Neuron platform, a state-of-the-art solution that improves vehicle software and enhances the efficiency of electronic control units. Panasonic also introduced new sustainability technologies and partnerships, such as eco-friendly Kinari material and bio CO2 technology, which are meant to improve the growth of crops and fight climate change.

They also expressed their commitment to STEM education through programs such as the Innovators for Impact initiative. The presence of Panasonic at CES 2024 proved the company’s commitment to improving lifestyles while prioritizing technological advancement and sustainability. 

Panasonic.com

Visionary 0 Series EVS by Honda 

O-Series-EVS-from-Honda

Honda shared some exciting plans during CES 2024 for their electric vehicles, or EVs, with the introduction of its 0 series EVs. The move challenges the existing trend of heavy and bulky electric cars. The brand unveiled a couple of concept vehicles, the Space-Hub and Saloon, marking a significant shift from conventional EV designs. 

They are preparing for the 2026 launch of their first-ever North American commercial model with a focus on producing light and thin EVs, which is a fresh take in the field of EVs. The Saloon, which is meant to be the first model in the 0 series, is the perfect example of the new direction. This sporty, spacious, and sleek EV looks like it came directly from a sci-fi flick. 

Honda.com

How Cad Crowd can help

Cad Crowd offers new invention development, consumer product design, wearables design, engineering design, prototype design, and more that could help you and your design firm become part of the CES soon. 

How Digital Prototyping Influences Company Product Development and Design


If you’re a product developer, you might already know how challenging the new product development process can get, especially once you get to the point when you need to build a prototype.

Product prototypes are among the most time-consuming and expensive stages of the product development process. You need to develop a unique and new item, build it from scratch, and check to see if you missed anything so you can change it before it’s too late. However, most of these problems are now eradicated with the help of technology. This article discusses how digital prototyping influences company product development and design.

Digital prototyping defined

Digital prototyping refers to the concept of creating real-world product models. Product models allow product developers to acquire early feedback from potential product users without releasing the product to market. Here, the prototypes are produced digitally with all the necessary transitions and animations that resemble the actual product. This differs from a throwaway or paper prototype, as product details are the main focus of digital prototypes.

During digital prototyping, the product’s functioning model is made before its actual development. It is made possible with the help of different tools for digital prototyping available in the market. Being in a digital format, these digital prototypes allow developers to quickly iterate and make a few adjustments without too much hassle, according to the feedback from the users.

The following primary phases are part of the digital prototyping process:

  1. Analysis of the problem and exploration of the product and its core idea.
  2. Brainstorming on the prototype’s development in digital format.
  3. Development of a real-world model of the prototype that allows testing using a reliable tool.
  4. Presentation of the prototype model to potential users to obtain valuable insights.
  5. Adjust the prototype based on the acquired feedback and start the process again.

RELATED: How Much Does it Cost to Make A Prototype for My New Product Invention?

Principles of digital prototyping

product1

Aside from helping you create prototypes that are as realistic as possible, digital prototyping has the following broad principles:

Build enough to learn but nothing else beyond that

Digital prototypes are not fully functioning designs. Instead, these digital prototype designs function as a test to answer critical questions regarding your hypothesis. Will people buy your product online? You can’t wait to test and develop your products at this point. Digital product prototype images will help answer the question and show how to fill the orders to ensure that clients won’t be disappointed.

You can discard prototypes

The main point is that digital prototypes are meant to be produced only as part of the product to present the appearance and features of the product and not necessarily the product itself. This is when you will test the idea. It means you’ll be wasting time if you spend more extended hours than necessary on prototype development. Aside from that, working longer on something will only increase your attachment to it. Depending on customer feedback, it’s never recommended to be too attached to a prototype because of the possibility of pivoting 180 degrees.

Anything can be developed into a prototype

There’s often significant time pressure when making digital prototypes. However, you can prototype almost anything under the sun.

RELATED: Elevating Your Company Using CAD Product Design Services During Product Development

Why is digital prototyping important in product development and design?

product2-1

Digital prototyping services can help you save money and time and assist with complex conversions to create better products. Developing digital prototypes offers many benefits, and the following are the most important ones:

Accuracy

You can create modern digital prototypes with excellent tolerances that are much tighter than physical prototypes. It lets developers create an accurate model of how the product’s production version might function without the need to go through the trouble of building it.

Visual aid for meticulous feedback

If you’ve ever tried articulating a visual concept, you know how difficult it can be. Sometimes, you may use paper and pen to illustrate your product concept. Digital prototypes work to help create visual representations to allow feedback.

Attainable

There’s a reason why digital prototyping plays a critical role in companies’ product development and design processes. The expertise and software required to work it are tricky, if possible, to implement on a smaller scale. However, this is starting to change gradually with the improved accessibility of digital prototyping technology, even for more minor scales.

Validate business goals

It’s common for businesses not to understand their goals aside from lowering costs and making money. Digital prototyping will force a company to see solutions in full action and consider whether these will solve their concerns.

product3

Better collaboration

In today’s manufacturing industry, an entire product design team typically works together on just one prototype. This is why it’s invaluable to be able to work on similar data at the same time. This luxury is possible with the help of a good package for digital prototyping.

Collaboration is fundamental for the success of any project. When the product development team works with a client, they meet regularly to run through things they’re working on. Introducing digital prototyping at this stage allows clients to work with the team to troubleshoot issues that require their technical expertise and industry knowledge.

Compatibility

Pen and paper prototype designs still come in handy in various respects. However, there’s no way that you can manipulate them. Digital prototypes can be tweaked endlessly, and multiple versions can be kept in storage that can be worked on using different devices.

Efficiency

Since it’s possible to conduct digital prototyping faster, it ensures a more thorough prototyping stage as part of the production process. It results in products superior to those that undergo the creaking cumbersomeness of traditional projects.

Lower budget

The first and most important concern of most product developers and freelance product designers is the cost involved in prototyping. Digital prototyping minimizes the need to build something. As a result, it lowers the materials and labor necessary for the process.

RELATED: Guide to Prototyping Methods Used in Product Development Services for Companies and Firms

Testing

One of the most critical purposes of digital prototyping is to confirm that the product will work as it is meant to. It also ensures that any initial errors will be addressed before the actual production stage. Since creating digital prototypes is faster, more tests can be conducted before abandoning the production stage.

Large applications may also take several months to reach the point where users can offer feedback. Digital prototyping can cut down this process so that users are given the chance to test the product. Digital prototypes are also faster to build and change and come in handy for validating new ideas for the product developer.

Shared understanding

One of the almost unavoidable concerns during product development is assuming everyone is on the same page regarding the idea. While some may recognize the limitations of concepts and techniques, others may not. Some developers may also misinterpret certain features specific to the industry since they lack information regarding how things work. Digital prototyping allows all parties to reach a shared understanding since the details are fully visualized.

Singular point of reference for developers and designers

Information is acquired from various places, including project managers, client meetings, emails, use stories, and more when a project starts. Consolidating everything into a digital prototype allows developers and designers a source of truth that they can refer to so they can start with product development.

Speed up the development process

Regarding product development, building products will be faster if the details have been hashed out in full and the number of reworks is minimized. Spending time on digital prototyping can help catch some of the issues that may otherwise show up during the actual development, which may result in longer delays to the product’s release.

Time

Digital prototyping also helps shorten the production stage as much as possible. It shortens the product development cycle, allowing better agility for the manufacturer when launching the product in the market.

product4

Confirm user needs

The most severe concern about new products is when they don’t fully cater to the target users’ needs. It often happens when the product developer assumes they have a fantastic idea that people will buy without bothering to check if they will buy it. Digital prototyping offers a rudimentary means for product developers to match with users and confirm if the product will simplify their lives.

Explore challenging concepts

Several concepts are difficult to understand and may be more challenging to design. Since digital prototyping isn’t focused on the details alone, it allows for exploring concerns without being too focused on trivial details.

RELATED: 5 Ways How Rapid Product Development & Prototyping Benefits Your Company

How Cad Crowd can help

Cad Crowd will help you find skilled digital prototyping professionals for easier product development and design. Our product prototyping experts will provide top-notch services that will help you simplify and streamline your product design and development process. With Cad Crowd, you can bring your new products to life efficiently and effectively and take your product development to the next level. Get a free quote now!

FEA (Finite Element Analysis) Mistakes to Avoid When Hiring FEA Engineering Services


The idea behind FEA (finite element analysis) is to predict how a design or structure responds to various types of physical forces and study the possibility of failure without using a physical prototype. Everything is done on a computer screen by combining 3D CAD technology and mathematical-based geometry analysis. It is a virtual simulation to visualize the effects of the usage environment on design parts, components, and assemblies made of any known material. Physical forces may include air pressures, water pressures, weights, vibrations, repeated impacts, dynamic loads, static loads, and temperature changes, to name a few.

The purpose of FEA (finite element analysis)

FEA services are meant to replicate both common/likely and worst-case real-life scenarios in the simulation. Under each scenario, the simulation offers comprehensive imagery depicting how a design responds and withstands physical forces until it deforms and breaks. The data is the foundation for discovering the solution that meets pre-defined design requirements like safety, durability, performance, and repairability.

RELATED: Product simulation and analysis: why it’s worthwhile

Since all physical products of any industry are affected by the conditions in which they are stored and used, they can be subjected to FEA tests. From the simplest small wooden carvings and complex crude oil pipelines to intricate blood transfusion devices and sophisticated microchips, FEA simulation engineering designers can determine the amount of stress loading under which their building blocks will fail. Manufacturers then use analysis results to improve their products.

Push-button solution

Several popular 3D CAD software packages come equipped with powerful FEA features. Many vendors still offer stand-alone software tools for each functionality, but integrating both technologies simplifies the analysis procedures. FEA simulation can only happen when the engineering design experts subdivide the CAD model into more minor elements in the form of a geometric mesh that represents the building blocks of the design. The “meshing” procedure is an automated process requiring manual inputs for refinements in specific design areas such as joints, connections, and edges.

RELATED: Finite element analysis costs, consulting company rates & engineering services pricing

The simulation also implements a semi-automation principle where users determine design characteristics, including material properties and assembly features, before running the analysis. The mostly automated computational procedure should allow users to perform an FEA simulation. Users can create (or have access to) the CAD model and the appropriate software to activate the simulation program. Thoughtful analysts argue that the idea of a push-button solution can be dangerous, and they almost certainly have a point. Every design is unique.

Two comparably shaped products of different materials should display dissimilar behaviors even when exposed to the same physical force; two distinctive products built from identical materials will also exhibit unalike responses to matching environmental factors. The inclination to run an FEA simulation is irresistible, especially in a hi-tech world where the solution to the problem is just one click away. Any suggestion to imply that automation makes every analyst equal is nonsensical. There will always be design issues to discover and, thereby, engineering problems.

Considering the level of complexity in design intent, materials science, and the physics of structural deformation, FEA is by no means a trivial matter. Just because users can run the analysis does not necessarily mean they should. No degree of automation can make FEA analysis easy, let alone accurate. More importantly, the results of the FEA simulation are approximate at best. They are only as accurate as the engineers determining the design constraints, materials’ parameters, and load thresholds. Take a stress analysis as an example.

RELATED: Product testing and validation: the role of CAD simulation services for companies

fea-services

Among the first things to define are the types, strength, and direction of strains exerted on the entire model during a typical usage scenario; specific criteria, such as the forces acted upon welded or glued connection as well as the cumulative effect of dynamic and constant loads, are determined next. To come up with realistic approximations, users must input multiple assumptions into the software:

  • Specific loads are considered likely usage conditions, while others are worst-case scenarios. All have varying degrees of intensity. Some loads only occur during the product assembly process.
  • Every material acts differently when exposed to external forces. Part properties, including thickness and length, will affect the material’s tensile strength.
  • Points of connection in the assembly, such as glued edges or welded parts, have different boundary conditions from solid blocks.

RELATED: What are CAE engineering costs, company consulting rates & services pricing?

Users must have access to an accurate database defining materials’ known characteristics and behaviors under stress, loads, heat, and pressure. In any case, a successful FEA simulation relies on at least the following complex steps:

  • Assessment: make the correct assumptions and ask the right questions to the software
  • Validation: ensure the software is mathematically precise enough to generate a workable solution
  • Interpretation: understand the results and translate the information into product performance data

Software developers and vendors keep on improving accuracy and interface to make the tools more reliable and easier to use. Users still need professional credentials to effectively and accurately utilize the analysis. 

Common mistakes when hiring FEA engineering services

FEA is a powerful computational tool to simulate the almost limitless possible deformations in structures as it is exposed to physical forces. It was once considered a domain exclusive to expert engineers and supercomputers. Still, thanks to technological advances and market competition that drive computer prices down, FEA is easily accessible by 3D artists and CAD users anywhere. 

RELATED: What are CFD engineering rates, consulting services costs & company pricing?

In any case, freelance finite element analysis & FEA engineering services exist mainly because only some people are qualified to run the analysis and interpret the results. The much-debated concerns over the democratization of FEA are not entirely baseless. Companies currently looking to outsource product analysis to external FEA consultant services should not fall into the trap of such democratization, leading to the following mistakes:

Incorrect Credentials

For most people, FEA and all its capabilities to predict the structural behaviors of products or materials are almost magic. It was once a black art practiced only by the most educated engineers. Since the rapid development and adoption of CAD technology, FEA has gradually made its way into the computers of typical 3D artists and casual users. Both the pre-processing and post-processing steps are mostly automated within the CAD interface. Familiar menus make operation as easy as it can be.

One of the most significant issues with democratization is that entry-level engineers and 3D product modeling services feel qualified to offer FEA services. Widespread adoption might be a good thing in other technologies, but there is a real danger in hiring a person with incorrect credentials to perform FEA. While most modelers and junior engineers probably have access to the FEA simulation program from their CAD software, they are not supposed to practice the analysis at a professional level.

RELATED: CAD vs. CAE: what stage of product development is your business in

product-design-and-development-company

They can run the simulation and come up with approximations. Still, at the moment, CAD software vendors need to offer a reliable mechanism to warn users that the generated results might be wrong. Even if some software packages do provide warnings, there are no easy-to-follow procedures to discover the underlying issues and fix the problems. The most effective workaround is to consult time-tested engineering experience and knowledge.

Wrong tools for the job

Nearly all major CAD software packages come with structural analysis features ready to deploy. 3D Modeling design firms specializing in 3D design and modeling may think that expanding the business into FEA territory is a good idea because the software has built-in features. The specializations do not fall under the FEA category. Companies or individuals looking to hire FEA services must avoid the firms at all costs.

RELATED: How computer-aided design (CAD) services are used by engineering firms

Integration between modeling and analysis is good, but only when the users are qualified to operate both. Many of the built-in features are stripped-down capabilities of the full-fledged FEA software. The features are not necessarily destructive but tend to omit many customization options in favor of automation. In other words, the analysis generates results by removing actual engineering inputs from the equation.

No modeling option

Firms or freelancers may rely entirely on the included features (in the CAD software) and automated functions. They have a model from the client, run the FEA simulation, and deliver analysis results within an hour. Every client needs to understand that a slight deviation in dimensions, load points, and angles can change the results to a great extent. Depending on how they were built in the first place, some models might be sensitive to minor variable alterations.

A typical stress analysis on a model may take 10 minutes or so using powerful computers. However, a true FEA professional will build dozens (if not more) of model variations to determine the proper constraints and structural behaviors based on in-depth engineering knowledge of material properties. Until the model is rebuilt multiple times with perturbations, it isn’t easy to accurately predict its structural behaviors. Repeated simulations with varying engineering parameters and boundary levels are indispensable for accuracy.

RELATED: Freelance aerospace engineering services, cost, rates, and pricing for companies

Lack of documentation

FEA documentation must provide enough details to allow clients to reproduce the results. Every project has documentation requirements but should contain at least model identification, source geometry, model assumptions, simulation parameters, and validation. Although the focus is on the results, proper documentation ensures the model and design remain traceable from the client’s standpoint. FEA aims to visualize the structural behavior of a model, and the client must be able to gain clear insights from the analysis at the end of the process. 

Assigning the task of FEA simulation to an unqualified person (whether as a cost-saving measure or due to an uninformed hiring decision) can be hazardous instead of advantageous. A qualified consultant has real-world engineering experience, specifically in the field related to your models or products. FEA enables companies to solve complex structural design problems, but only if the consultant performing the analysis has a working knowledge of engineering practices.

RELATED: Top 101 engineering and mechanical design firms in the United States

Discover FEA with Cad Crowd

Avoid common mistakes and achieve optimal results for your projects. Equip yourself with knowledge, sidestep potential missteps, and contact us for guidance. Contact us today to hire the best FEA expert for your company.