Outsourcing 3D modeling design services is at the center of an evolving and technology-driven architectural industry with a lot of niches and specializations that could be equally as important as any, depending on the project.
It changed the way we interact and plan for spaces and objects, their hierarchy, and function within a structure – but even more, by outsourcing these services, we allow ourselves to tap many of these niches and specializations without breaking the bank. Architects and design companies realized this long ago: leveraging external expertise to enhance or execute their ideas is a boon that can elevate the design and streamline the process.
Cad Crowd has worked for over a decade to deliver the best outsourced 3D modeling talent to reputable architectural, design, and engineering companies. Here’s why you should outsource your 3D modeling services for your project.
🚀 Table of contents
3D modeling and its importance in architecture
Truly an indispensable tool in modern architecture, 3D modeling allows architects to create many designs and projects with unparalleled detail, providing accurate representations of their designs to facilitate better visualization, communication, and decision-making – there’s nothing that offers the same versatility to be certain. Traditional 2D drawings don’t even compare; 3d models provide a more immersive experience, enabling clients, stakeholders, and construction teams to understand the project’s scope and intricacies more clearly while giving you and your clients a very easy way to modify, replace, and re-do designs quickly. This is hard to do without something concrete or tangible to work with.
Primarily through the rise of Building Information Modeling services, virtual reality, and augmented reality, there is a noted increase in demand for high-quality 3D models. These newer technologies rely heavily on accurate 3d modeling; this puts pressure on architects and design firms to be able to produce top-tier 3D models and to be creative in their approach, not just in terms of the design.
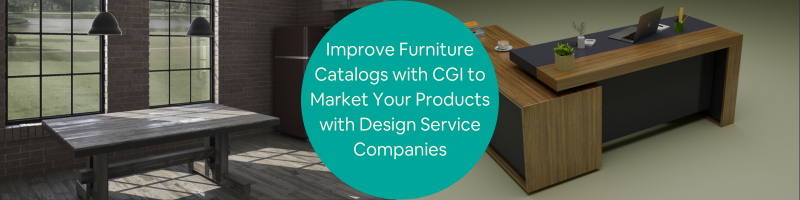
RELATED: How to create captivating 3D commercial rendering architecture designs for companies

Why architects outsource 3D modeling services
Outsourcing 3D modeling services is attractive for architects and design companies because it offers many compelling advantages. Not to mention, these advantages can now be considered as standards, especially in specific niches wherein an expertise or specialization can make or break the project.
- Access to specialized expertise
The possibilities are endless when you’re able to tap into pools of specialized expertise with extensive experience in many aspects of 3D modeling and design. These professionals are often experts in the latest software, tools, and techniques, ensuring that their models are of the highest quality. More notable, though, is that these experts tend to specialize areas in design, logistics, or even rare applications that are usually not immediately available without training or preparation, even in larger design firms.
If you choose to outsource certain tasks and 3D modeling services, you’ll not only save in terms of costs but you’ll be able to leverage specialized knowledge without having to waste a lot of time and resources training someone or investing in expensive software that you might never use again.
One of the most significant benefits of outsourcing 3D modeling services is cost efficiency. Maintaining an in-house team of 3D modelers can be expensive, especially when you factor in training, benefits, and software costs. So unless your company or team is specifically tailored to create 3D models of any variety, outsourcing is a more flexible and cost-effective solution that ensures you only pay for the services when you need them. It also eliminates many overhead costs associated with maintaining a team, such as office space.
- Scalability and flexibility
The best thing about outsourcing 3D modeling services is the high degree of flexibility and scalability. You only have to hire for what you need, and most of the time, the most skilled professionals are able to work on many project demands in high quality. Design companies can easily scale up or down their 3D modeling needs based on project demands. Whether working on a small residential project or a large commercial development, outsourcing allows companies to adjust their resources accordingly. This flexibility is particularly beneficial for companies that experience fluctuations in project volume or have seasonal peaks in demand.
The architectural outsourcing industry has been a saving grace for many companies facing many types of challenges. External 3D modeling experts’ teams often work around the clock, leveraging global time zones to deliver projects faster. Additionally, outsourcing allows architects to focus on other critical aspects of the design process, such as client communication, project management, and creative development, while experts handle the 3D modeling work.
RELATED: Proven advantages of contracting architectural CGI services for real estate marketing firms
- Access to the latest technology
Naturally, you would want you and your team to be on top of a rapidly evolving field – often updating and developing newer and newer tools and software. It’s inevitable that keeping up with these advancements would be challenging and potentially costly for you. Fortunately, there isn’t a need to be on top of everything. In fact, it’s more prudent to hire external experts when you are faced with bespoke projects.
Outsourcing 3D modeling services gives you instant access to their skill sets and expertise without breaking the bank. The more important thing to note here is the reliability of their work as their years of experience working with peculiar software, tools, or techniques that would usually take years for anyone to learn.
- Improved focus on core competencies
Outsourcing 3D modeling services allows design companies to focus on their core competencies, such as architectural design, project management, and client relations. By delegating the time-consuming task of 3D modeling to external experts, architects can concentrate on what they do best, ultimately leading to higher-quality designs and more satisfied clients.
Outsourcing can help mitigate the risks associated with in-house 3D modeling. External providers often have established quality control processes, ensuring that the models they deliver meet the highest standards. Additionally, outsourcing reduces the risk of project delays caused by in-house resource constraints, such as employee turnover or equipment failures. By partnering with a reliable 3D modeling service provider, 3d rendering design companies can ensure that their projects stay on track and meet client expectations.
- Access to a global talent pool
Outsourcing 3D modeling services opens the door to a global talent pool, allowing architects to collaborate with professionals from different parts of the world. This diversity of talent can bring fresh perspectives and innovative ideas to architectural projects, resulting in more creative and unique designs. Additionally, outsourcing to international providers can be cost-effective, as labor costs may be lower in certain regions.

RELATED: Why 3D rendering and retail store design services for commercial spaces are important
What are the benefits of outsourcing 3D modeling services for design companies?
Outsourcing 3D modeling services offers numerous benefits for design companies, enhancing their overall efficiency, creativity, and profitability. Here’s how outsourcing can benefit your design company:
Enhanced design quality
By outsourcing 3D modeling to specialized experts, design companies can ensure that their projects are of the highest quality. High-quality 3D models enable architects to visualize their designs better, identify potential issues early in the process, and make informed decisions. This leads to more accurate and refined designs, ultimately resulting in higher client satisfaction.
Increased productivity
Outsourcing 3D modeling services allows design companies to increase productivity by freeing up internal resources. Architectural firms and designers can focus on their core tasks, such as conceptualizing and developing designs, while external experts handle the technical aspects of 3D modeling. This division of labor leads to more efficient project workflows and faster completion times.
Cost savings
Outsourcing 3D modeling services can lead to significant cost savings for design companies. By eliminating the need to hire and maintain an in-house team, companies can reduce their overhead costs and allocate their budget more efficiently. Additionally, outsourcing allows companies to pay for services on a project-by-project basis, ensuring that they only incur costs when necessary.
Improved client communication
High-quality 3D models are invaluable tools for client communication. They provide clients with a clear and realistic representation of the final design, making it easier for them to understand the project’s scope and make informed decisions. Outsourcing 3D modeling services ensures that design companies have access to the best tools and expertise, allowing them to present their ideas more effectively and build stronger client relationships.
Faster project delivery
Outsourcing 3D modeling services can significantly reduce project turnaround times. External providers often work on tight schedules and have the resources to deliver projects quickly without compromising quality. This speed can give design companies a competitive edge, allowing them to take on more projects and meet client deadlines more effectively.
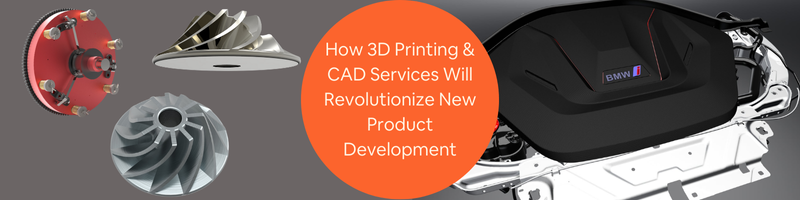
RELATED: What are the main types of 3D modeling, and how do companies use them?
Access to diverse skills and perspectives
Outsourcing opens the door to a diverse range of skills and perspectives that may not be available in-house. External 3D modeling providers often have experience working on various projects across different industries, bringing unique insights and approaches to architectural design firms. This diversity can lead to more innovative and creative solutions, setting your design company apart from the competition.
Scalability for large projects
Outsourcing provides the scalability needed to handle large and complex projects. Design companies can quickly ramp up their 3D modeling capabilities by partnering with external providers, ensuring they have the resources to tackle even the most demanding projects. This scalability allows companies to take on more significant projects without the burden of expanding their in-house teams.
Reduced risk of errors
Outsourcing 3D modeling services to experienced professionals reduces the risk of errors in the modeling process. External providers often have robust quality control measures to ensure that the models they deliver are accurate and error-free. This level of precision is crucial in architecture, where even minor mistakes can lead to costly delays and revisions.
Increased innovation
By outsourcing 3D modeling services, design and drafting companies can tap into cutting-edge technologies and innovative techniques that may not be readily available in-house. External providers often stay updated with the latest advancements in 3D modeling, offering access to new tools and methods that can enhance the design process. This access to innovation can give design companies a competitive advantage and help them stay ahead of industry trends.
Focus on client satisfaction
Outsourcing 3D modeling services allows design companies to prioritize client satisfaction by delivering high-quality, accurate, and visually compelling models. When clients can see a realistic representation of their project, they are more likely to feel confident in the design and make informed decisions. This level of client engagement can lead to stronger relationships and repeat business.
Outsourcing 3D modeling services offers many benefits for architects and design companies. From cost savings and increased productivity to access to specialized expertise and the latest technology, outsourcing is a strategic choice that can enhance the quality of your projects and drive business growth. By partnering with a reliable 3D modeling service provider, your design company can stay competitive, deliver exceptional results, and exceed client expectations.
How Cad Crowd can help
Outsourcing 3D modeling services can transform how you approach architectural design, offering you the tools and expertise needed to bring your vision to life. If you’re ready to experience the benefits of outsourcing, Cad Crowd is here to help. We have over 10 years of experience assisting companies to find a team of skilled 3D modelers dedicated to delivering high-quality, accurate models tailored to your unique needs. Contact us today to request a quote and take the first step toward elevating your design projects.